
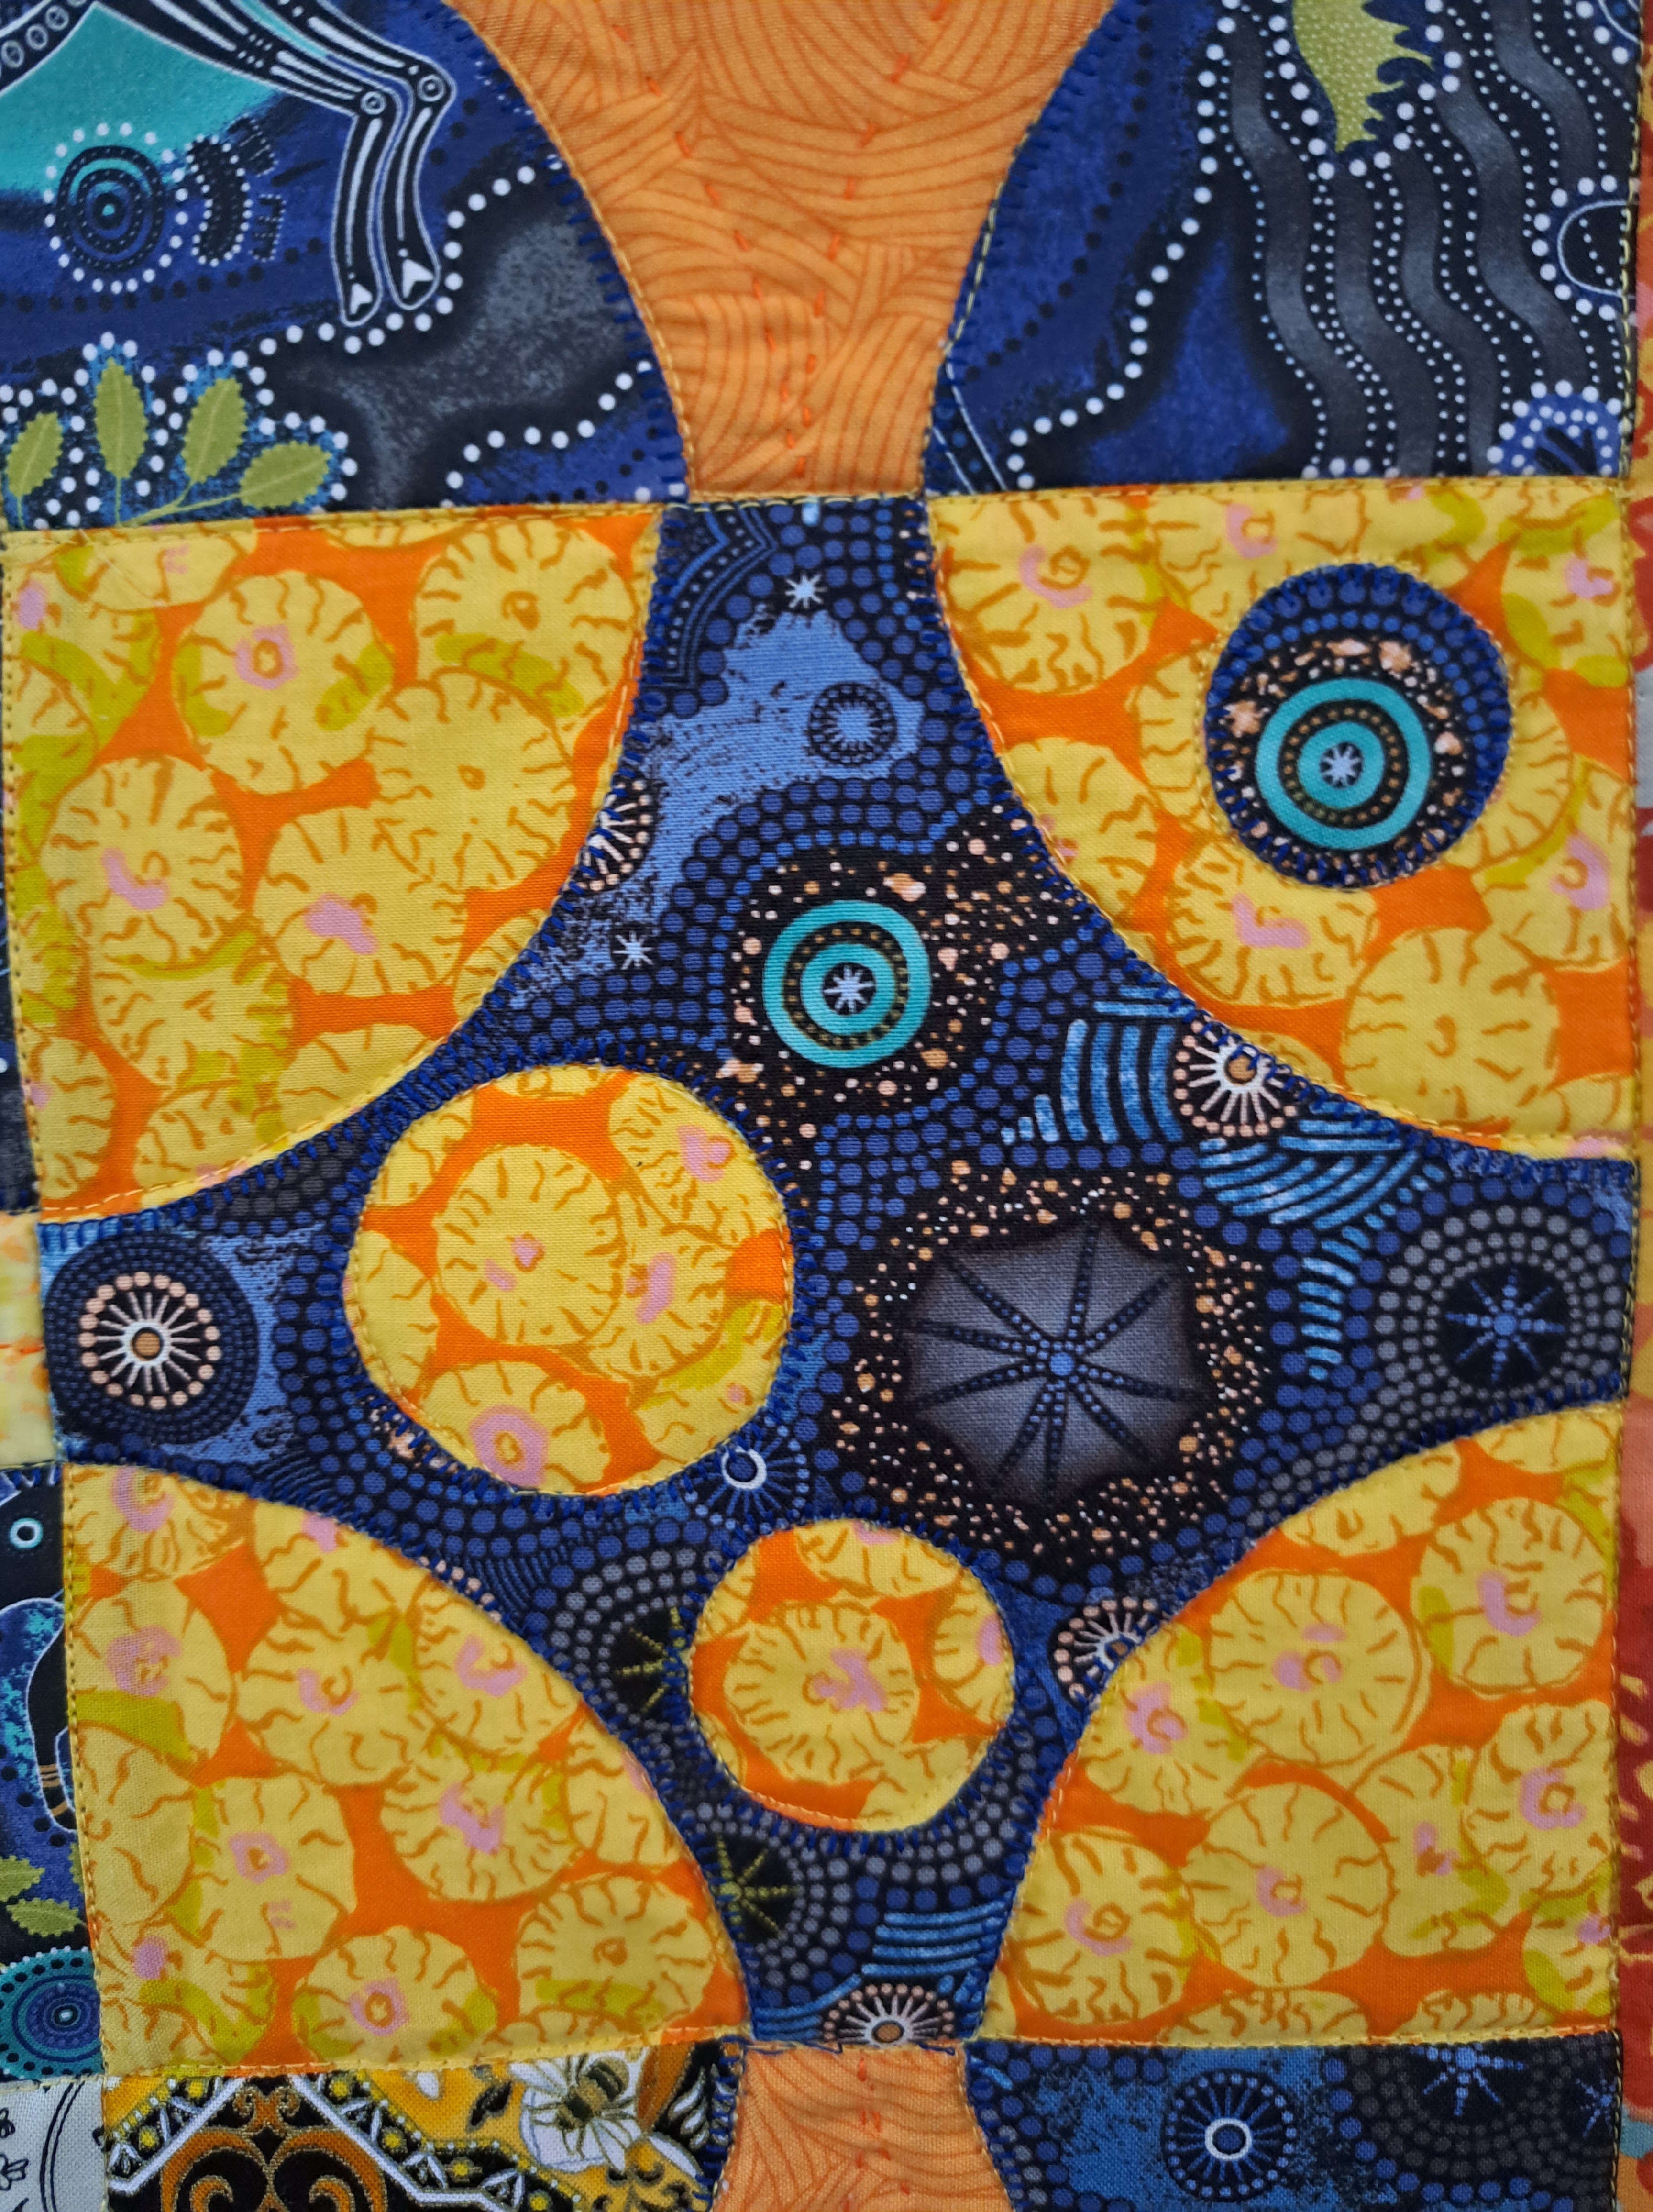
I’m HAPPY to report that my Challenge piece is done….well, except for some more Big Stitch quilting when my wrist allows. I quilted the major lines and block details on my longarm. Then added more quilting lines using the Big Stitch with Sulky 12 wt. cotton thread. The Binding was also done using the Big Stitch and the 12 wt thread. See the quilt below!

I’m also THRILLED that we had a 3-way tie for FIRST PLACE!!! My quilt was one of those three!!!! There were almost 20 people that had a quilt in the challenge, Thimble Pleasures Quilt Guild. The name of the Challenge was Circles, Curves and Colors. We were given a variety of circles cut from a wide variety of styles of fabric. A bit challenging to work them together. I did not change the circle sizes, I used ALL of them as given. I should have taken photos of all the quilts, there was such a great variety of techniques used.
I showed a couple step photos recently in previous Two Tips about machine applique. It was a fun quilt to work on and happy to show the entire qilt. It was a “two fer” Challenge. The other guild I belong to (Blackstone Valley Heritage Quilters) also had a Challenge where we had to use a book from our guild library to make a quilt or use the book as inspiration for a quilt or quilted item. The book I picked (no peeking on the pick, no clue until I opened the bag) was Give & Take Machine Applique by Daphne Greig and Susan Purney Mark. I showed BVHQ’s Challenge quilts a few weeks ago, minus mine since it was waiting for the second guild’s Challenge.
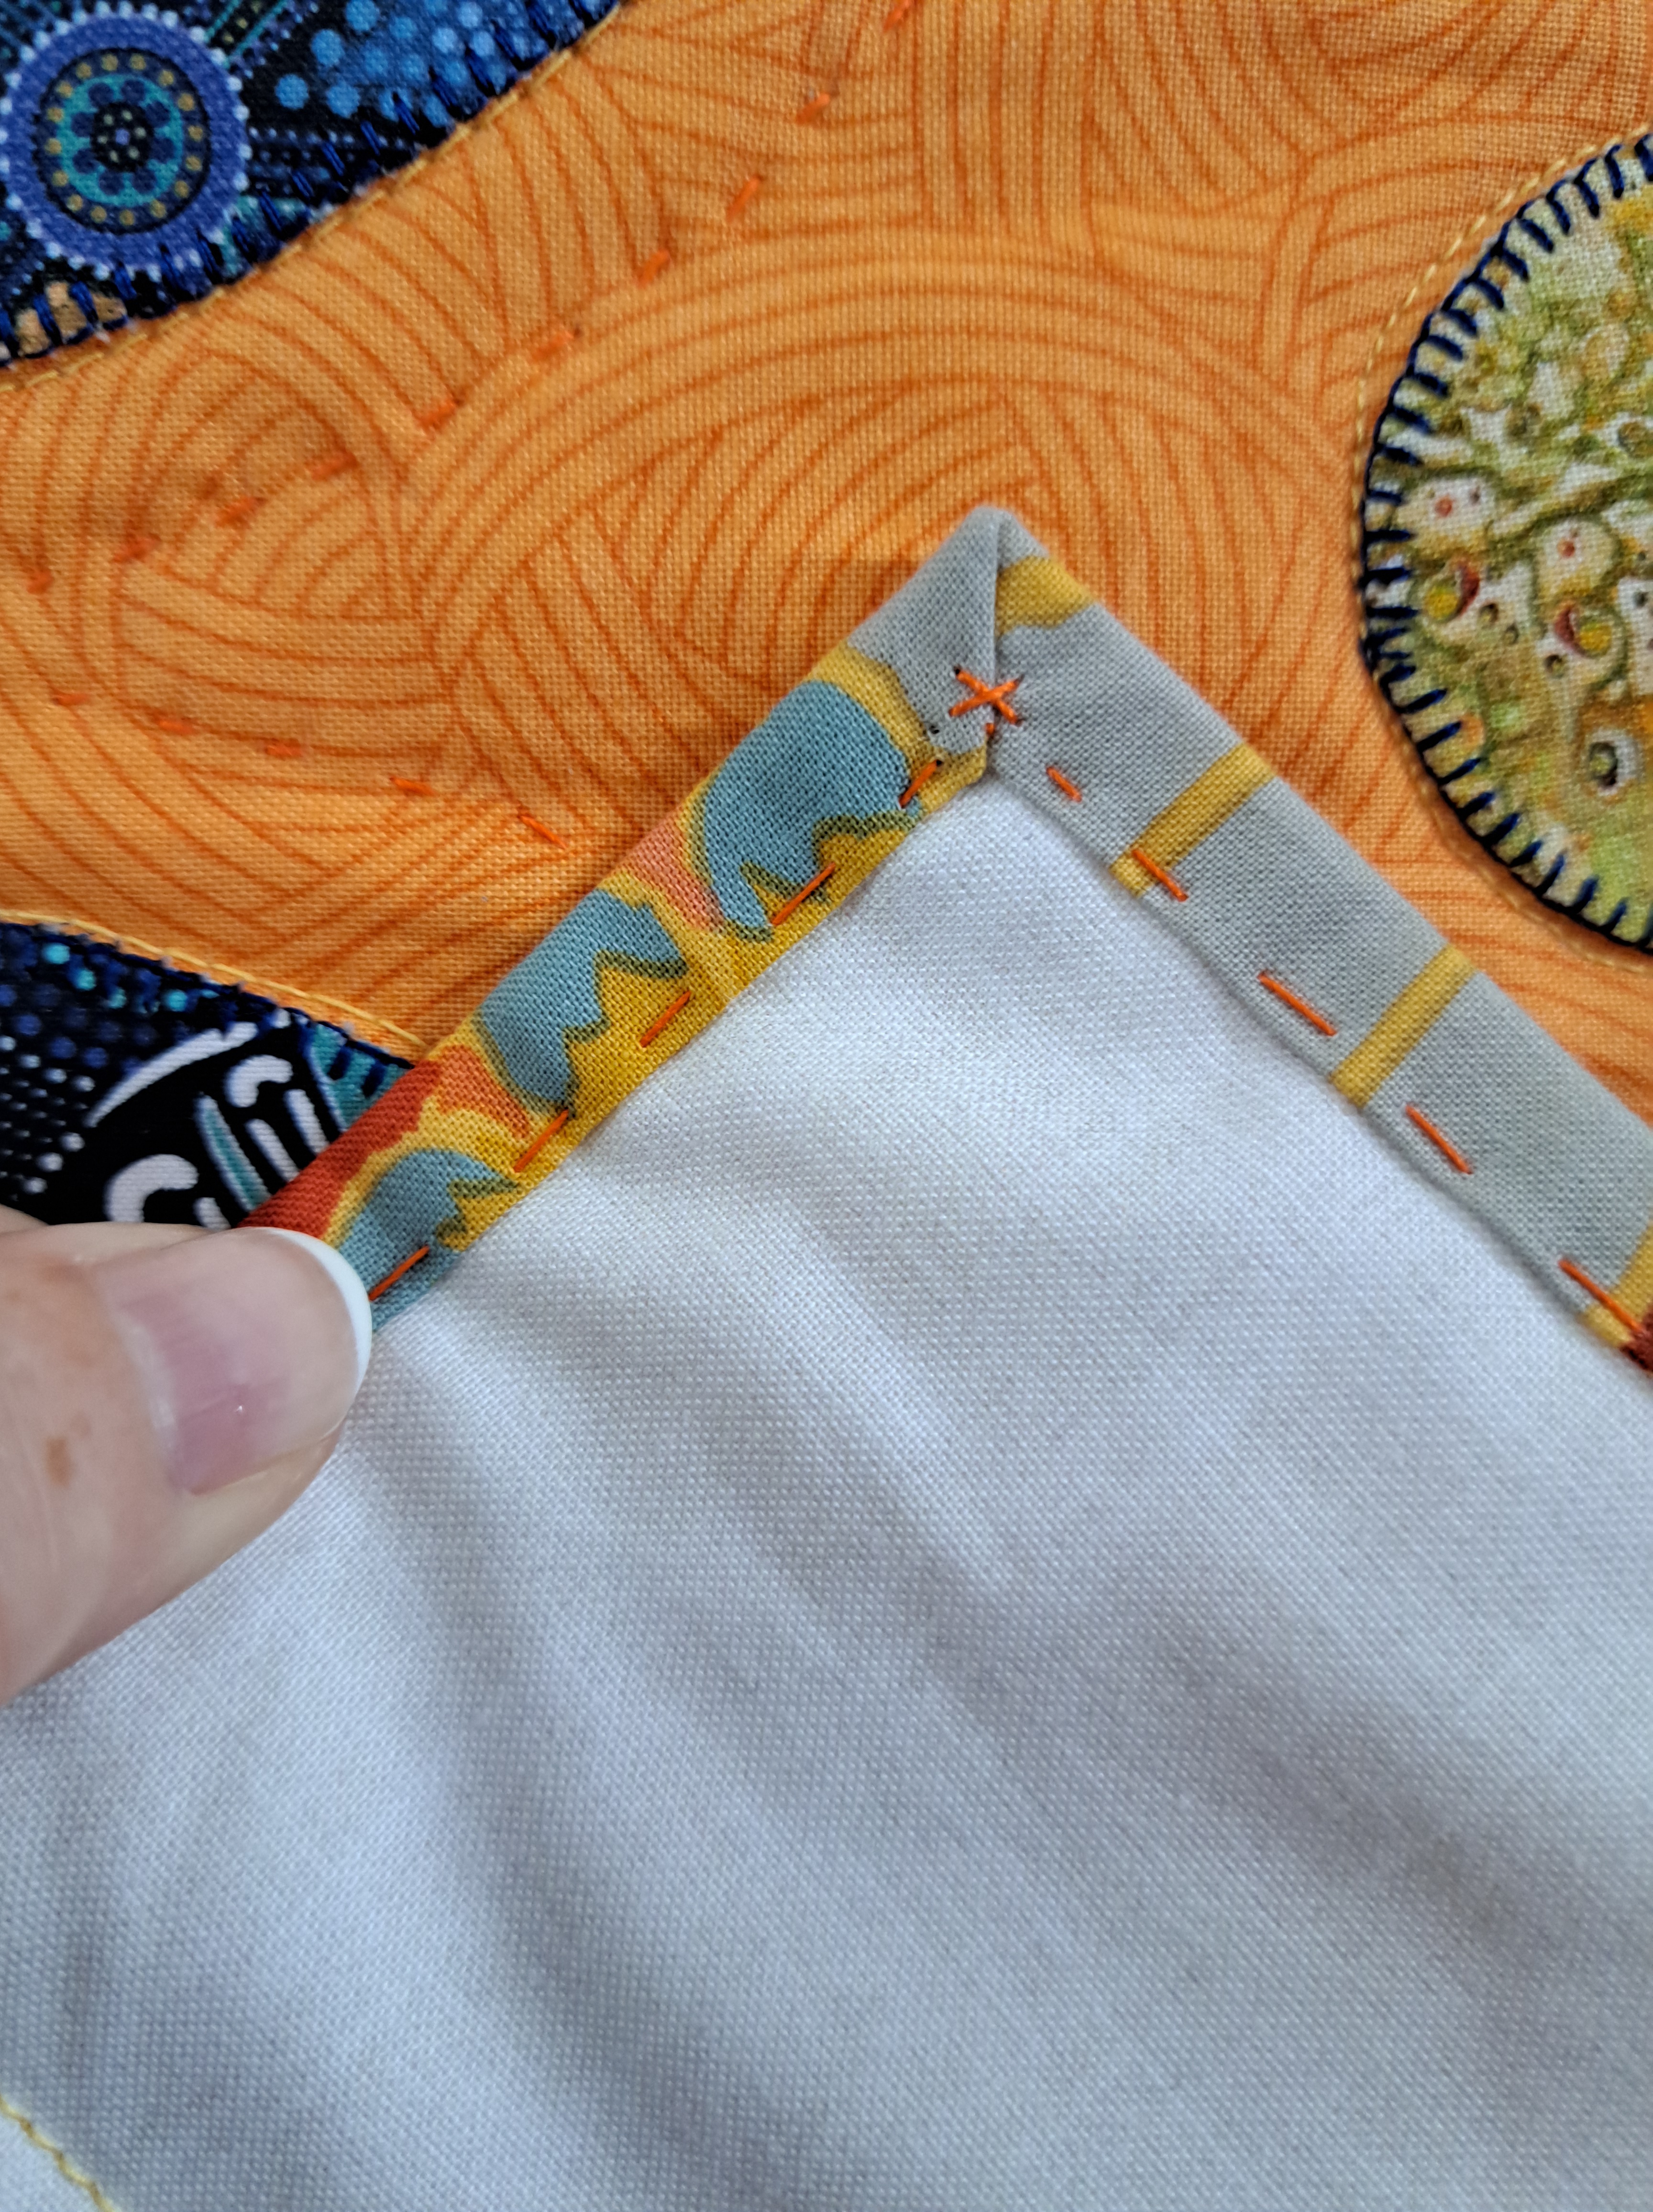
A couple close up photos of the applique and Big Stitch…

I also did Big Stitch sewing of the binding to the back of the quilt. I knew I wanted to use this method for a couple reasons – 1. to get it done quickly and 2. It played well with the Big Stitch quilting I did on the quilt. Here is one of the mitered corners. I like to put and “X” on the miter to hold it securely in place.
A couple of tips on the Binding
#1 – I used Elmer’s glue to hold the binding in place and ironed it dry. It helped my hand/wrist, since it is still tender from the sprain. Plus, no need for pins or clips! It allowed me to “fly” with the stitching. (You can see a glue spot in the top right side of the mitered corner fold in the next photo. The glue will easily wash out! It is made for kids and water soluble.)
#2 – I stood at my ironing board to hand sew the binding. The weight of the quilt was on the board, it was a good height to hand sew and with the hot weather, I didn’t have to have the quilt on my lap. Plus it kept me from holding the binding edge with my sore hand/wrist.

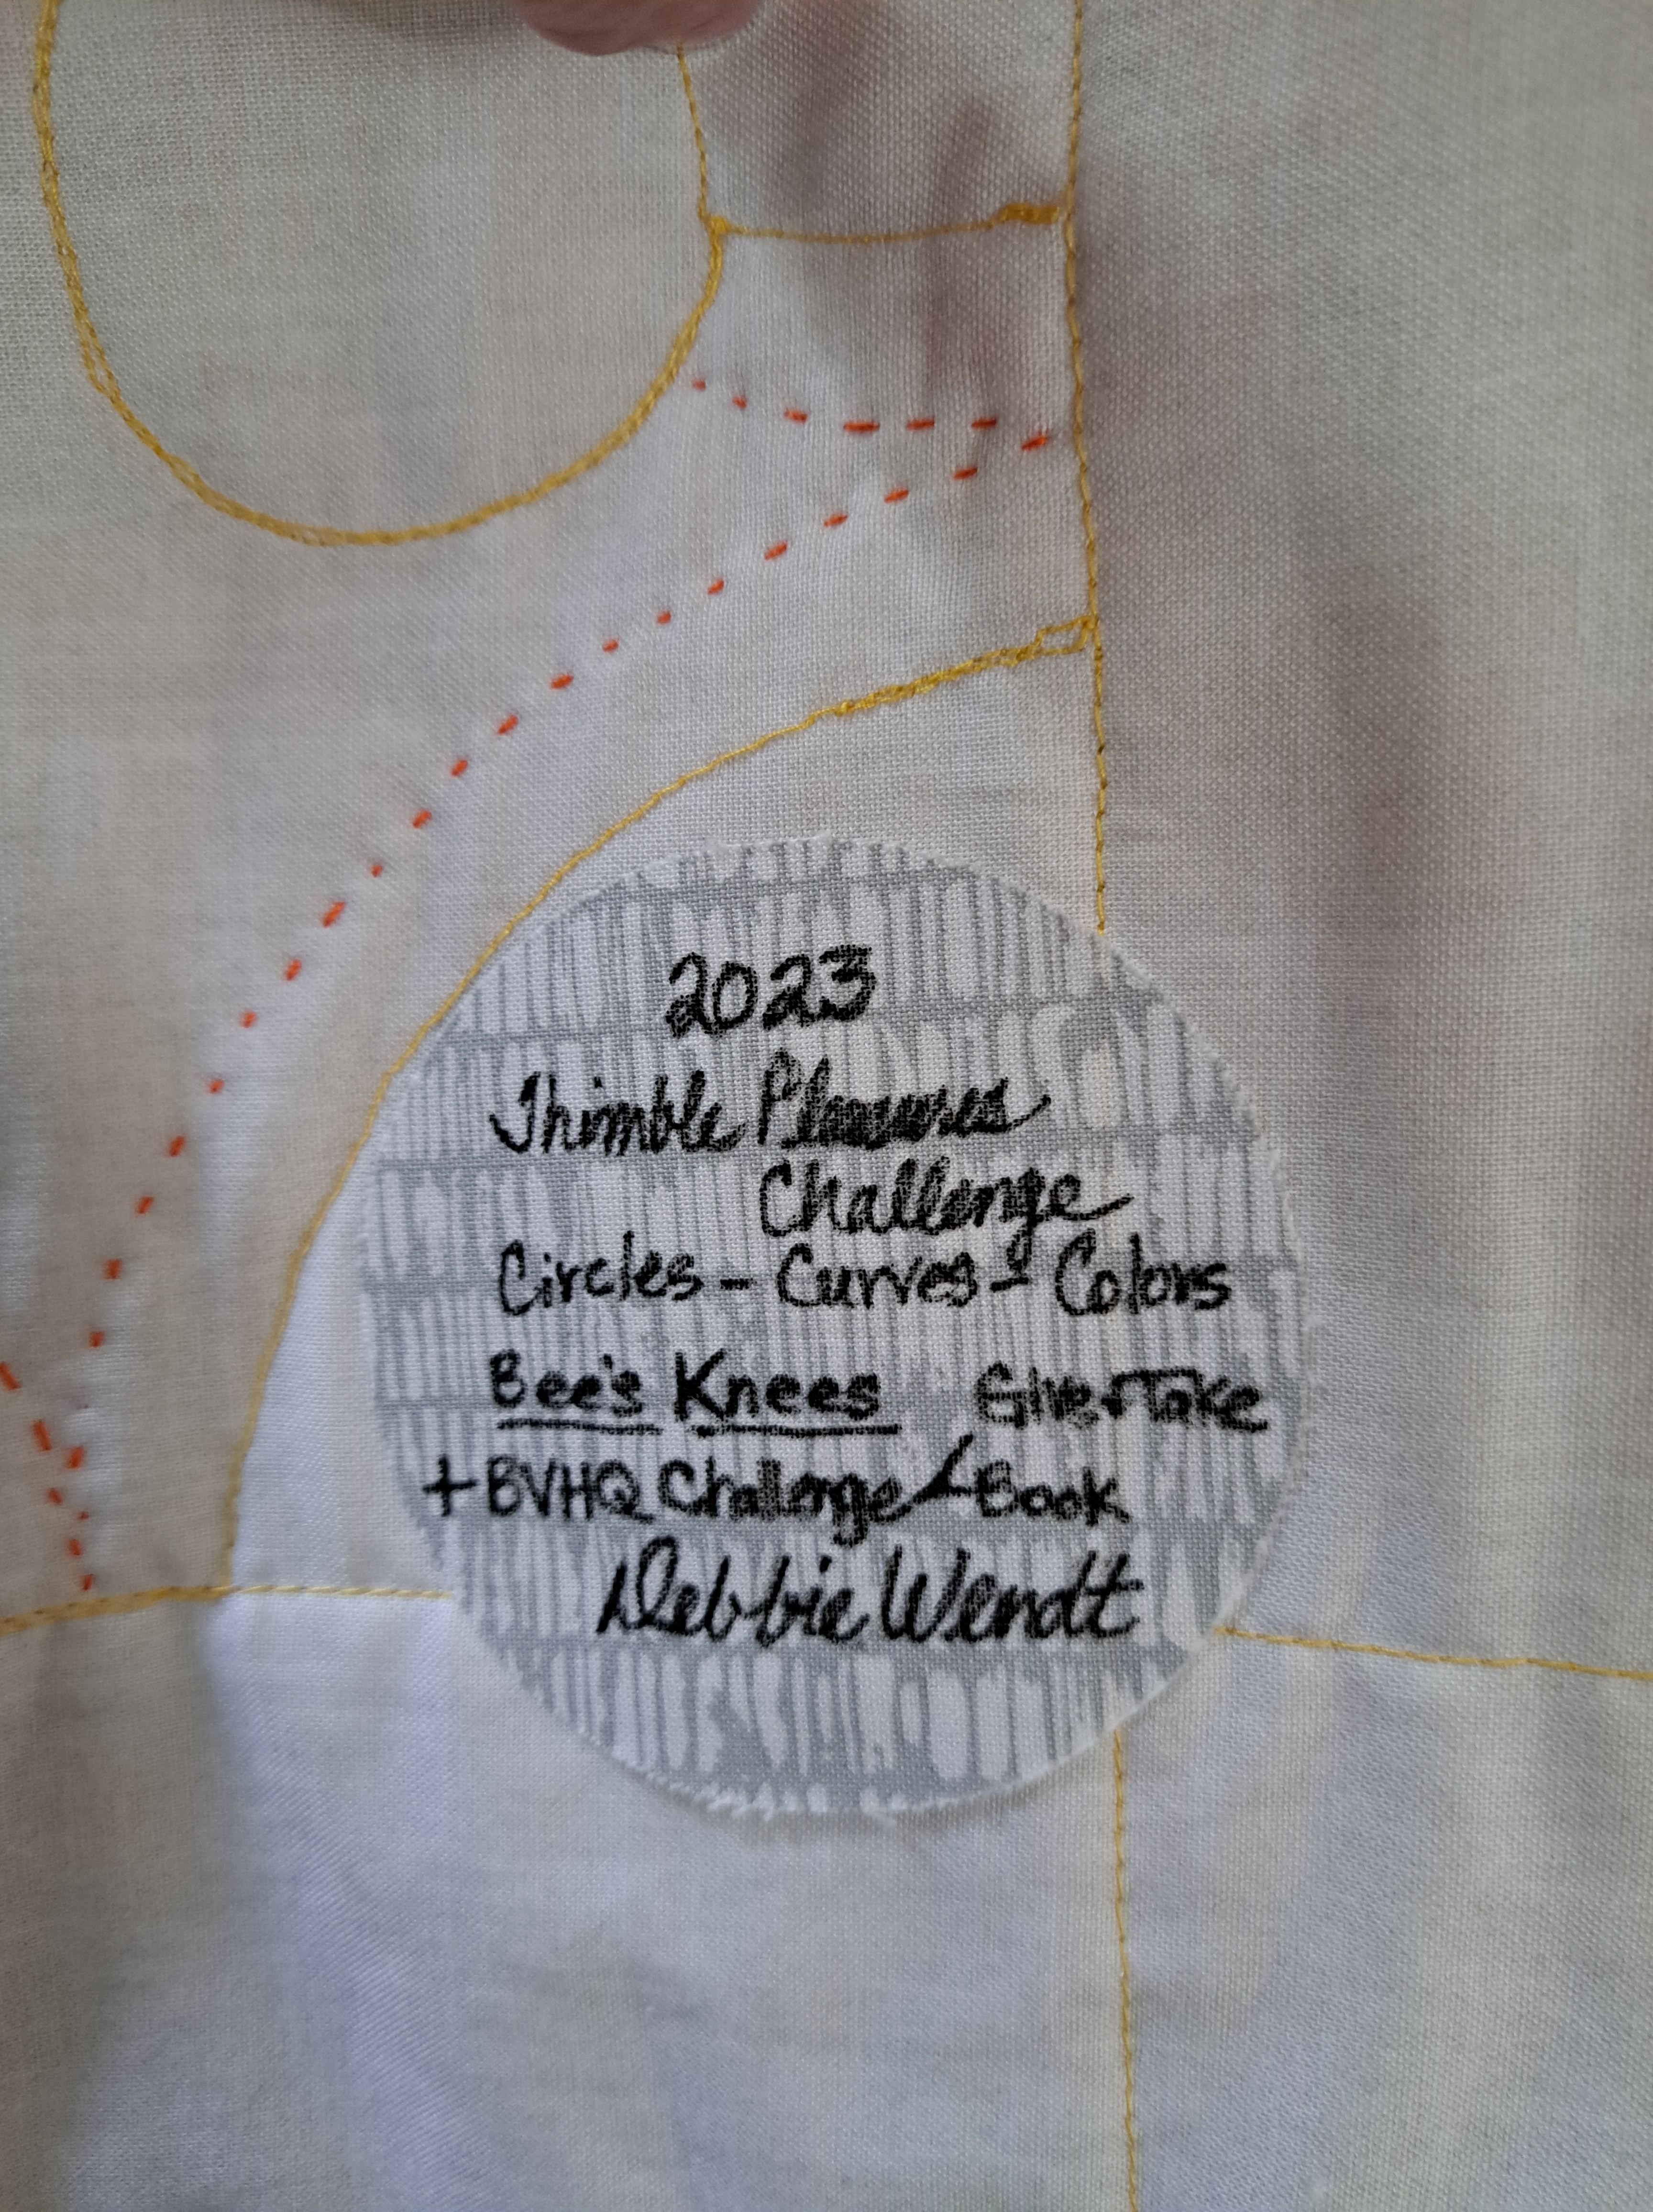
I even got the label done!!
in quilting,
Debbie
