I’m happy to report the R-W-B Boise Workshop was a success! We missed a few students from not feeling well, but four carried on. No one choose to use red/white/blue as the cover photo and title suggested. We did have some great combinations that will make wonderful quilt. So, please find below the start of some fun quilts…
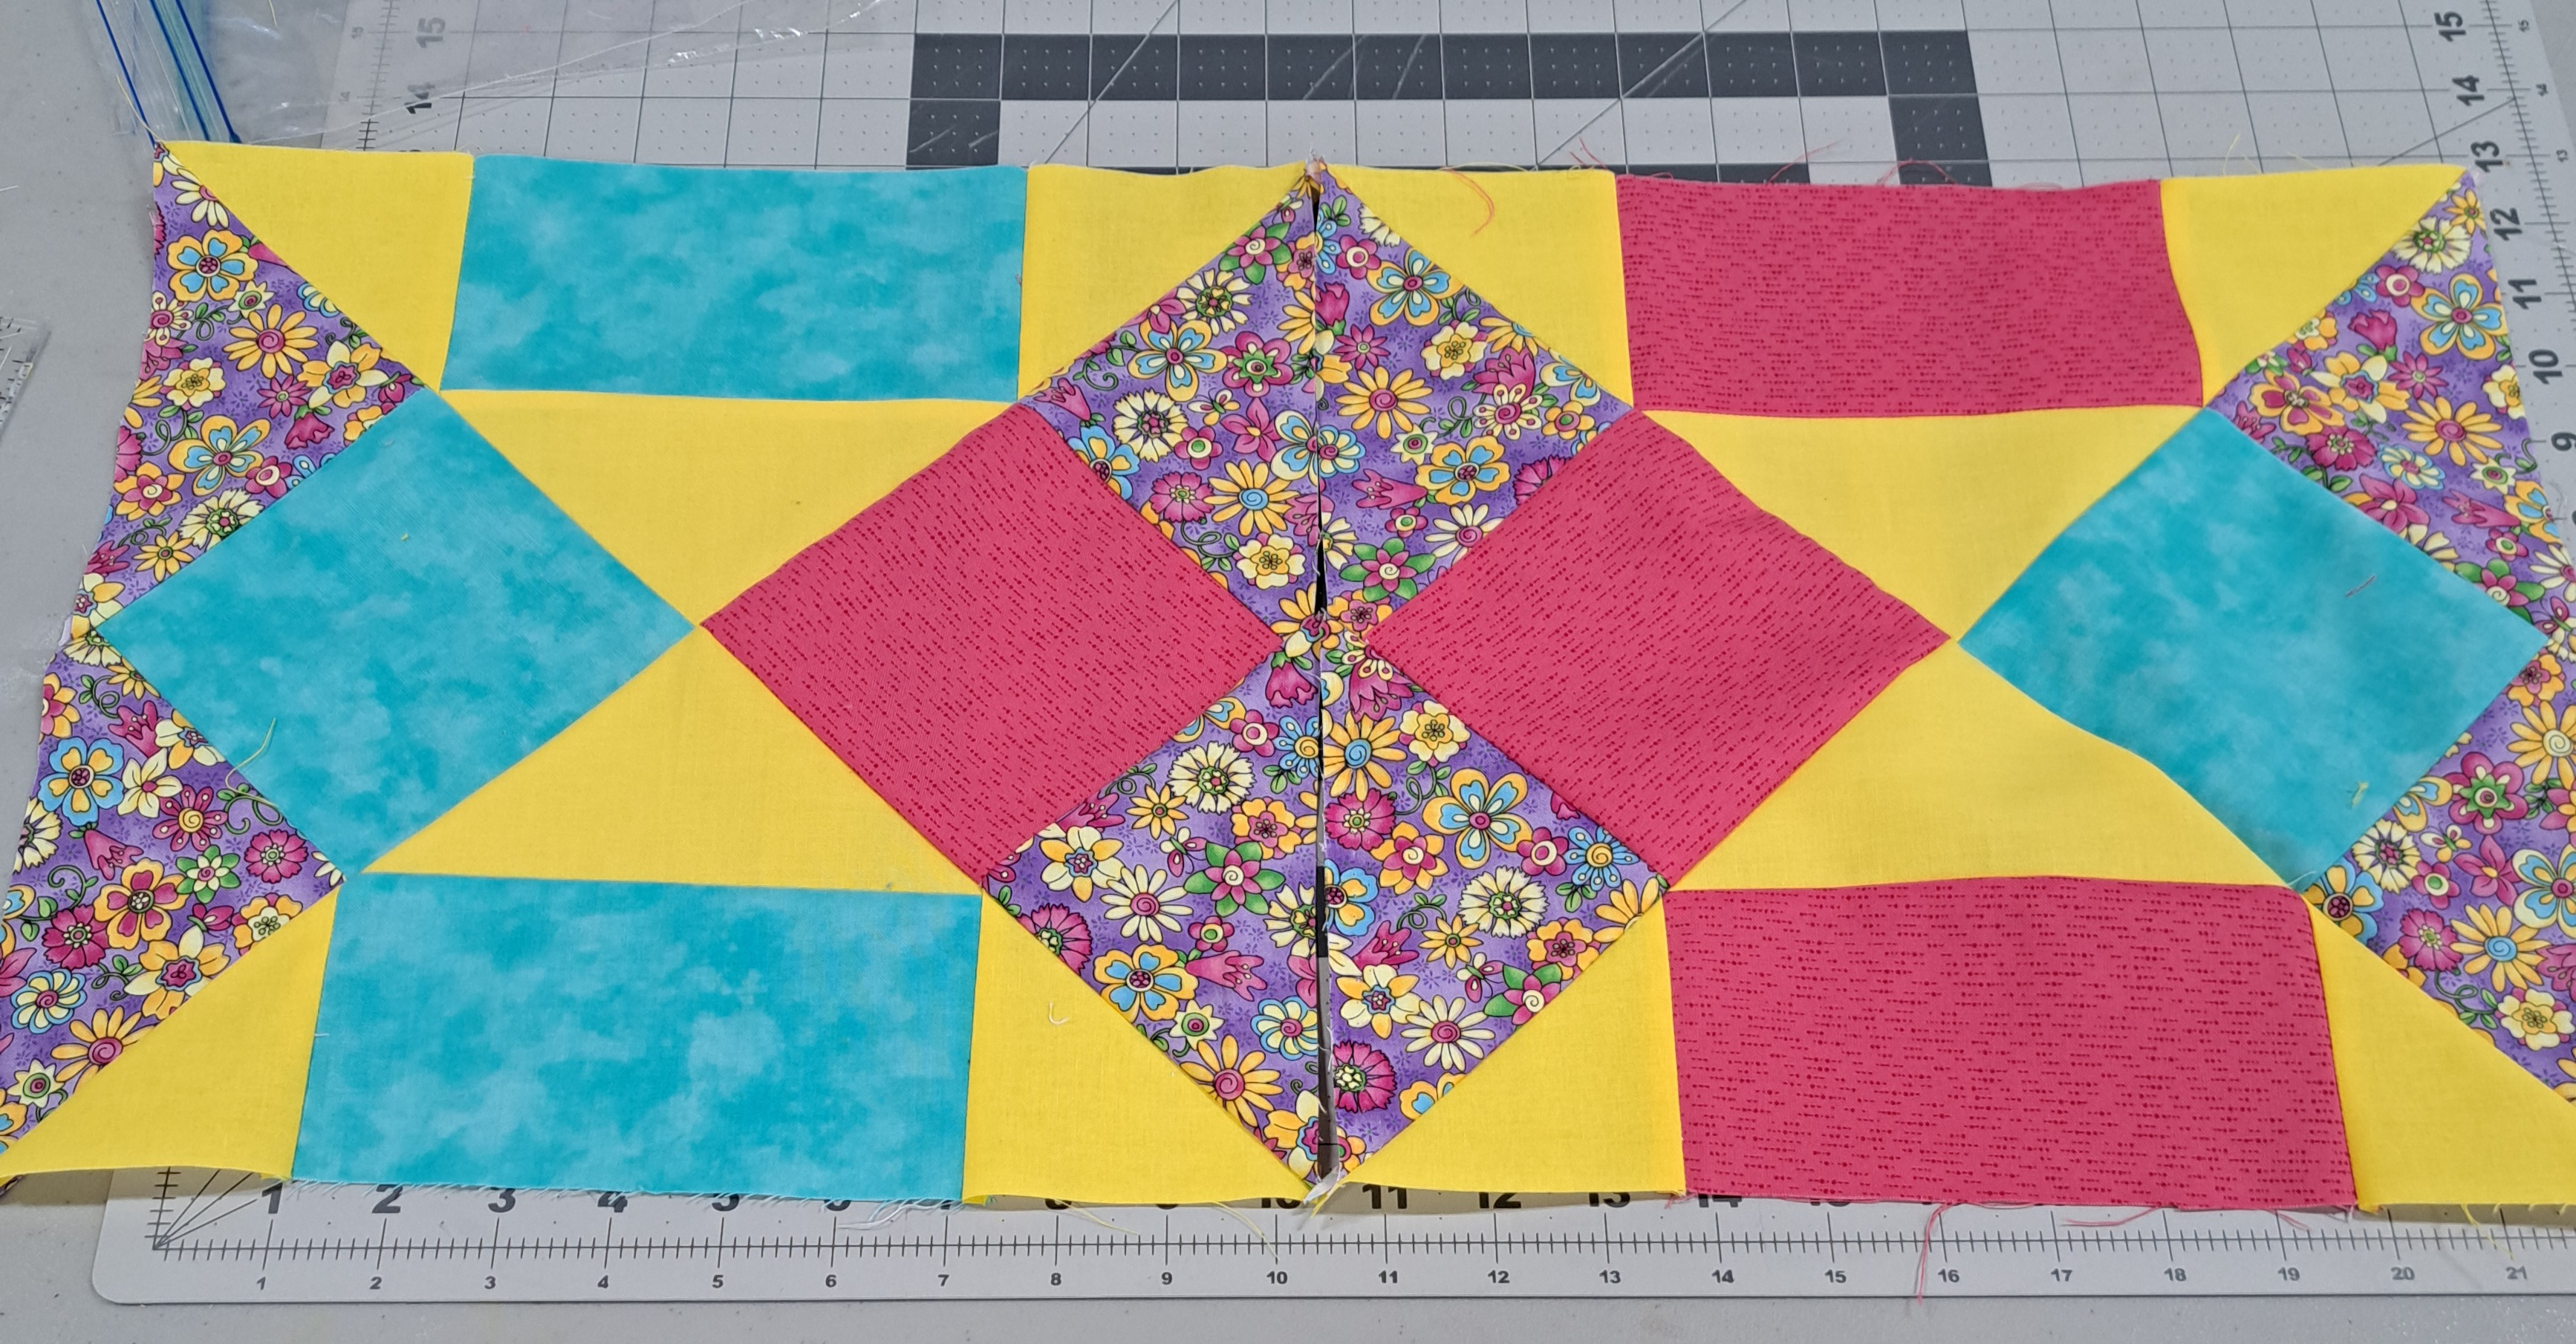
Sylvia’s brights –
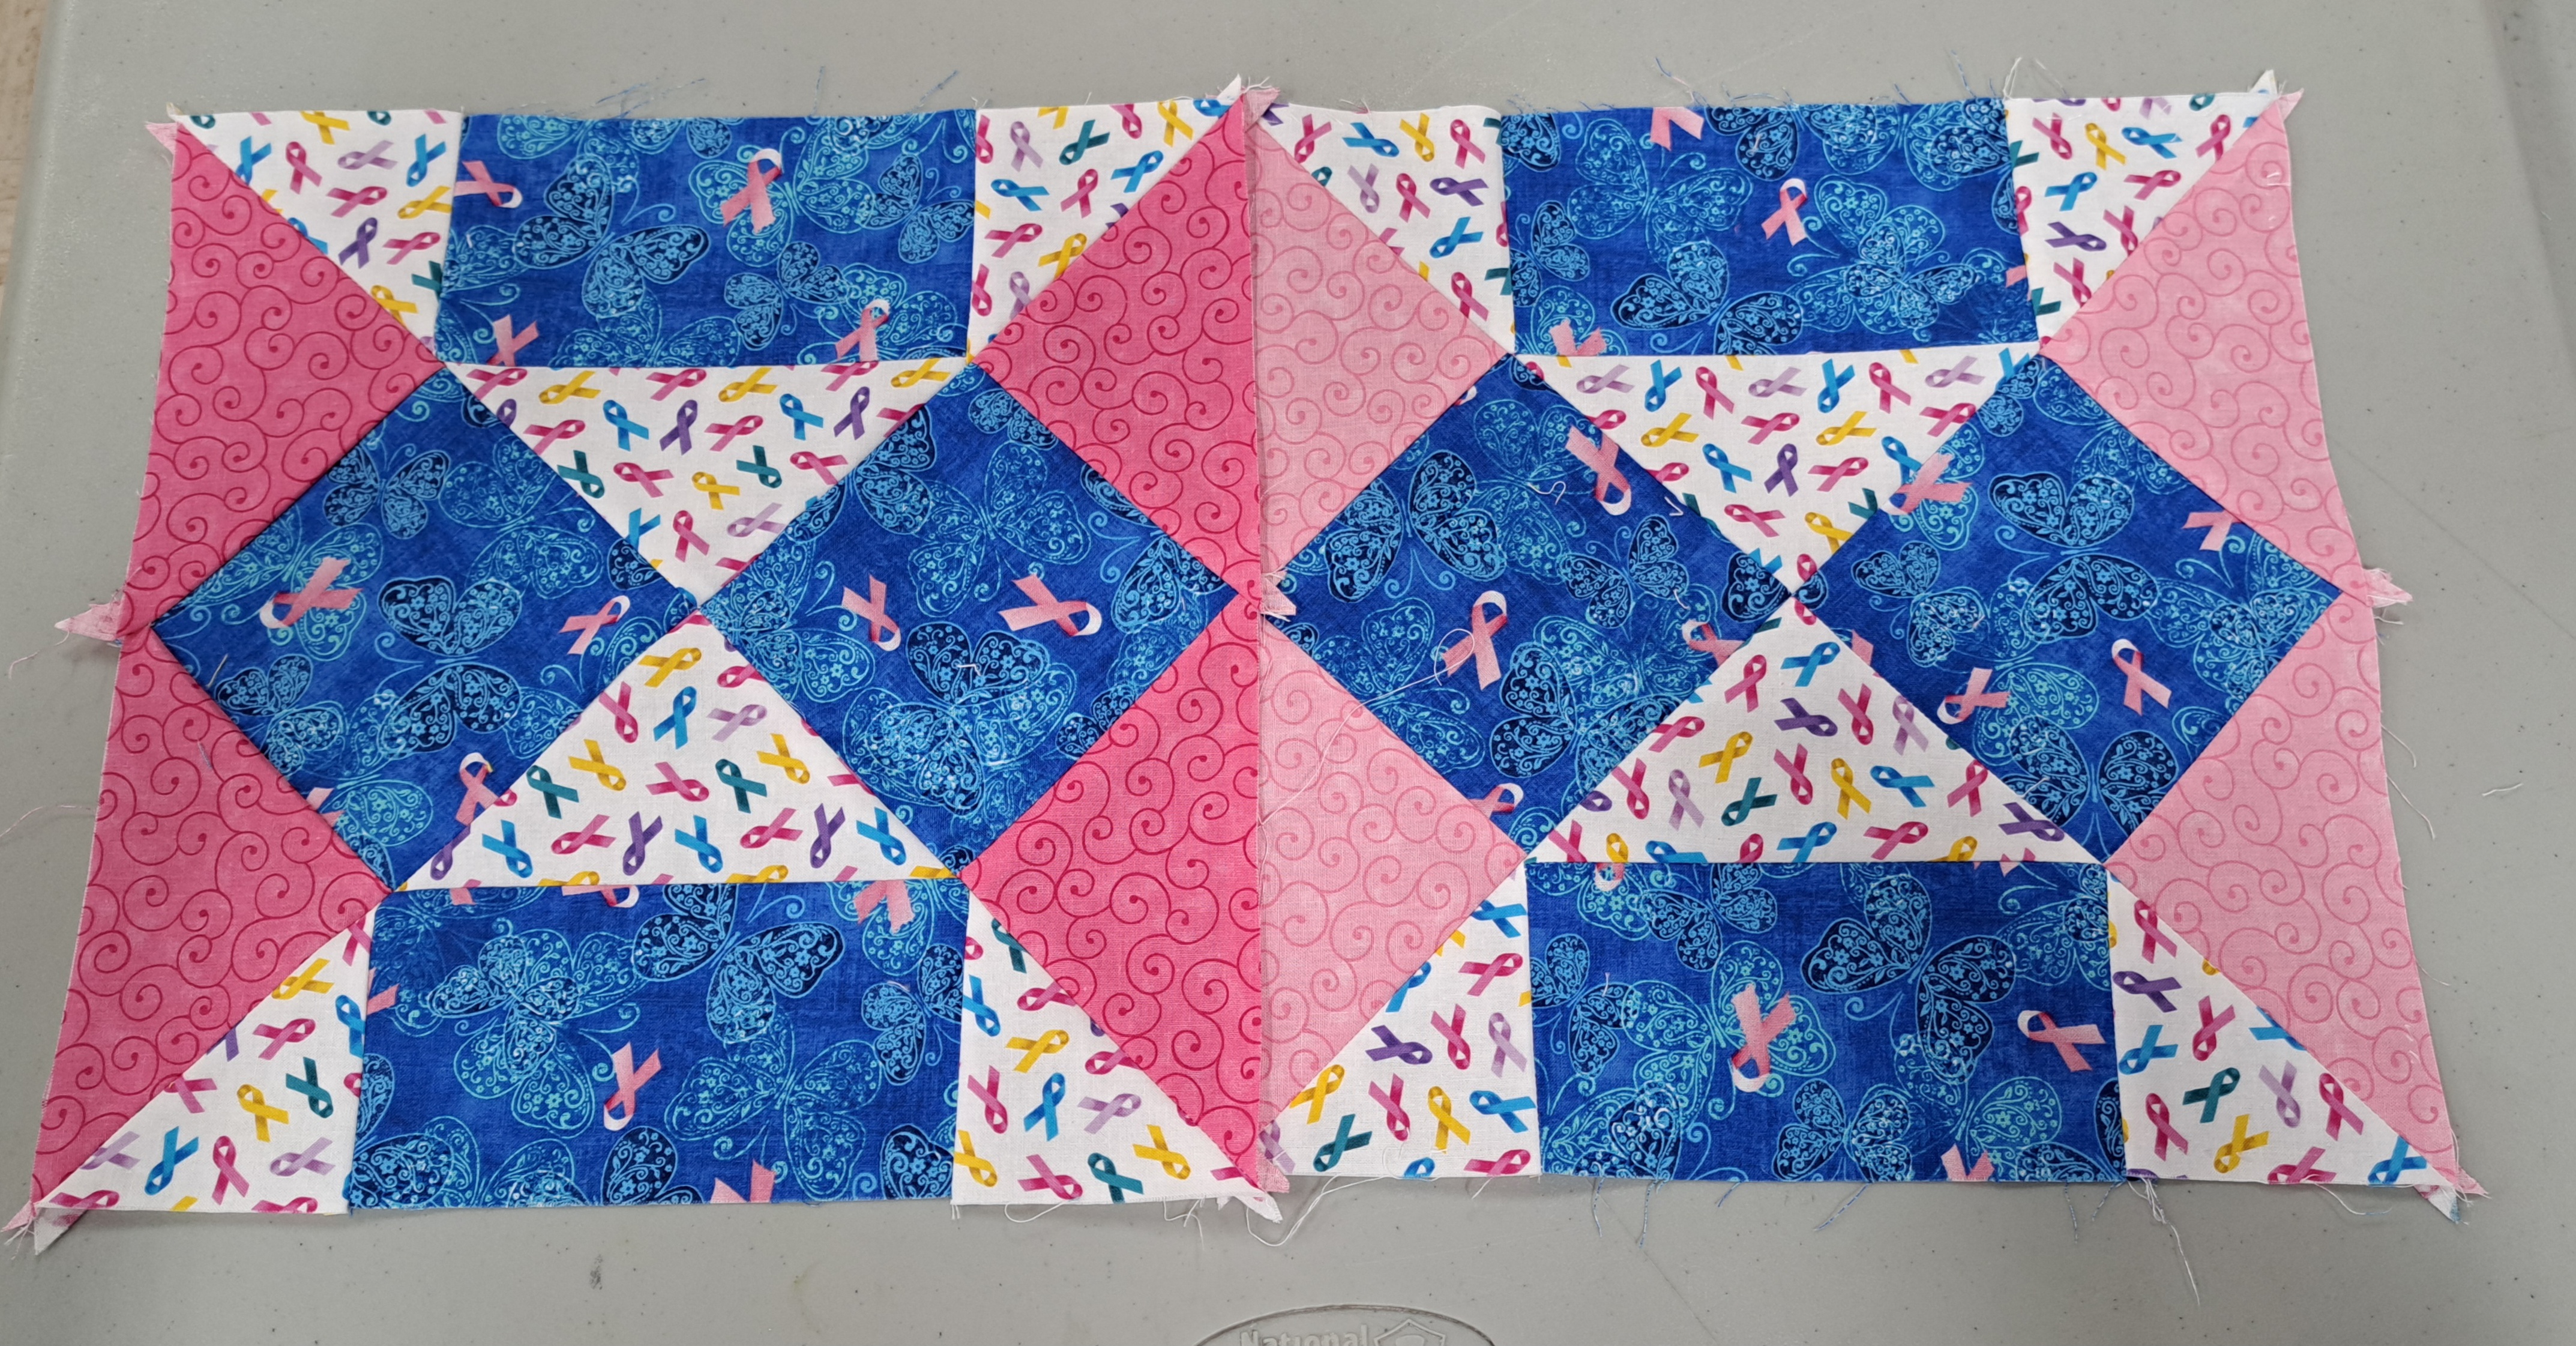
Mary’s ribbons –
Carol’s purples and greens –
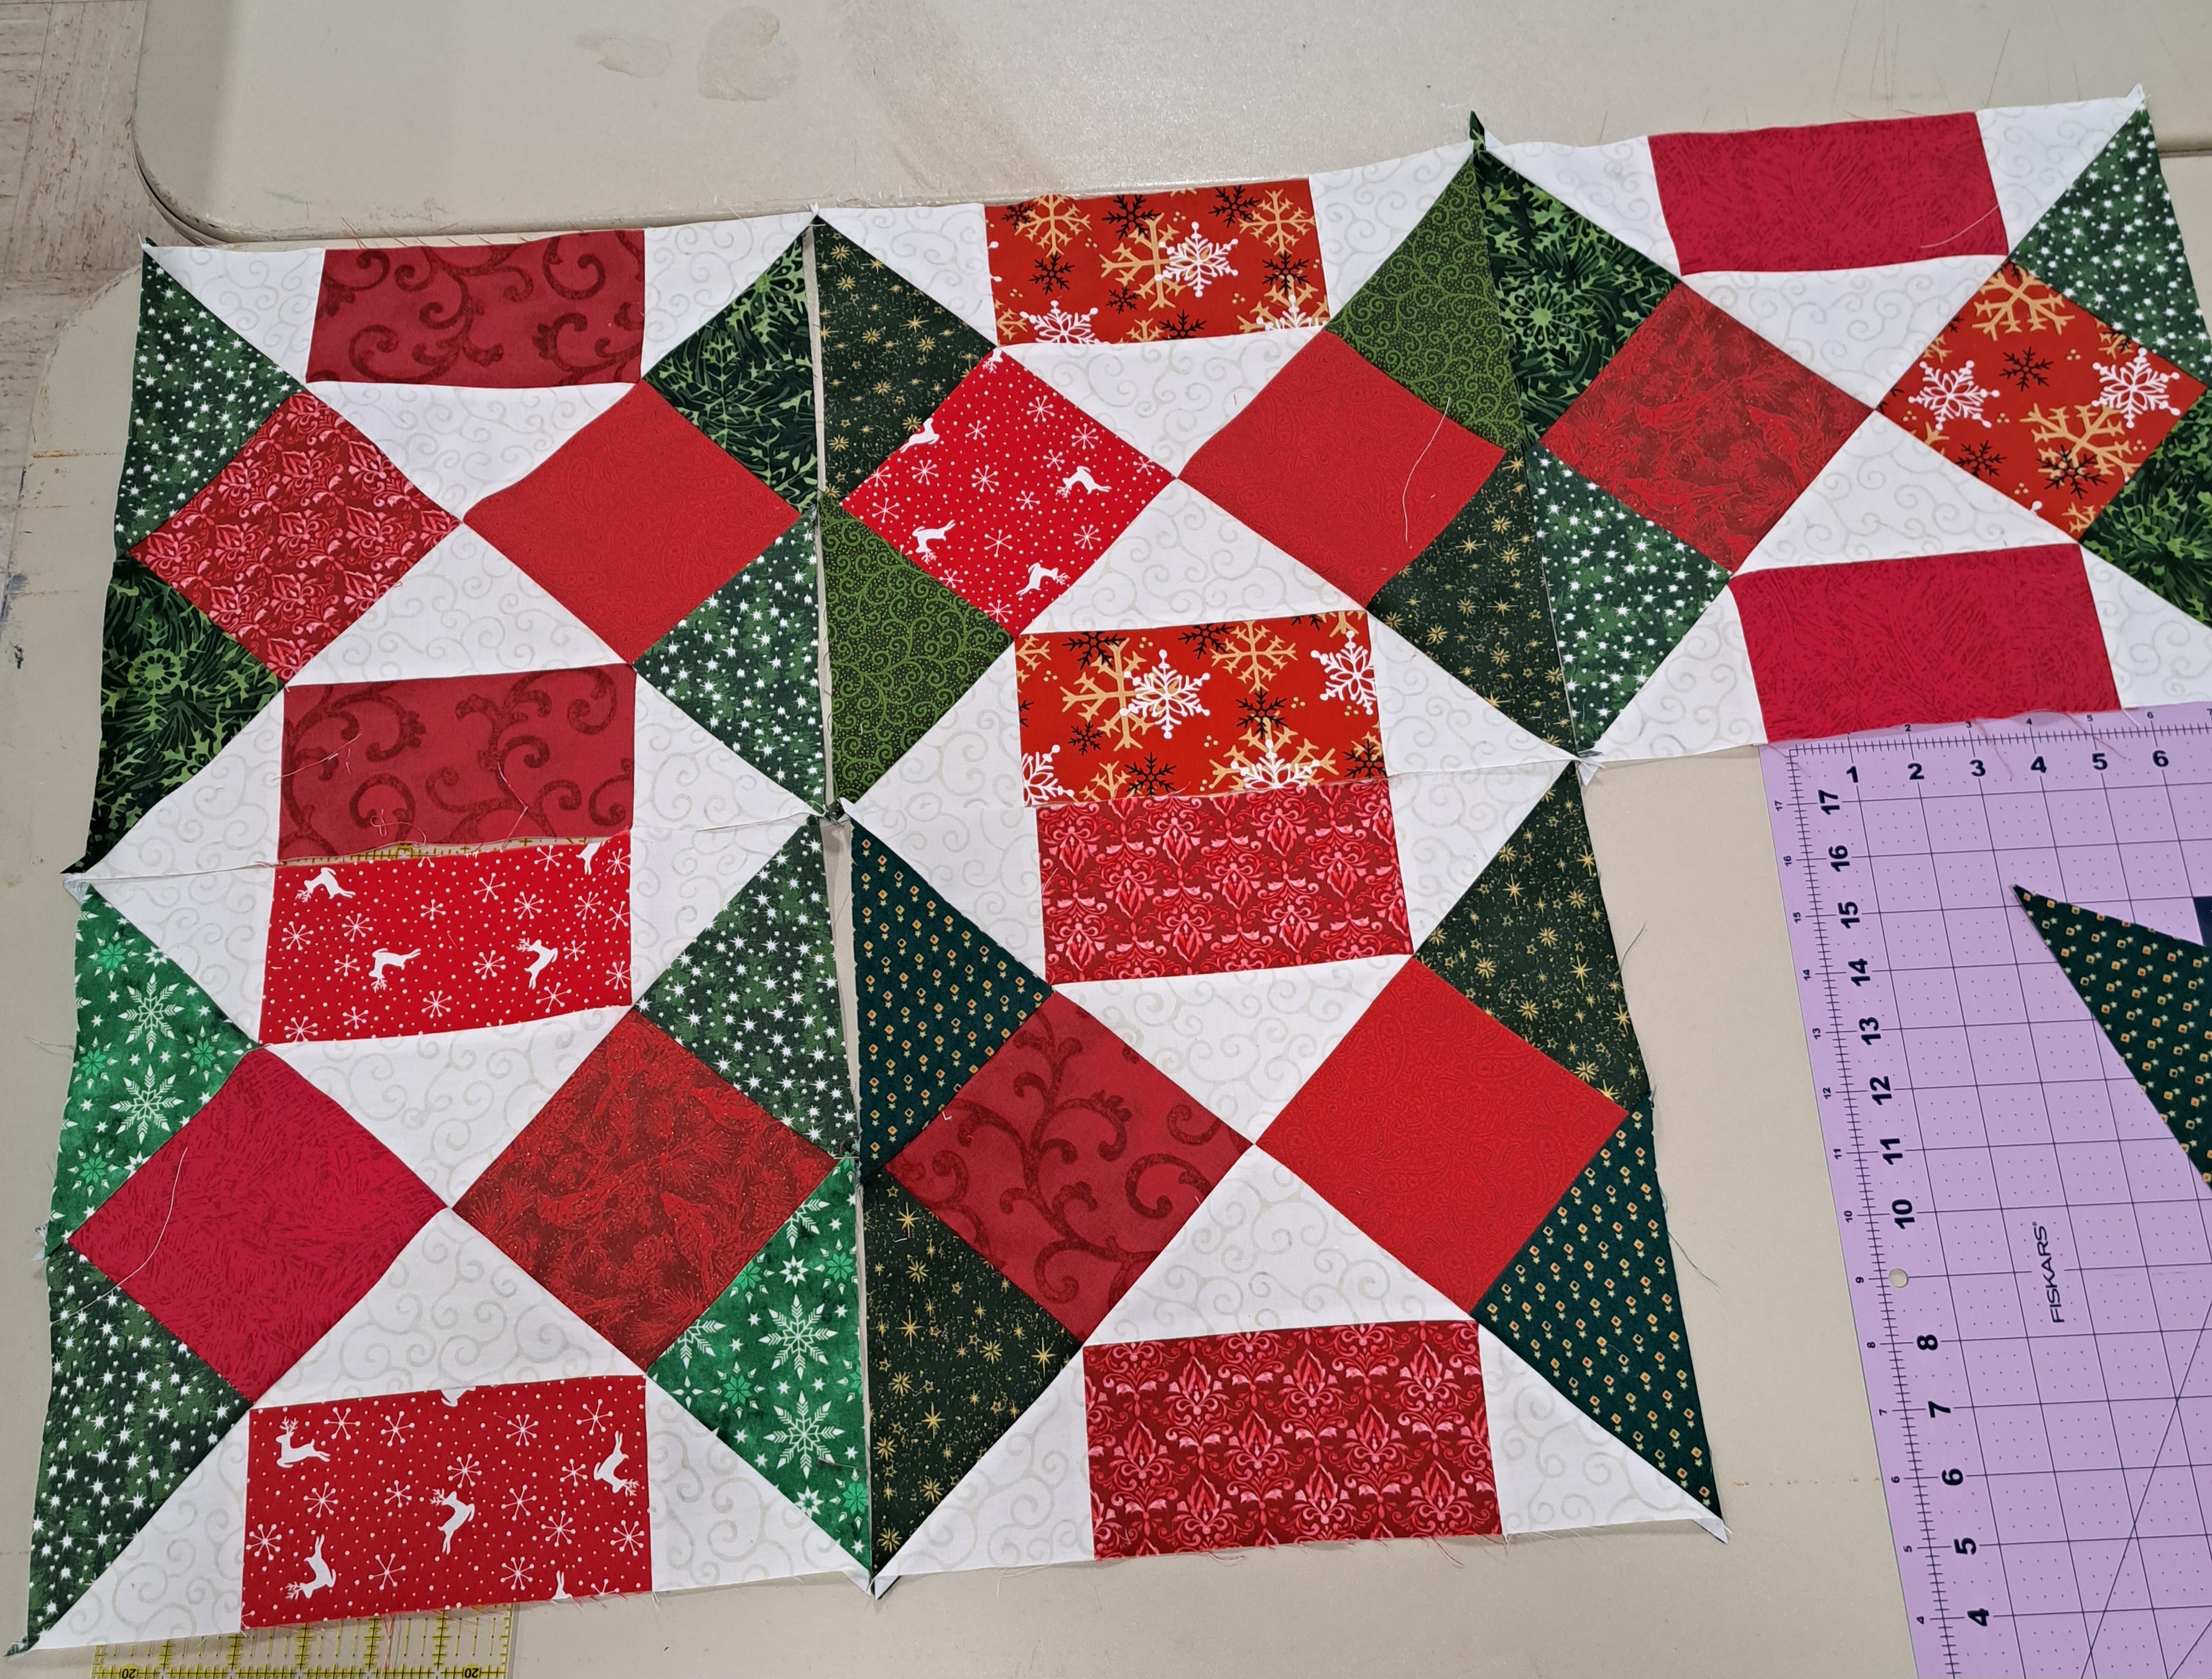
Jaye’s reds and greens –
The girls did a wonderful job with this block. One of the things we discussed was pressing. To one side or open. It was up to them! The pattern does give pressing suggestions. The flatter the seam intersections, the easier it will be quilt. We also discussed quilting. Because they all were focusing on their fabric, I suggested they keep the quilting simple. No need for anything fancy. Let the fabrics and blocks be the focus!
Tips for this quilt and other scrappy quilts
#1 – Let the fabrics be the focus! A simple background fabric can help.
#2 – With scrappy quilts, I like simple quilting. Sure, you can practice designs but in the end usually the joy of the fabrics is what wins.
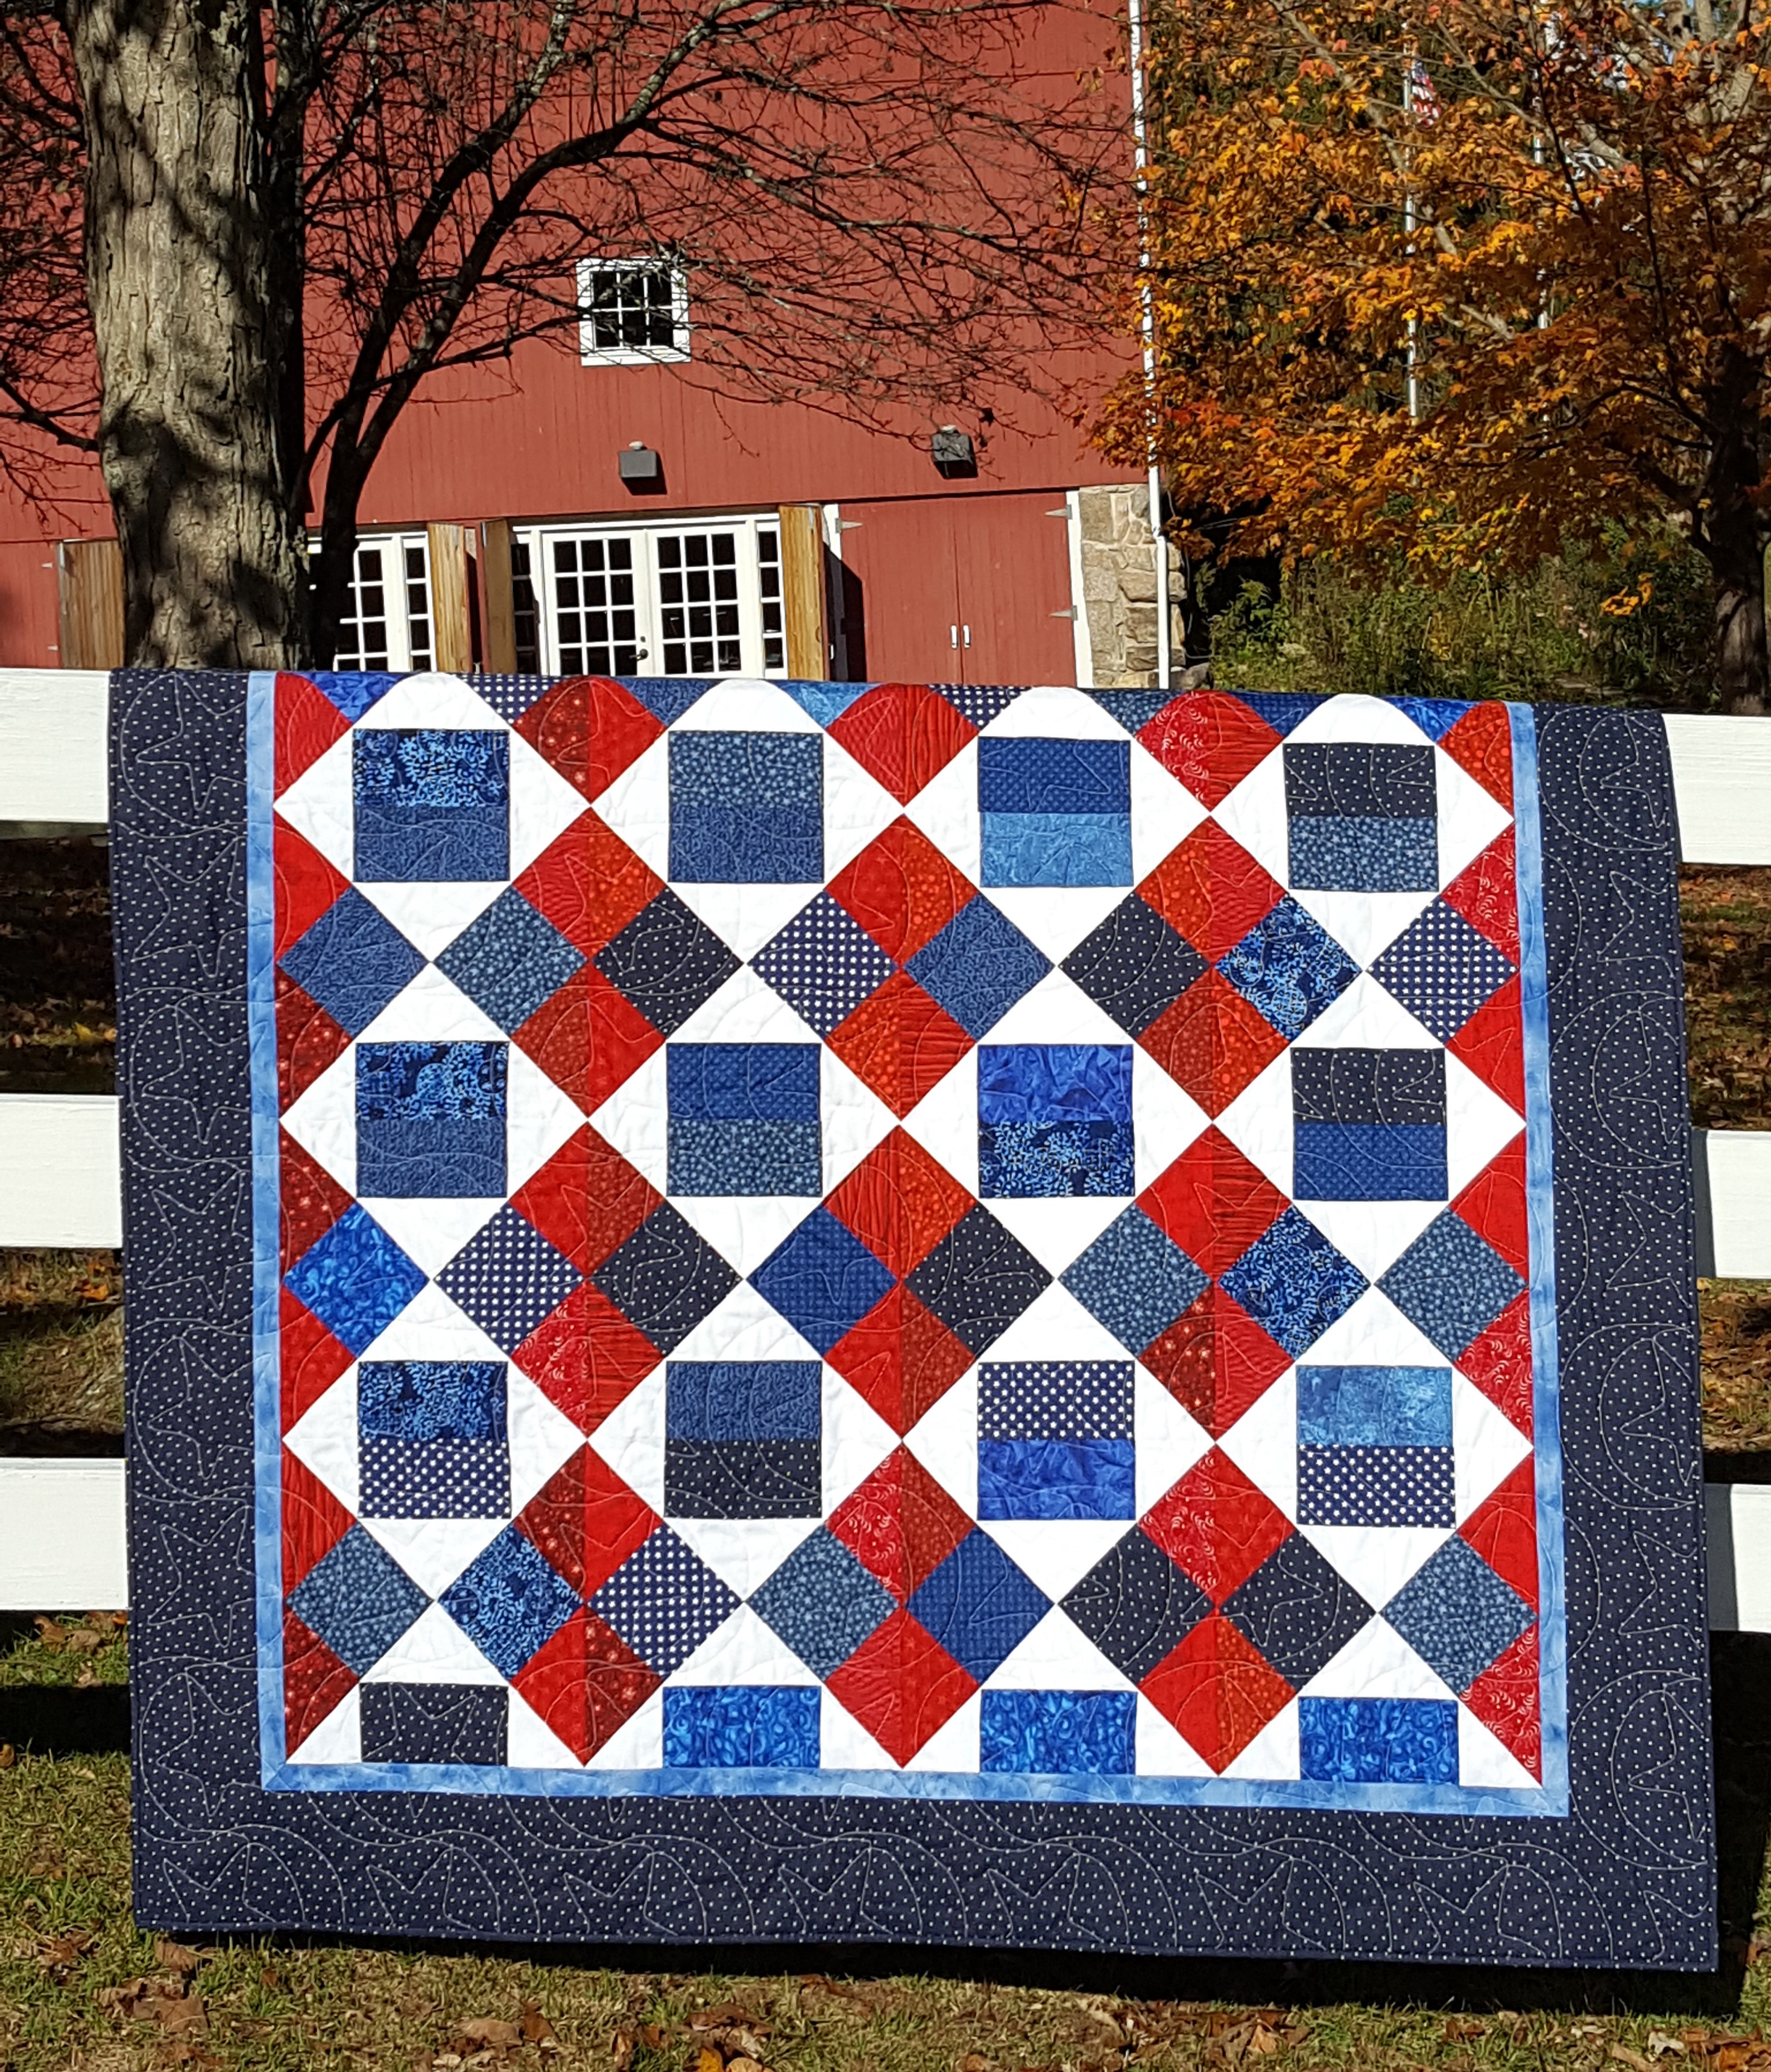
I am prepping for a class/workshop I will be teaching on Saturday, R-W-B Boise quilt for Blackstone Valley Heritage Quilters. See the quilt below!
I’ve decided to make my sample quilt using some of my plaid collection/stash. It will be Christmas colors in red and green plaids. In searching through my stash, I found small-ish fabrics I want to include but they were not quite big enough. So what is a quilter to do? I have some tricks to cut the quarter square triangles I need. Not from a square and cut diagonally twice as I’ve done in the instructions…but rather improvise with what I have on hand.
So traditionally in cutting quarter-square triangles, you cut a square and then cut it diagonally twice, as shown below.
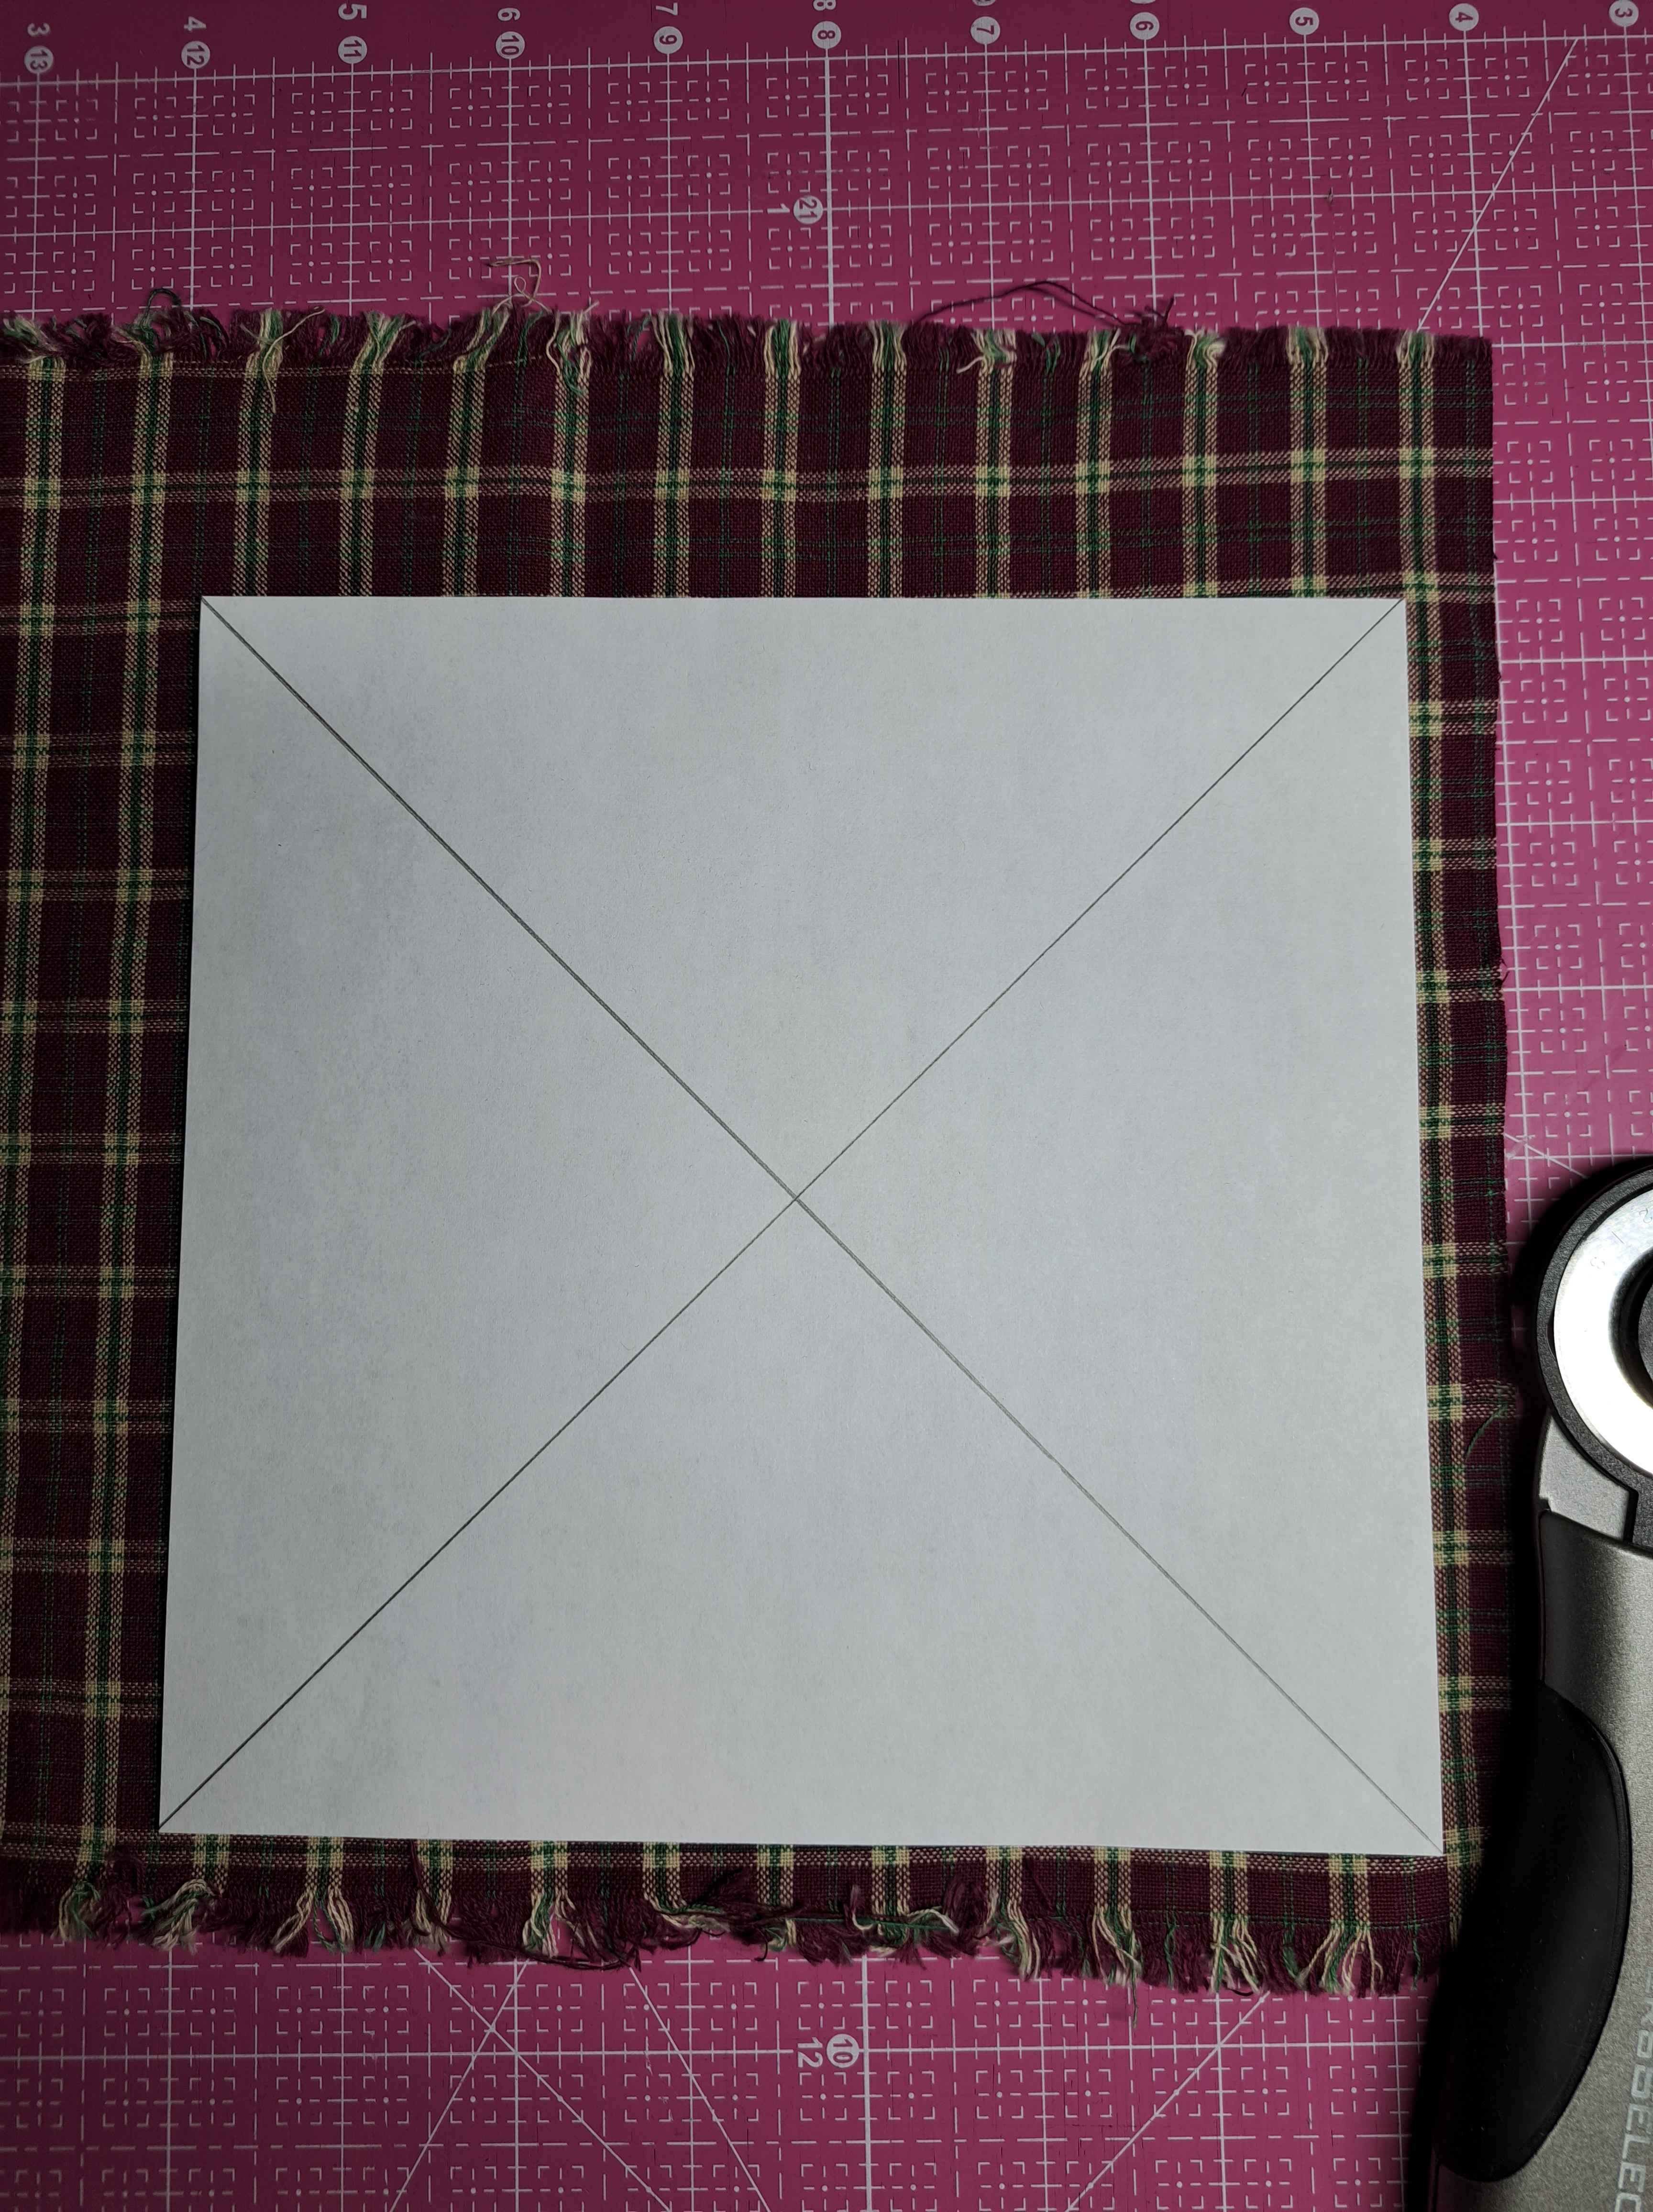
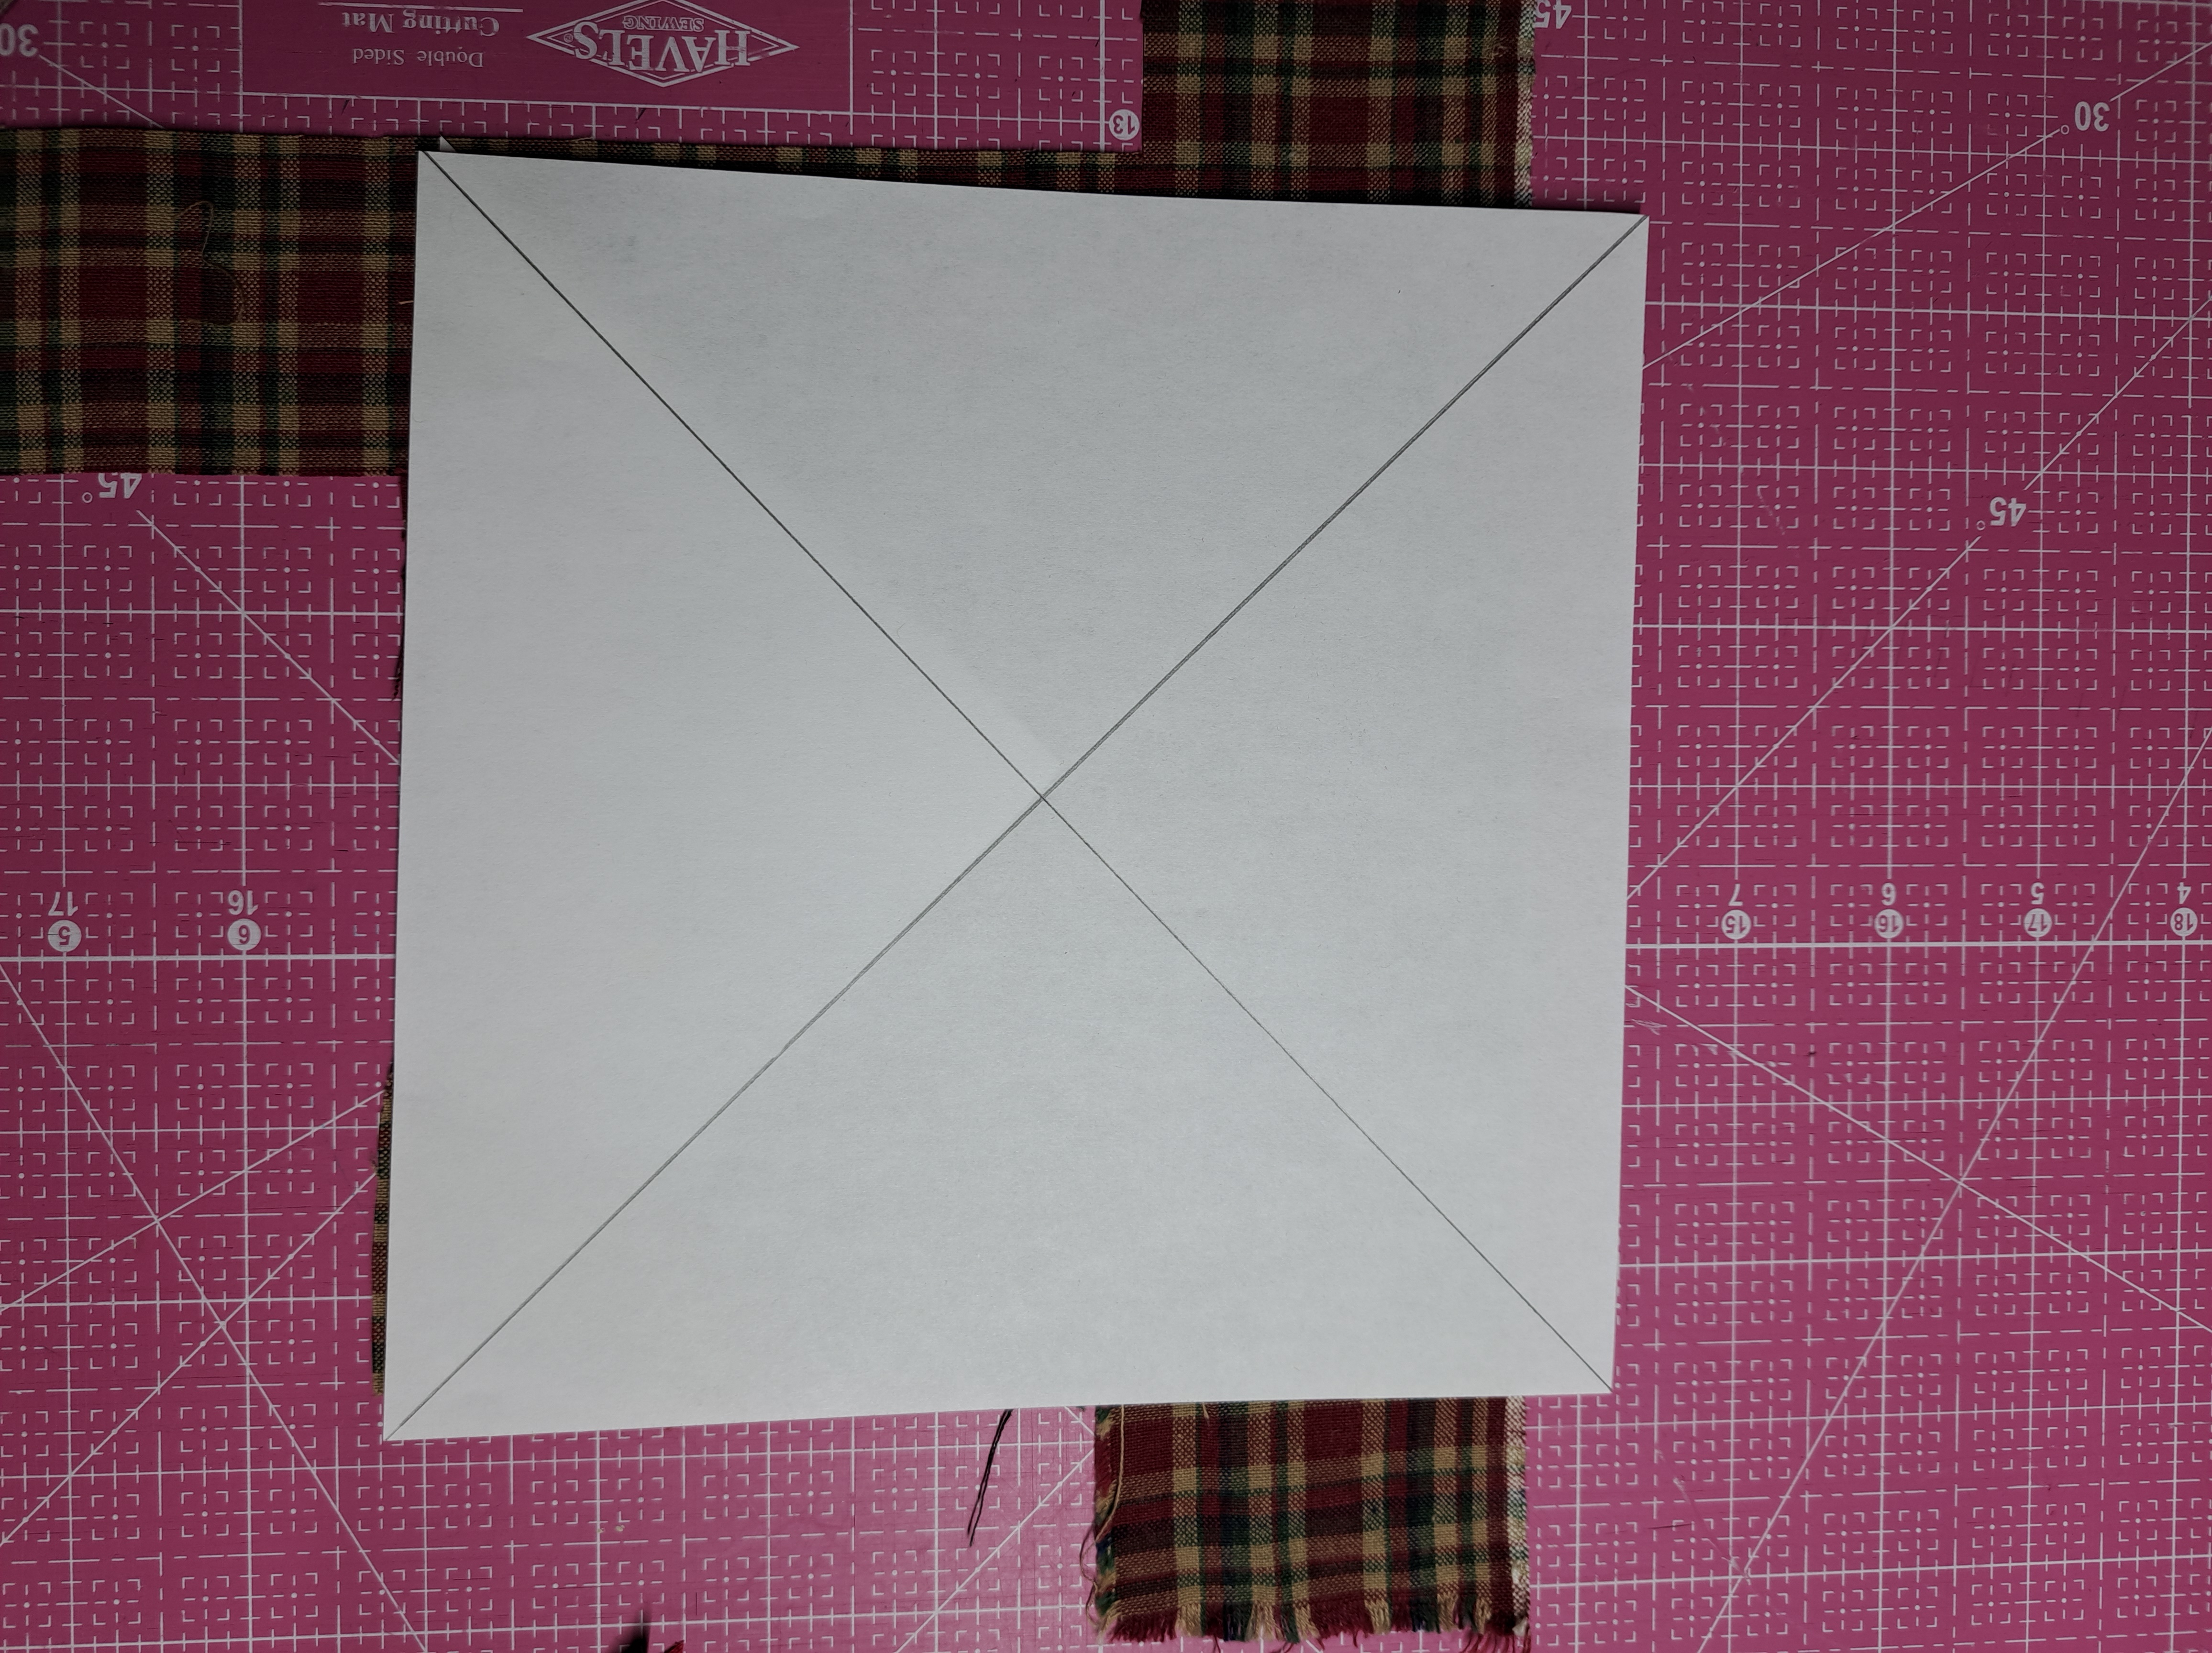
BUT when the fabric you want to use is not large enough, what can be done? Cut a piece of paper the size required and draw the diagonal lines. Then cut that apart and you have smaller pieces that can be placed on your “chunks” of fabric. The left image below is the paper shown on a piece of fabric, it fits! Then on the right, the paper is shown on a piece that isn’t big enough. Dang!
Here is an example of how I can get two of the quarter square triangles from the “chunk” of fabric shown above! It does not get me 4 of the same fabric but two will work in the design and I can find another fabric to cut two more triangles from to increase the numbers needed!
And I had a strip of another fabric just wide enough to get 4 quarter square triangles of the same fabric, SCORE! Also shown is other quarter square triangles already cut, stacked, and ready to use.
Why go through the trouble of placing the pieces as I did on the “chunks” of fabric?….I want the longest triangle edge to be on the straight-of-grain. That edge will have the least amount of stretch and will help the block stay “square”.
Now back to cutting and prepping/sewing some sections of the blocks needed! Those of you in class on Saturday, you just got a sneak peek!
Tip #1 – Make a paper template of the pieces you want to cut from “chunks” of fabric….when there isn’t quite enough.
Tip #2 – When making quarter square triangles the longest edge of the triangle is on the straight-of-grain. This will help to stabilize the edge of the block or unit you are sewing. Quarter square triangles are often used in flying geese.
in quilting,
Debbie
P.S. If you are going to Daytona Beach, be sure to sign up for classes, soon! Many are filling up! Done by Three with Fat Quarters is FULL already!!
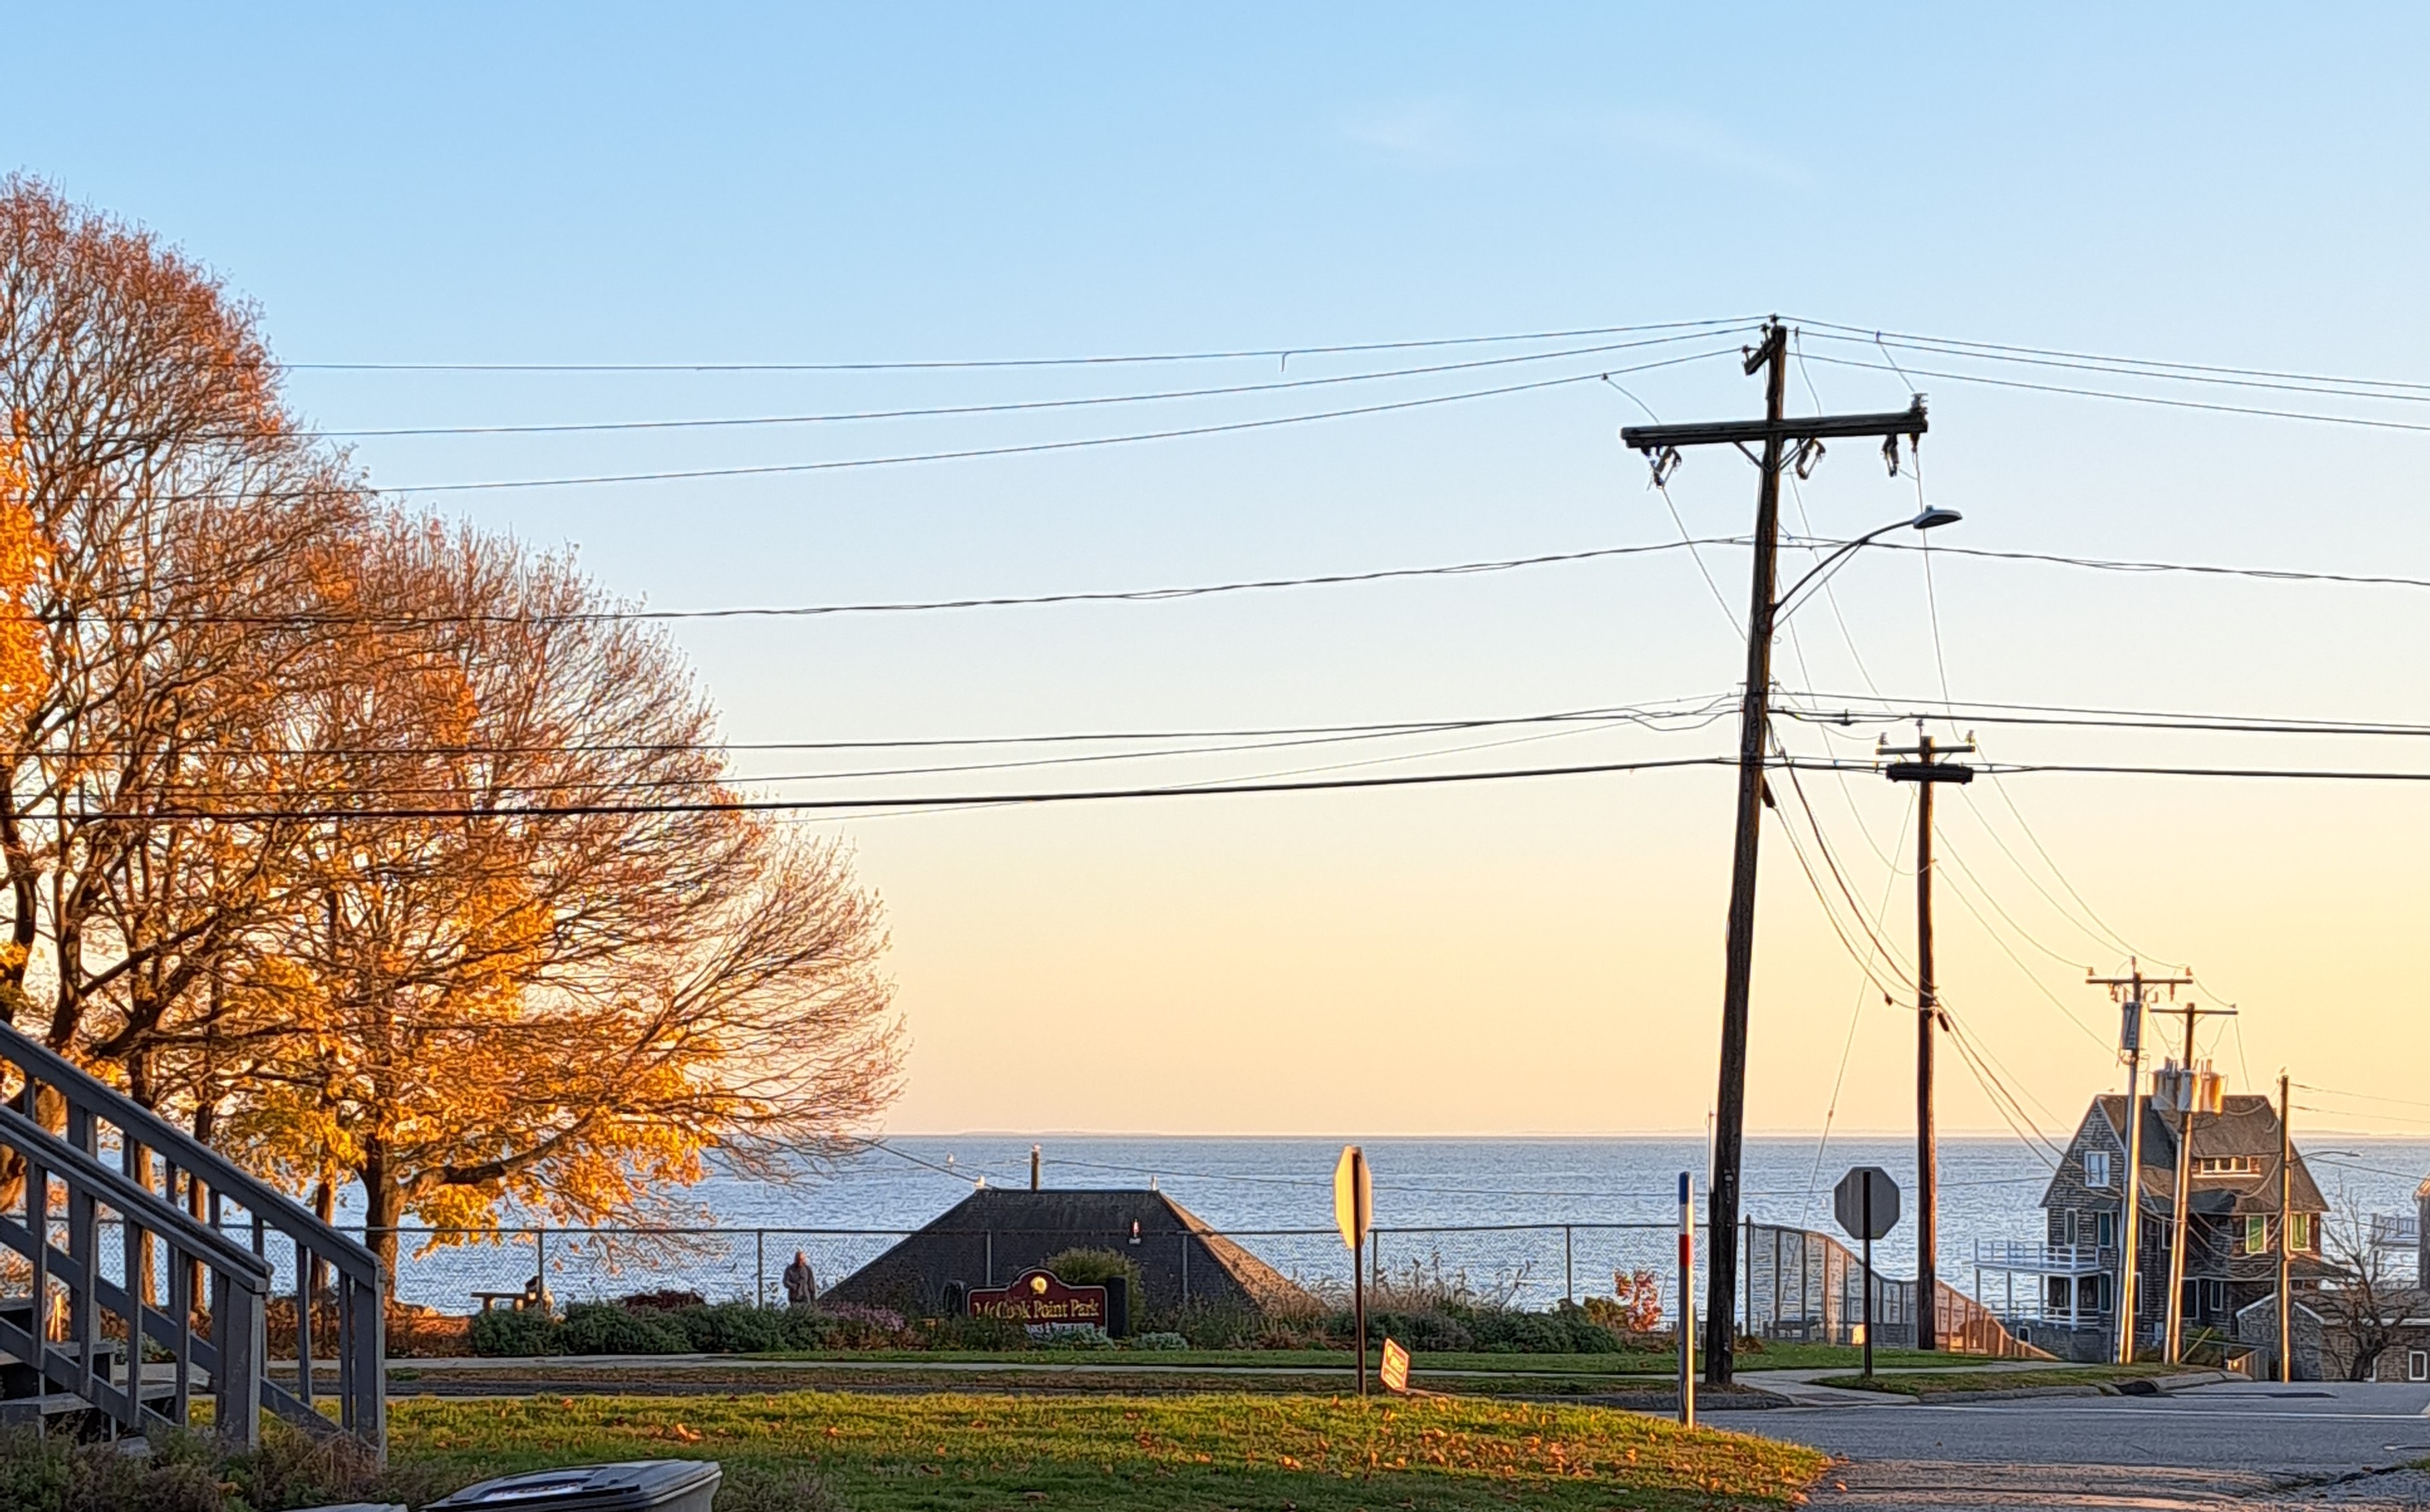
During this Thanksgiving week, I am so thankful for family, friends, quilts and customers!! As I mentioned last week, I was in CT with the Clamshell Quilt guild. A great two days of a lecture and workshop. Both on the Egyptian Tentmakers’ Applique. The view from the workshop venue was wonderful! Thank you ladies and gentlemen for a great evening and day!
And look at this view when we arrived in Florida. A DOUBLE rainbow. I love seeing rainbows and Florida seems to always give me one or this day….two!!
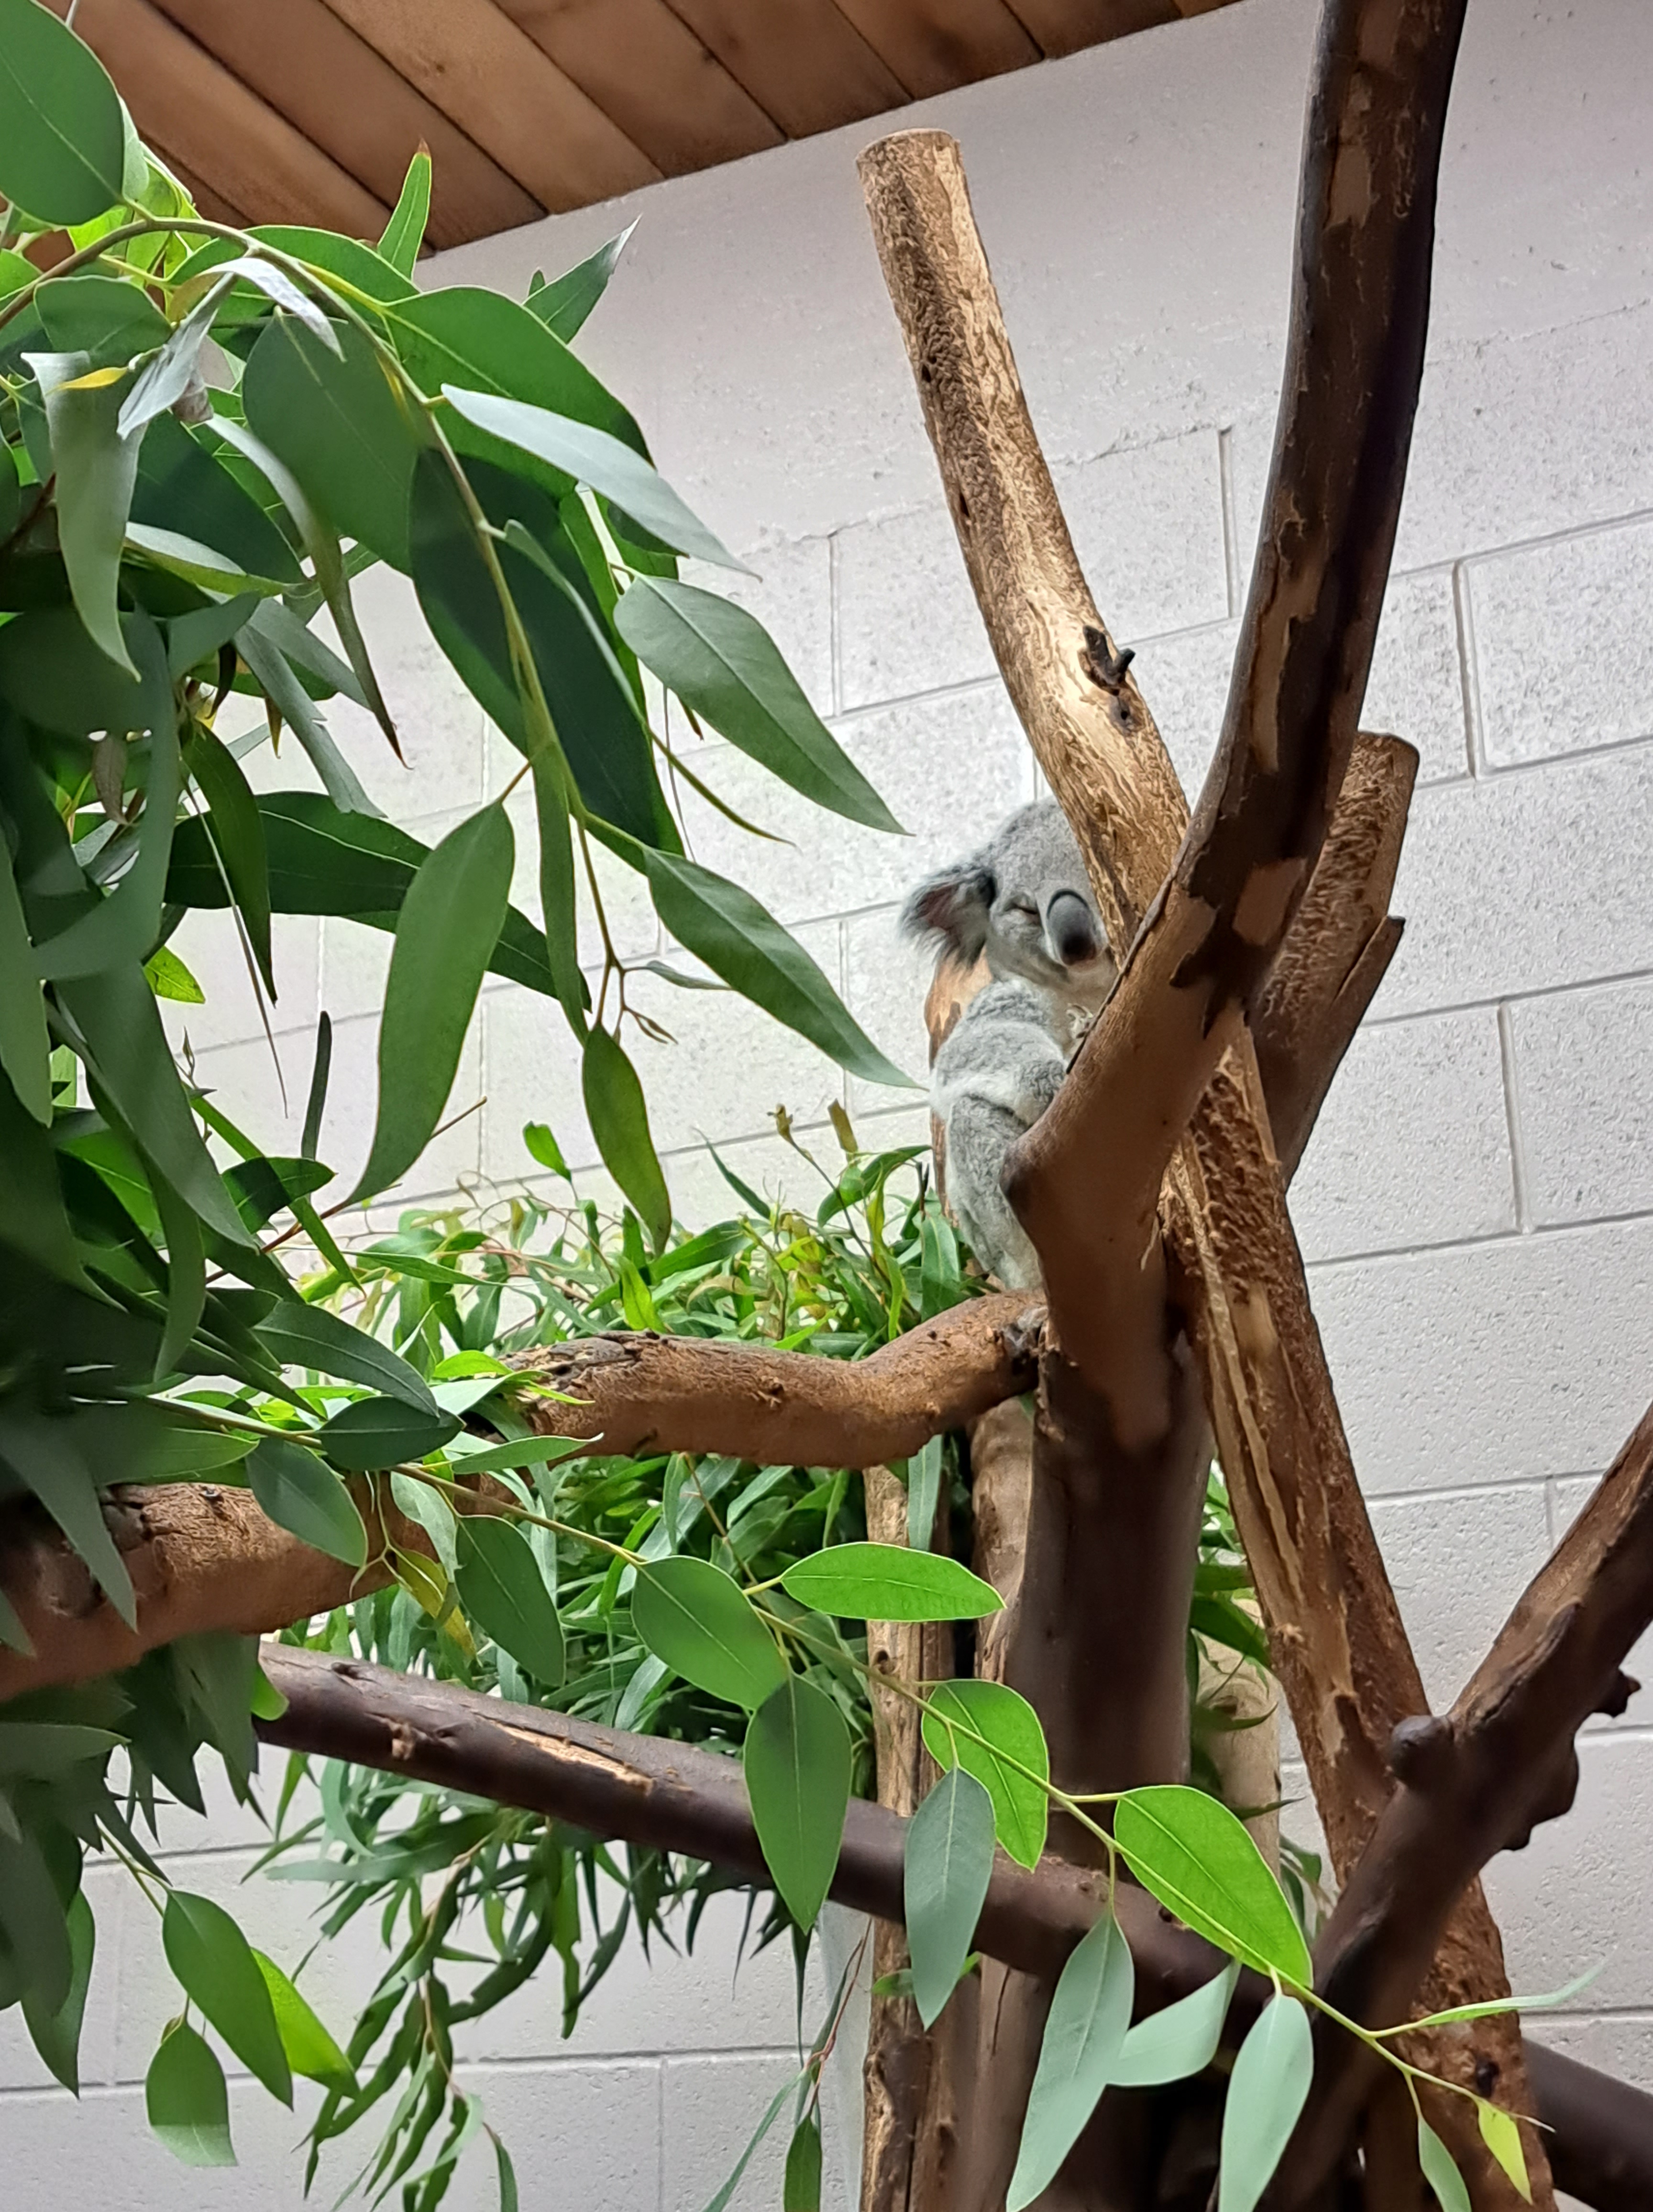
I’m spending time with family and we did a FUN adventure at the Dreher Park Zoo. Loads of walking around but a great smaller zoom. The Koala Experience was just that an experience! A look up close and personal about the Koala’s lives and habitats. No touching or holding, but great up close photos from 3 ft. distance.
An even closer experience with feeding the Lorikeets! WOW! I had four on my hand/arm at one time. Noisy little birds! Look at their feathers. Great inspiration for choosing colors for a bright quilt!
…and the rainbow shown above. It kept getting better and better! We could see ROY G BIV very clearly!
Thankful tips…
#1 – Enjoy family near and far! Give them a call and tell them you love them!
#2 – Color inspiration in nature….a beautiful fall day in Connecticut, a rainbow in Florida and birds at the Zoo!!
As this year winds down, I’m gearing up for the final guild lectures and workshops. I was at the Mothertown Quilters Guild tonight, thanks ladies for all the great questions and attention to detail of the Egyptian Tentmakers’ Applique! Tomorrow, I head to CT for the Clamshell Quilt Guild. I’ll be lecturing on the Tentmakers and also doing a workshop on their style of Applique on Thursday. Then on Dec. 2nd, I’ll be teaching my R-W-B Boise quilt to one of my home guilds, Blackstone Valley Heritage Quilters. So why mention all of this. First, I hope to see some of you out there in Quilty-land! And second, I want to emphasize the importance of taking classes/workshops. guilds and shows work hard at coming up with just the right mix of classes to offer. So, take ADVANTAGE of these opportunities!! I’ll use myself as an example, do I WANT to take a class, ALWAYS! Might I already know how to do the technique, sometimes….BUT why miss out on the FUN you will have being with like minded people and having a QUILTY-FUN day??!!?? I hope you all will step-up and sign-up and enjoy classes whenever they come your way!!
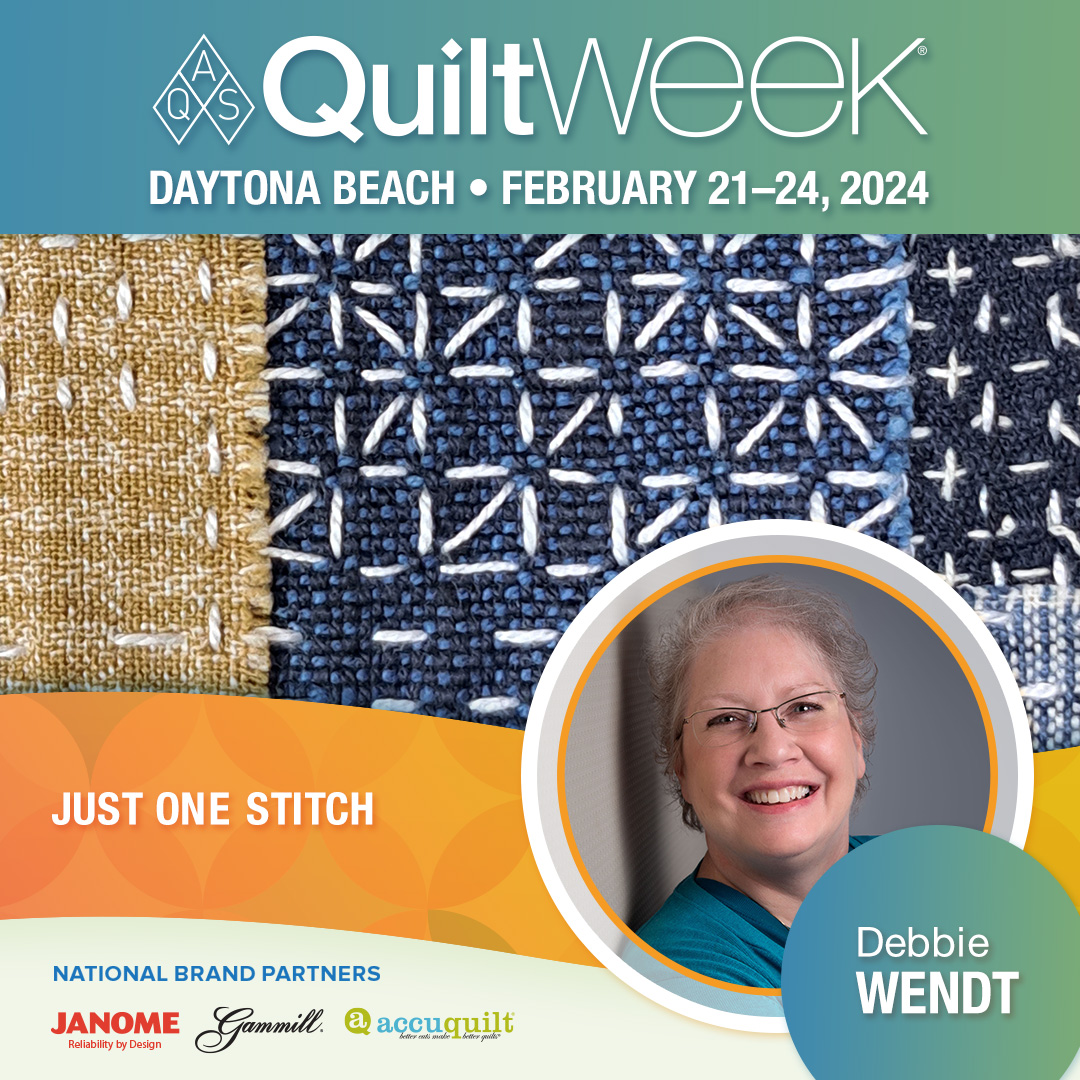
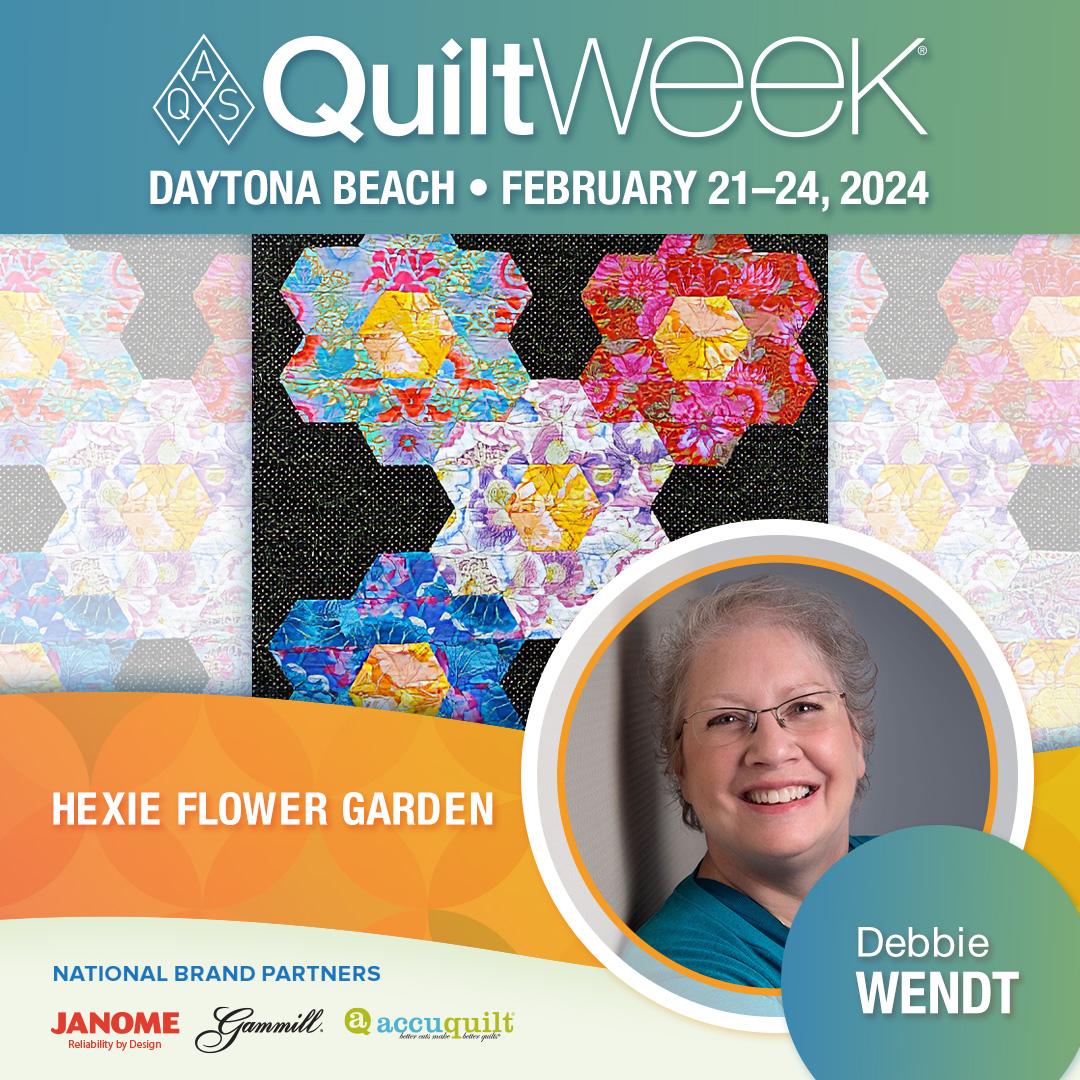
The AQS Quilt Week in Daytona Beach has opened up class enrollment. I’ll be teaching three classes and two lectures. Join me and the fun in sunny Florida and sign up for a class! The pics below highlight all the events I’ll be teaching! (That is a lot of pictures of me, but I love the graphics with what I’ll be teaching!)
In preparing for my Egyptian Tentmakers’ Applique workshop called “Pharaoh’s Messenger Bag”, I found an “old” sample I made with the Tentmakers’ style applique. It is always fun to visit my samples and get pumped for another class. The “old” is the black with pink fabric. The Messenger bag is the teal/blue lotus flower canvas bag.
Tentmaker Applique
#1 – Take a class! Learn a new technique or re-visit an old technique. You just might have some Quilty-fun while you are at it!
#2 – You don’t have to purchase new fabric when taking a class. If you are learning a technique that you are not sure you will use again. Use up the “old” stuff!! It makes room for new fabric!!!
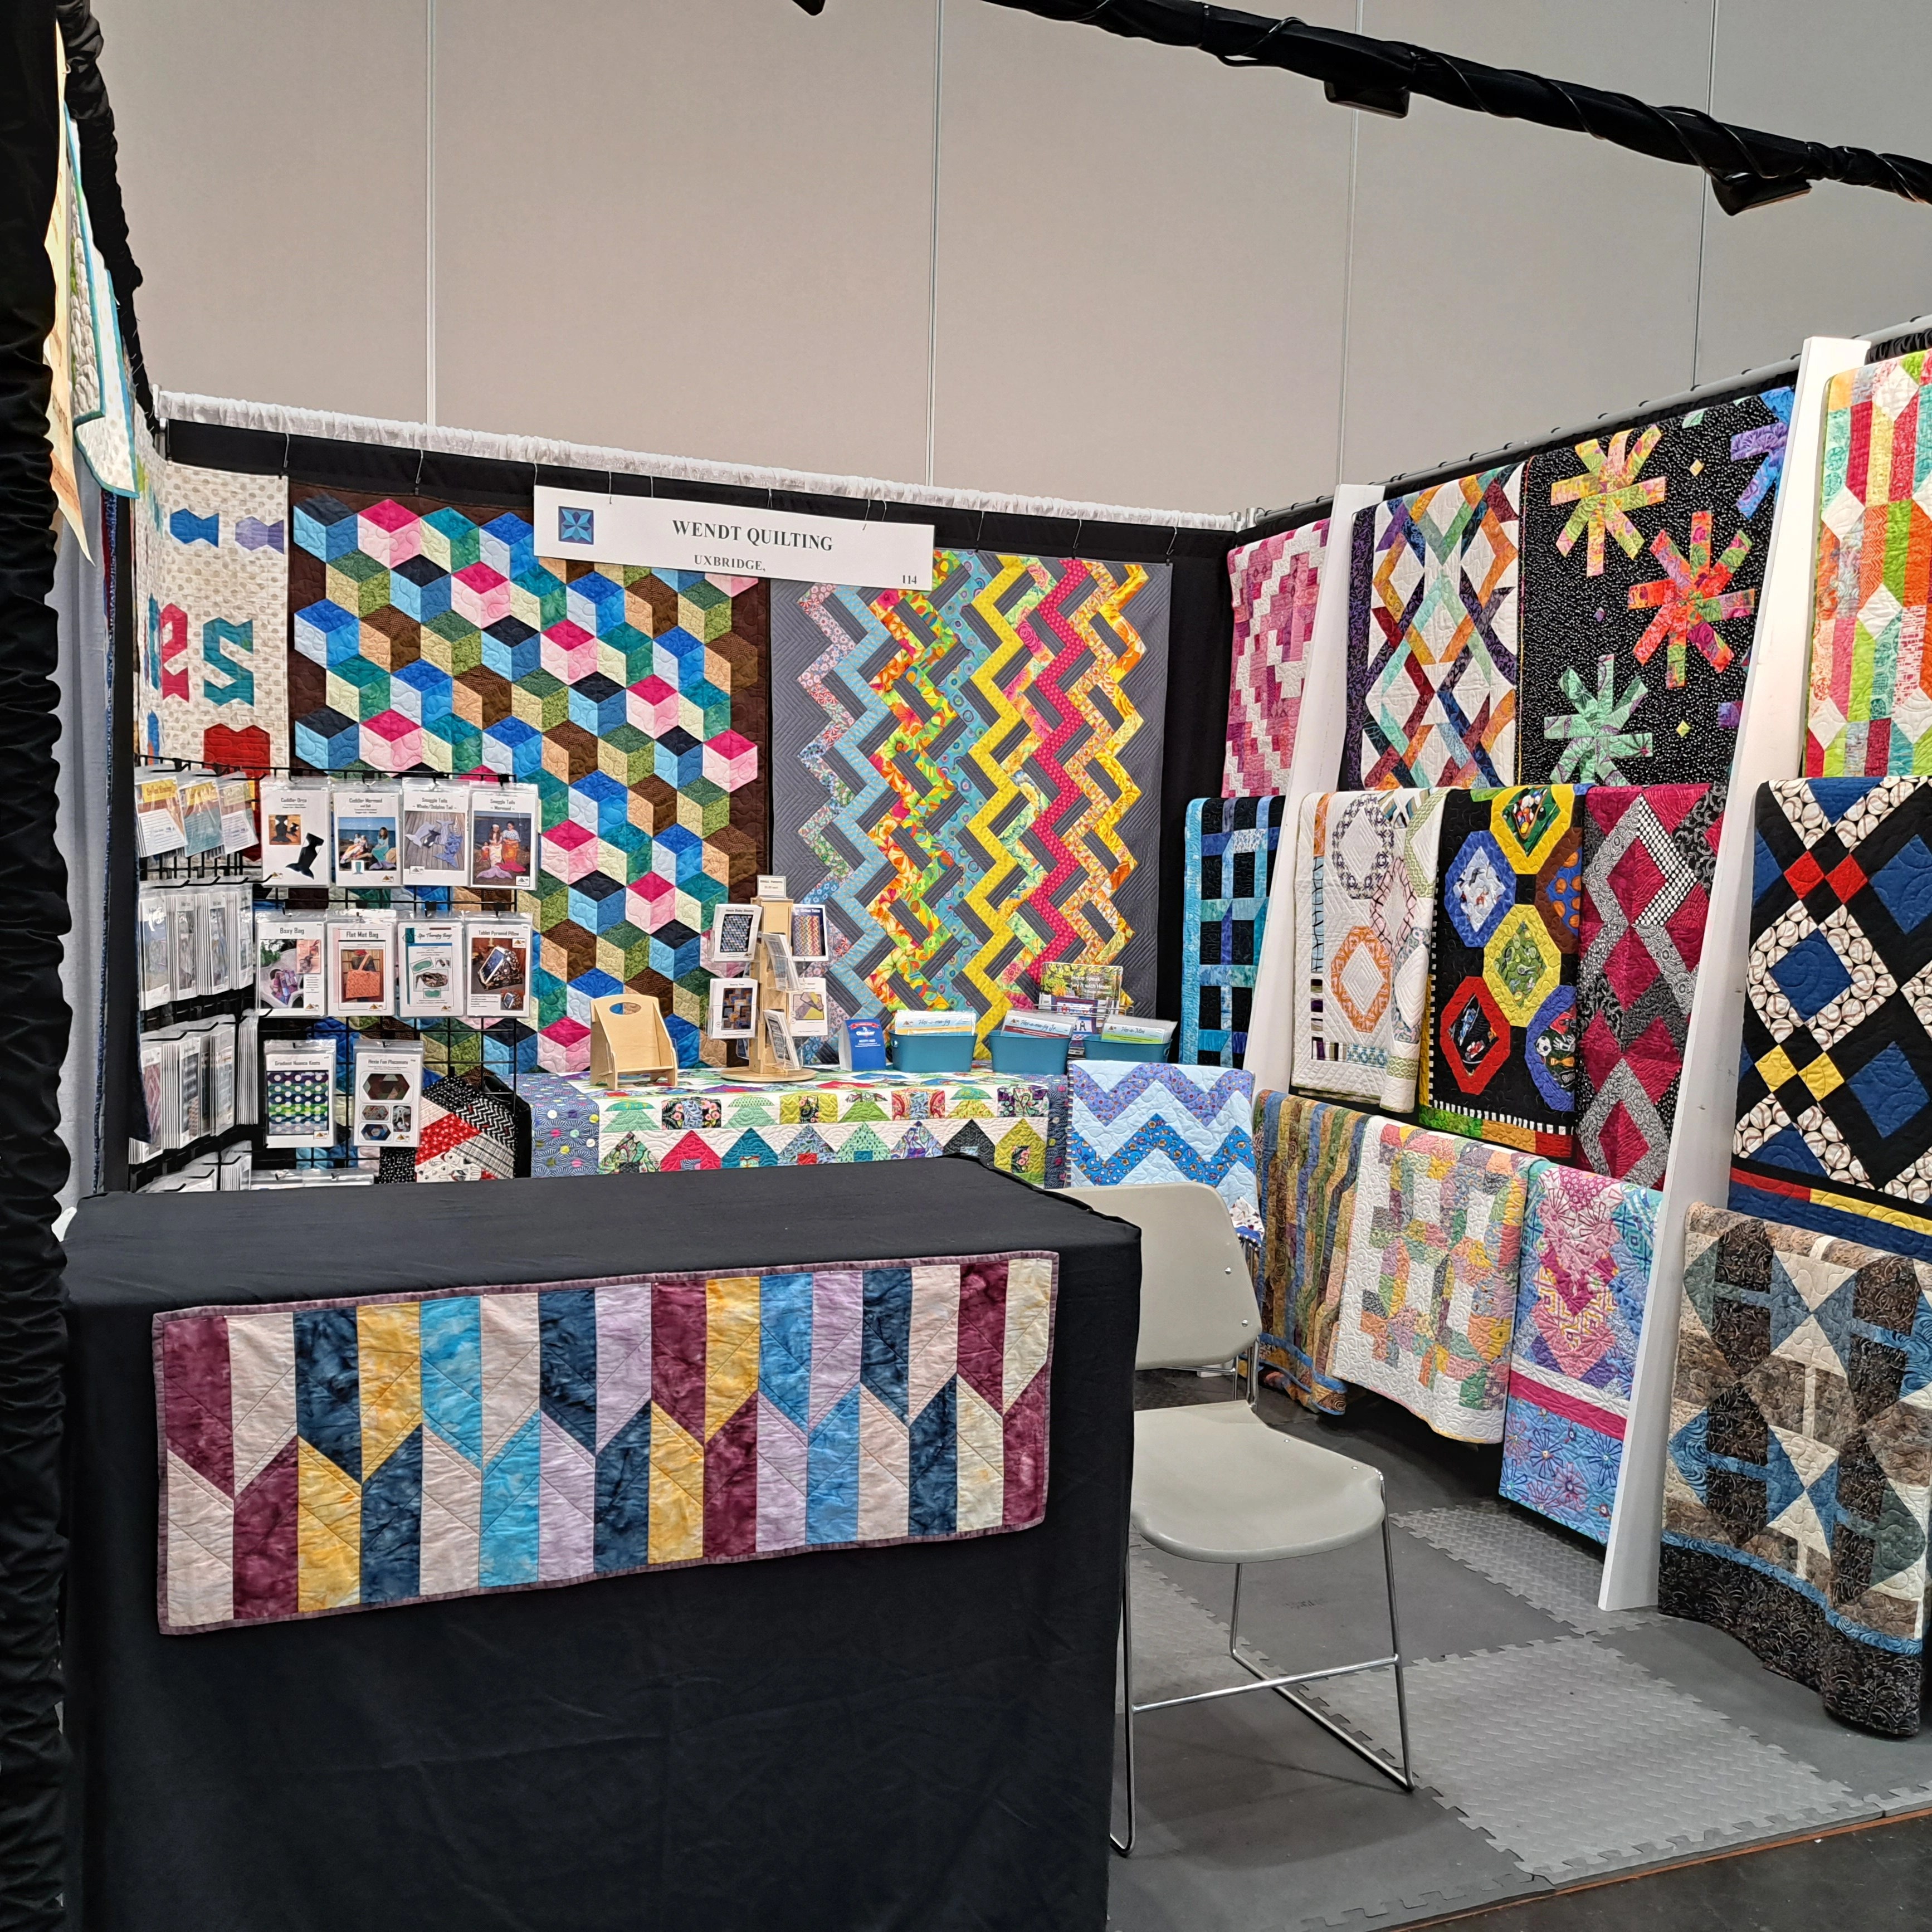
What a couple weeks! I had a great Quilt Market and Festival in Houston, TX. Now we are taking a couple days rest before the big drive home. Thank you shop owners, quilters and quilt admirers for stopping and shopping with me! The energy and excitement was contagious!
The first photo is of my NEW frame to hold almost all of my “Brilliant” and “Tool” quilts from said patterns. I haven’t been able to put them all in “one place” before. I’m thrilled with my new simple frame to hold them to see/show all at once. The next photo is what my booth looked like from the aisle before we opened for Market and before I set up my demo table. Featured on the back wall are my two new patterns I showed you a couple weeks ago. Both were a hit!
Then…..the expand to Festival. I went from a single booth to a double. More quilts and space to show them and some of my other patterns. My friend Nancy Hinds was my helper and demo Queen! My husband also helped with check out. Lots of laughs and smiles and ah-ha moments with customers!!
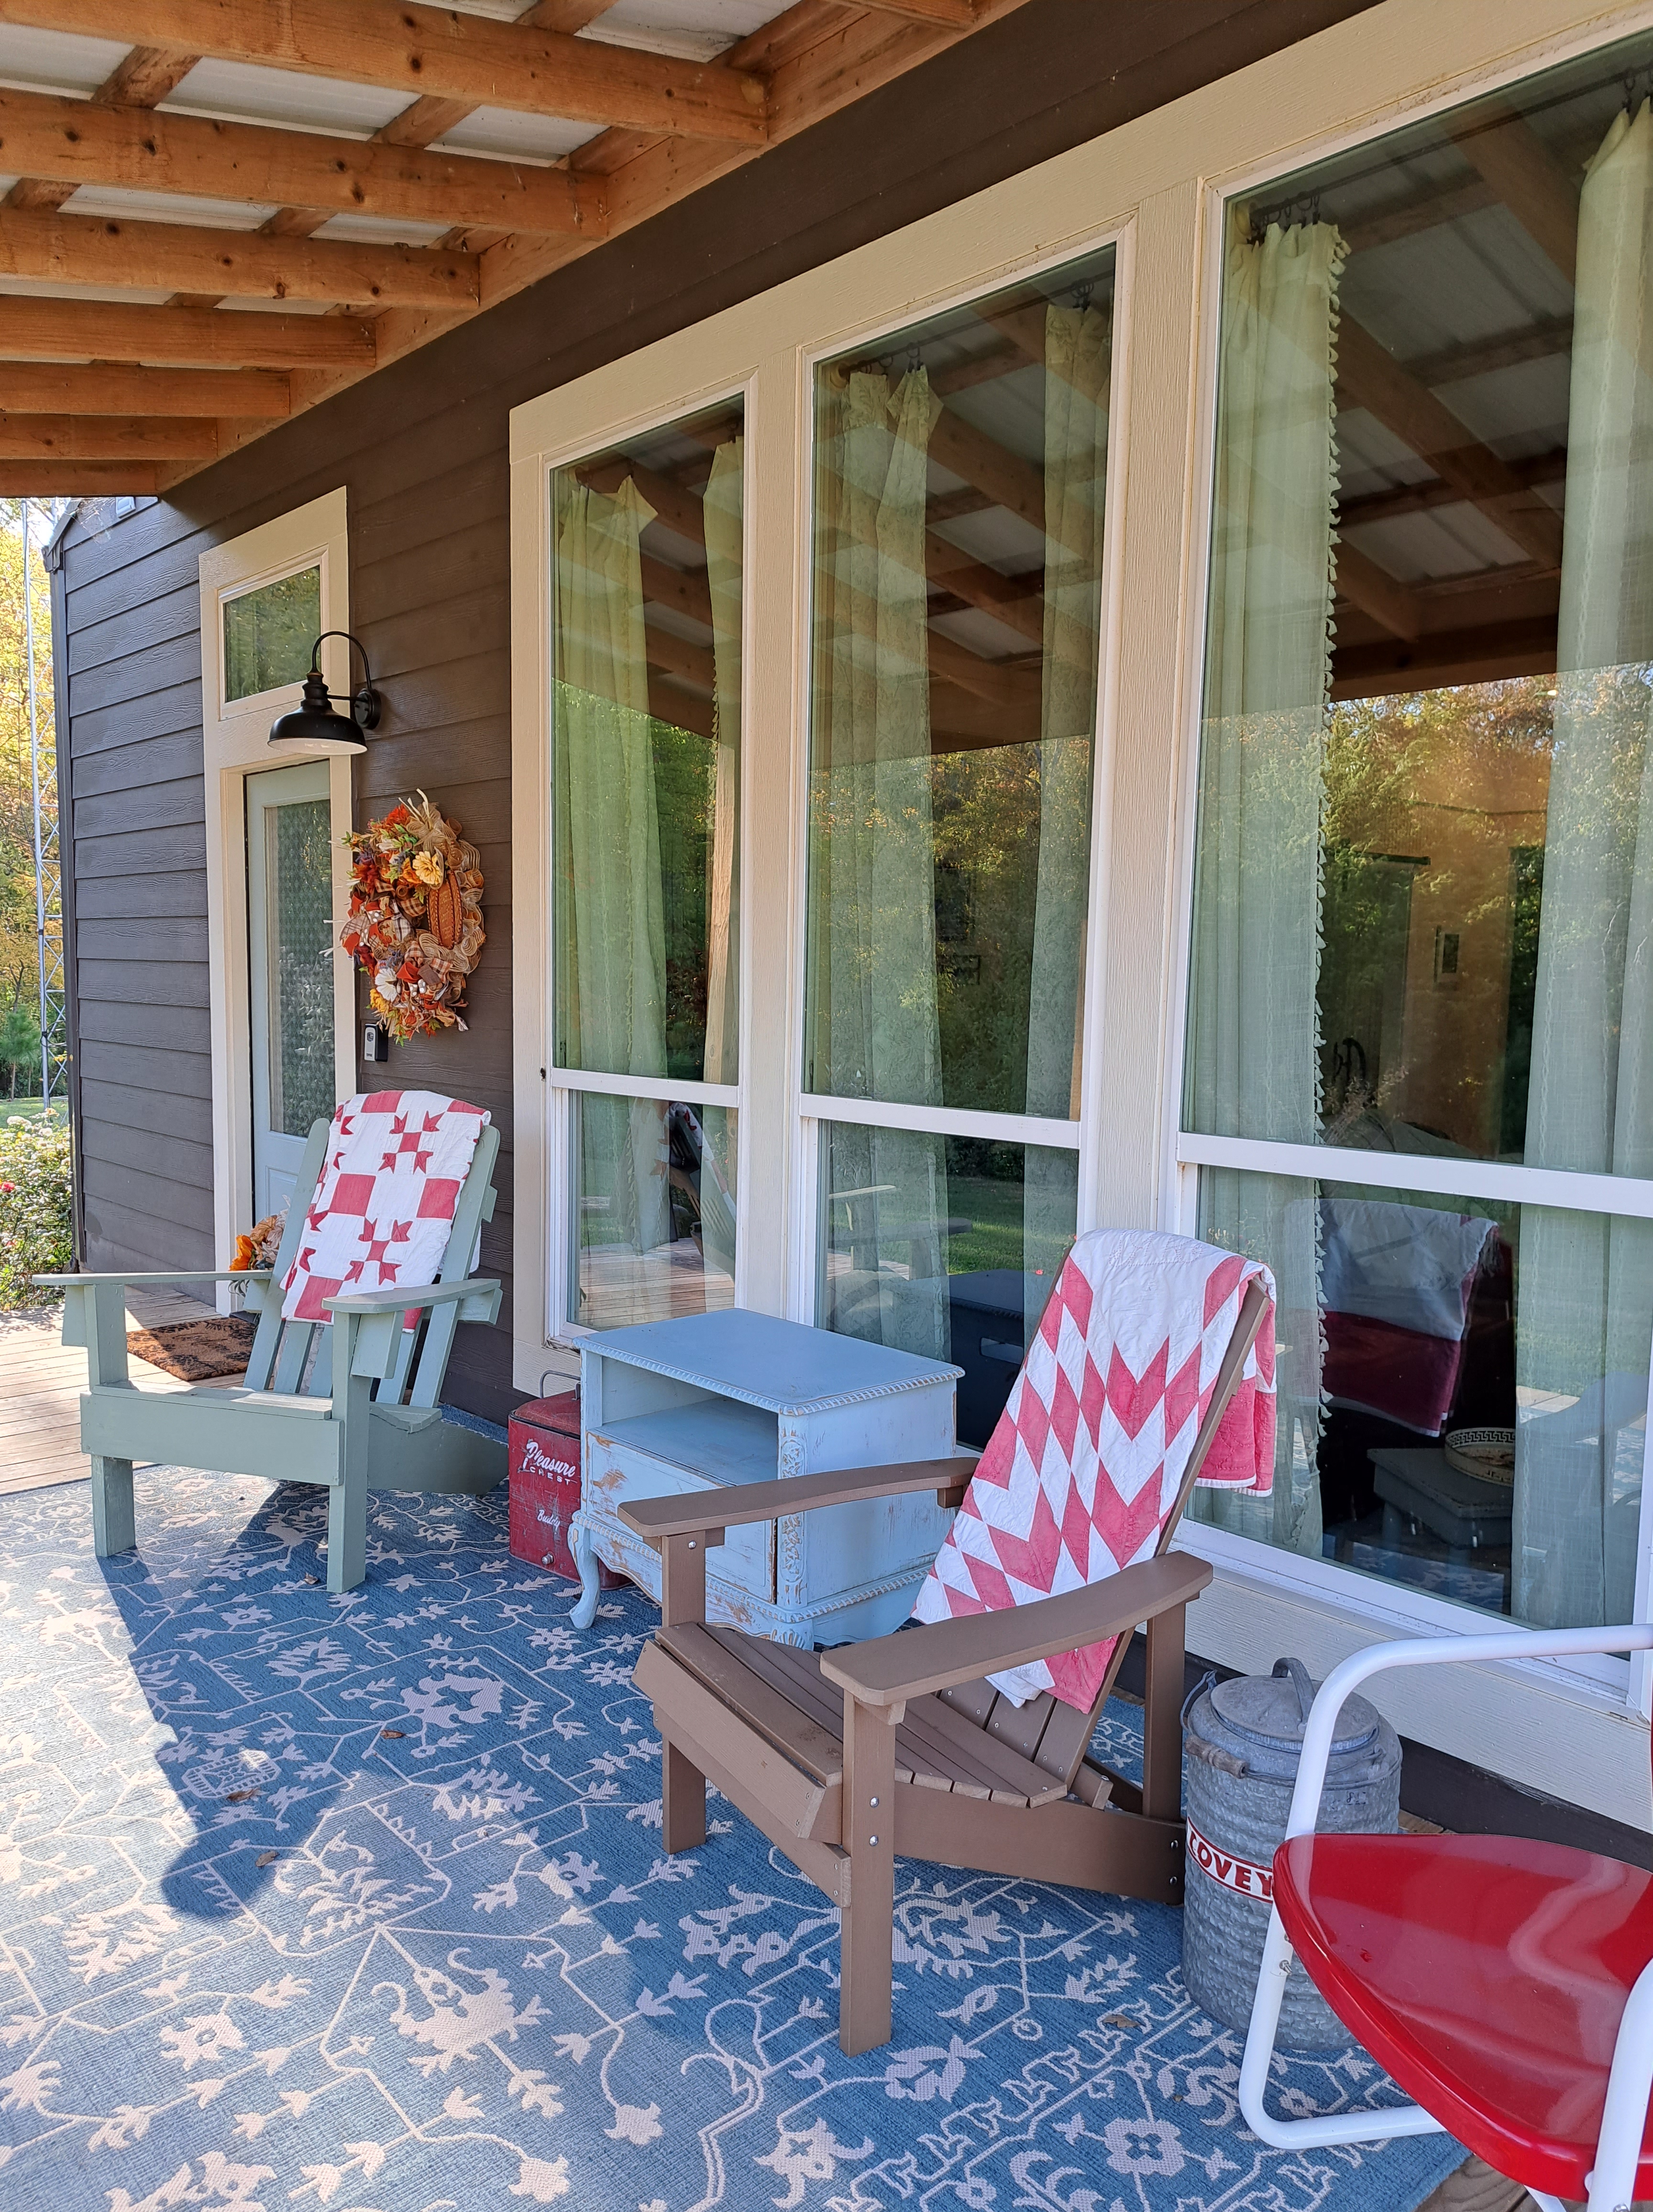
It was a great two weeks but a little R&R in a beautiful Airbnb was a welcome change. A love of quilts by this cottage owner has made this place incredibly relaxing!
Tip #1 – Take time to RELAX and rejuvenate between shows/quilts/events. It does the soul good!
#2 – My tip of walking the show from both ends of the aisle was discussed with several show go-ers. It does make for seeing different/new things in the same booth.
Driving, driving, driving!! Houston, no problem, we are here! Looking forward to a great Quilt Market and Festival. Will I see you? Come by Booth #114 and say hi. I’ll be in the same spot for both.
The new patterns are HERE!!! In hand, not on the website, yet. I decided to go with my smaller layout for these two, BUT, they are packed with instructions and diagrams!
The first pic is a few of my favorites with Never Strikes Twice. I love my PaperMate #2 mechanical pencils, the Taylor Seville seam ripper (a great sharp point!) and the Karen Kay Buckley scissors….AND speaking of scissors/snips, I have the little “Super Snips” from Tacony and I’ll have them for sale in my booth at Festival!
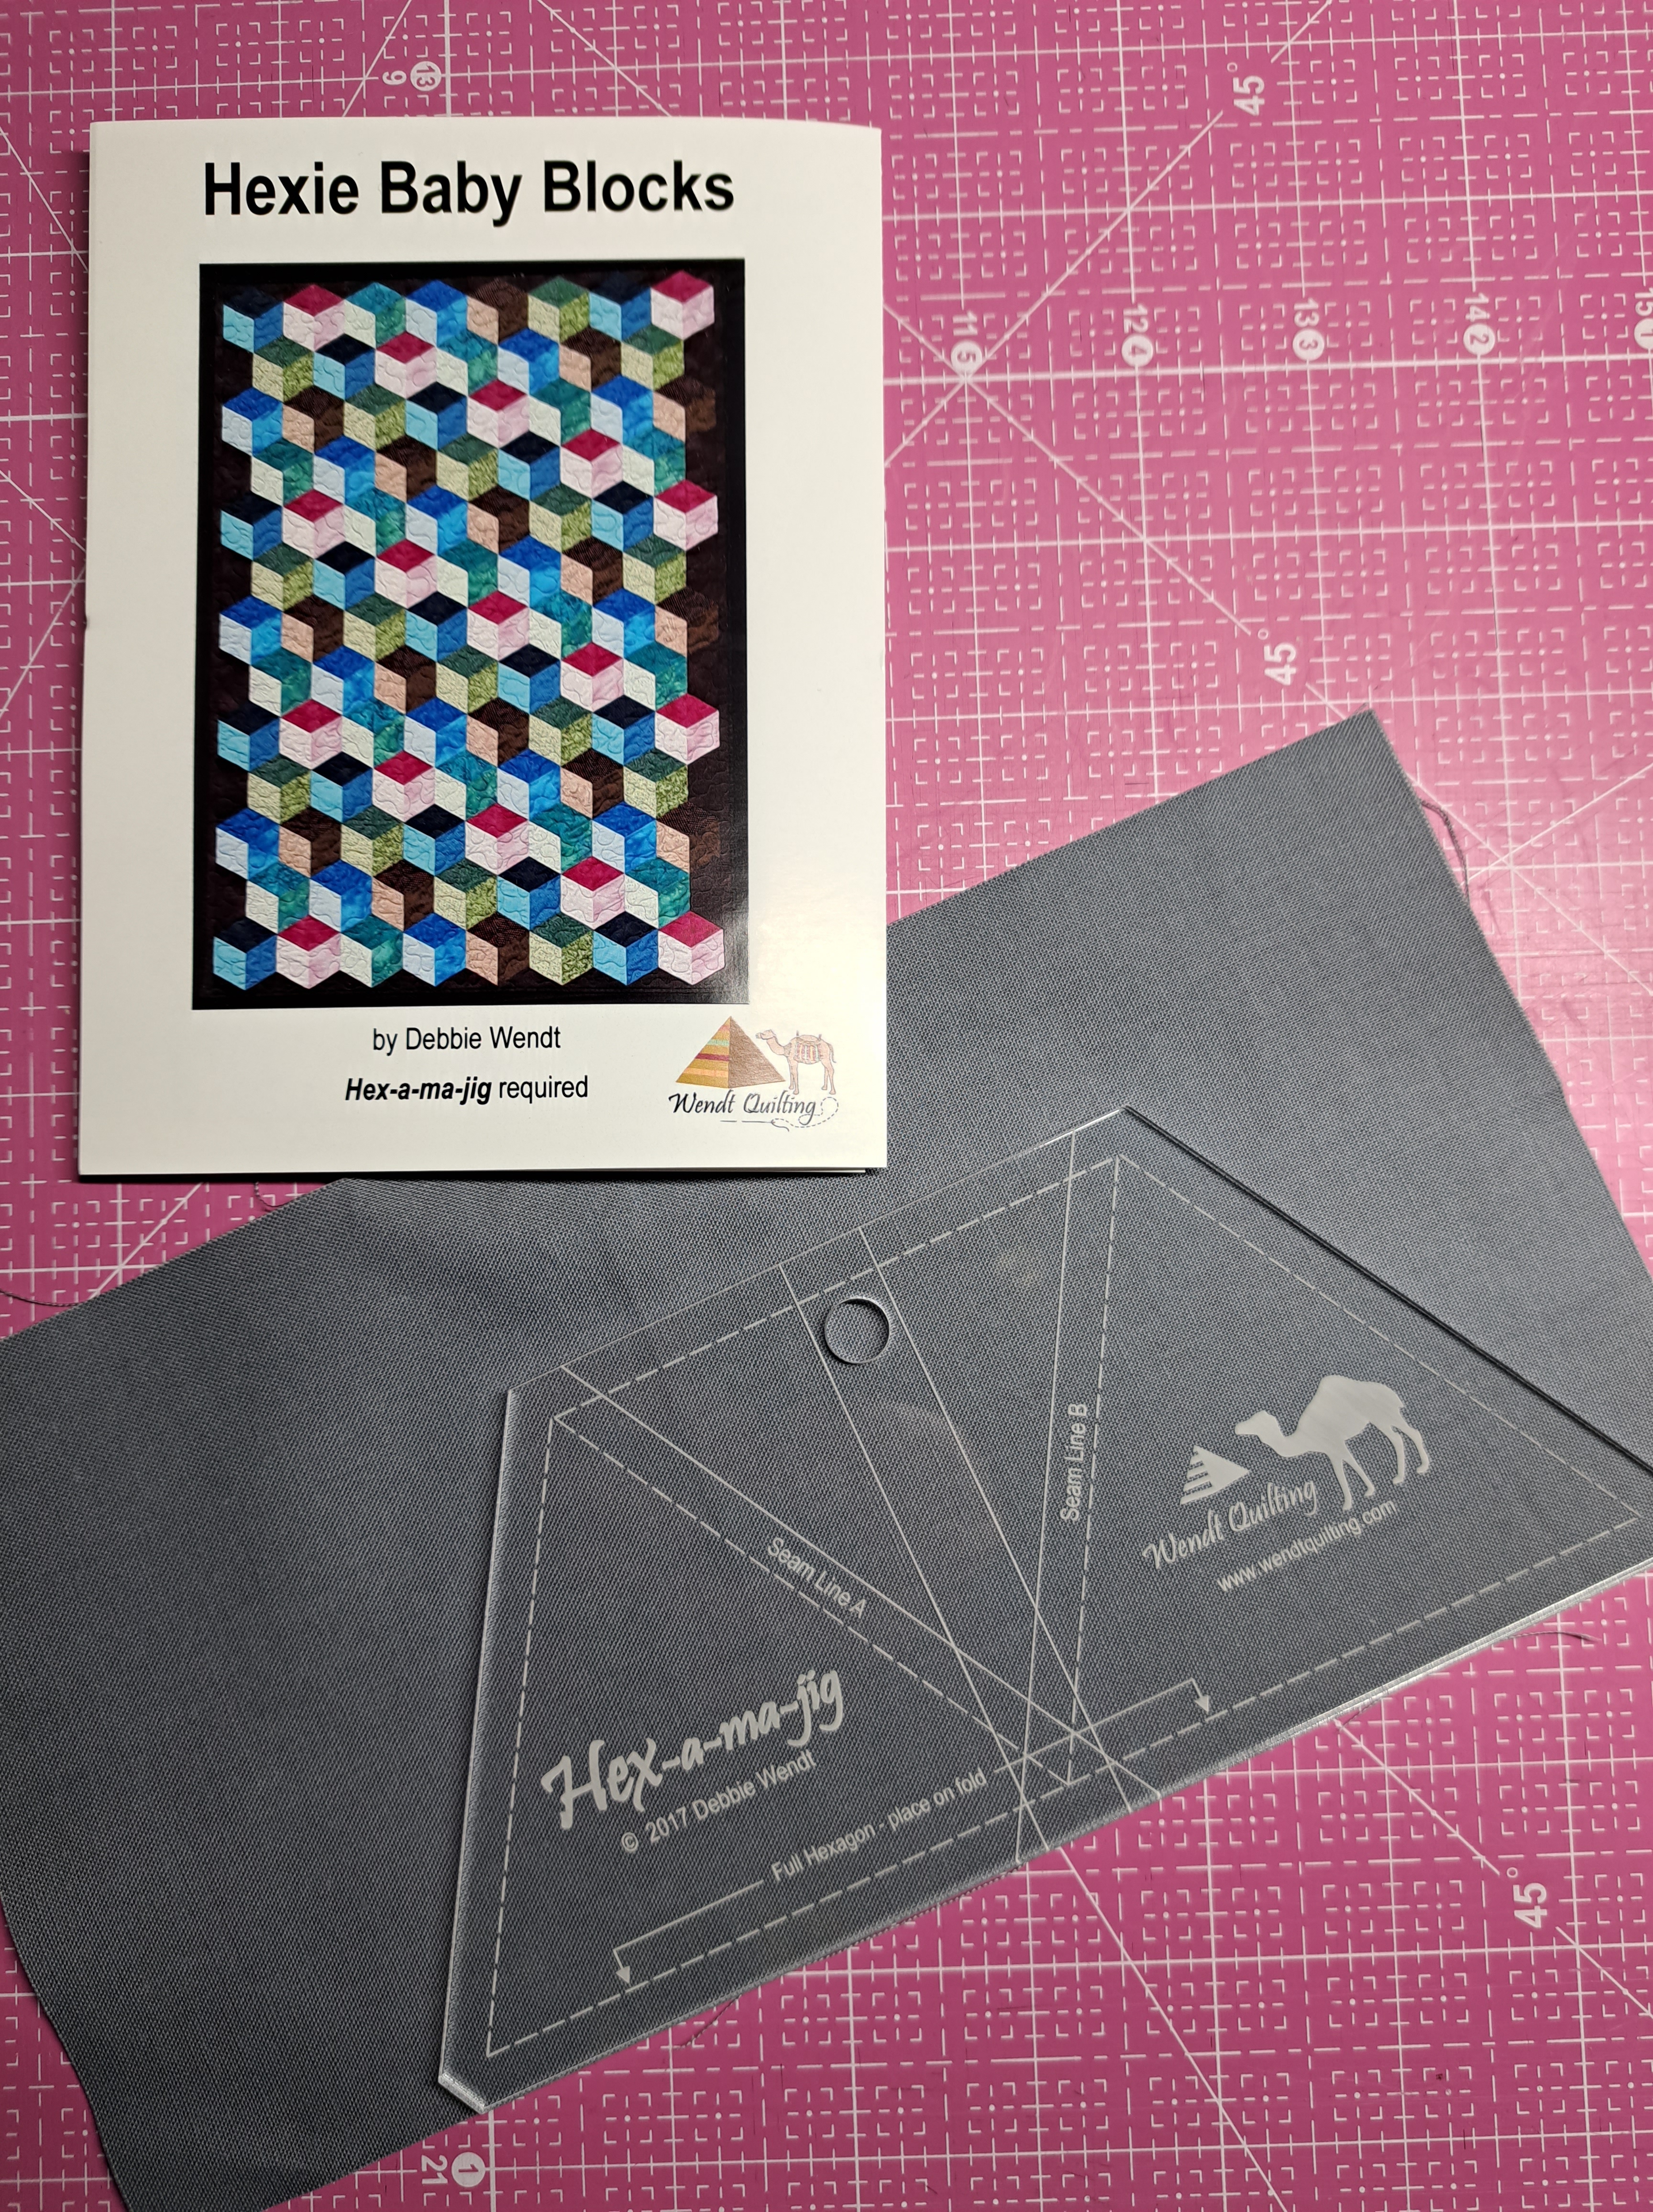
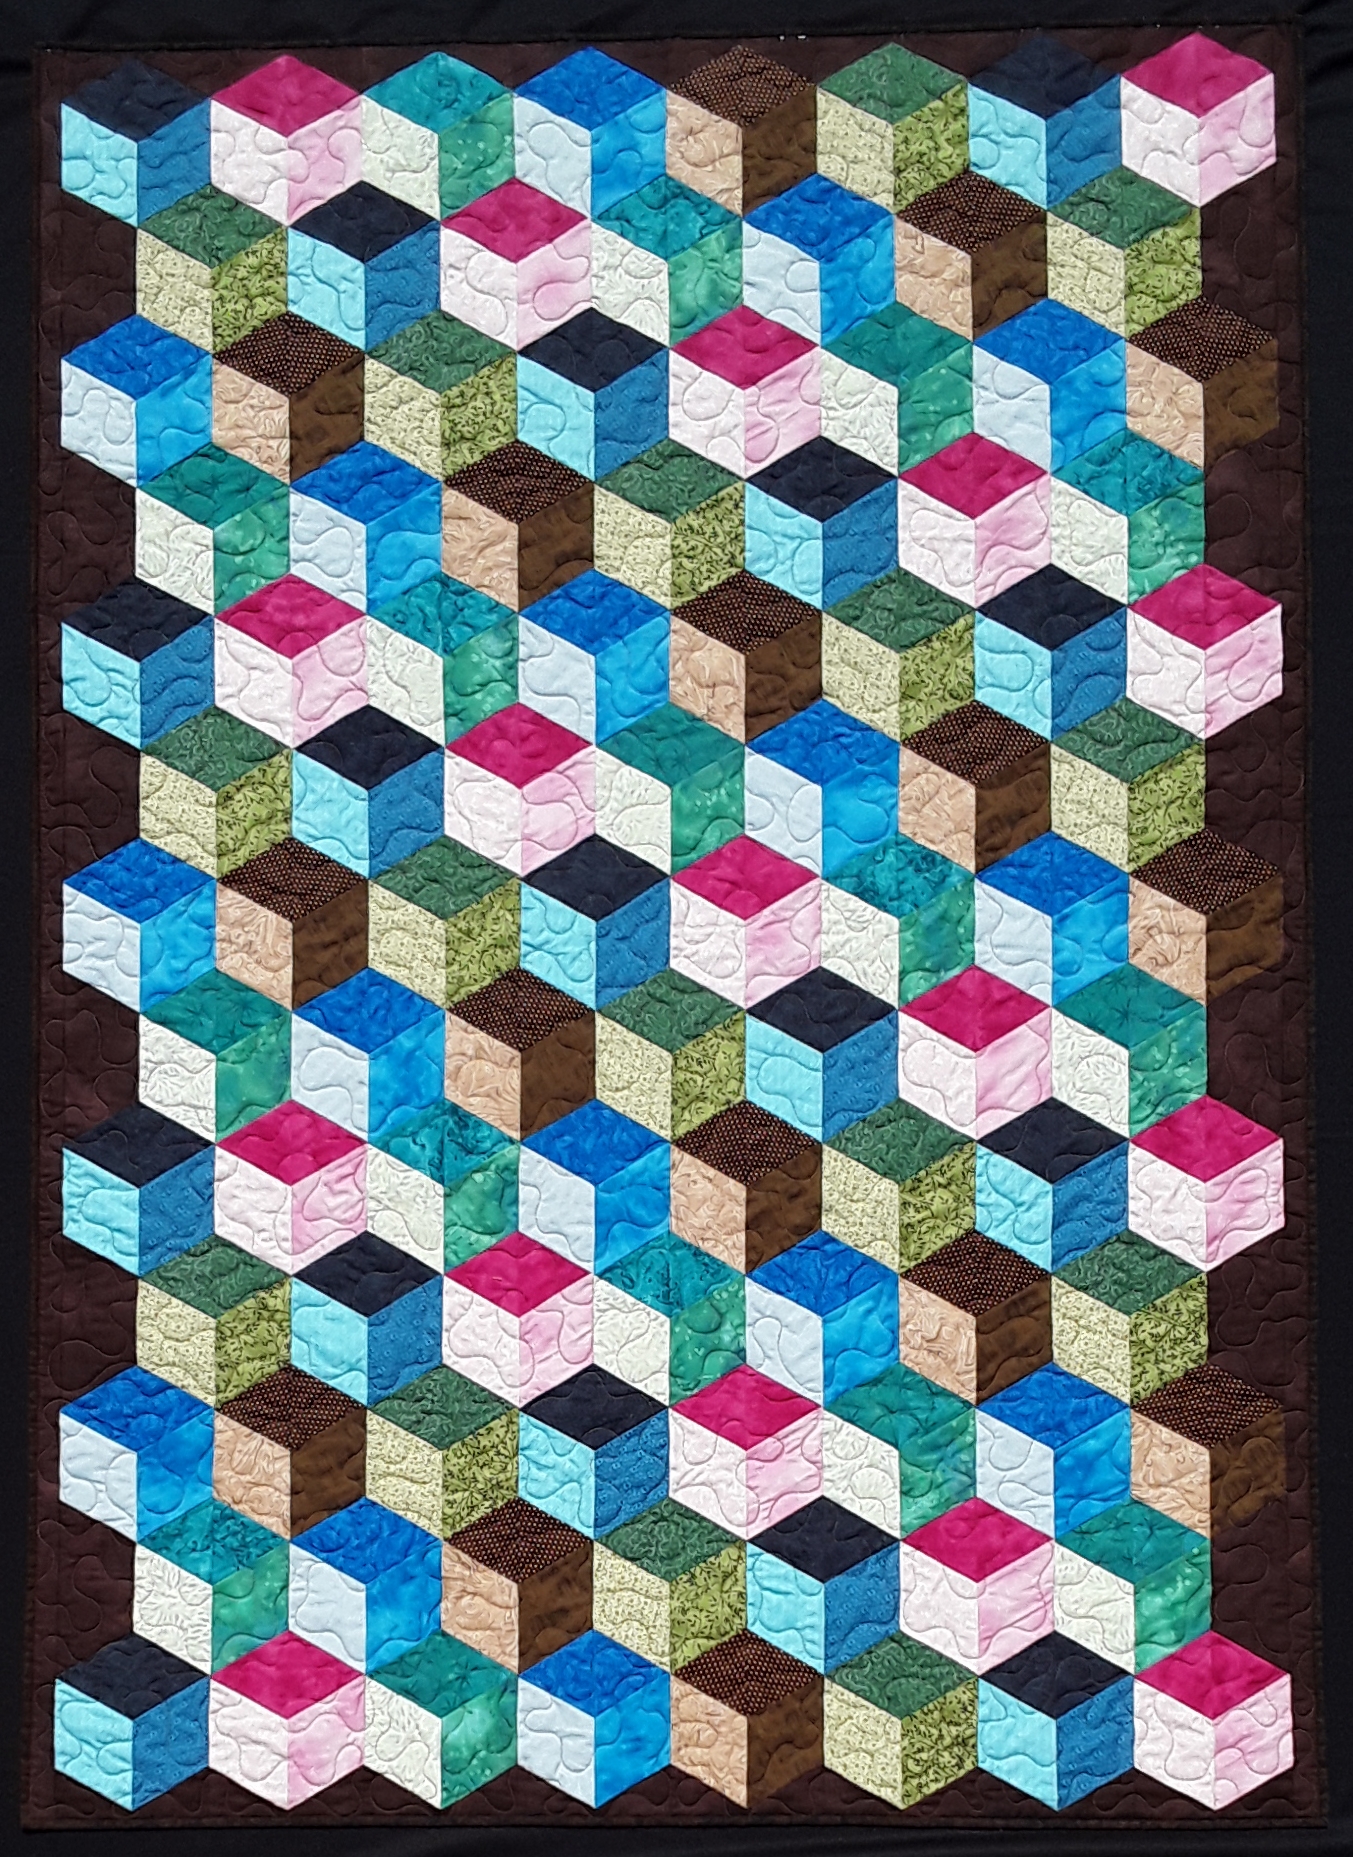
Second is Hexie Baby Blocks. It does require my Hex-a-ma-jig template. I love that I was able to combined the instructions already in the tool with additional cutting options to save fabric for this traditional favorite quilt.
Now back to sorting and packing for Quilt Market and International Quilt Festival!!
What do you take to a quilt show?
Tip #1 – Carry a lightweight purse! No need to load yourself down with a heavy purse when you know you will be shopping and have more to carry.
Tip #2 – I’ve said it before, but again…look on both side of the aisle when walking the quilt shows. Plus take notes. I’ve tried helping numerous people try to find that one piece of fabric they know they saw….without luck. So my suggestion, buy it when you see it! Or write it down.
I did a guild trunk show today on Bindings – A World of Options for the Country Piecemakers in Middleboro, MA. It was a great day and wonderful discussion on binding tips. Thank you ladies and gentlemen! However, all the quilts I showed need to go back into their travel suitcases for the show or storage suitcase for the next guild trunk show/lecture. Back to work…
I am thick into getting ready for Quilt Market and Quilt Festival in Houston, TX in a few weeks. It always seems like there is more time. NOT! Since Houston is a four day drive it really bumps our departure, so time is running slim! I’m getting things done, thank goodness! I have two new patterns almost ready to share. The first one is Hexie Baby Blocks. I’ve displayed this quilt in my booth for a while now. I get comments ….”I’ve always wanted to make a Tumbling blocks quilt” (another name for Baby Blocks). And….”Oh, there it is, but I don’t want to do a “Y” seam”. Well you are in luck, this quilt uses my Hex-a-ma-jig template to make this quilt and there are NO “Y” seams! I’ll have the pattern on my website within a couple weeks. Hex-a-ma-jig is already under favorite tools. Tap on the highlighted link above to get to Hex-a-ma-jig.
It is strip pieced for ease of construction! I can’t wait to see what fabrics you all make with this pattern. I’ve been making a couple samples to share in the OPEN STUDIO at Quilt Festival on Saturday, Nov. 4th from Noon-2pm. Look for the title Baby Blocks without “Y” Seams in the Sew/Stitch area.
I’ll also be in OPEN STUDIO on Friday, Nov. 3rd from 10am – noon demo-ing Machine Sewn Bindings. Look for the title Machine Sewn Bindings for the Win in the Quilt area.
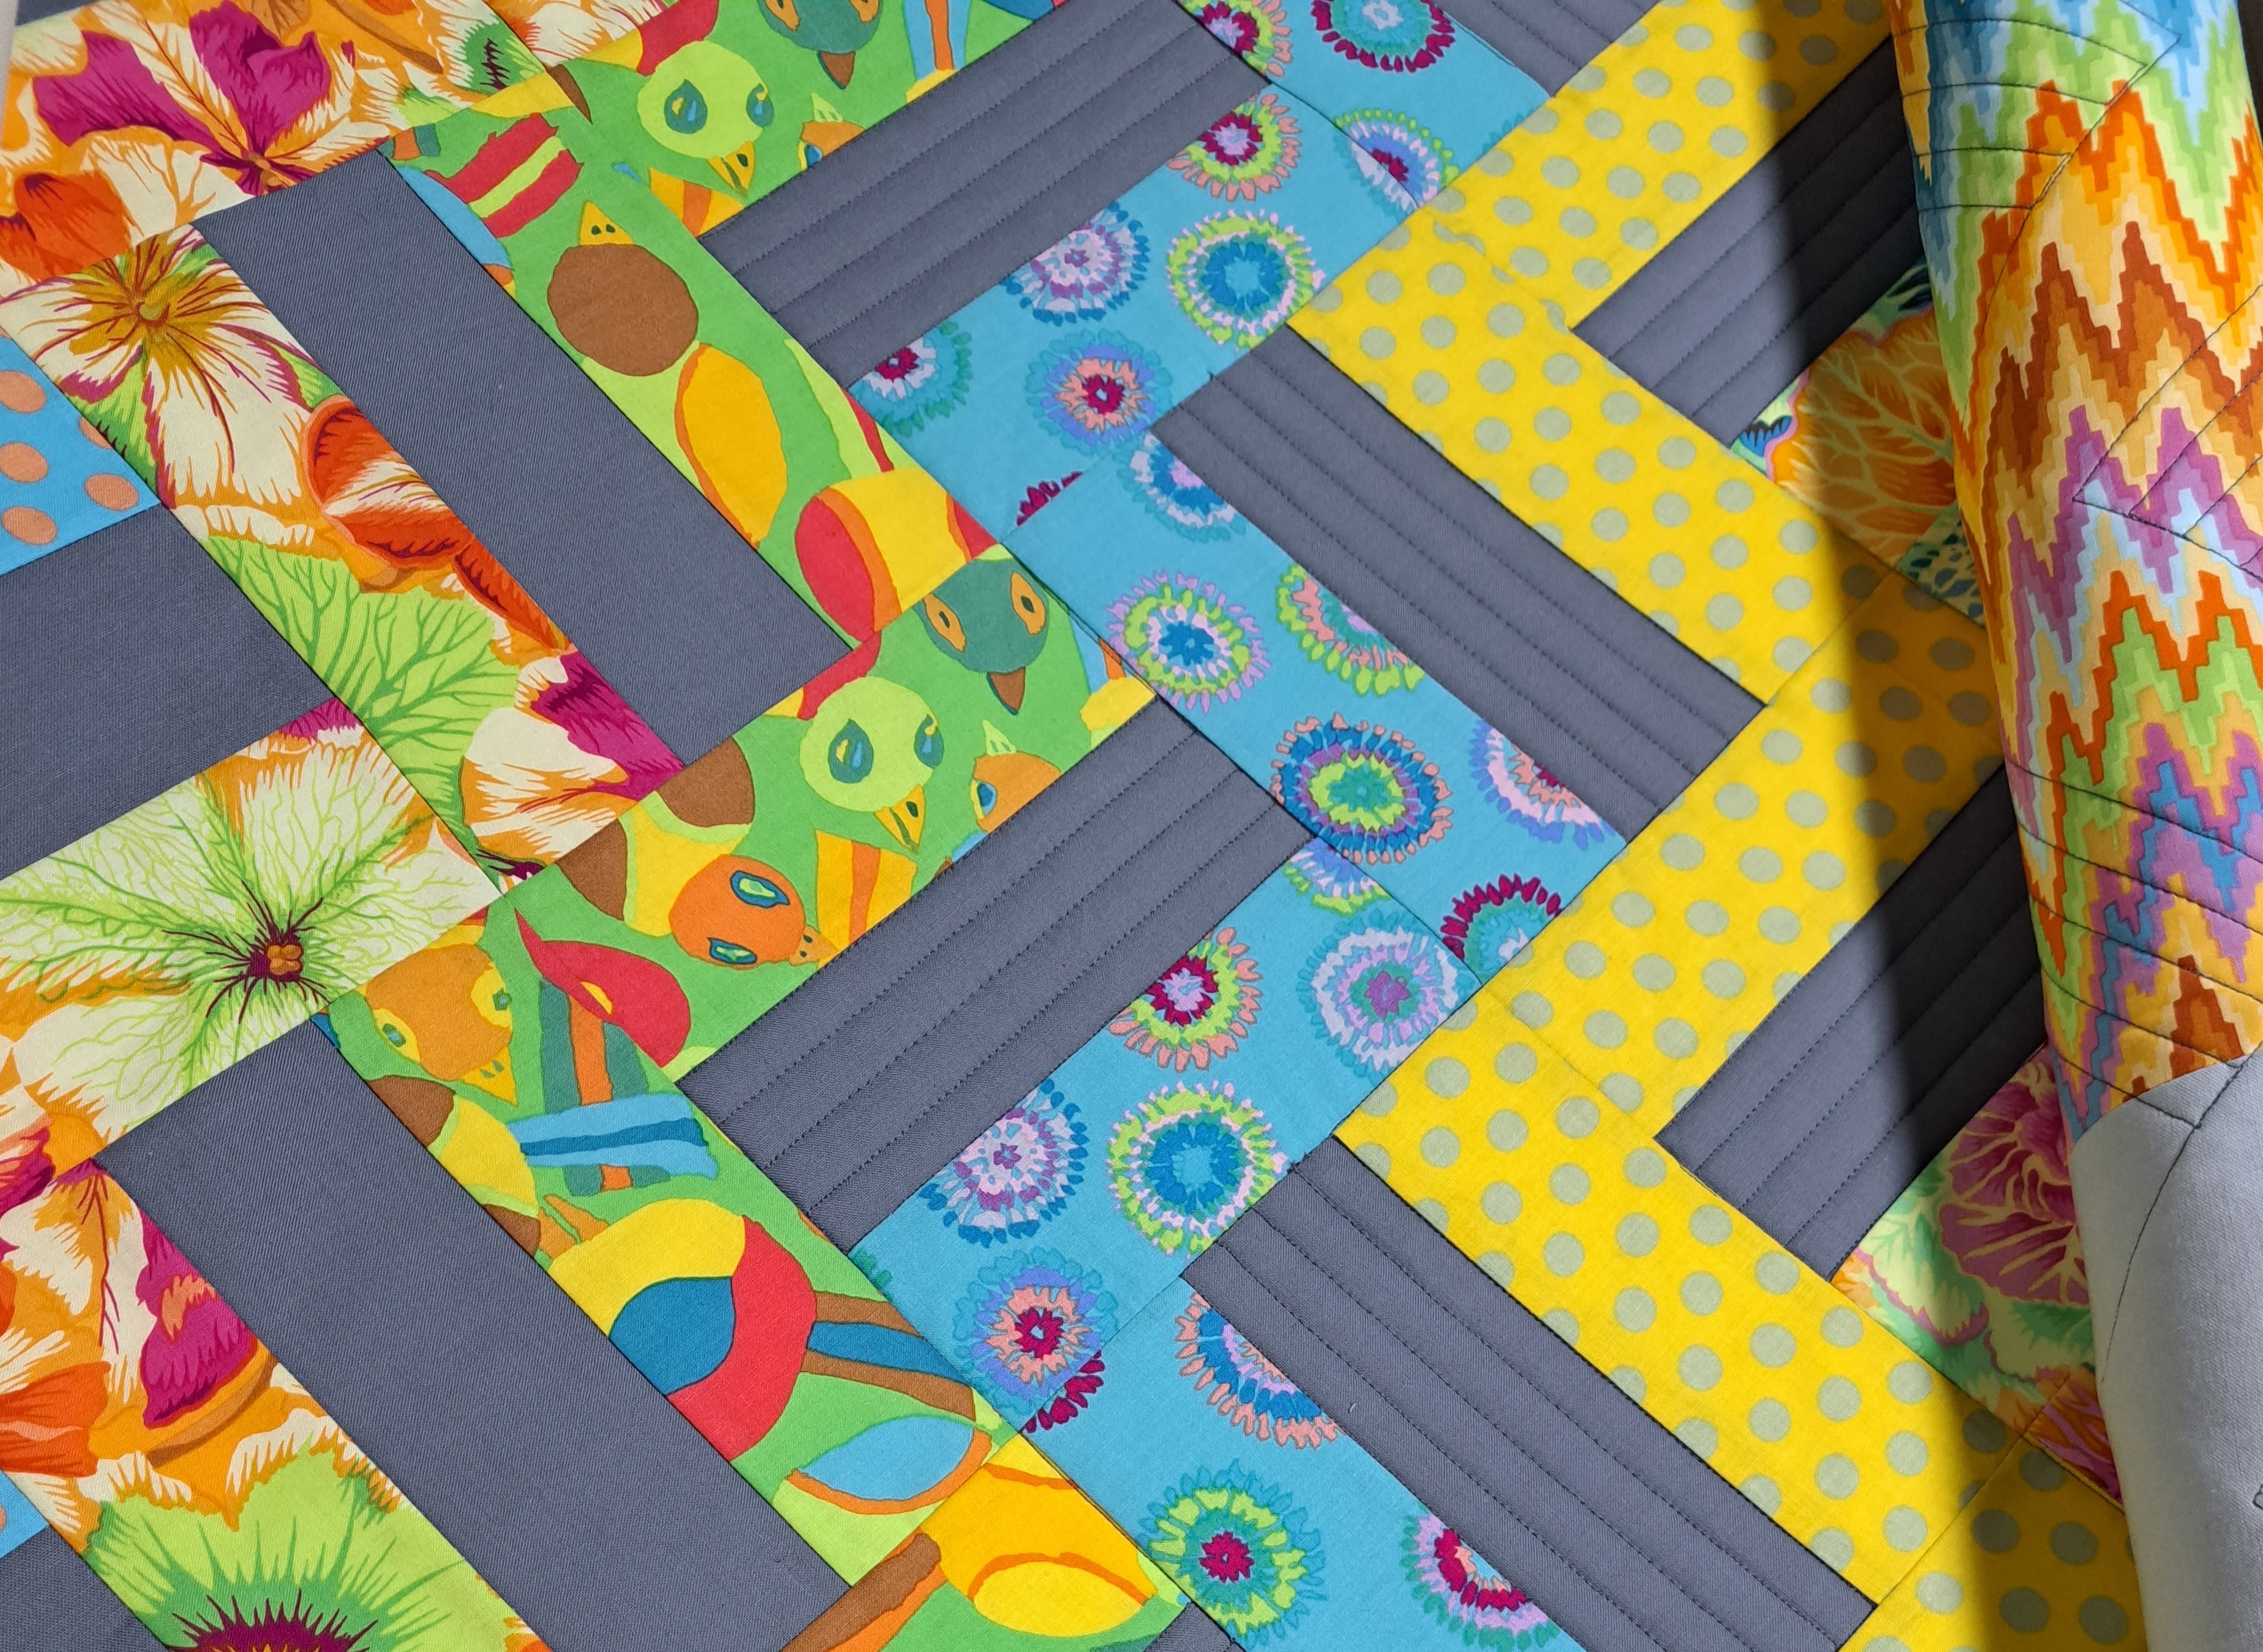
The batting I was preparing last week is now quilted into a new quilt! If you remember my Rail Fence Remix quilt, it is now a pattern! Never Strikes Twice I’m super happy with how this turned out and love how simple, yet effective, it is. A sneak peek is below! I’ll share the entire quilt once I get my cover photo done.
Today’s tips….
1 – Plan ahead and work ahead! Don’t be last minute like Moi!
2 – Simple quilting yields great results. I’ve talked before about how quilting doesn’t always have to be heirloom. Some quilts shine with simple quilting. And for those quilts that will be well loved, simple is best!
Welcome to the new followers after my guild presentation via Zoom with the New Mexico Quilters Association last week. It was great to talk about and teach bindings. Our workshop on Saturday had the all loved AH-HA moments!!
Speaking of AH-HAs…I did not realize my podcast for I Love Notions was live. I was interviewed by Carolina Moore for her new podcast series. It was fun to share my start in the quilting world with my Brilliant Bindings tool and my latest Hex-a-ma-jig templates. You can find it HERE!! This is a direct link to my interview!
As my title implies I have been getting batting ready to one of my final new quilts for Quilt Market and Festival. I will share the quilt and title the week of Market…know that it is a fun, fast, simple design that I am thrilled with. The batting part of that is getting this quilt quilted so I can take the cover photo. Yes, a bit of pressure, but I seem to work well with deadlines fast approaching.
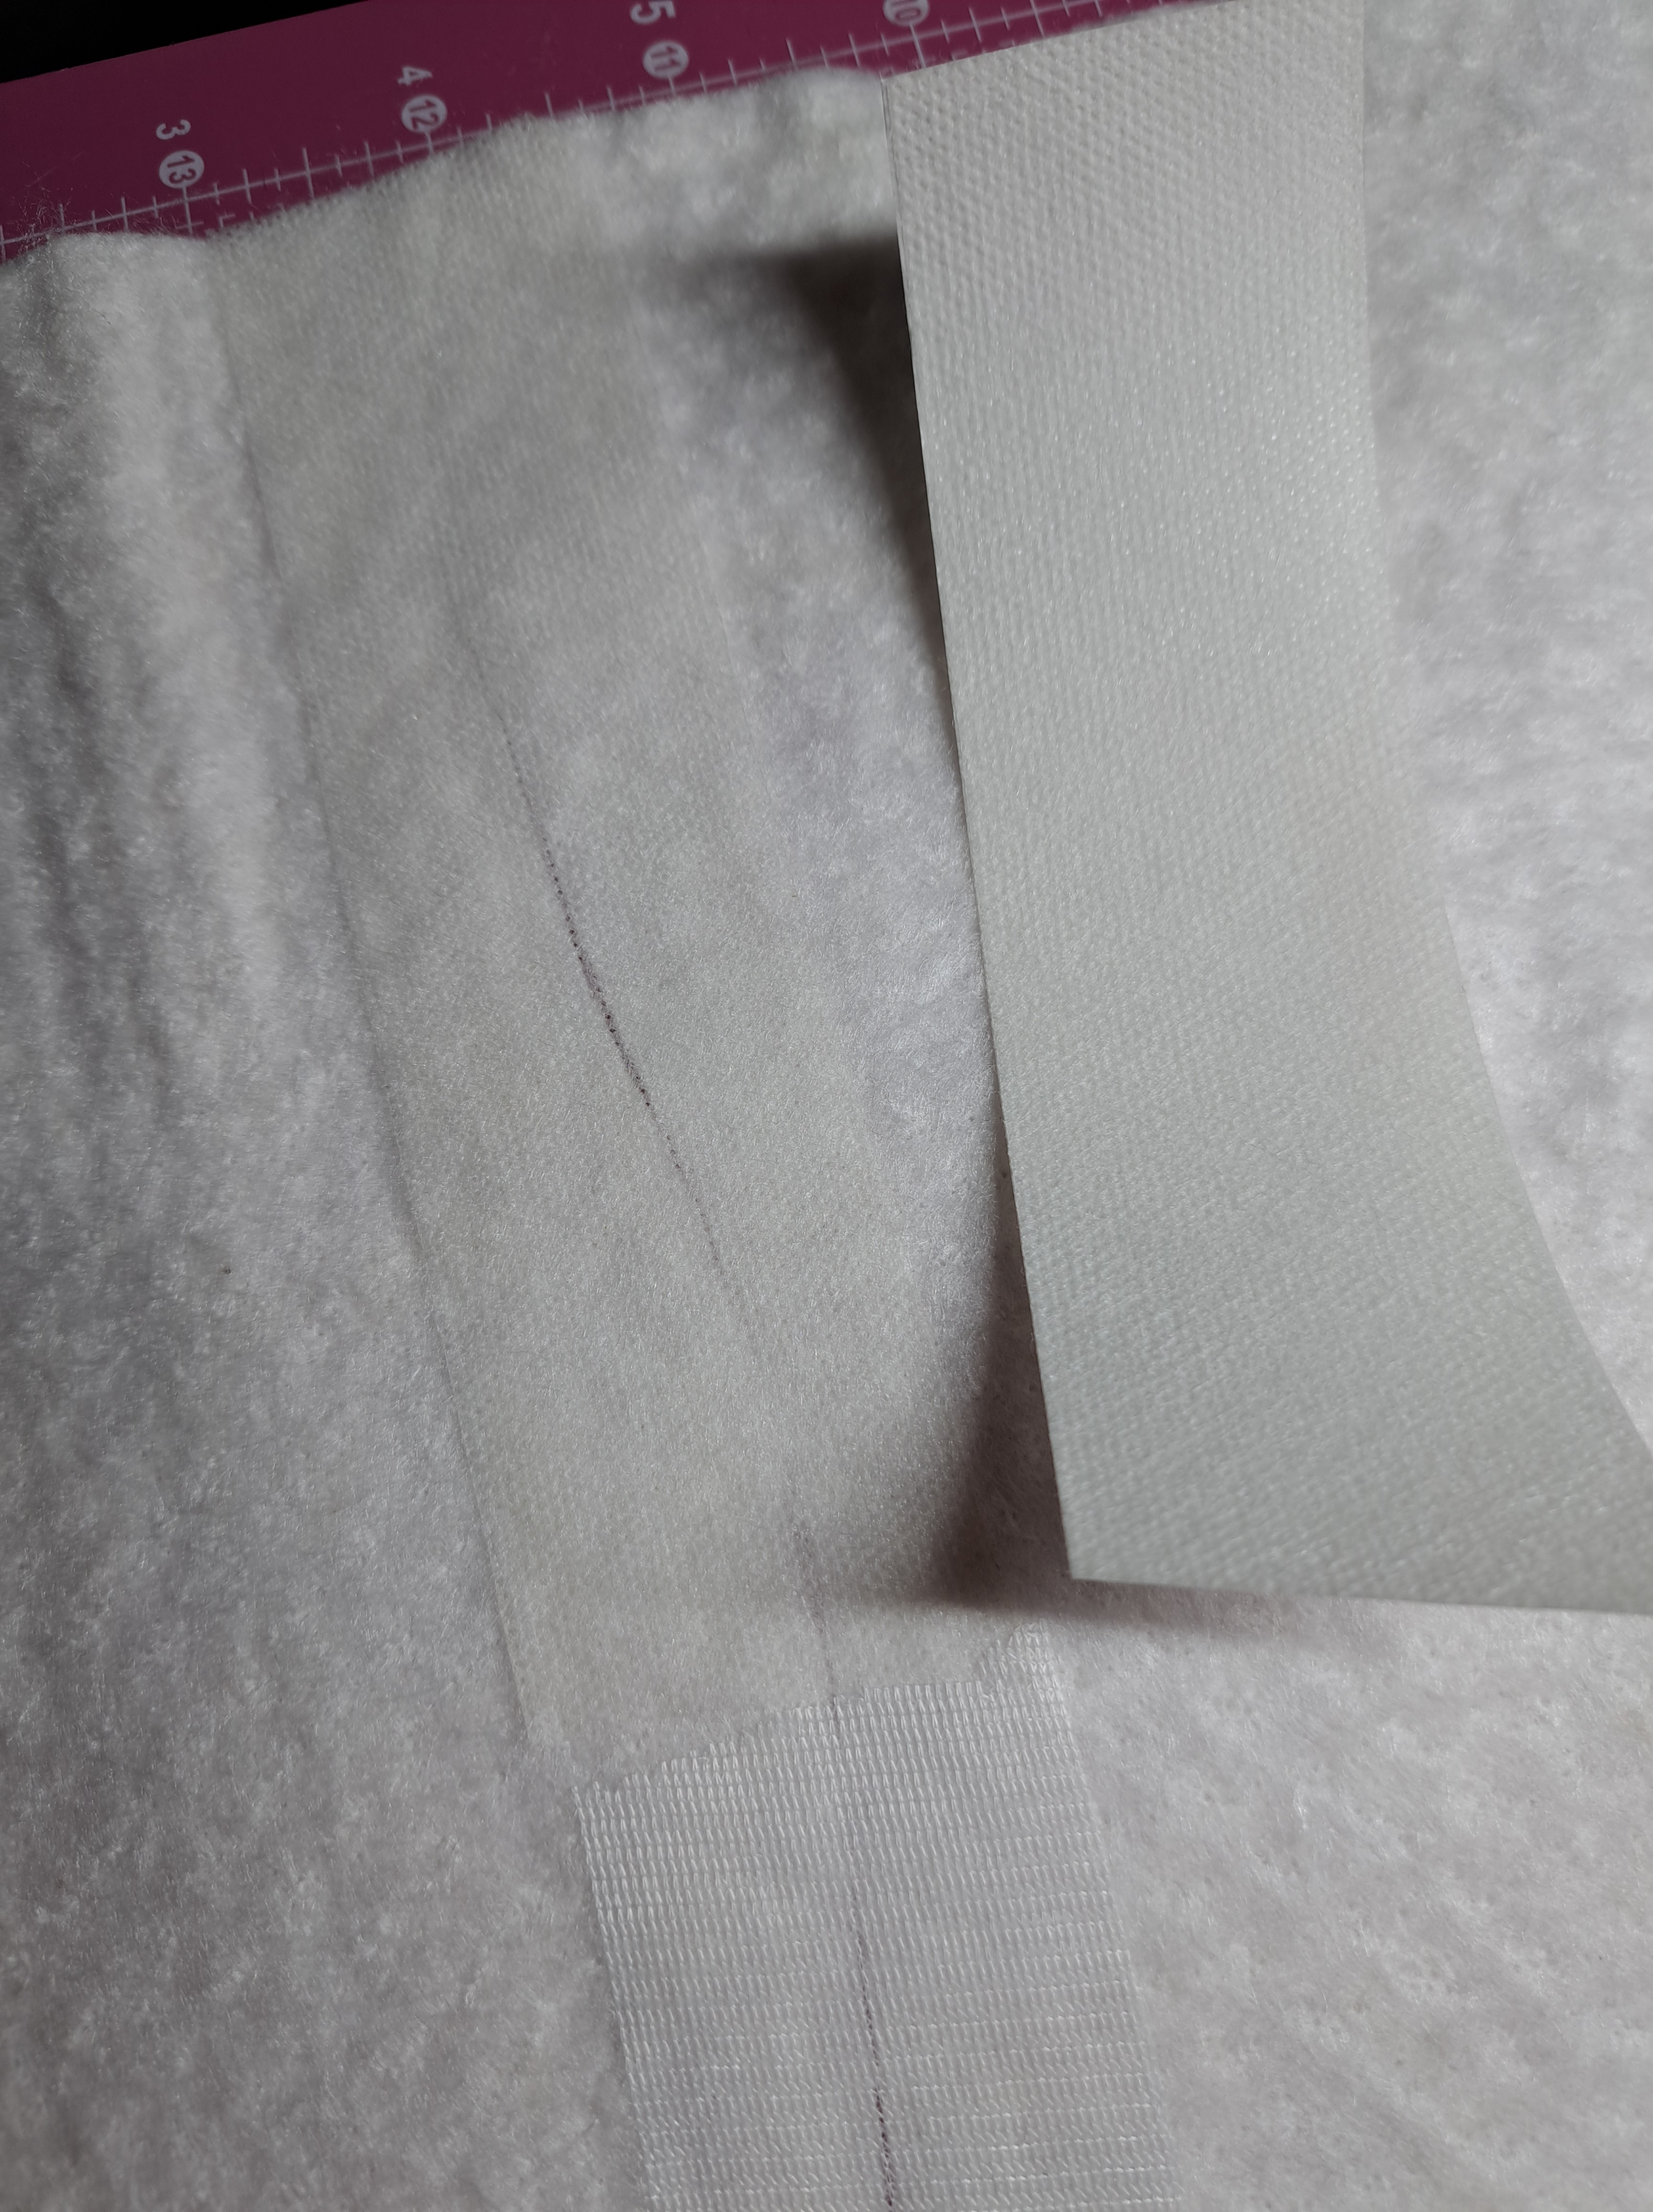
My favorite batting is Bamboo by Winline, as I have talked about several times before. I love the softness and wonderful drape. Once the quilt is washed it is so yummy. I had a piece left but it wasn’t the right size. So, I’ve pieced it together as many call this “Franken’ Batting” (as in Frankenstein, teehee….good word with Halloween fast approaching). Sooooo, how do I do this?
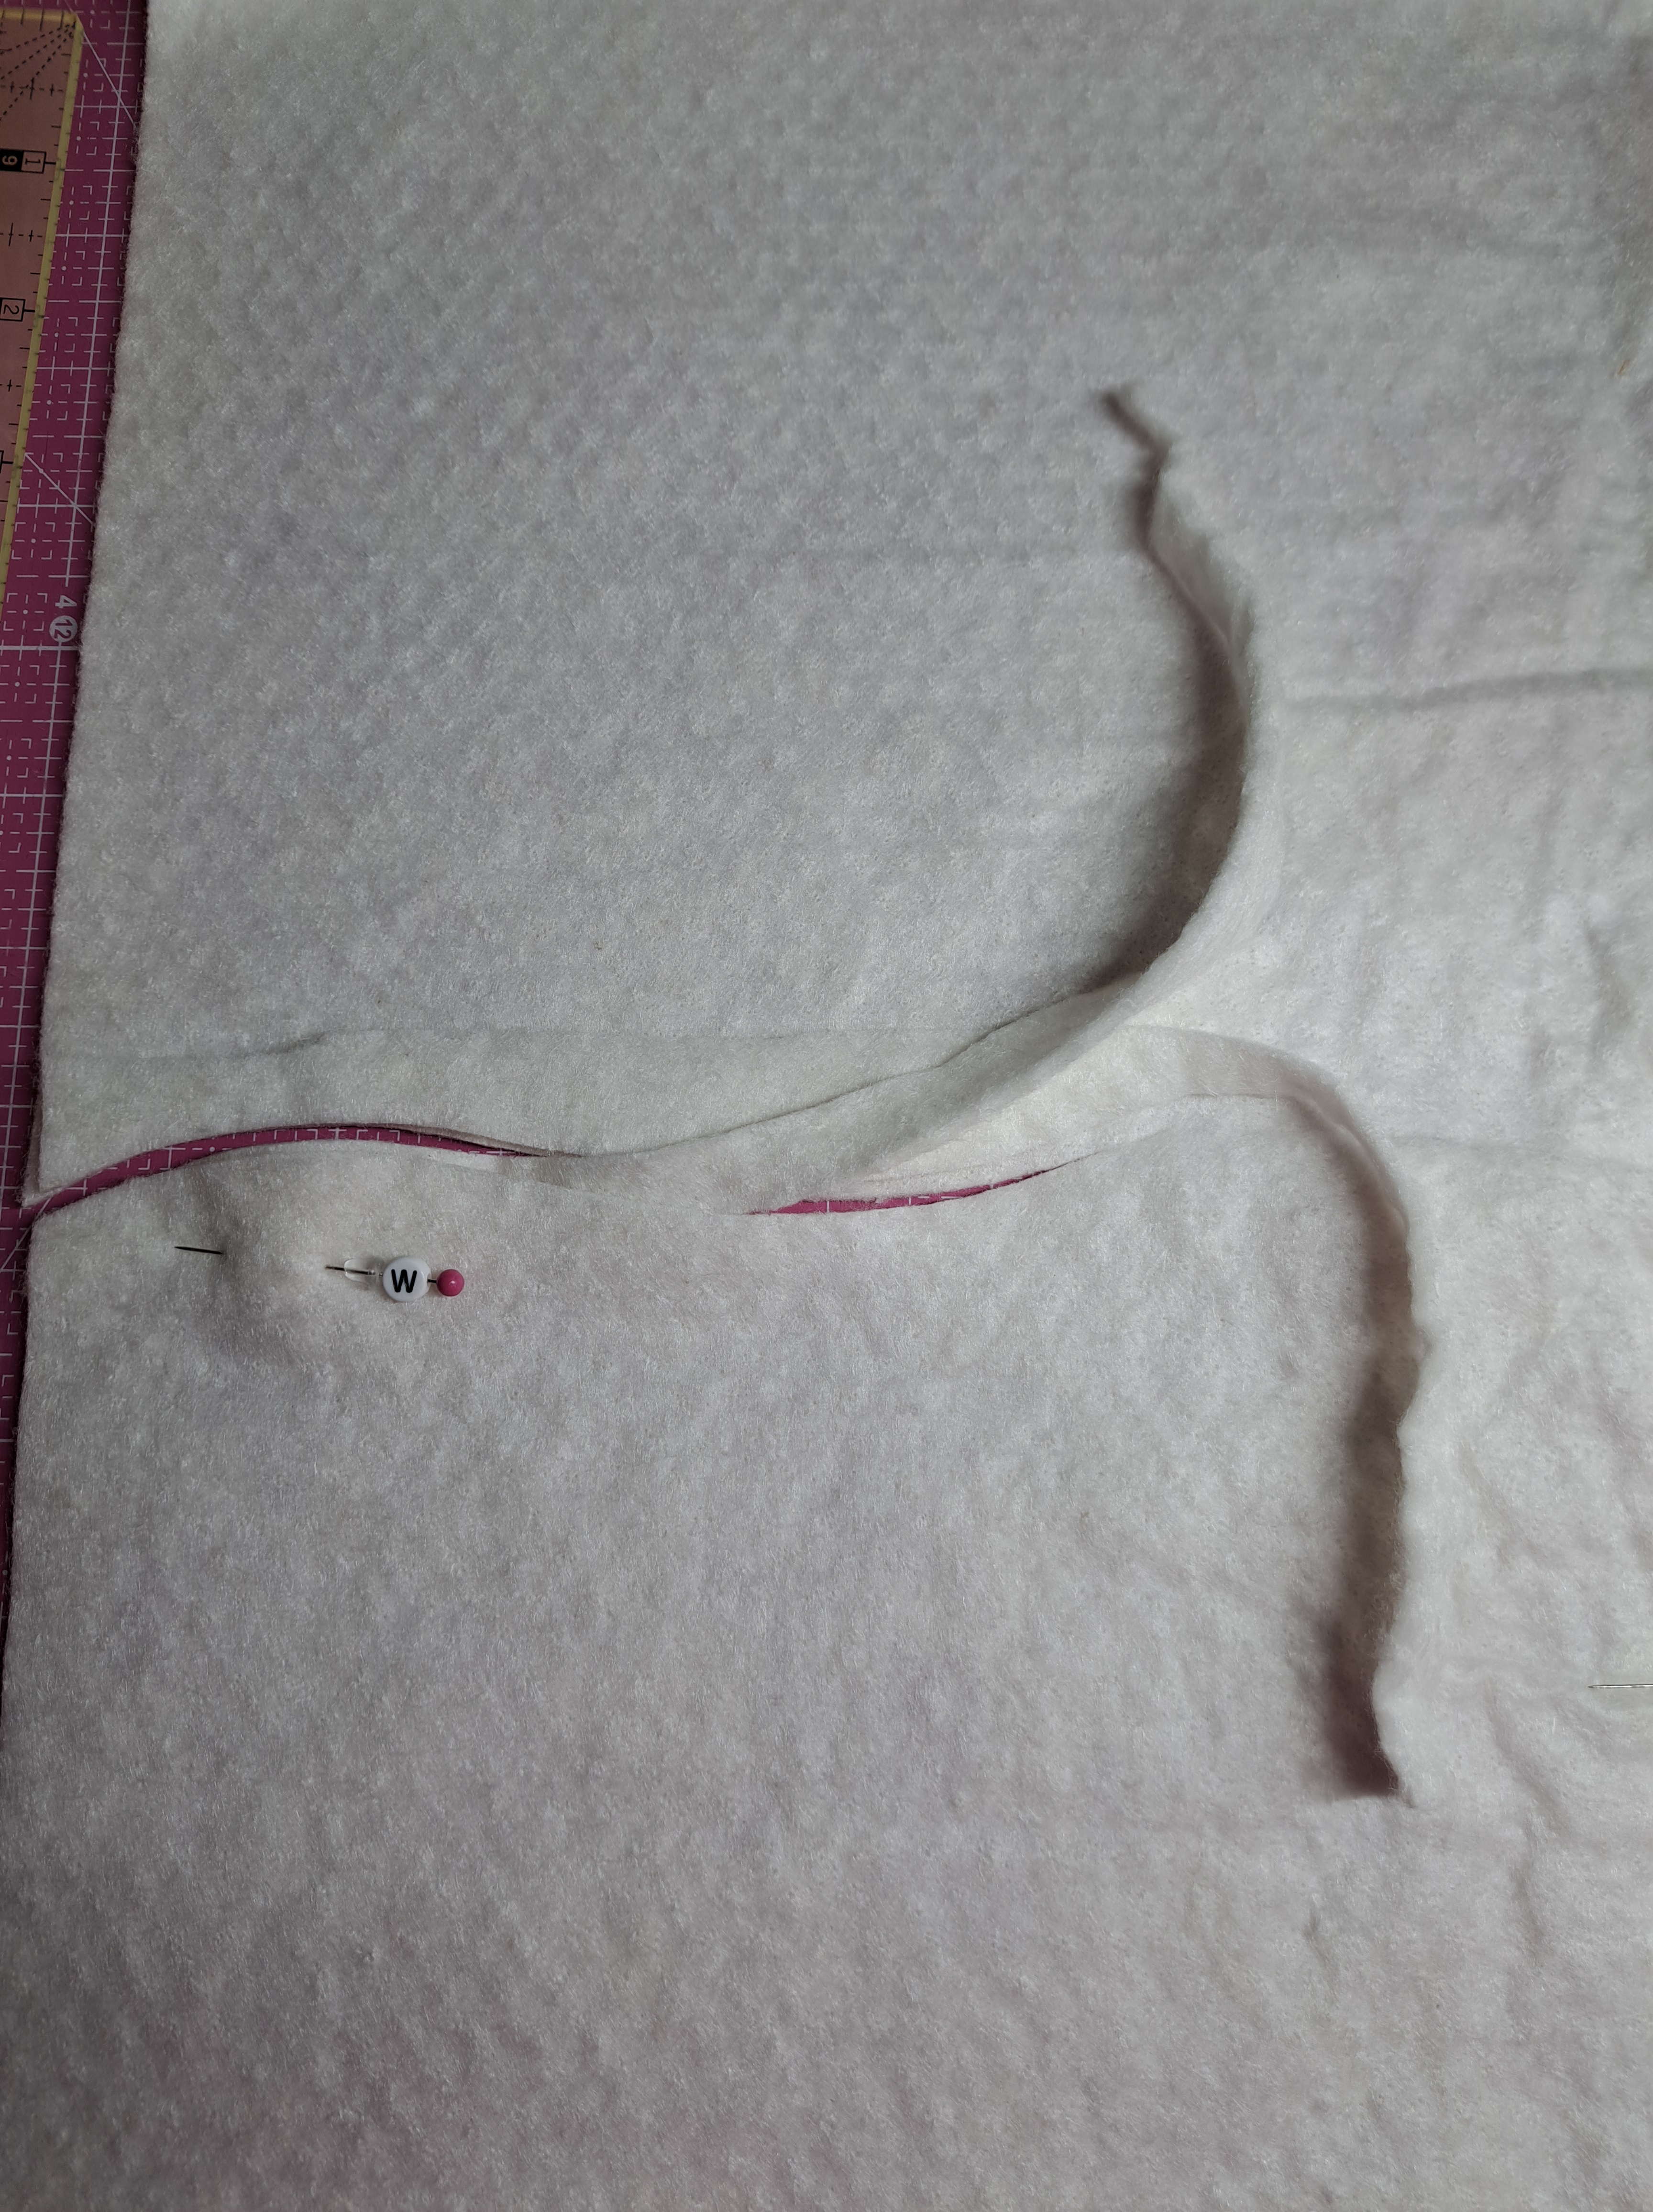
I was able to cut the 96″ length of the batting down to the 74″ length I needed and use the excess to add width for the quilt. I overlap the edges and cut a long curvy line through the double layer. I do this instead of trying to put two straight edges together. It makes for a much smoother join and transition! I then zigzag the join. Those steps are shown below in pictures. You can stitch by hand or sewing machine. I much prefer a extra wide zigzag on the machine. I was in a hurry so I did one section by machine and the other long edge with a couple different products on the market. One is Pellon’s Stick-n-Washaway Tape and the other is Heat Press Batting Together. I’ll show those products below the cutting and sewing steps. I have no affiliation, but had them handy to speed up the process.
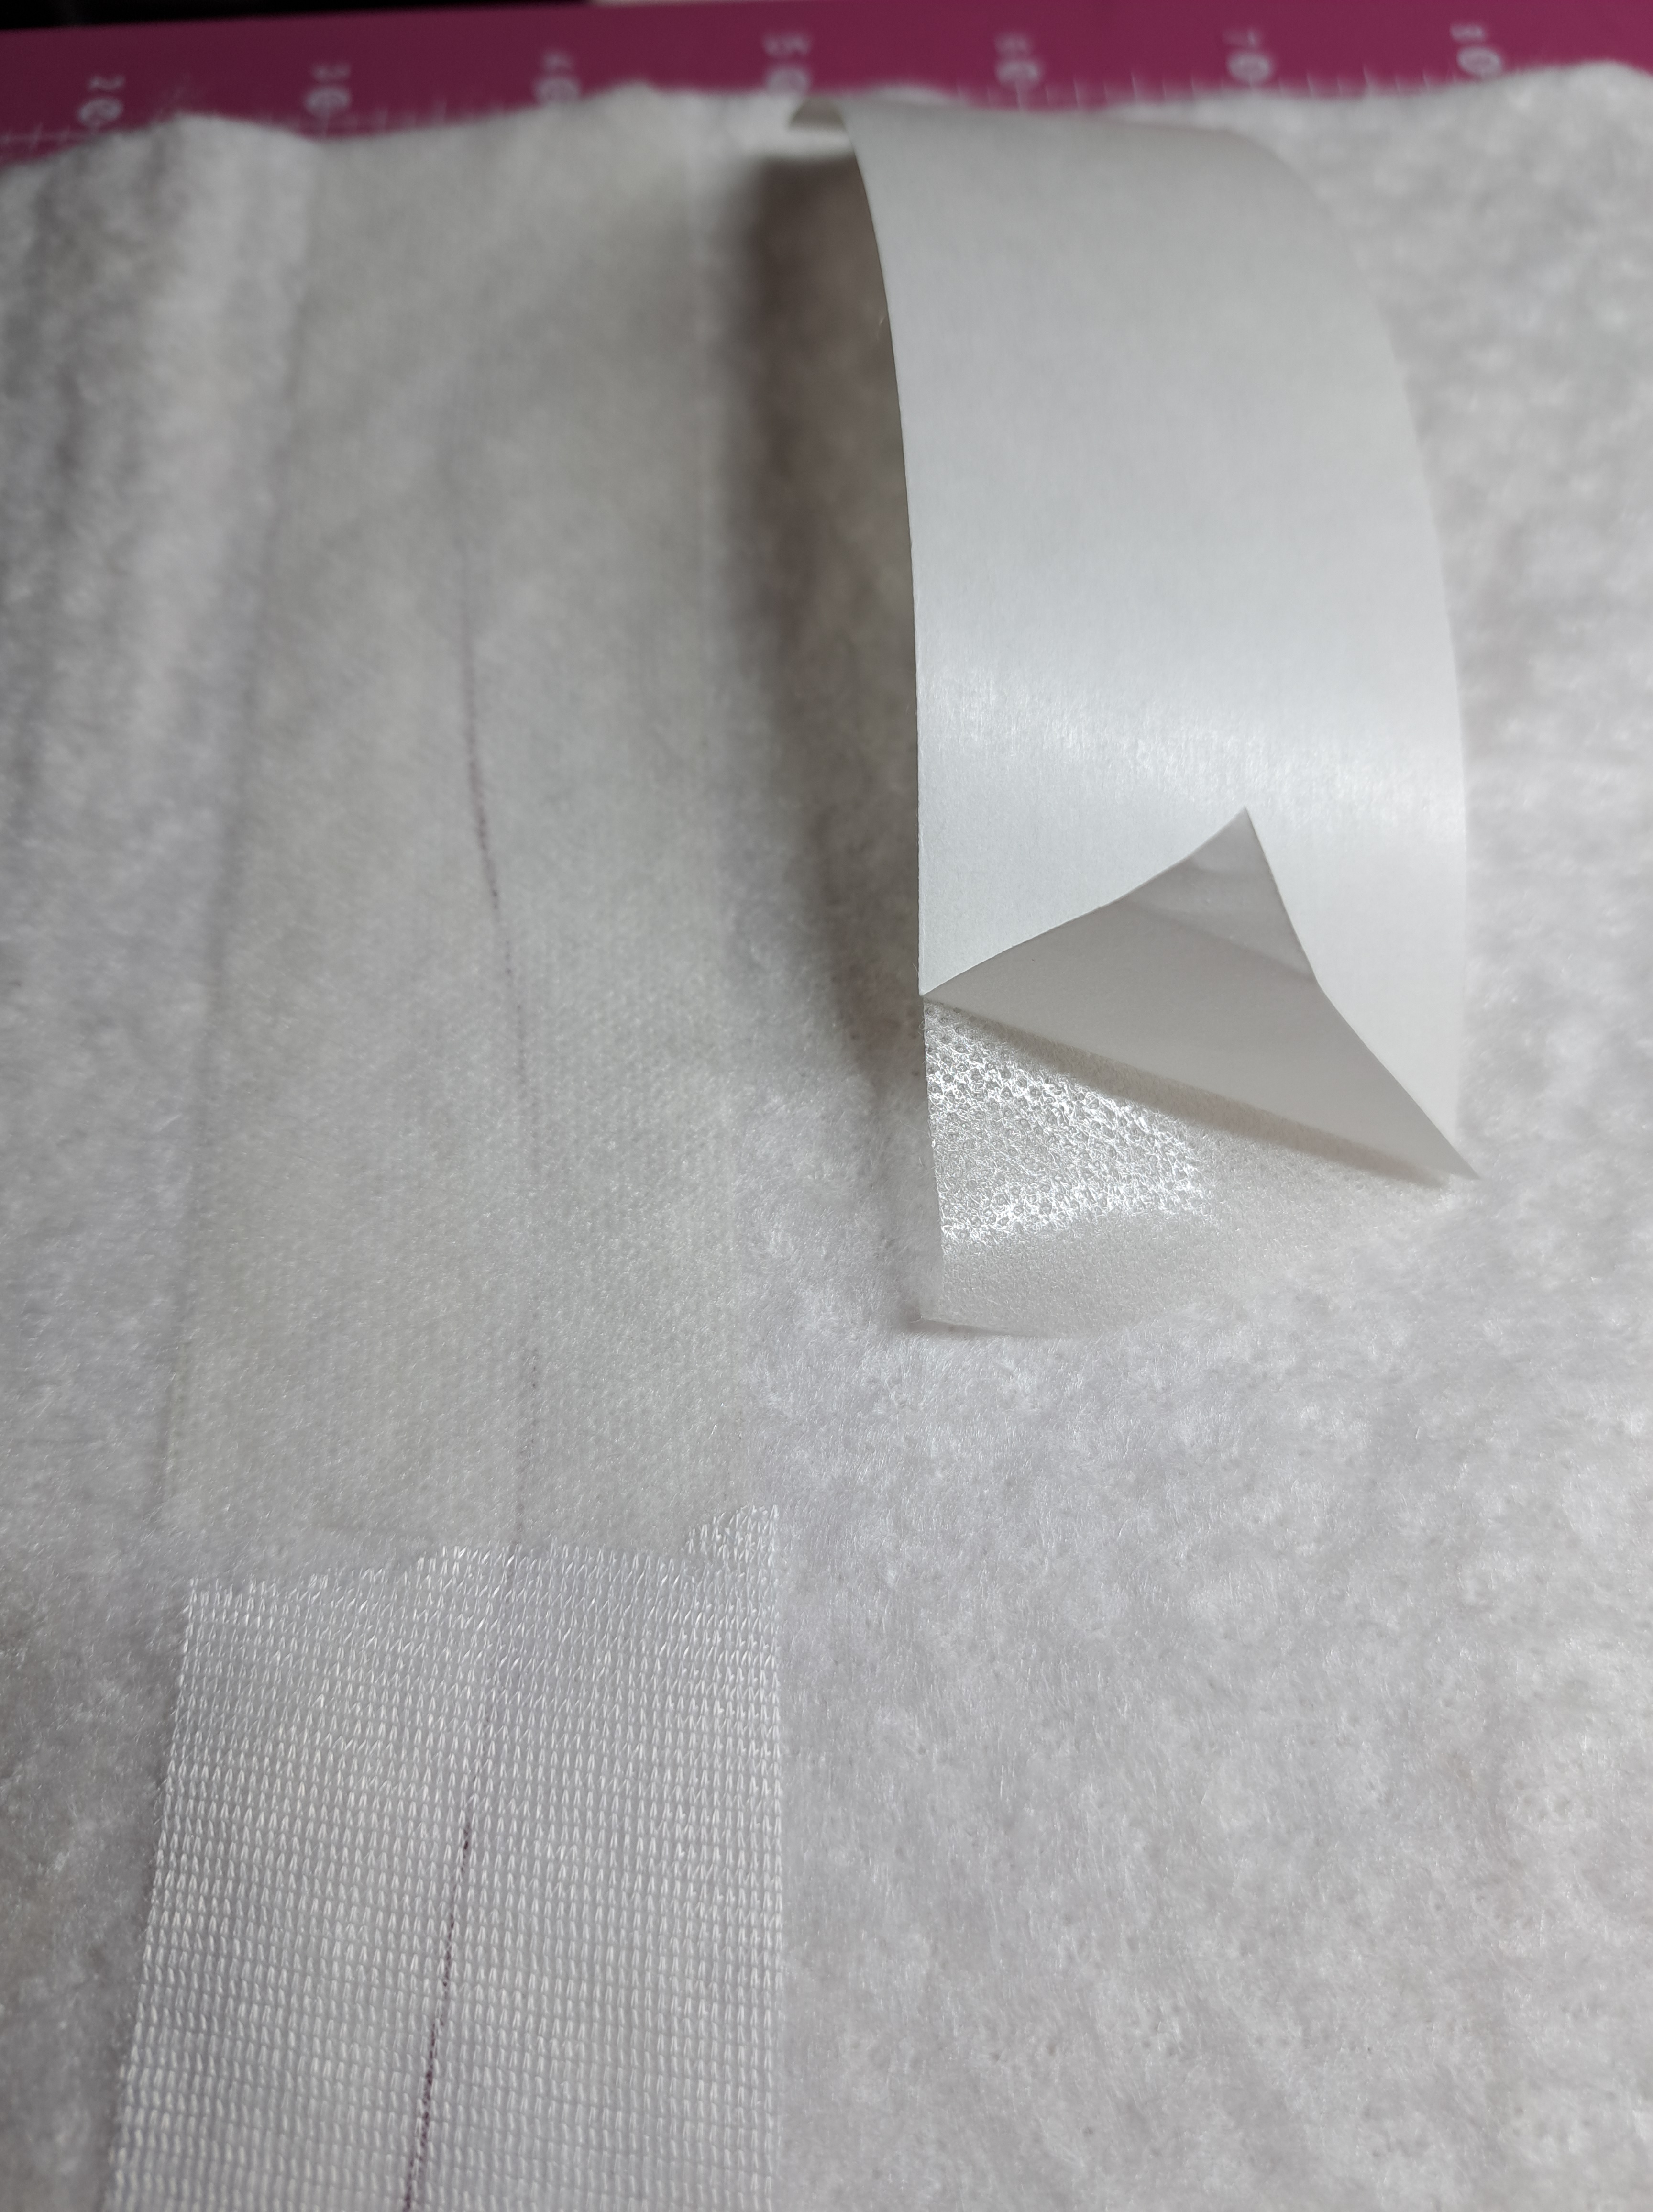
If you don’t want to zigzag, the products discussed above are shown below.
Pellon’s Stick-n-Washaway Tape. It has a sticky side and the other is not. Just remove the paper backing and stitch right over the cut joined edges. My concern is the washaway part…. Once the batting is between the layers of the quilt top and backing and quilted, everything should stay in place.
Heat Press Batting Together… This is also on a roll and you press it onto the batting join. Be sure to check your iron temperature.
I hope you found some tips or ideas to try if you ever run short on batting and need to piece some together!
#1 – Overlap batting edges by about an inch and cut a gently wavy line through all layers. Remove extra edge bits and sew together.
#2 – Give some batting tape a try. There are several brands on the market. Find what works best for you or use my favorite wide zigzag. I like cotton thread so this keeps the batting all natural, no poly. Plus, I know the edges will stay together with the zigzag stitching!
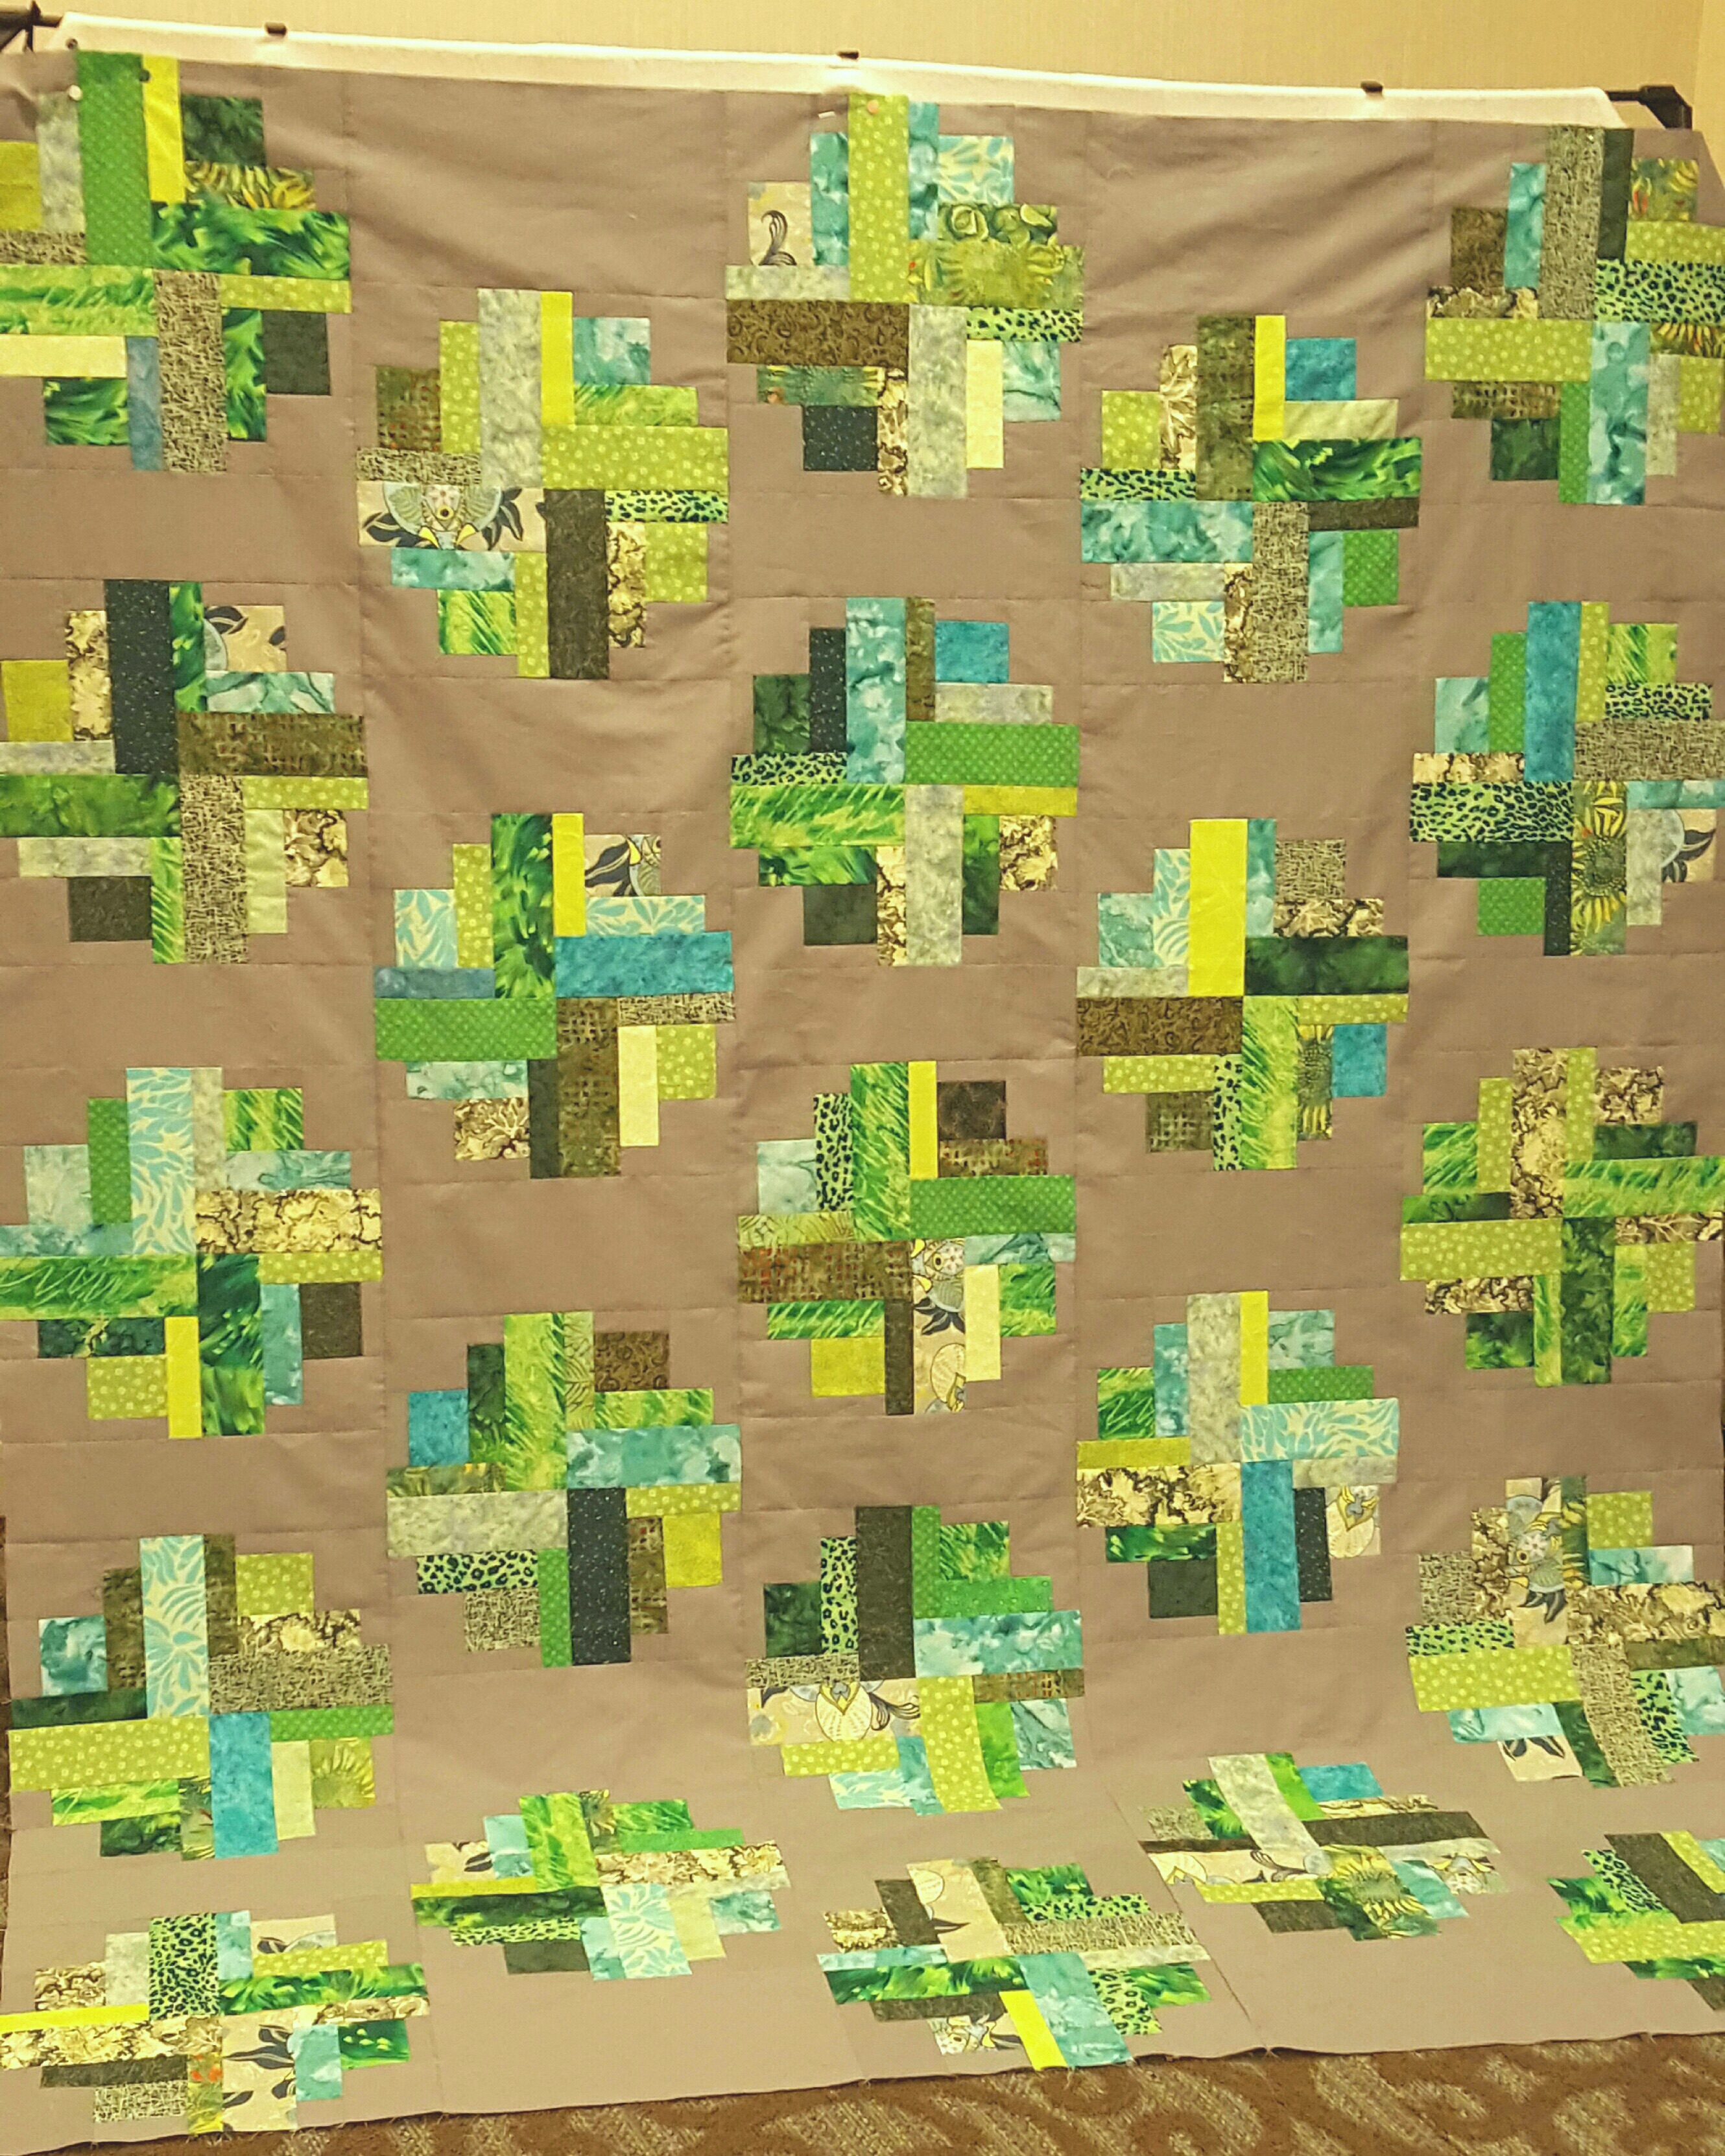
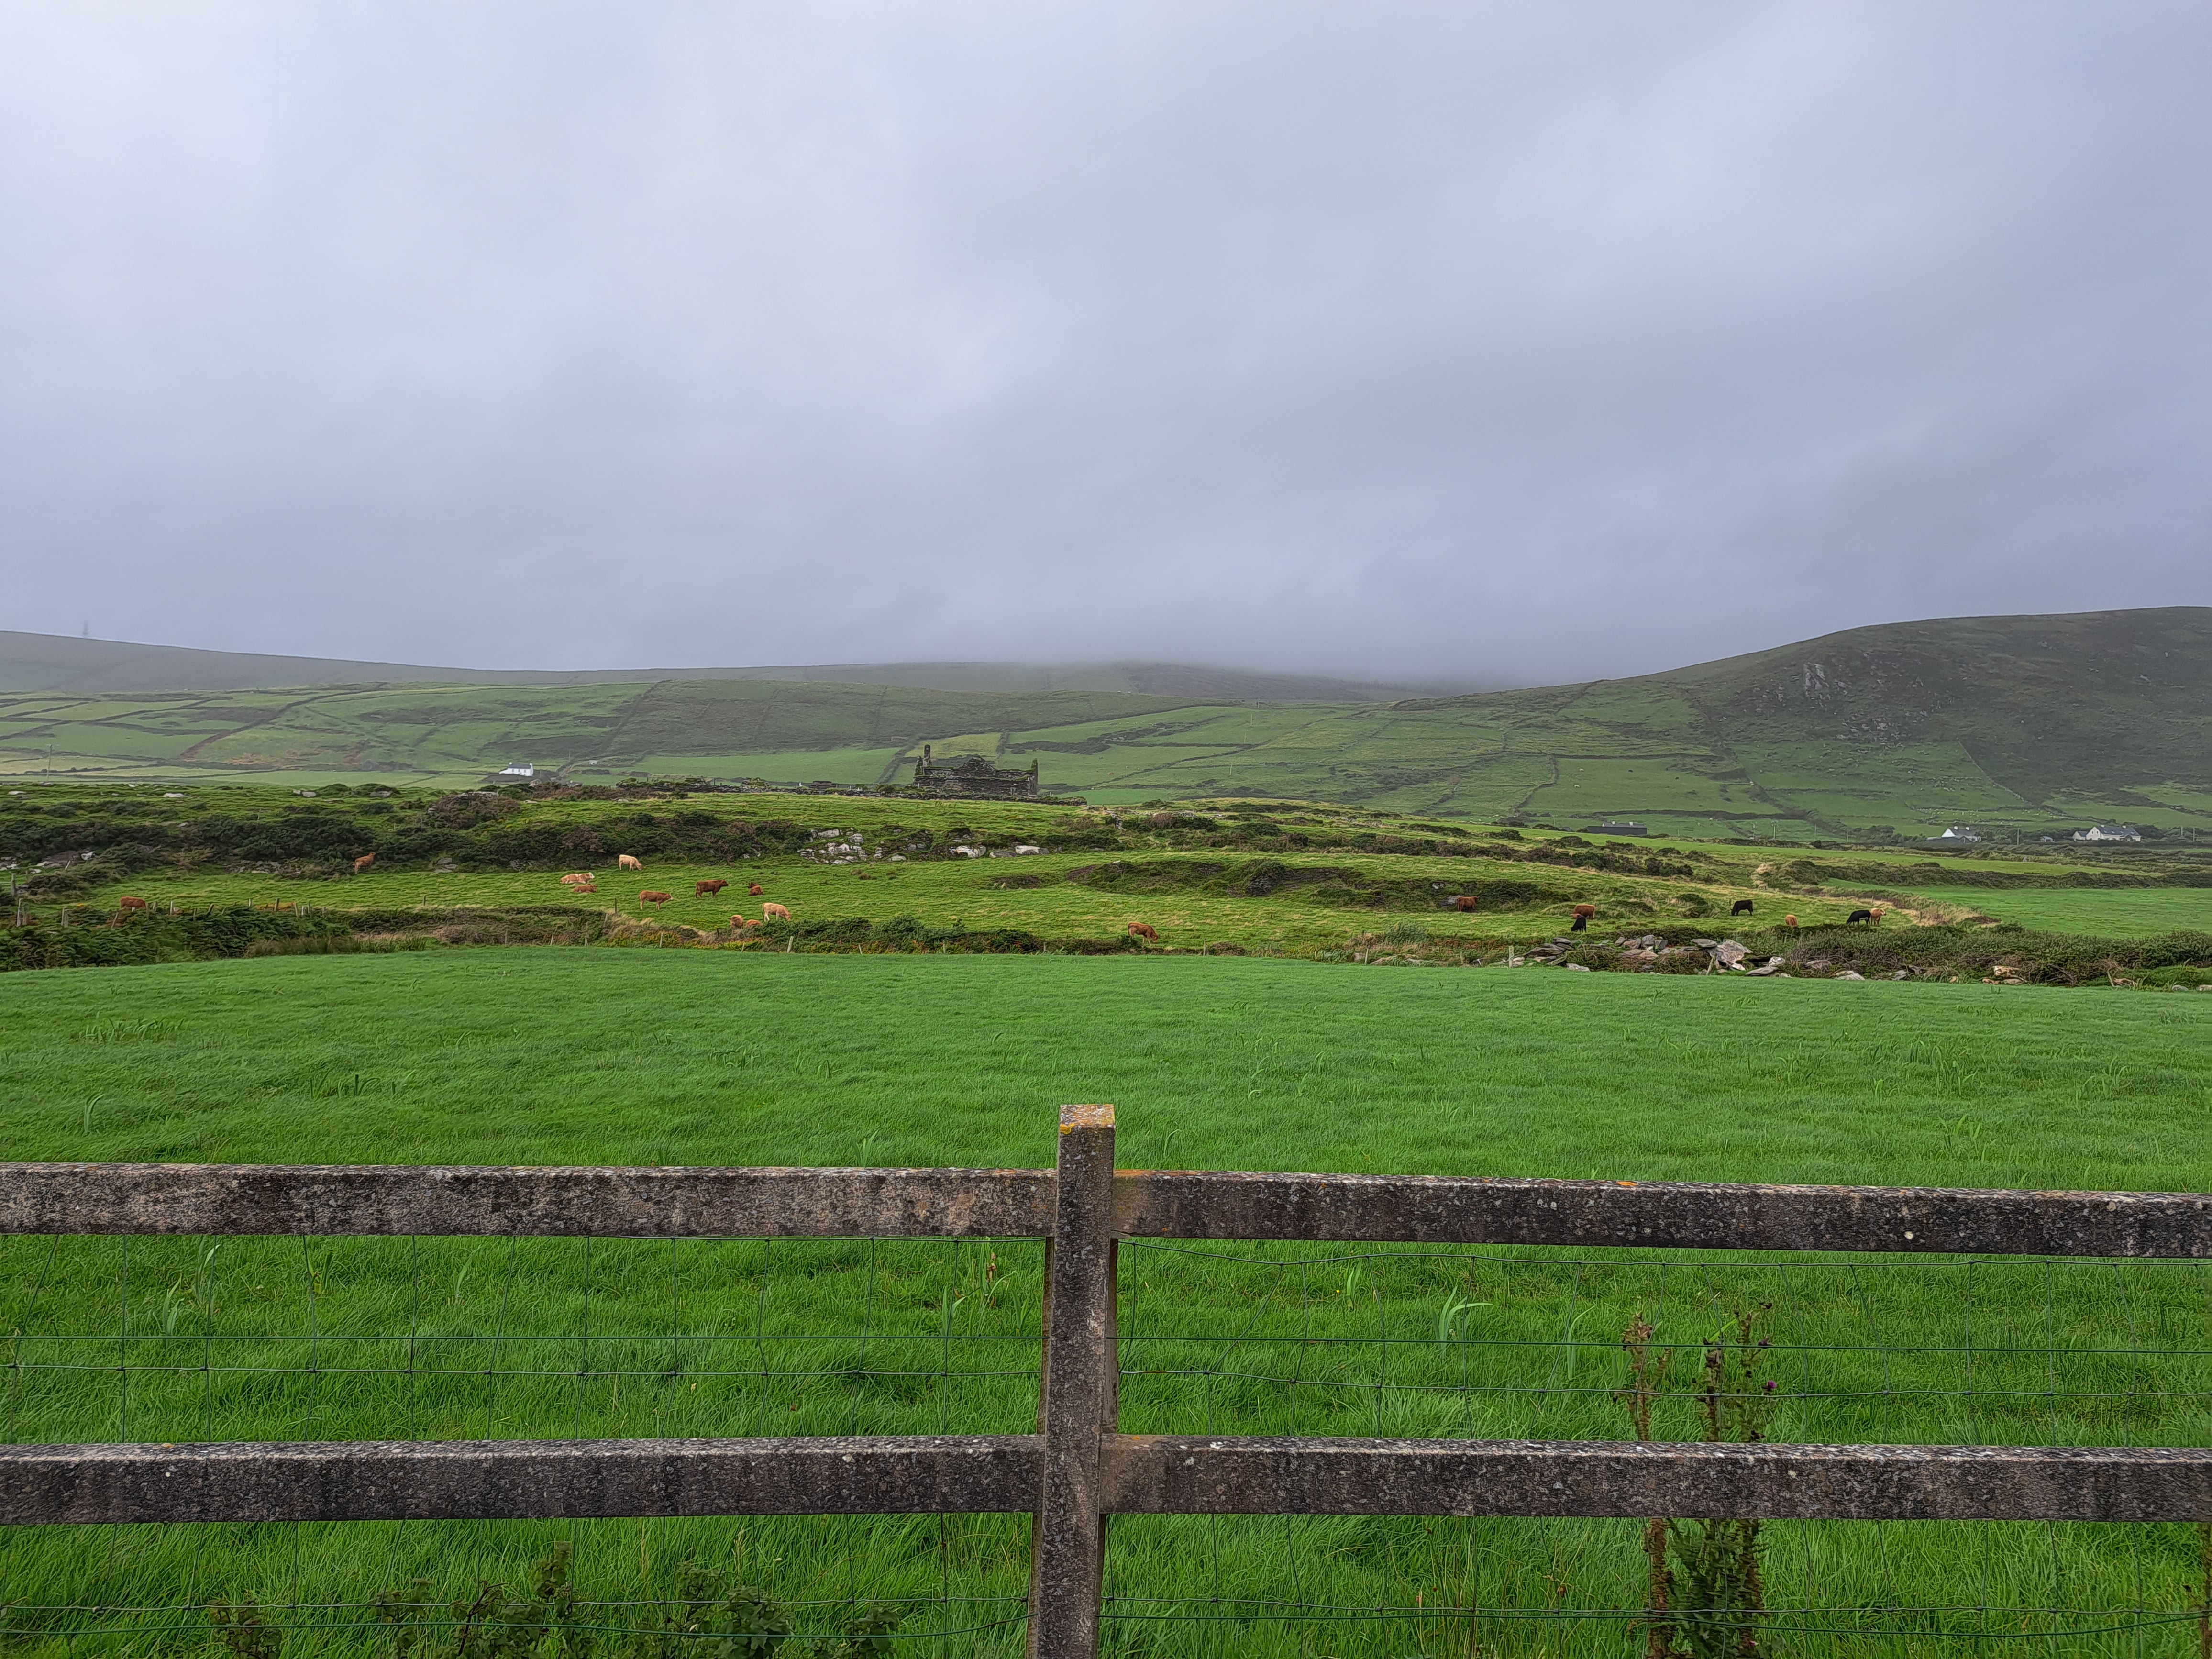
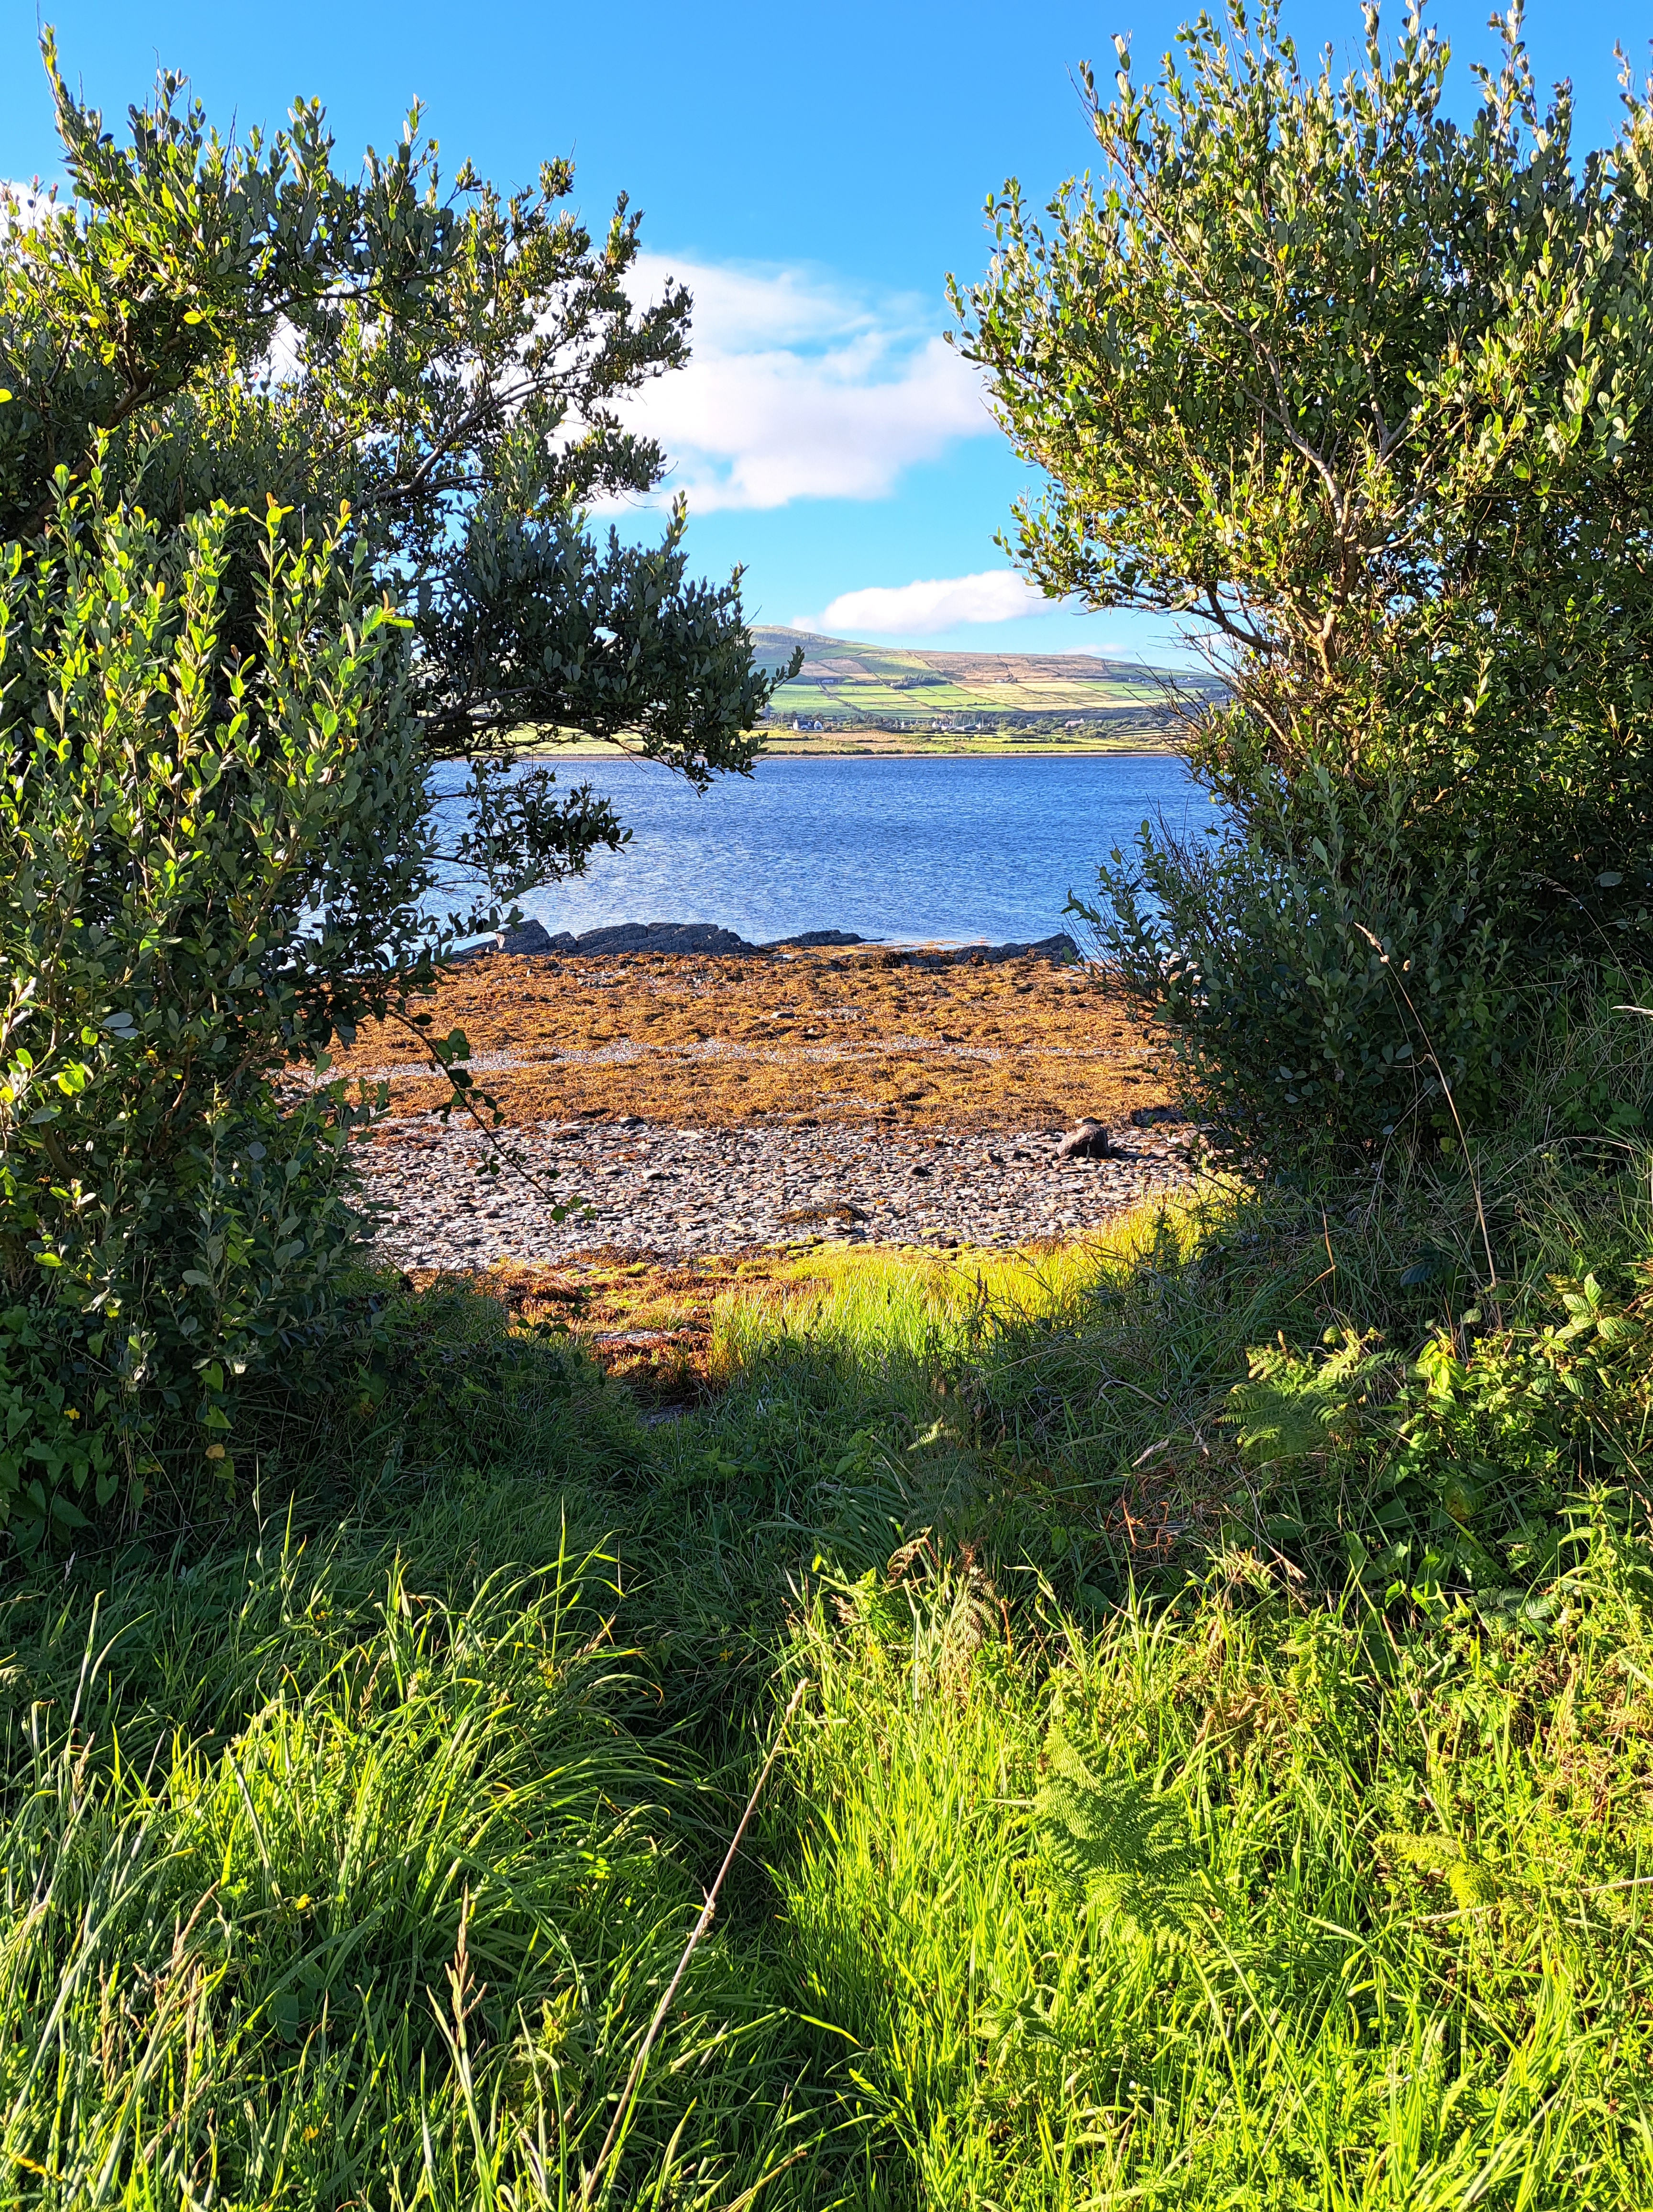
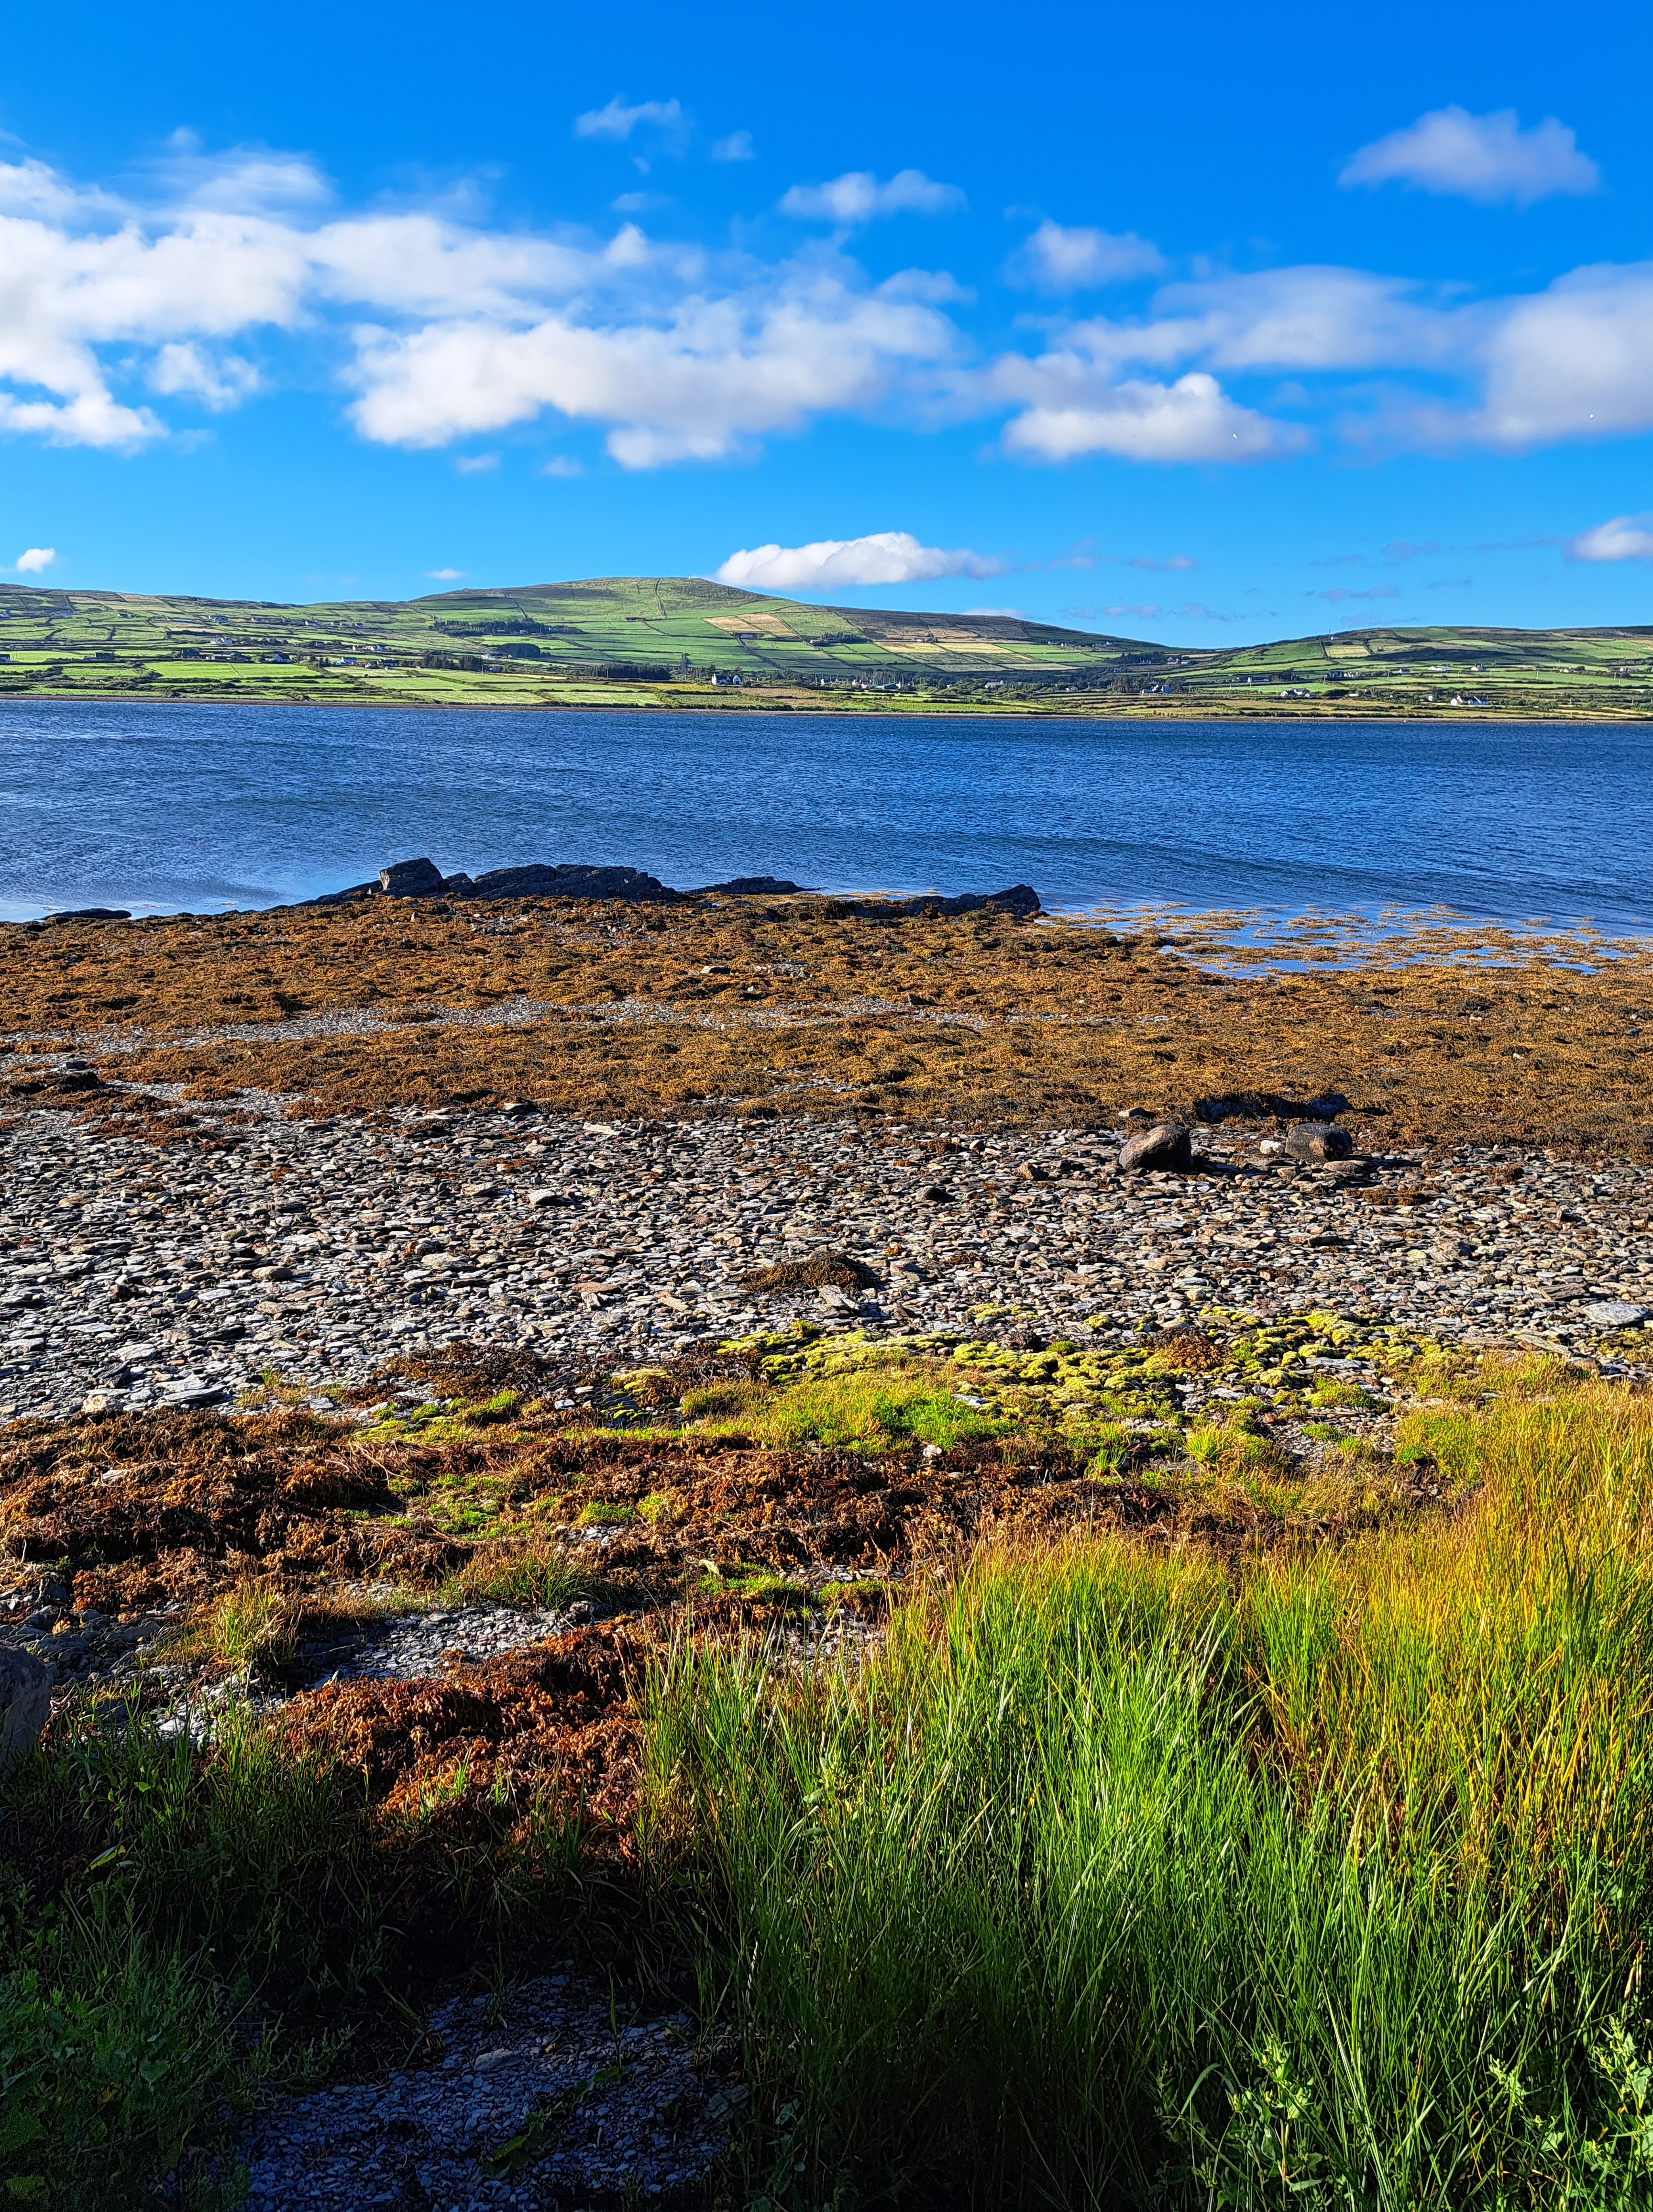
As I sit thinking about what to write about, I keep thinking about all the beauty I saw in Ireland last month. The true beauty was the bride and groom, dear friends and family. But in thinking about other beauties of our trip, I have to say the GREENS have it. So much green! In all varieties of bright, light, dark and in between. So looking back through my photos, I see GREEN. Lots of green!
In relating all these beautiful pictures to quilts, I see color inspiration. Think about green quilts that you have seen or made. Were they only one shade? Did you use light medium or darks in your greens? What background went well with your greens? Did you add other colors besides green? I’ve made one green quilt that I can can say I only focused on green. It was from a workshop I took with Beth Helfter of Eva Paige Designs. (Yes, I still take workshops!) I loved the process of mixing up all my greens and thrilled that they ALL went together. Fabrics don’t always have to be matchy-matchy to go together. The photo is a bit yellow but you can see all the different shades and variations of green with the gray background. The pattern is called Kickin’ Stash.
“Fried Green Tomatoes” D.W.
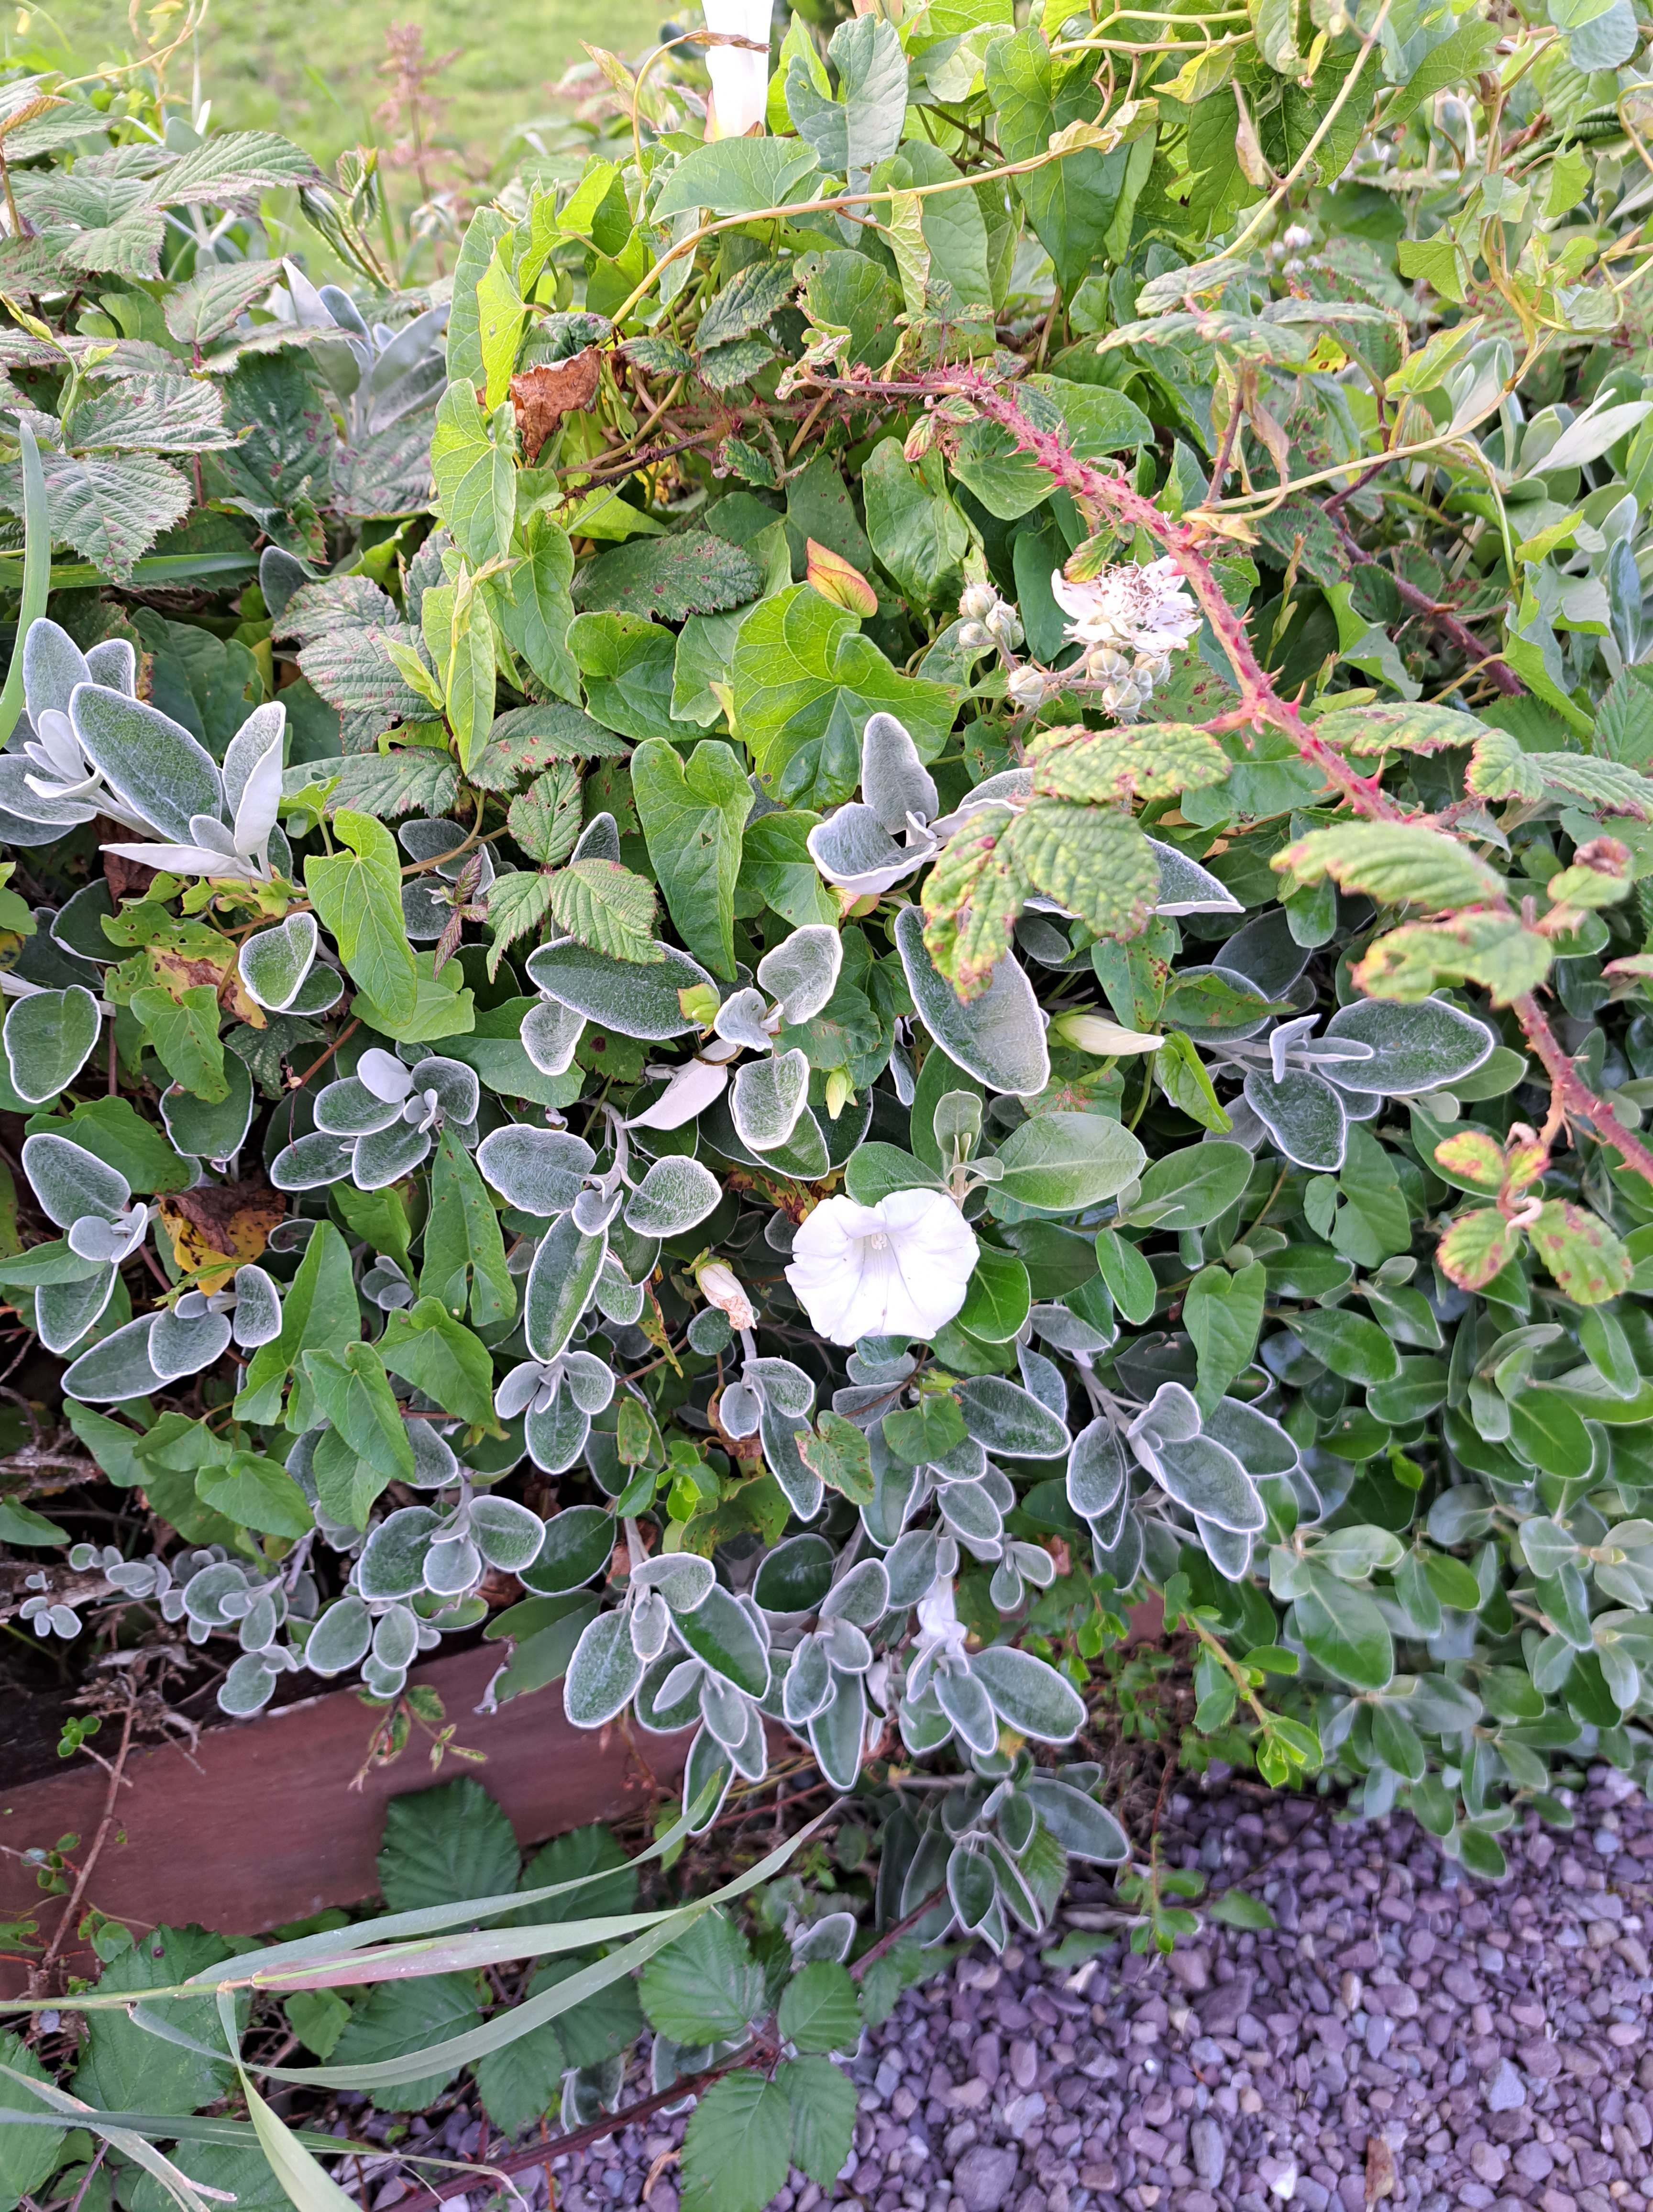
Nature proves this point of ALL greens work well together! See some GREEN color inspiration below…
So, give nature a look-see! Find inspiration in her beautiful colors, especially GREEN!
#1 – Look to Mother Nature for color inspiration!
#2 – Just because you choose one color to be the focus does not mean all your fabrics have to match. Look for light medium and dark AND variations of the color…example lime green, dark green, mustard green, olive green, blue green, yellow green, etc.!!!