
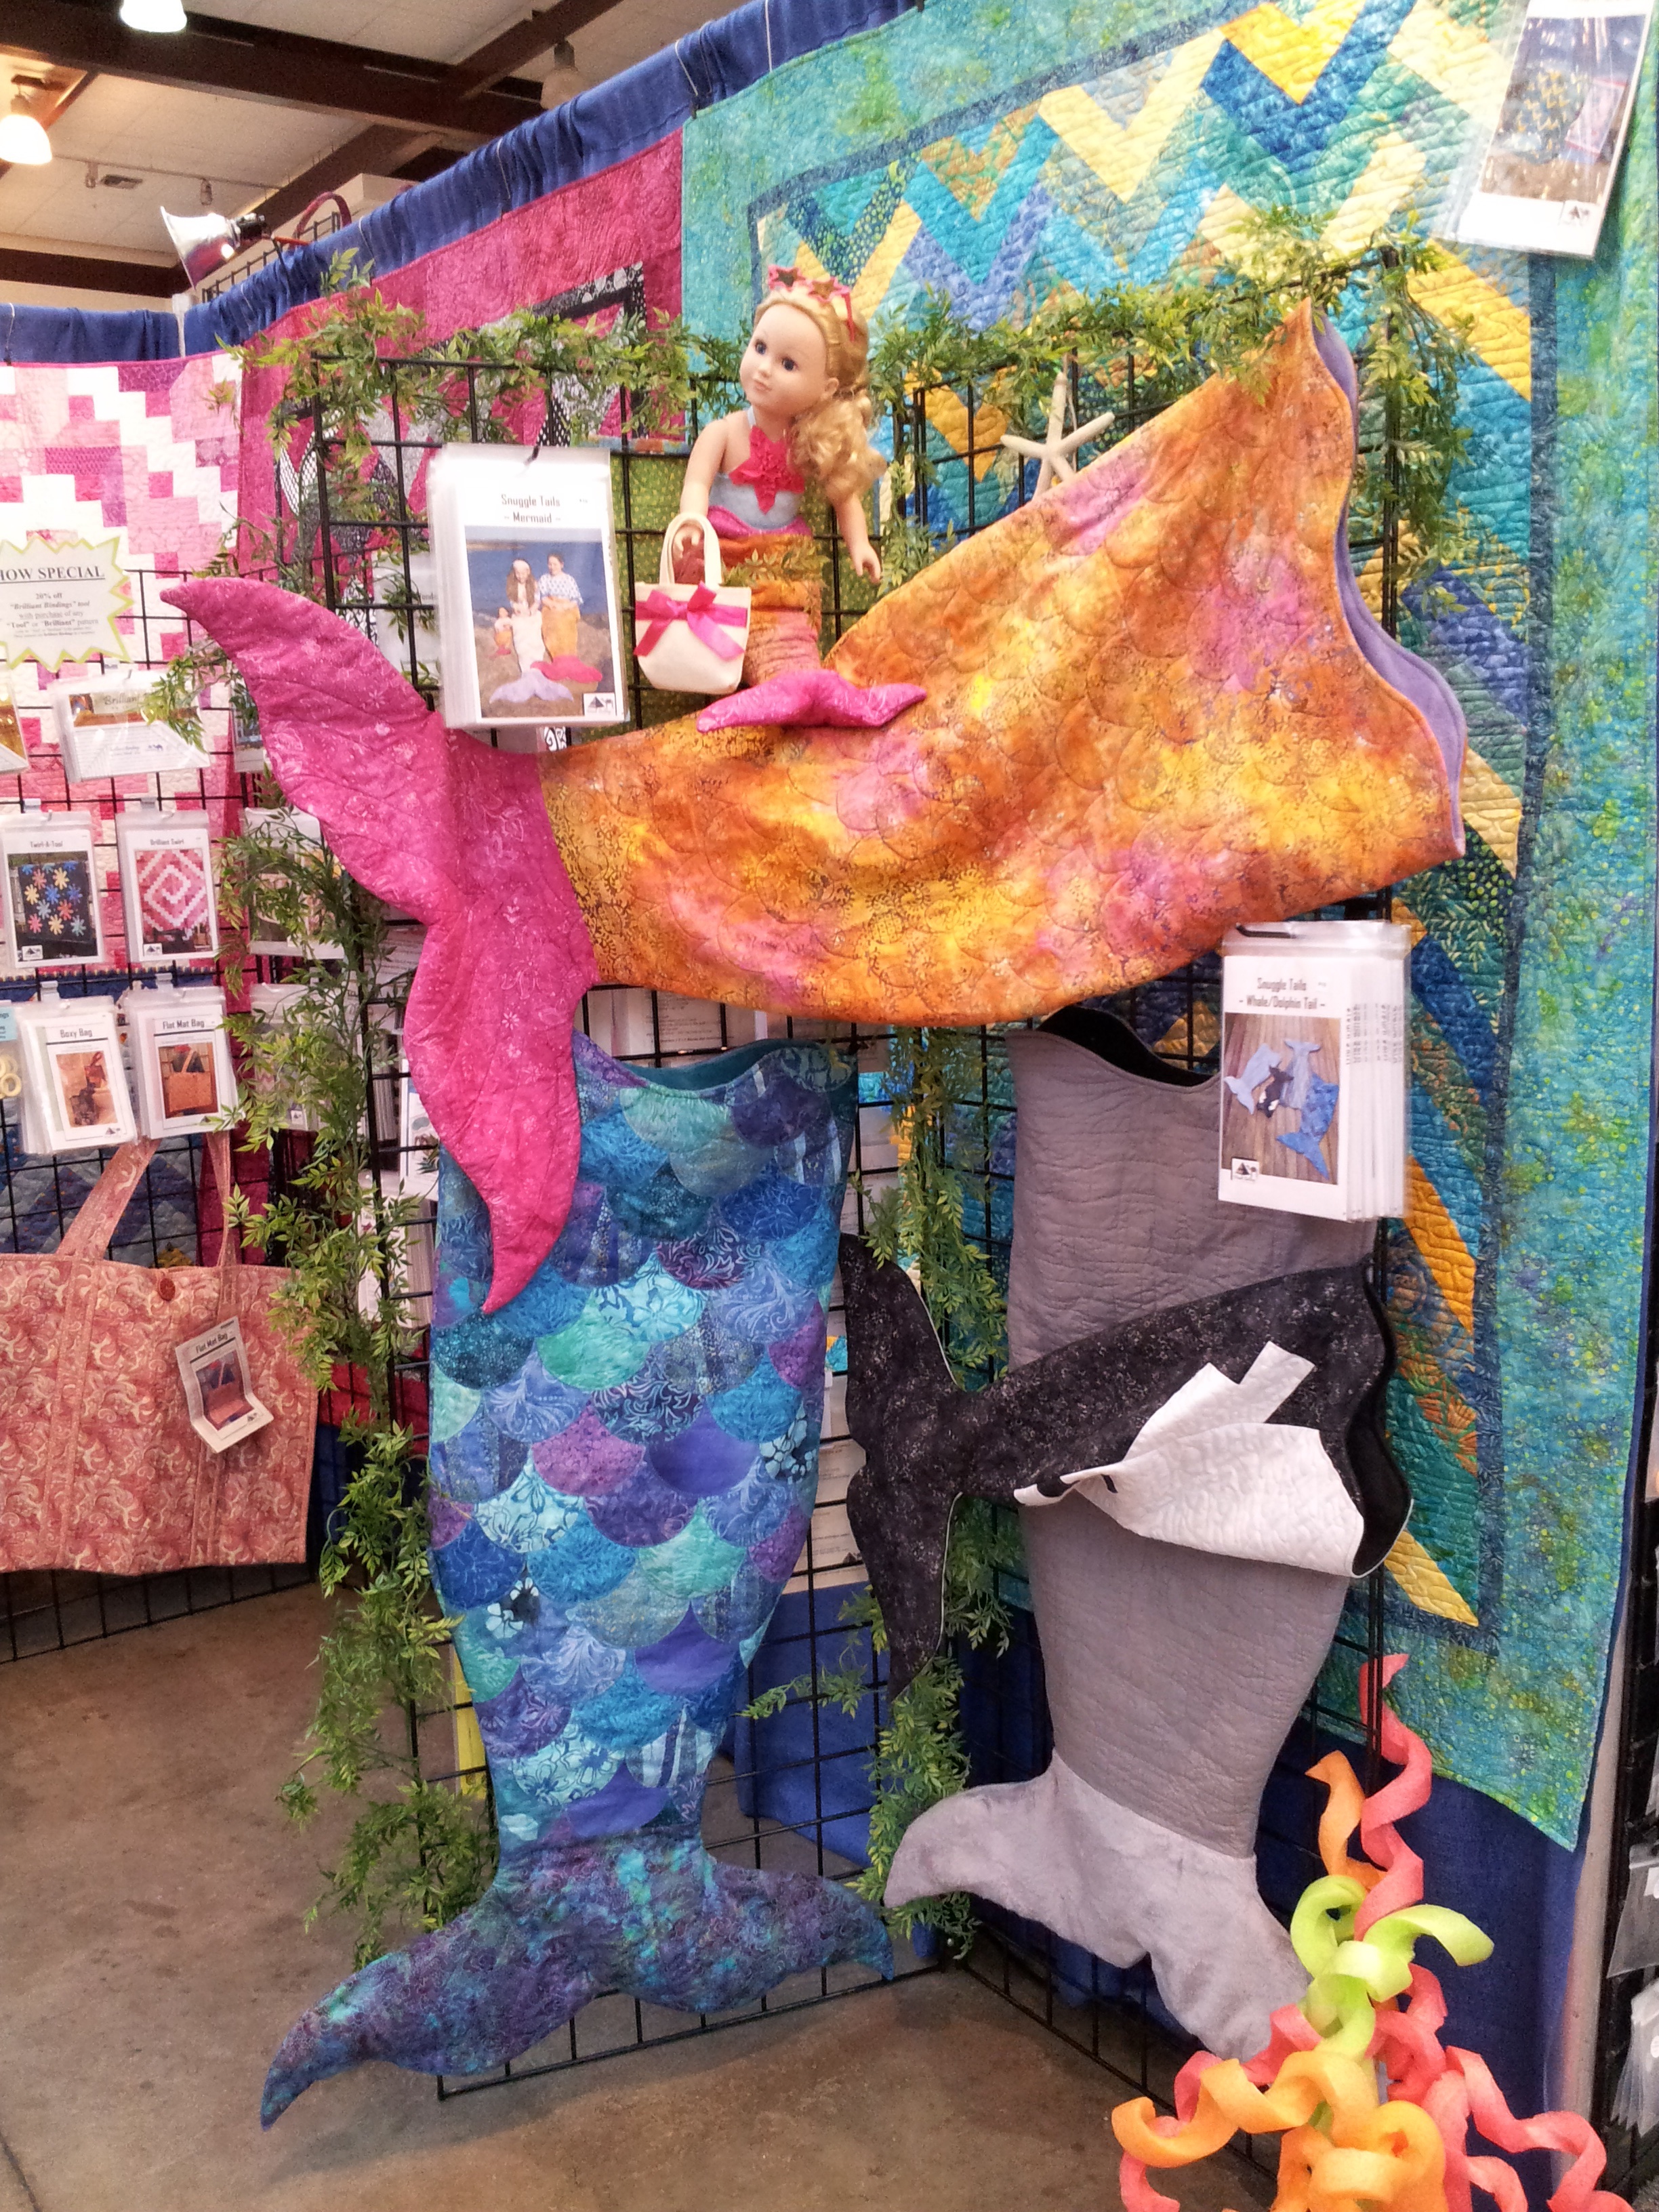
More tails!! I taught a workshop Saturday on Mermaid Tails. One of the demos included the clamshells I showed how to cut last week. Now, let’s see how to build the foundation to create the raw edge appliqué clamshell tail! The clamshell tail is the bottom left.
Snuggle Tails-DW
The clamshells are fused onto a fusible gridded interfacing. The grid on the interfacing keeps the clamshells straight and in place!
#1- Gridded fusible interfacing can be used as a piecing or appliqué foundation!
The clamshells piece is built one row on top of the next.
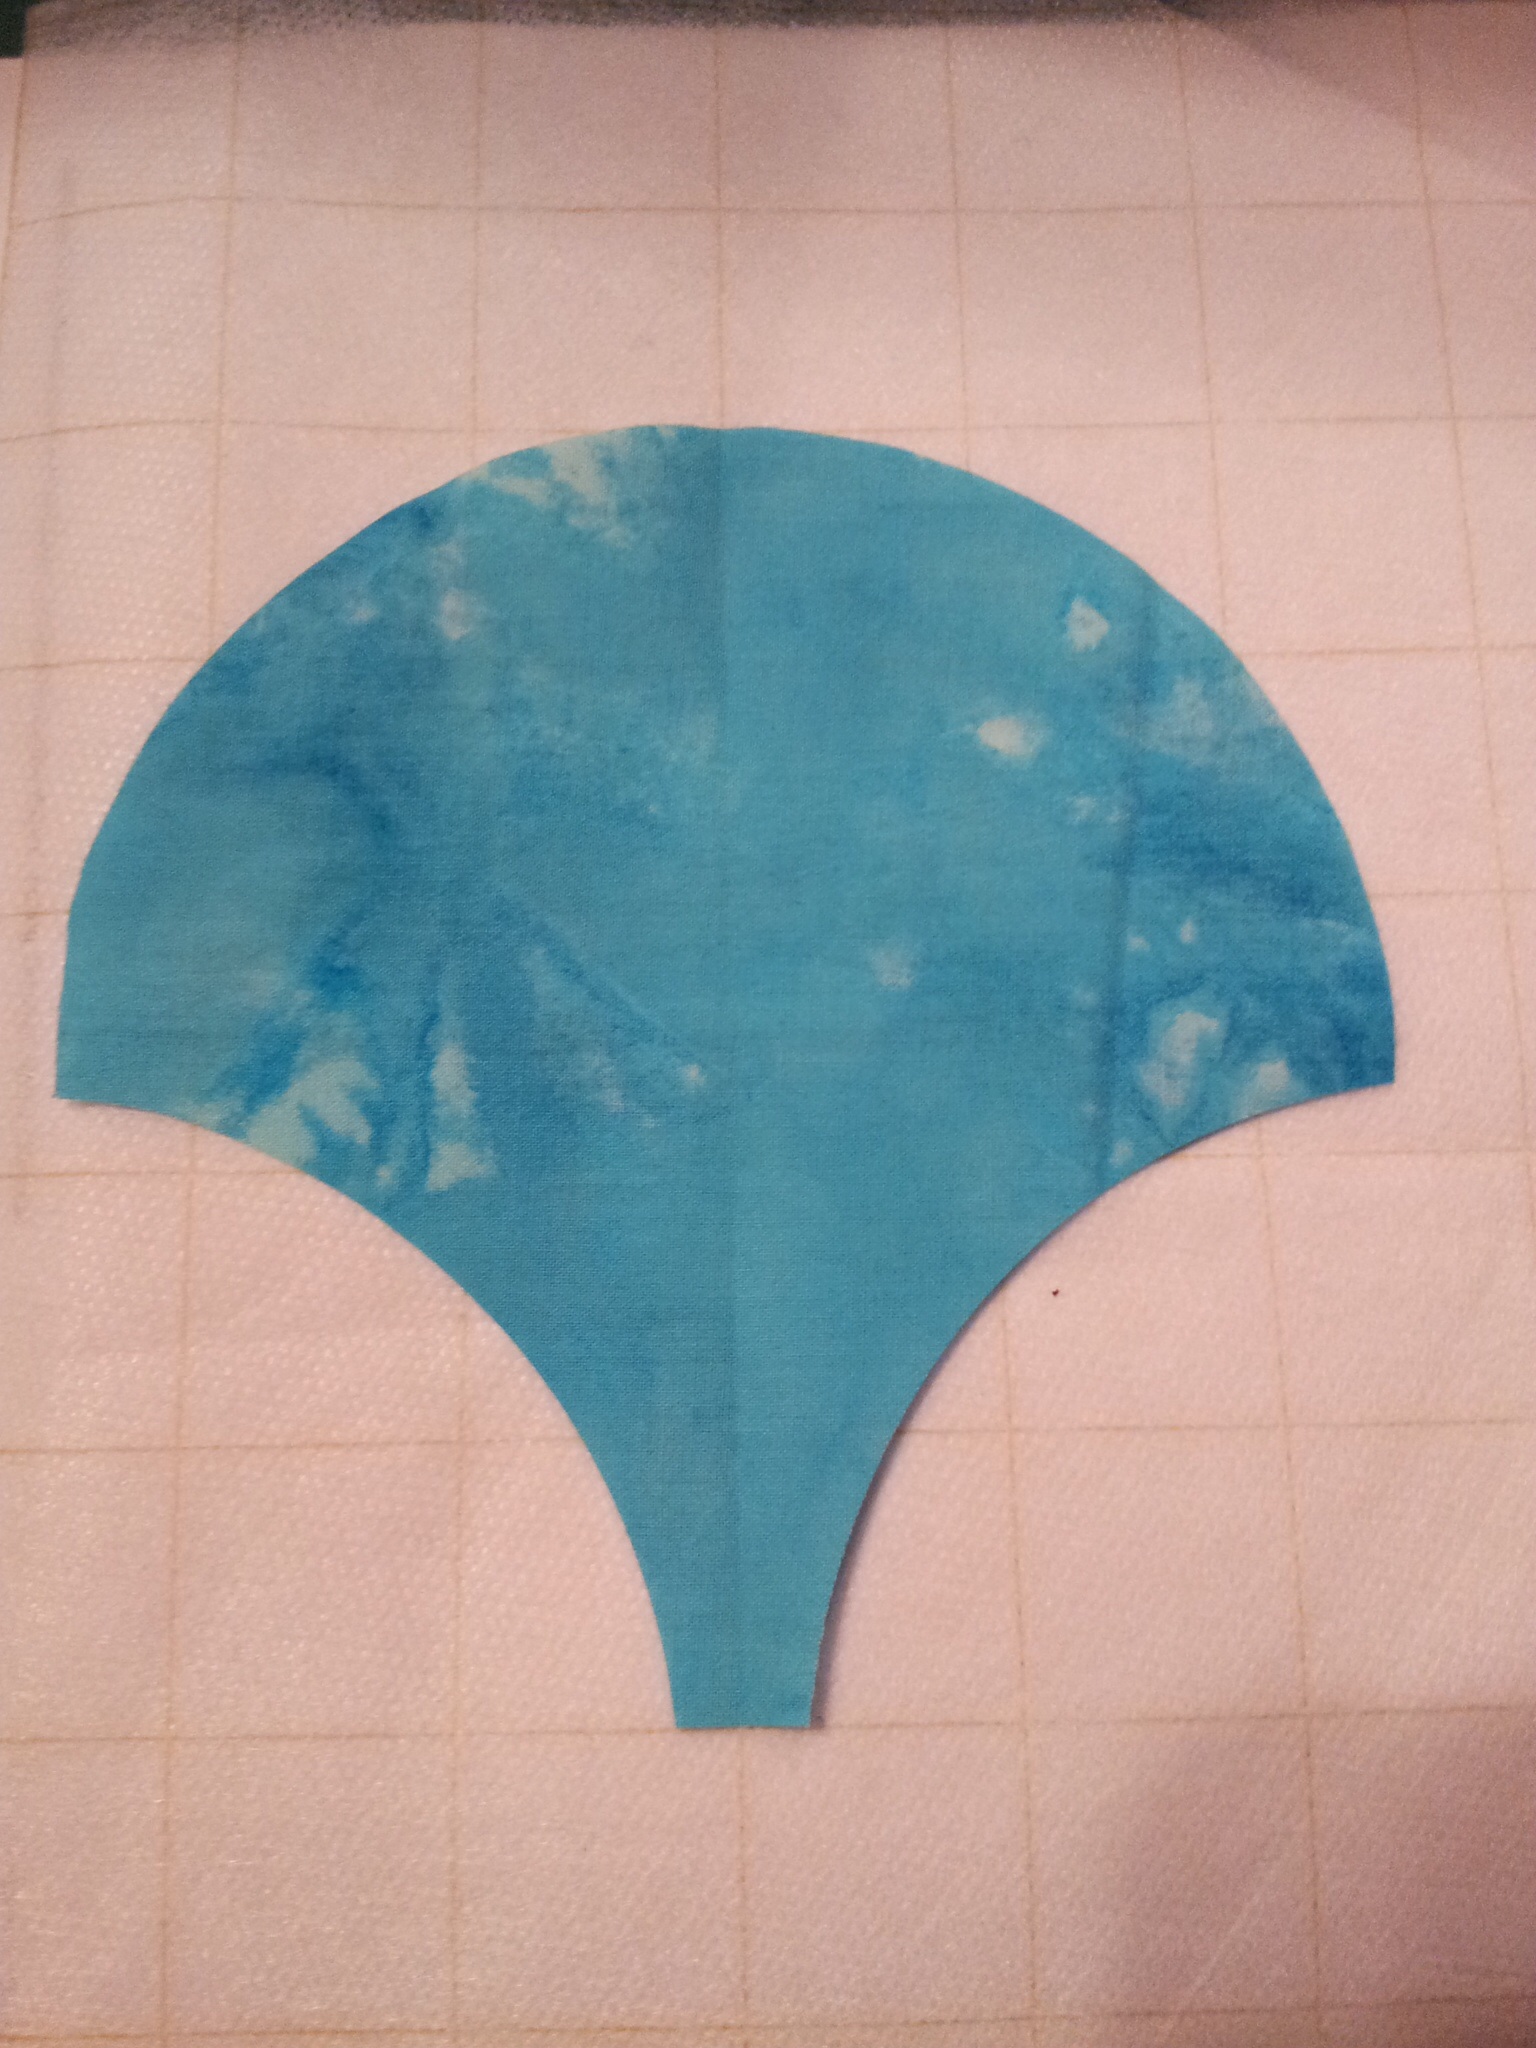
Use the grid to center a clam shell. Add rows across. (Note the top of the clamshell is on a line and is centered on a vertical line.)
The next row is added overlapping the previous by 1/4″. Or you can put the corner tips on the line and the bottom of the shell will land between the lines. I put a piece of paper behind the interfacing to help show the grid more clearly in the photo.
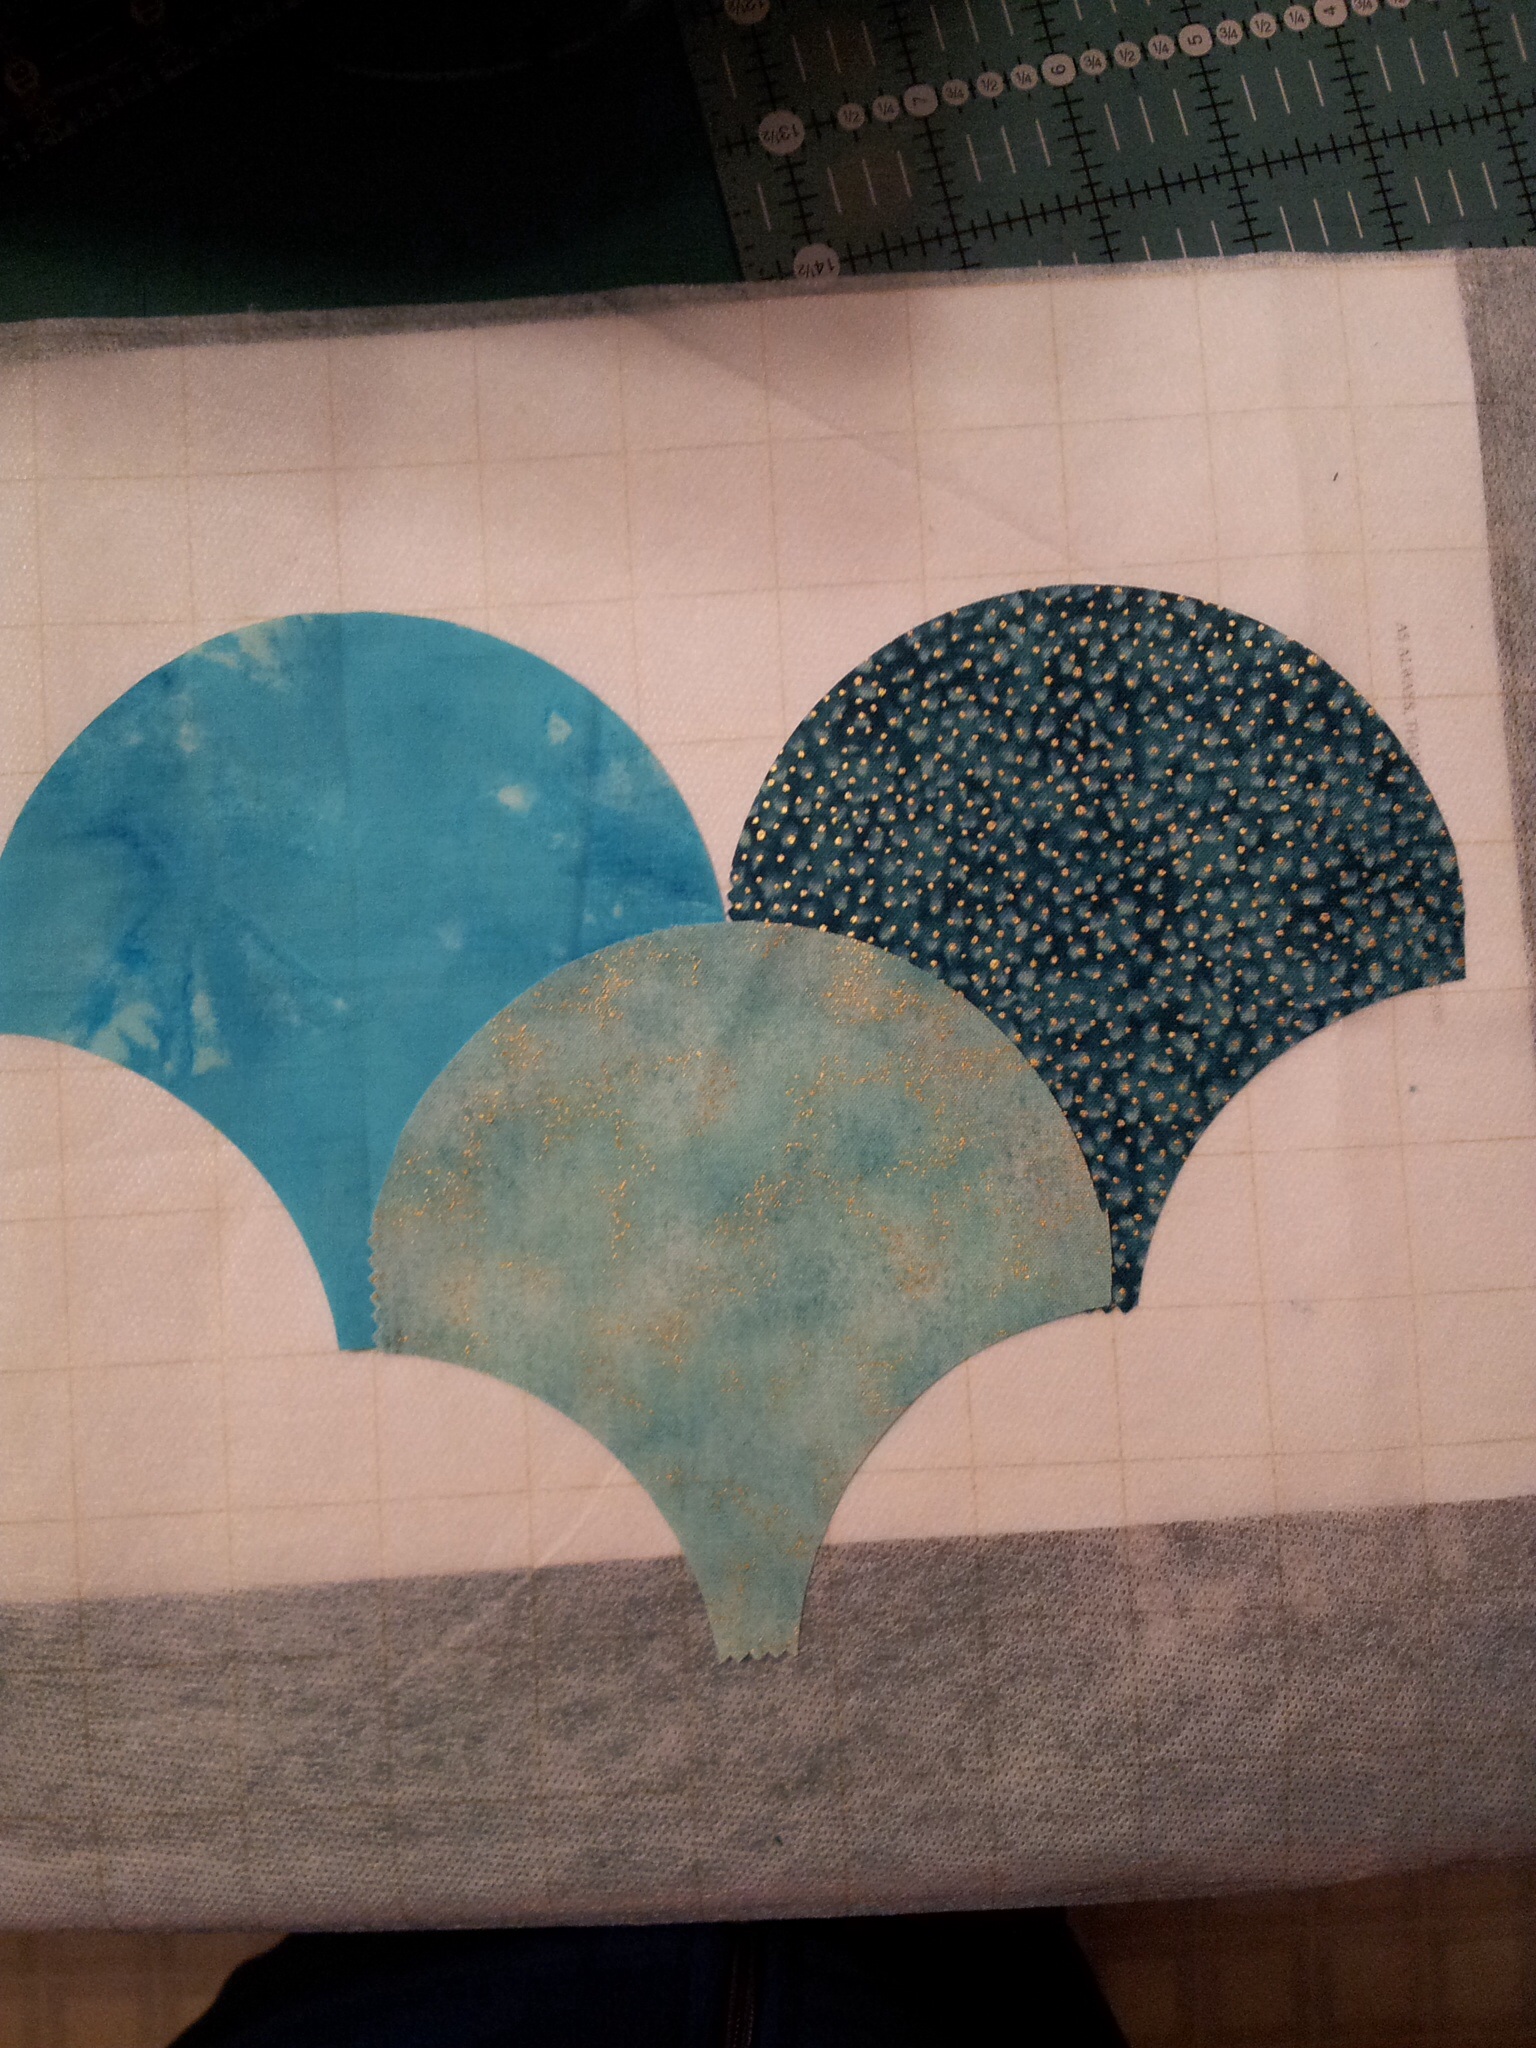 Only a portion of two rows is shown. You can see in the tails photo, the entire piece is rotated so they look like “fish scales”!!
Once the area is complete, use a wet press cloth to fuse everything in place. Always follow manufacture’s instructions.
#2- A piece of muslin makes a great press cloth.
Use a zig zag or button hole stitch to stitch the curved edges, finishing the raw edge clamshells. Layering batting behind the piece before you stitch will get the quilting done at the same time!
in quilting,
Debbie
