
Before and After! Myself and 3 others in the Thimble Pleasures quilt guild participated in a mini Round Robin. We did give ourselves a few rules to give structure. One being that we had to include appliqué on someone’s round and to keep the size to maximum 12″ (as I recall). I am thrilled with mine and had a blast working on the others!
BEFORE

TP Mini Robin Centers
Mine is the mini 3″ Twirl-A-Tool on the bottom right!
AFTER
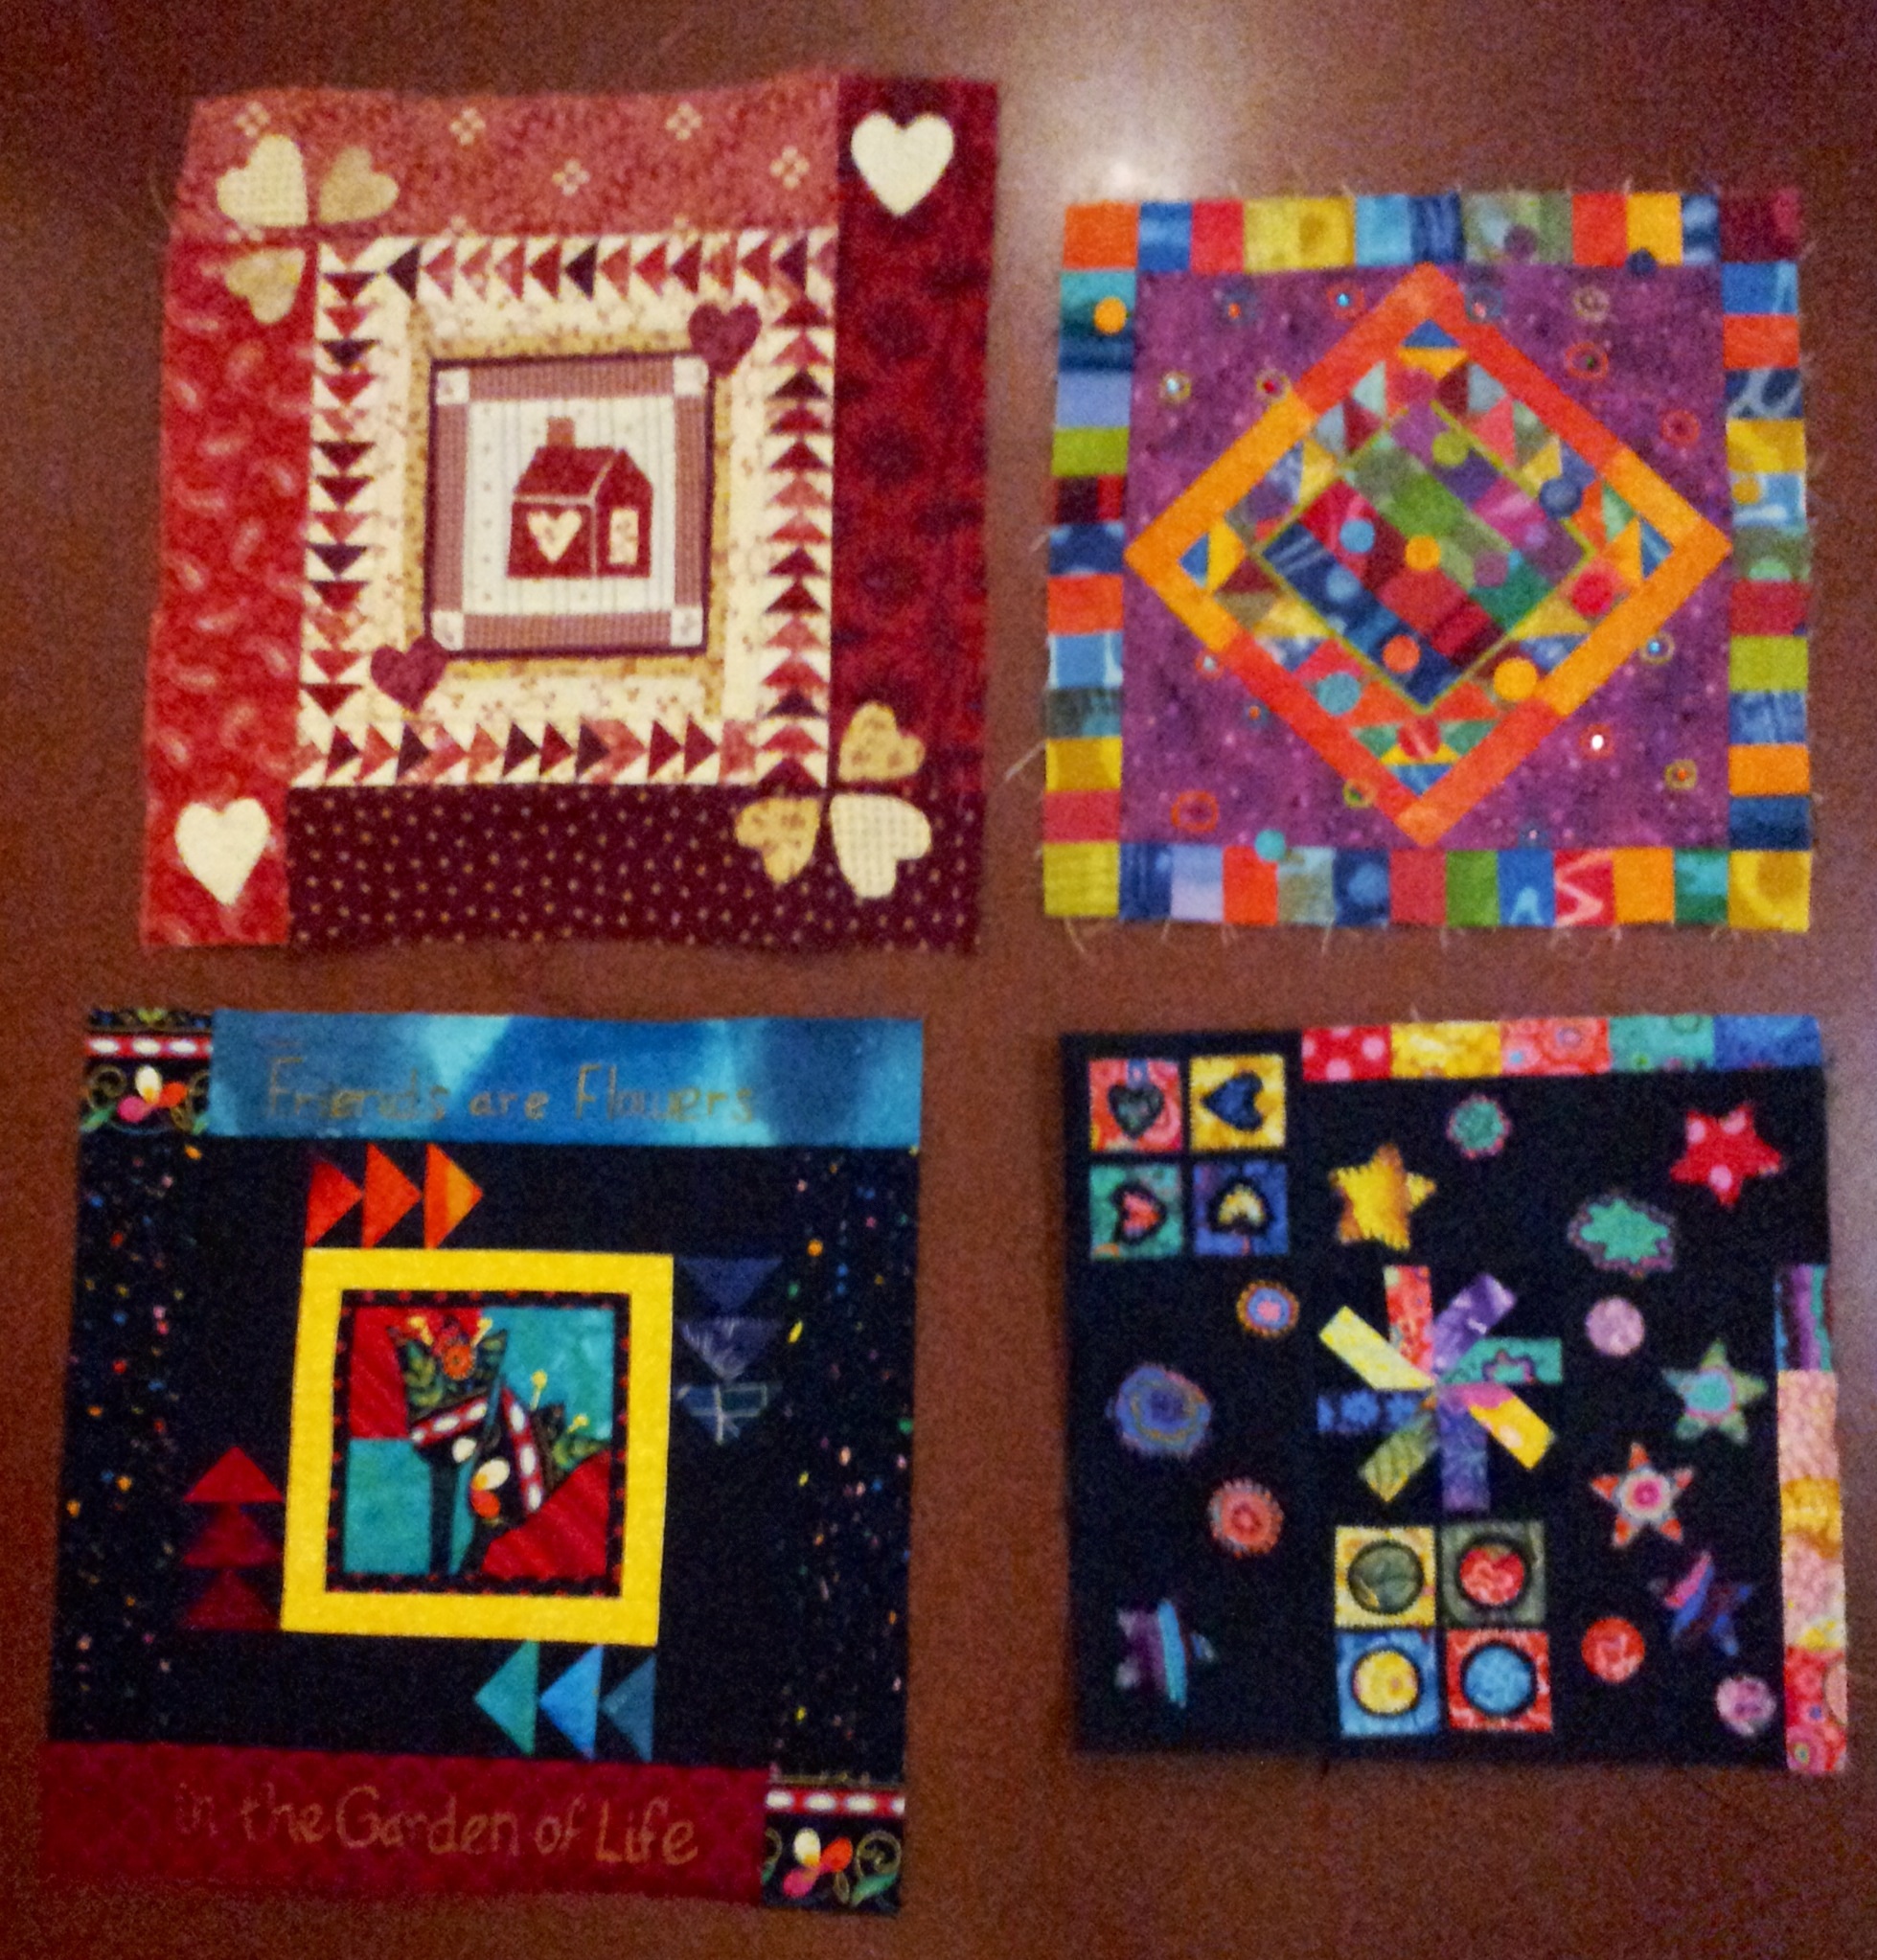
TP Mini Robins
WOW!!! I love the changes that happen! The influence of what others do/did effects what the next person does! I am so impressed! Nicely done Marcia, Christine and June!!!
…..so some tips in working in a robin group…
#1- Set some rules! It really helps to not be all over the place. (I was in another round robin several years ago and we had rules for each round.)
#2 – spread your creativity wings! (Someone in our group said she didn’t think she liked handwork, yet she did it on a couple here and enjoyed it!). You never know what new technique you might find you like. And if you do it on someone else’s it might be less threatening.
There are many different robins our guild has done, not only “round” robins. How about…
~ block robins
~ row robins
~ embellishment robins
Get a group of quilting friends together and make some plans! I highly recommend you add to what has happened before. Don’t put a bunch of bits in a box and have the owner put it all together later. I think the creativity and challenge comes in adding to what is already there.
Look at our simple blocks BEFORE they were passed and then AFTER they were done…WOW!
So, just in case you are wondering which rounds I did… The flying geese around the house, the outside squares and small appliqué circles on those squares of the top right and the simple bright inside borders around the flowers.
in quilting,
Debbie

Congratulations on your blogging success! Thank you for your time commitment to bring your blog to us to with all your great tips.