
Tuesday slipped right past me! I bring the tips a day late.
Thank you AQS Quilt Week Grand Rapids for a wonderful time last week! I gave many demos on Brilliant Bindings in the booth and had fun watching the reactions to the new Snuggle Tails! Laughter and smiles abound. In my class, “Become a Brilliant Binder”, we explored all the basics on making bindings and putting bindings on straight, curved and scalloped edges. A huge thanks to Elna sewing machines for providing the machines!
I love talking about bindings and how fabric choices can make a quilt. One of my favorite quilt bindings is the stripe I put on “Accuracy Does Madder”, my quilt in Barbara Chainey’s book Fast Quilts From Fat Quarters. I love how the binding framed the quilt without taking away from it. The stripe worked perfectly.

Accuracy Does Madder
~D. Wendt
The binding was sewn to the front and turned to the back. I stitched in the ditch on the front to secure the binding. Yes, you can see the stitching on the back. I am perfectly fine with that because in the book photo it looks hand sewn 🙂 !!
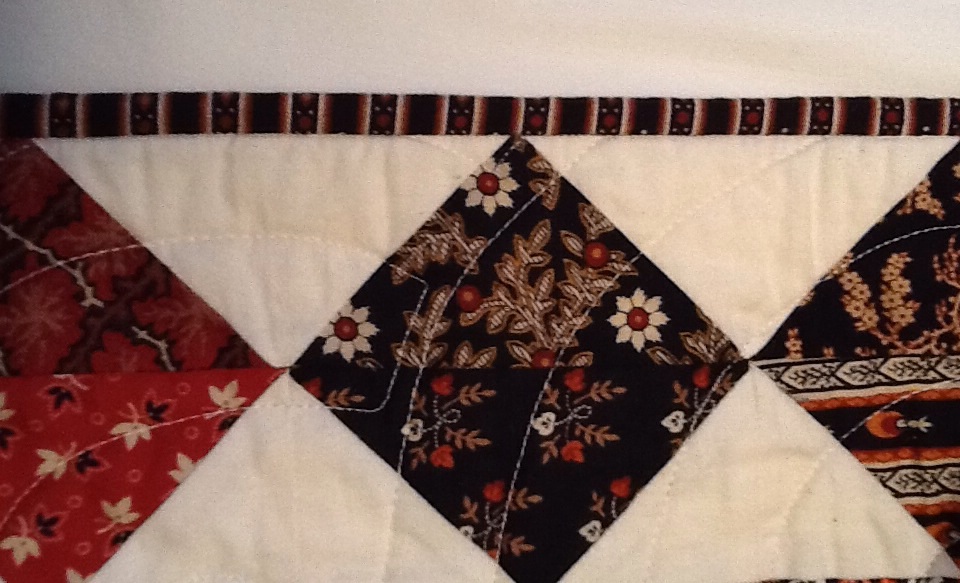
Accuracy Does Madder
~D. Wendt

Accuracy Does Madder
~D. Wendt
#1- whether you hand sew or machine sew a binding, execute it well!
For the quilt below, I cut the binding on the bias. The same fabric was used in the border but it looks different cut on the bias. By using a fabric in the quilt, it brings the inside out to the edge and helps focus back to the inside.
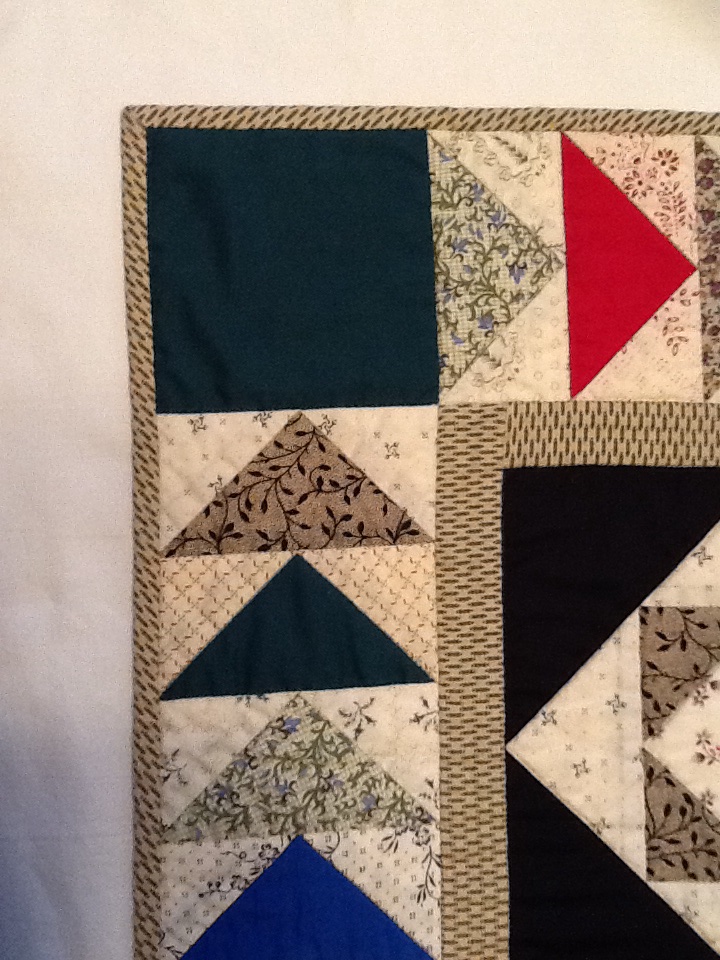
Bias binding
Both of the next two photos have a seam.
Can you see them?

Continuous binding seam

Continuous binding seam
#2- make continuous binding seams as invisible as possible!
in quilting,
Debbie
