
Last week I showed a photo of a quilt I made for my niece’s baby shower. I am psyched about being a Great Aunt!! And so happy for them!! I made two quilts. Yes, two! They had both pinned on Pinterest so I HAD to make them both! As you saw on the Cuddle/Flannel quilt last week it has a larger binding edge. (I’ll show the photo again below in case you missed it last week.)

Flannel Squares with wide Cuddle
back to front binding D.W.
This binding was done as a back to front binding. I have given instruction on this binding before but not this wide. The reason I am repeating and showing these instructions…I didn’t want to loose any of the width of the outside squares. That would have looked a bit “off”. So, my solution was to extend the batting beyond the pieced top edge. This gave the extra width I wanted for the binding and did not take away from the pieced front squares. I quilted into the batting and backing layer beyond the quilt top so it would have a similar feel and weight of the rest of the quilt. I used a number of basting lines to be sure I had enough batting and backing to make the Back to Front WIDE Binding. I will post the steps below!
Backing – Allow double the width of desired WIDE binding plus extra 1/4″ – 1/2″. For quilting, I loaded the Cuddle backing on my longarm but you can accomplish the same on a domestic machine.
Layer – Layer batting then quilt top, same as layering for any quilt. Where this technique will differ… make sure to allow for the extra batting width and backing on ALL four sides.
Quilting – I basted down the raw edge of the quilt top. I also basted a line 2″ beyond the top’s edge. When quilting, I extended my quilting design over the top edge into the exposed batting. This gives the back the same look all the way out to what will be the new outside edge of the back.
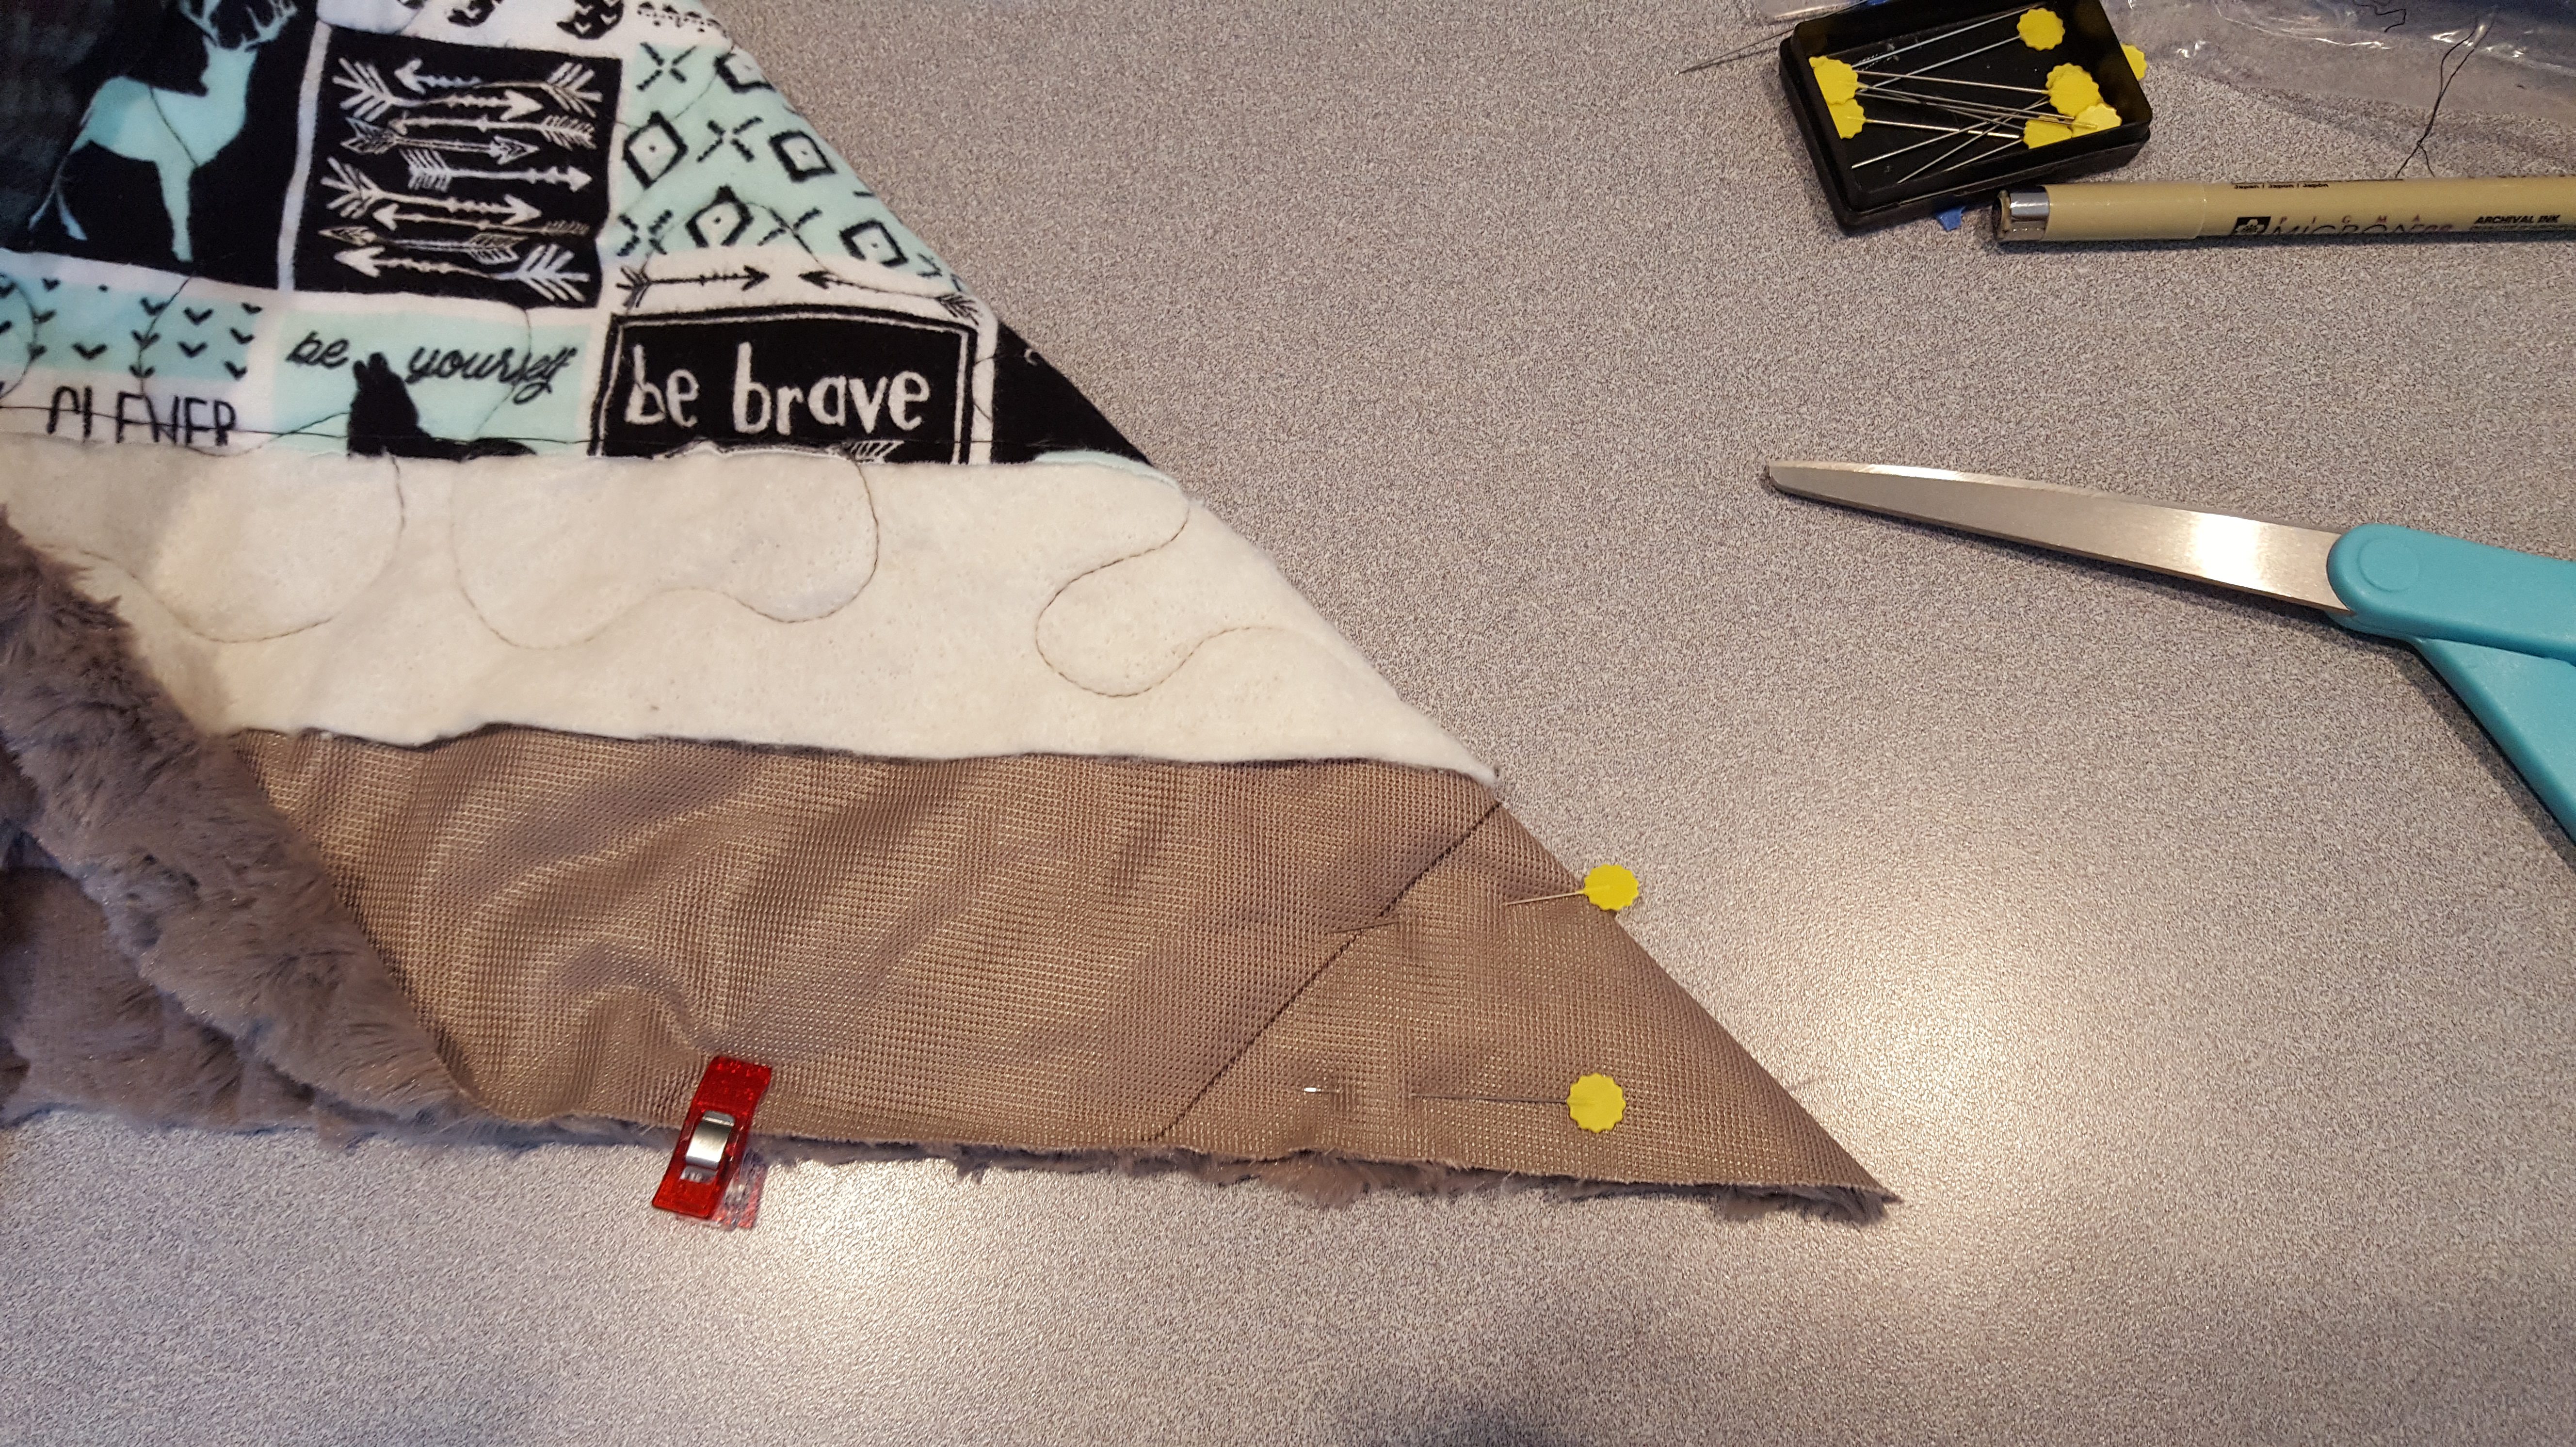
Trim – Trim batting just outside of the basting line you stitched 2″ beyond the top. Scissor cut the batting! You will need the backing fabric to extend even wider! Trim backing 2 1/4″ – 2 1/2″ beyond the trimmed batting edge.

Wide Cuddle B to F Binding
with extended batting D.W.
Bottom side batting trimmed with scissors to basting line. (backing still to be trimmed to 4 1/2″ from quilt top edge.)
Side edge of Cuddle backing rotary cut to 2 1/2″ from basting line on batting for a total of 4 1/2″ from quilt top outside edge. (batting still needs to be trimmed to basting line)
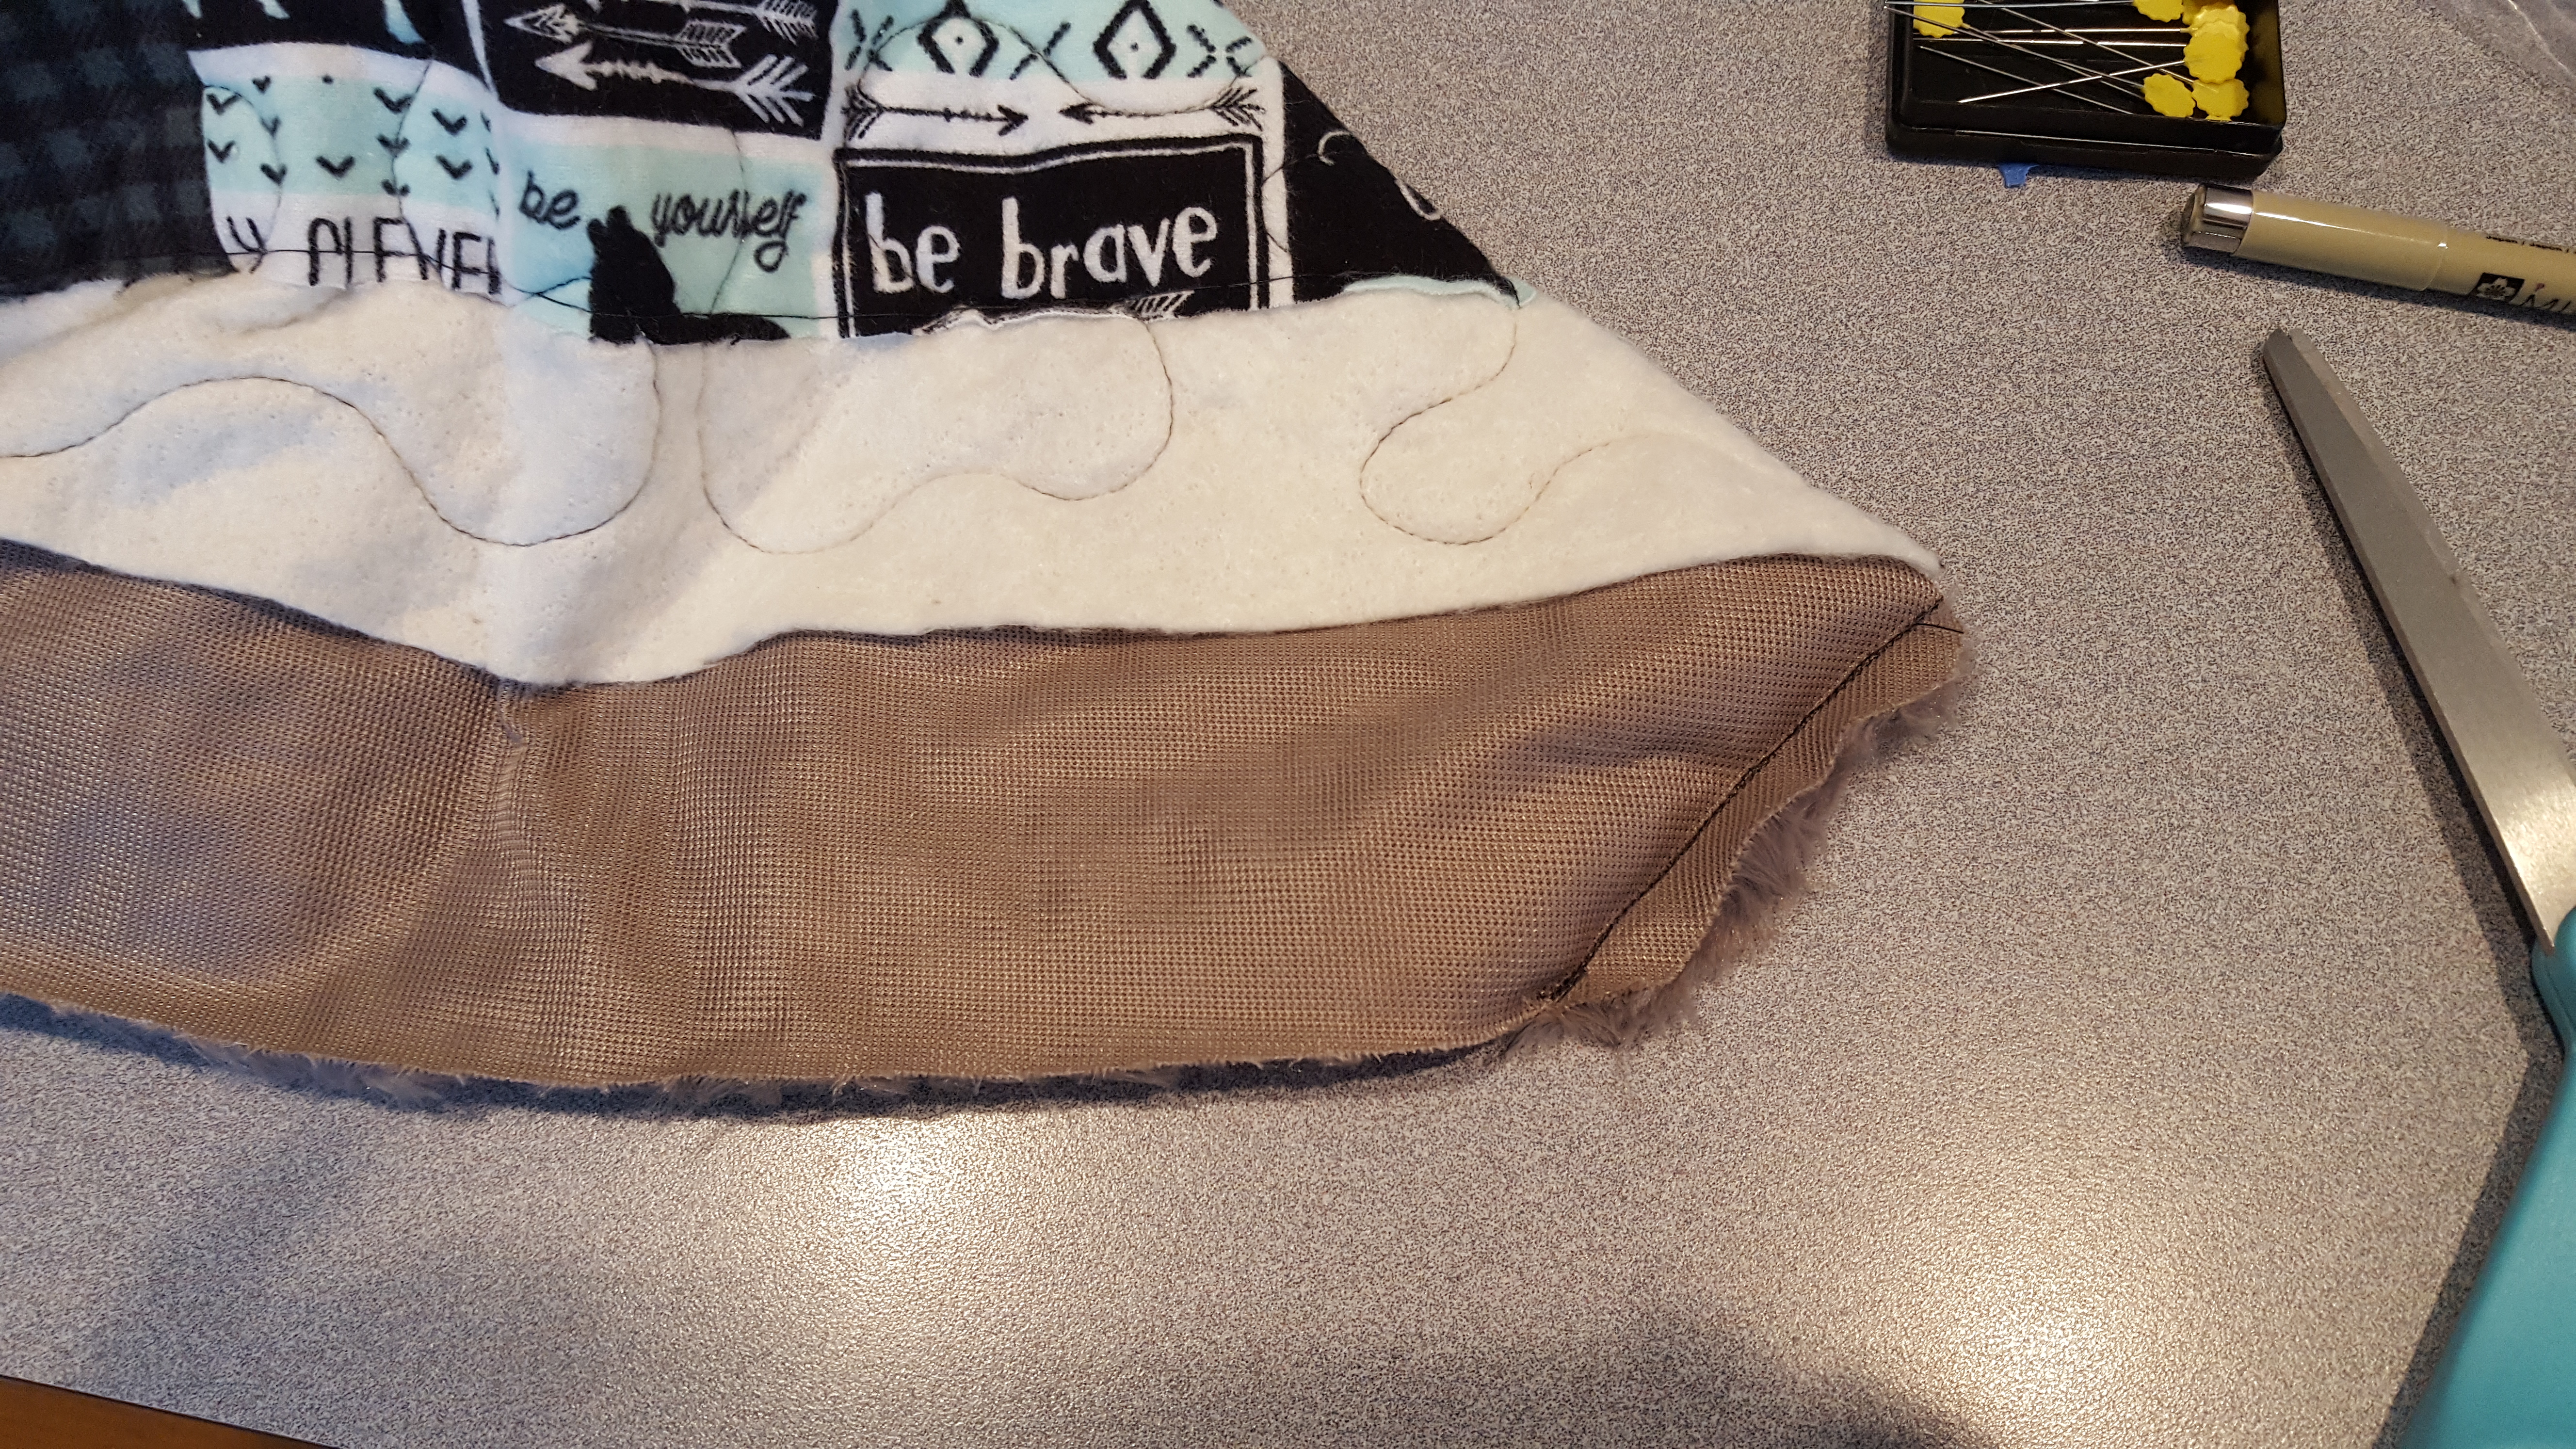
Back to Front Binding (B to F) – Before proceeding, be sure the backing will turn to the front covering the extended batting and at least 1/4″-1/2″ of the outside edge of the quilt top. (If you did not allow enough backing, you can trim down some of the batting.)
See photos for back to front binding finishing steps or refer to my previous posts on the technique.
All batting trimmed, basting removed and folded for B to F binding corner seam.
Corner seam sewn and trimmed
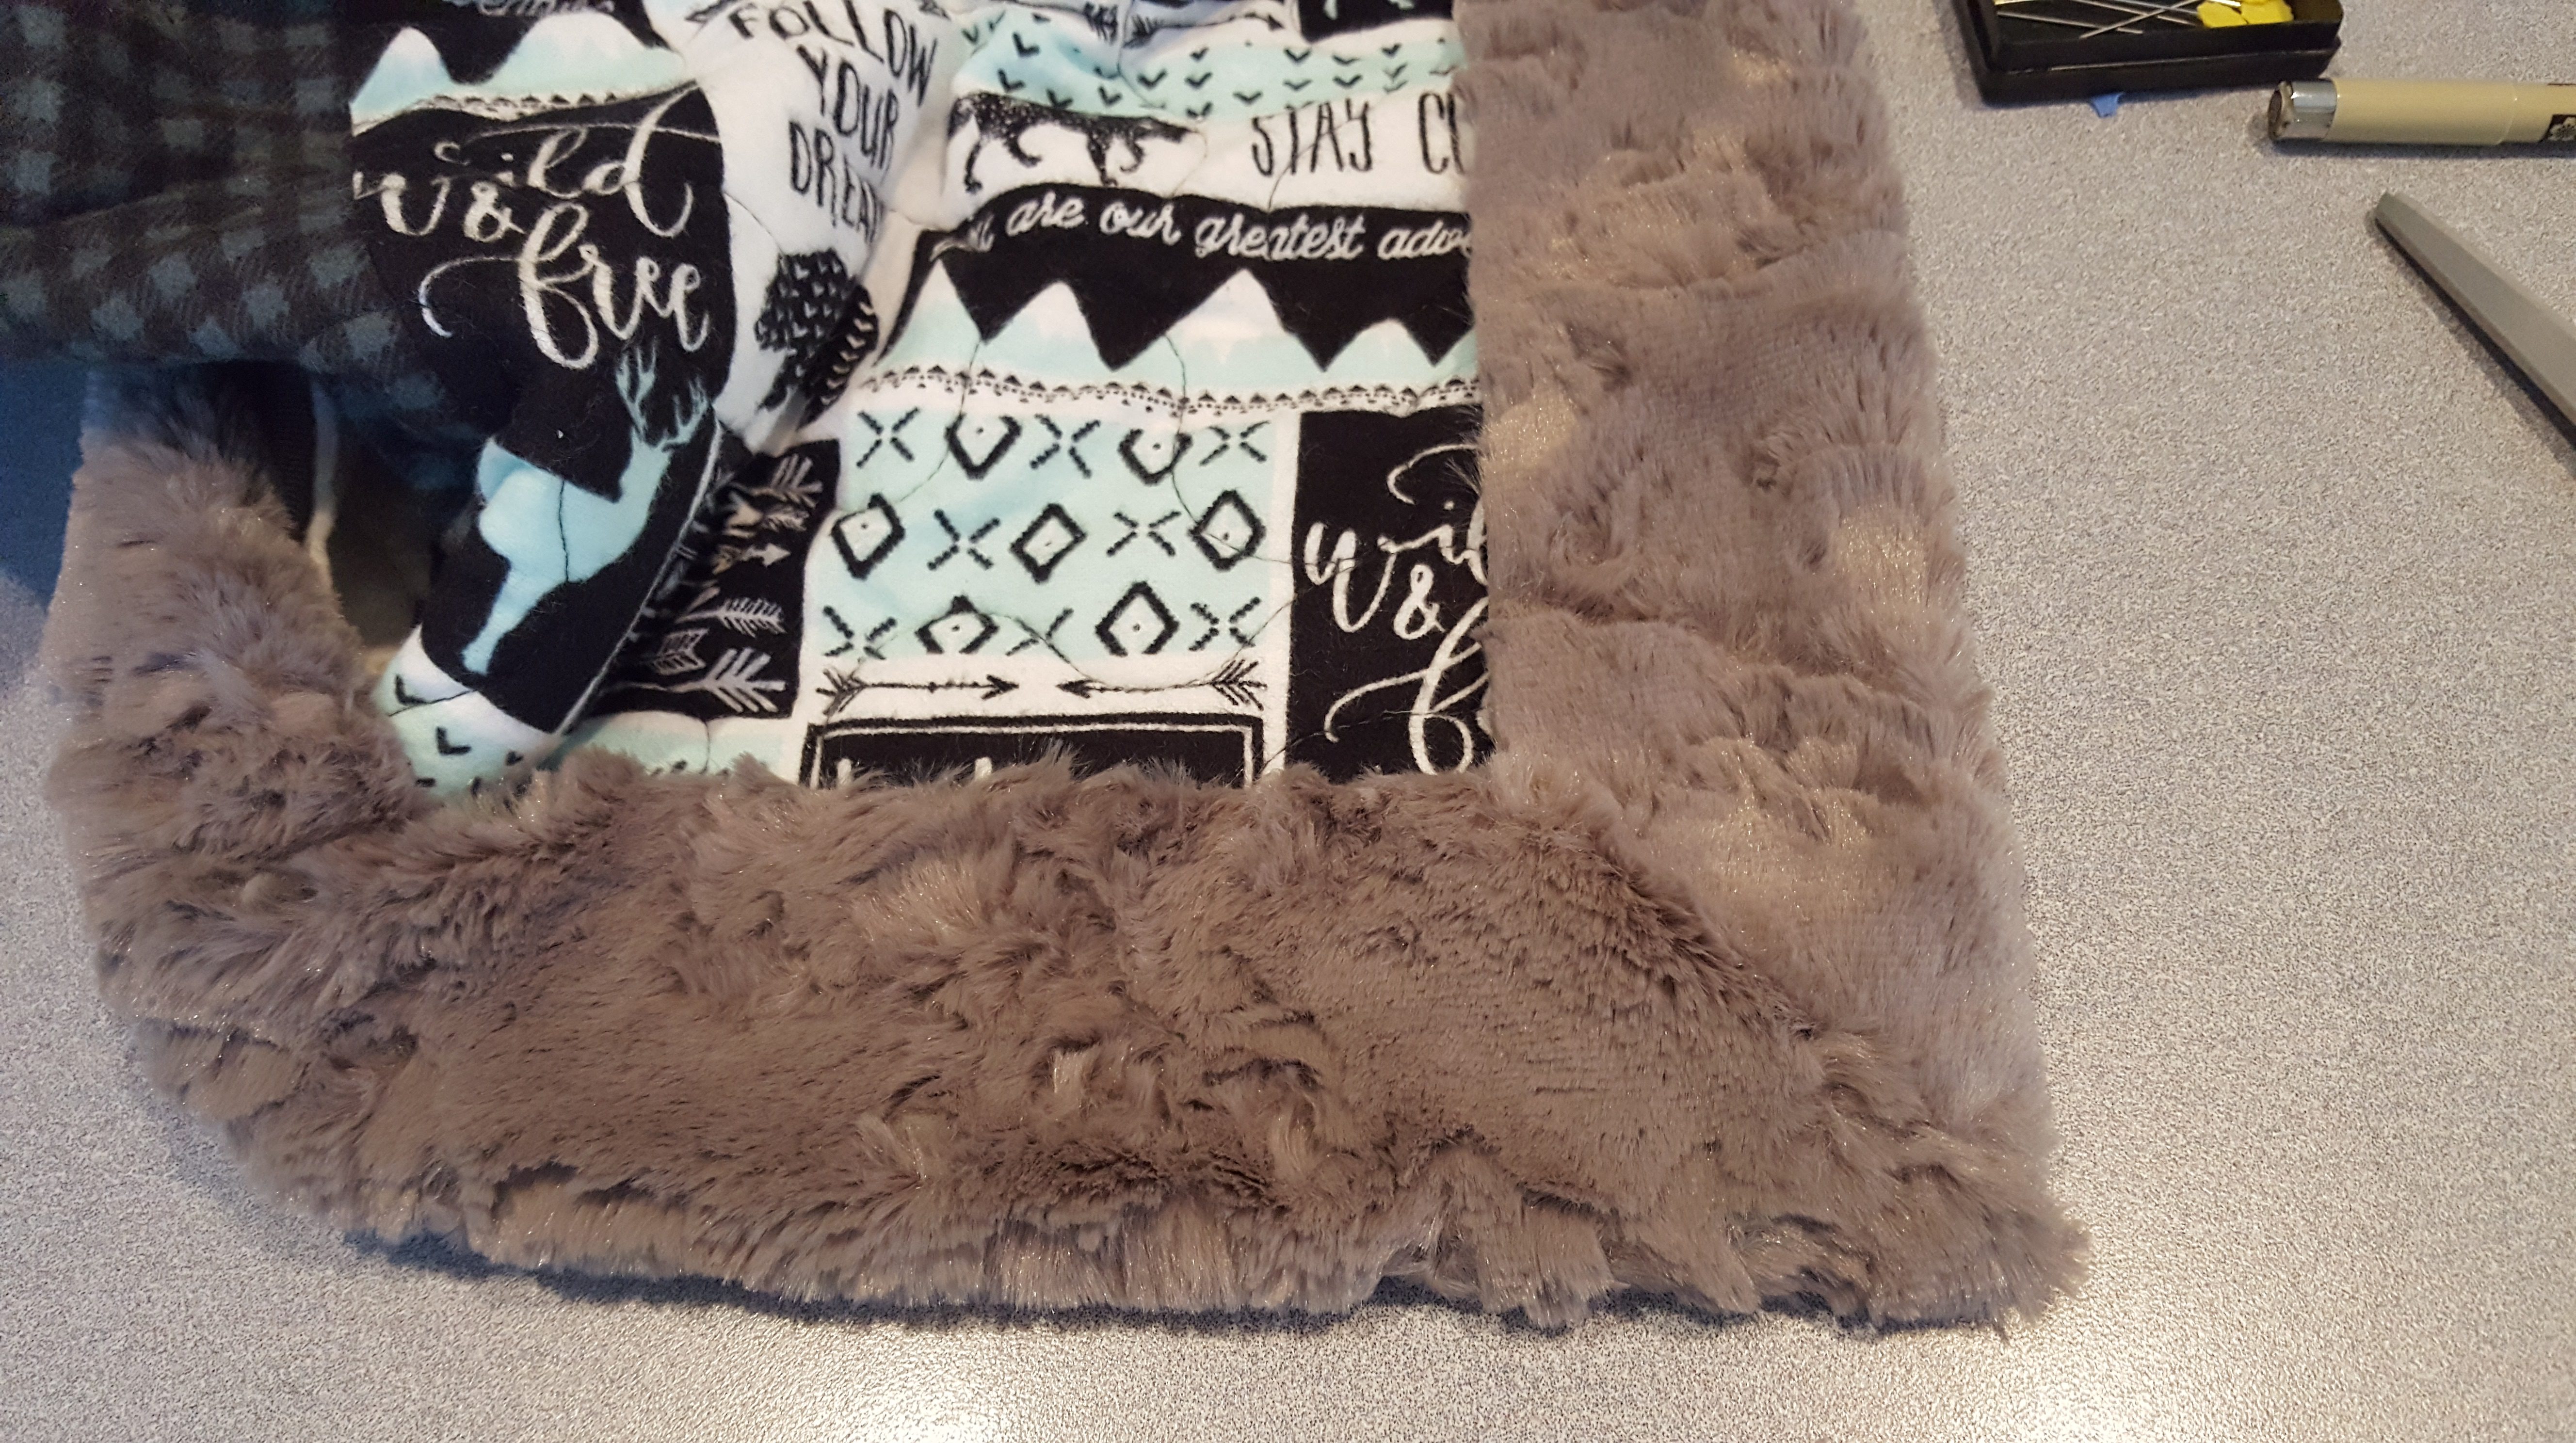
Wide B to F binding turned
Ready to stitch in place
TaDa!!! A wide back to front binding without loosing any of the width of the outside edge of the quilt top! This technique can be done with “regular” cottons as well. I would recommend your turn a hem in the backing edge so you do not have a raw edge. It is o.k. to have a raw edge with Cuddle, it won’t fray.
#1 – A WIDE Back to Front Binding can be added without having to add extra width to the quilt top.
#2 – By following the tips in the above instructions and photos, it is an easy edge for a Cuddle Baby quilt!!
in quilting,
Debbie
