
Thank you for following the Designers Quilt Show! We had a great week of seeing 28 designers. It is always fun for me to see what other designers are doing and their unique designs. I hope you had fun, I know I did.
I hope you all had a wonderful socially distancing Passover and Easter. It was very quiet at my house but nice to have a reflective day on what we are thankful for in our lives. One of my guild friends shared her Easter table decked out with her Hexie placemats from my class on March 7th. They are elegant and beautiful! Thank you Suzanne M. for sharing your fabulous finish!
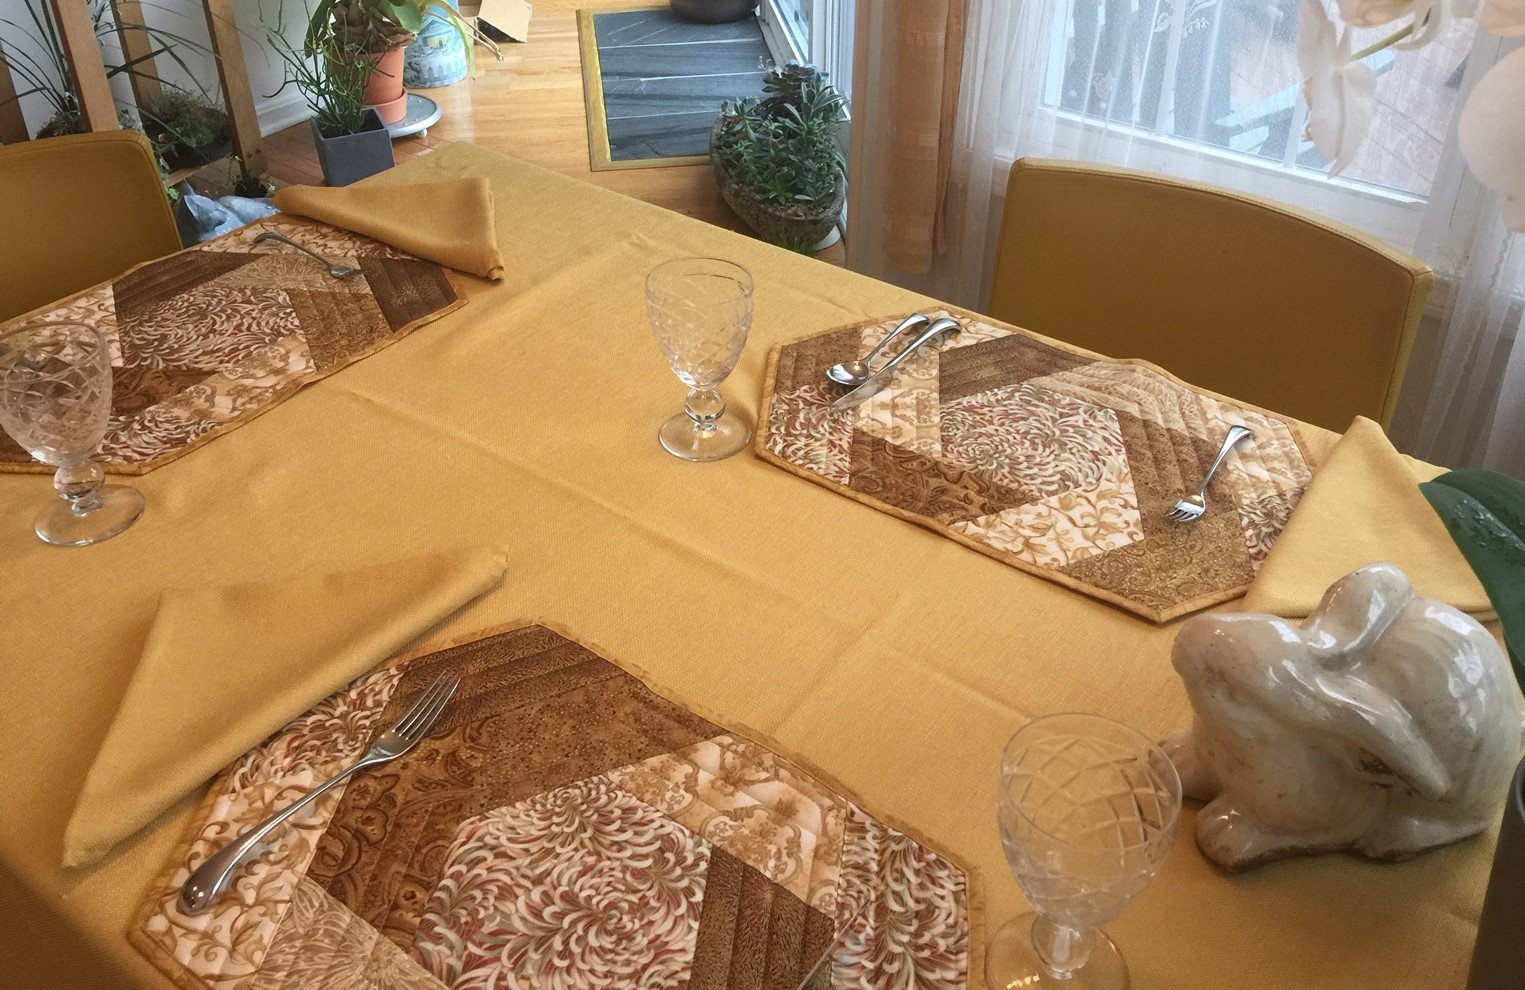
Hexie placemats by Suzanne M.
This reminds me, I now have the Hexie Placemat and Mug Rug pattern on my website. You can find it here. These are so fun and easy to make! The Mug Rug was featured last week with the Crispy Oatmeal Cookies recipe. The Placemats are made with Hex-a-ma-jig and the best size for the Mug Rug uses Hex-a-ma-jig Jr.
Back to front binding instructions are now included in the pattern. (Send me an email if you previously purchased the placemat pattern and want the Back to Front Binding information.) I will give more then two tips today. I’ll show a few key areas when making back to front bindings on Placemats or Mug Rugs with their “odd angle” corners.
#1 – Cut backing 2 times the width of desired binding from the outside top edge. Fold in half and press crease.
#2 – Following the outside edge of your placemat, draw a line extending onto the wrong side of the backing fabric, in both directions at corner. Mark pressed crease across drawn lines.

Extend edge with lines onto
wrong side of backing. Mark fold with cross lines.
#3 – Fold backing wrong sides together from corner and stitch on line from corner point to cross lines. Trim seam.
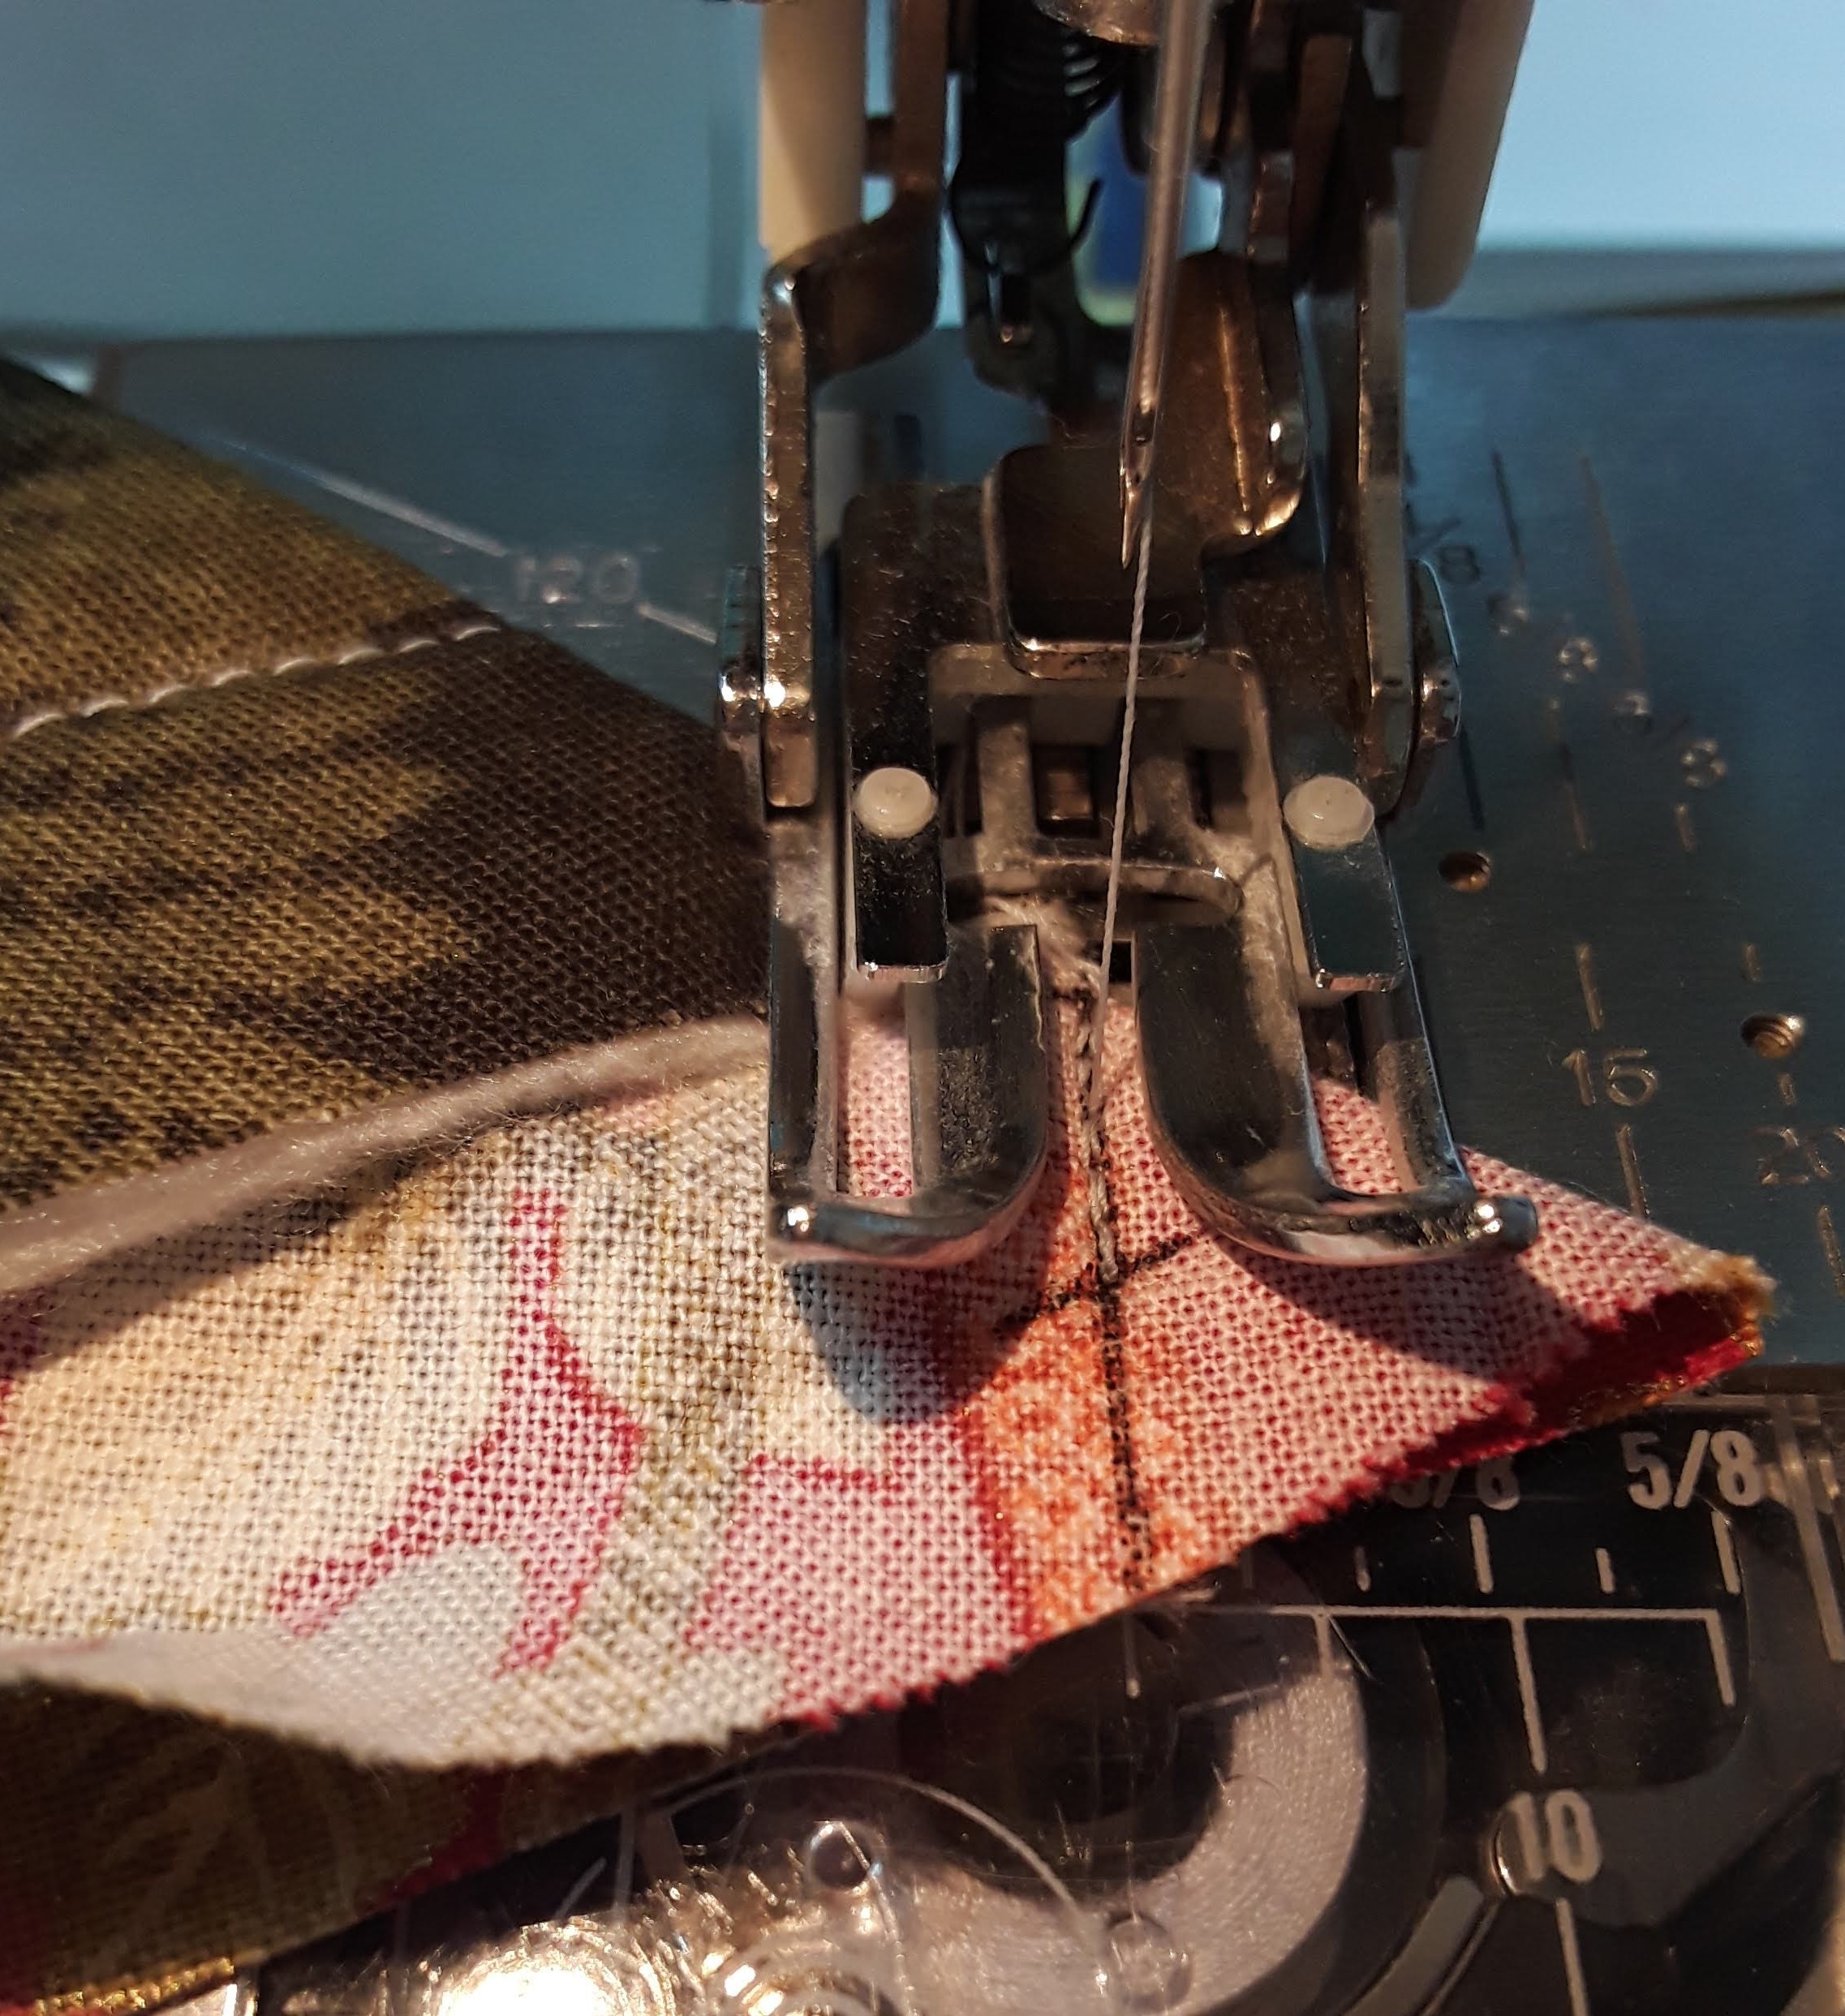
Stitch from corner on drawn line to cross lines.

Trim seam.
#4 – Turn binding right side out pushing out corner and tucking in raw edges. Top stitch in place.

Turn binding right side out.
Poking out corner.
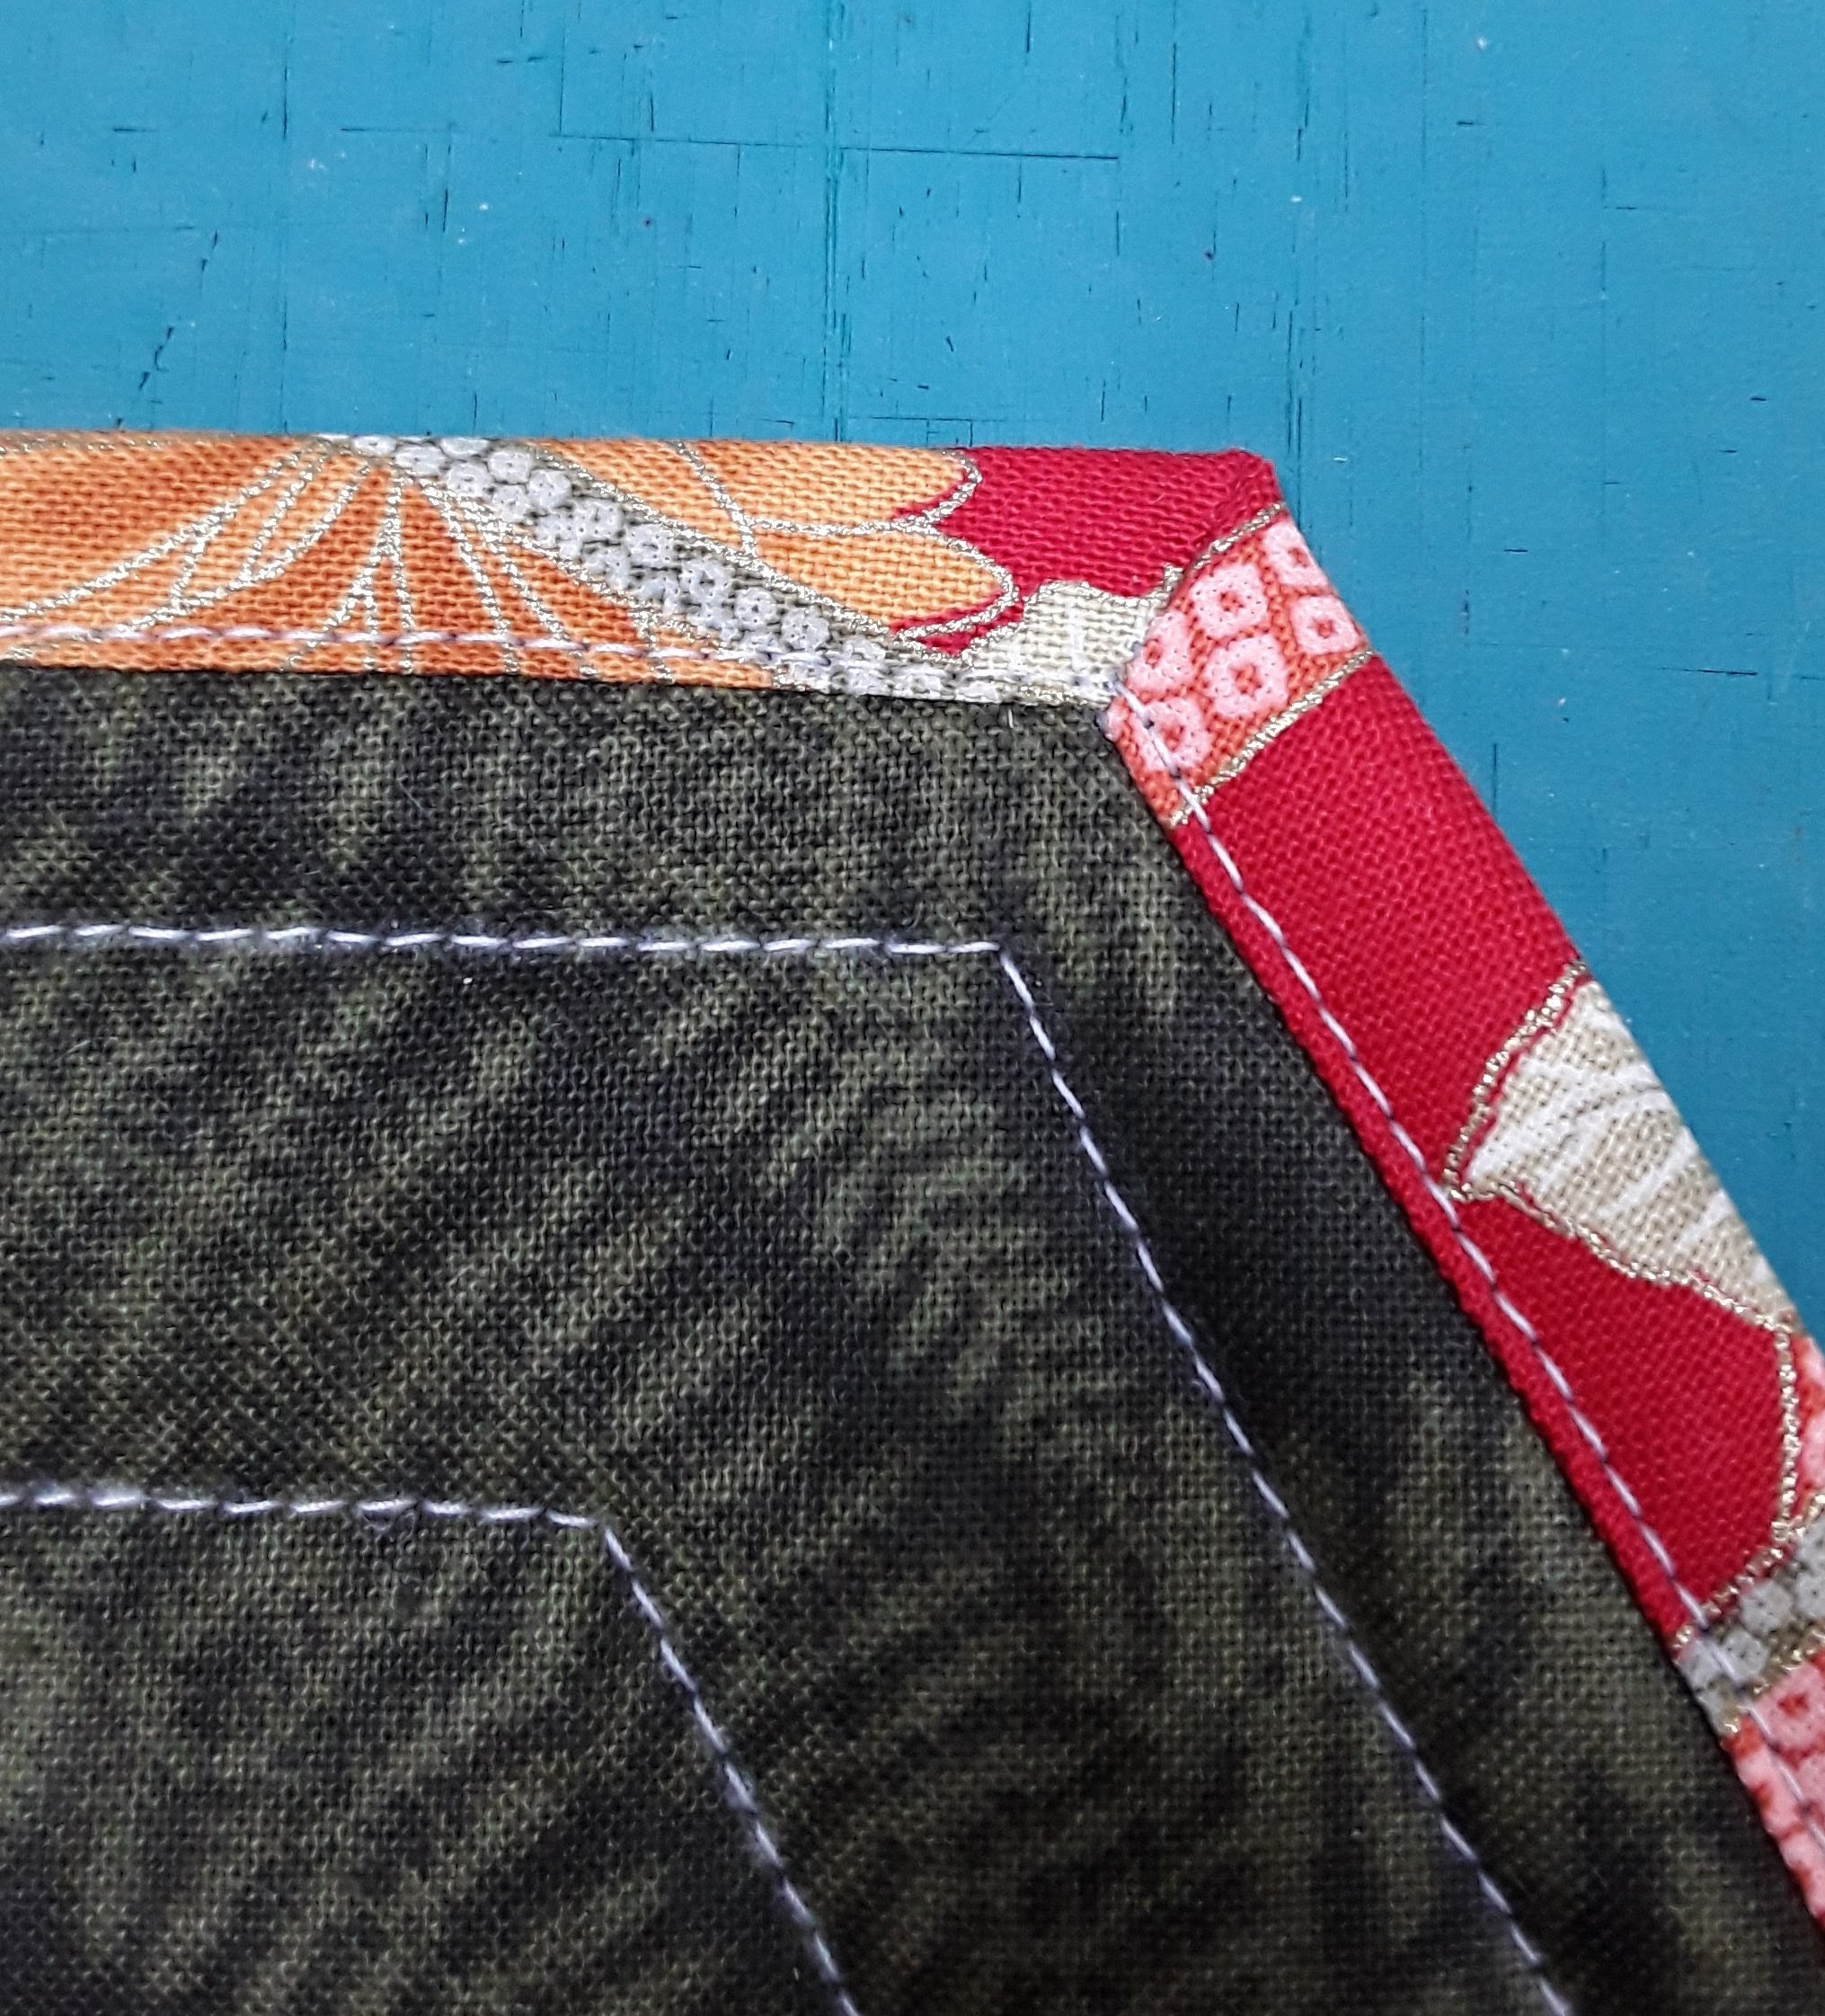
Top stitch along binding edge.
Ta da! A beautiful finish for placemat and mug rugs.
in quilting,
Debbie
