Looks like REST is now enforced, not an option! This is my hand/wrist/forearm. UGG! I think a lot of cutting and carrying a carryon got it overstressed and resulted in an achy wrist and pain, lots of pain. I gave in today, after a lot of ice and doing nothing for two days, urgent care put me in this brace. Bones are good but next up, a call to a hand specialist. I need to find out what is happening!
I can’t quilt, cut or pick up anything. I can’t even hold anything to do handwork. So, typing one handed is the new task. I’m not good at sitting but have to take this rest. Lessons/Tips in this
#1 – Take breaks when cutting! Cutting too long only aggravates those muscles you are using. The repetitive motions and pressure on cutting templates and rulers can cause unwanted damage.
#2 – Vary activities. I’ve always said to have your iron away from your sewing machine. Get up and move! Now, I need to cut some, stop, sew some, stop, and so on!
I’m learning the hard way….. 38 years of quilting just snuck up on me.
The Blackstone Valley Heritage Quilters Challenge Reveal was last week. I was the chair for the Challenge. The Challenge involved reducing our guild’s Library of books. We have limited space to storing them and they were not being used as much as they had in previous years. We decided to forgo keeping a Library for the guild moving forward. Sooooo, every guild member was given a quilting book from our Library in a black plastic bag, no peeking. We even had a guest take a book! They could exchange the book with another member or with the another books in a black bag, BUT they could NOT give it back. If they choose to not take the Challenge they were asked to recycle the book or give it away (keeping it from the trash!) Other rules included – use the book for inspiration of colors to make a quilt, make a quilt using a pattern from the book or use a technique from their book on a quilt. I am happy to report we had some wonderful finishes. (Mine is in progress and will not be revealed until next month….two guild challenges….one quilt!)
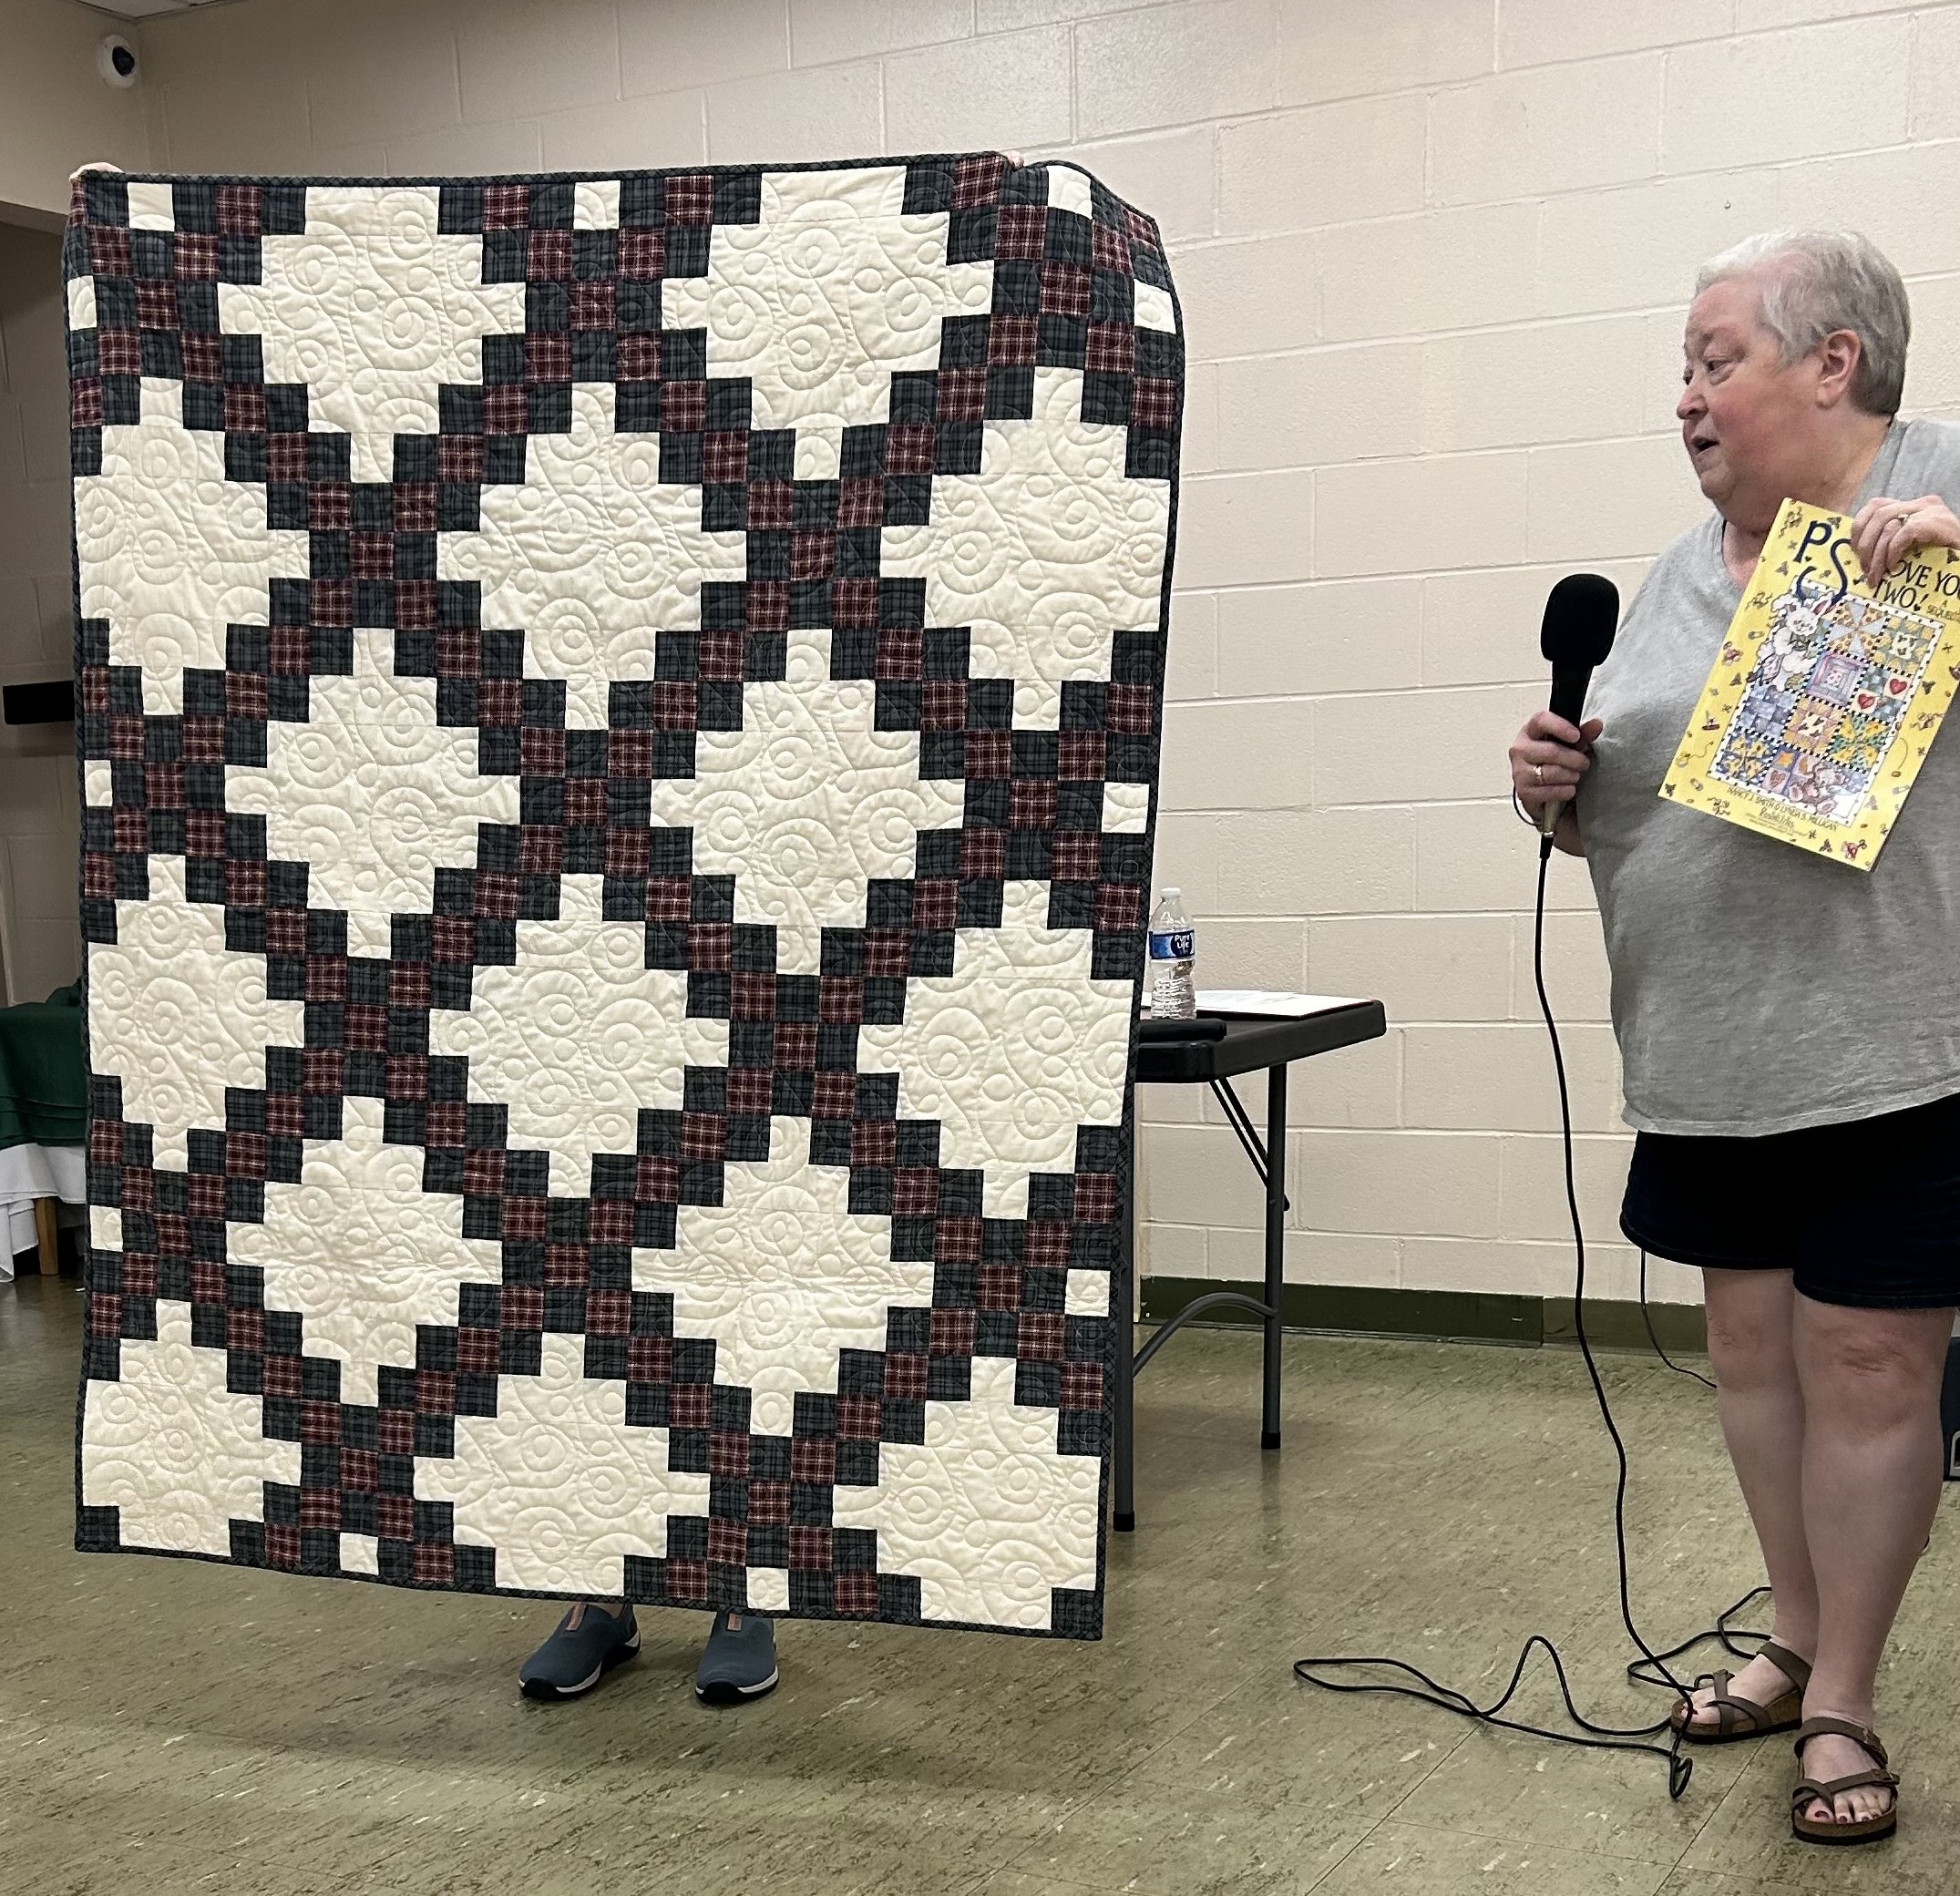
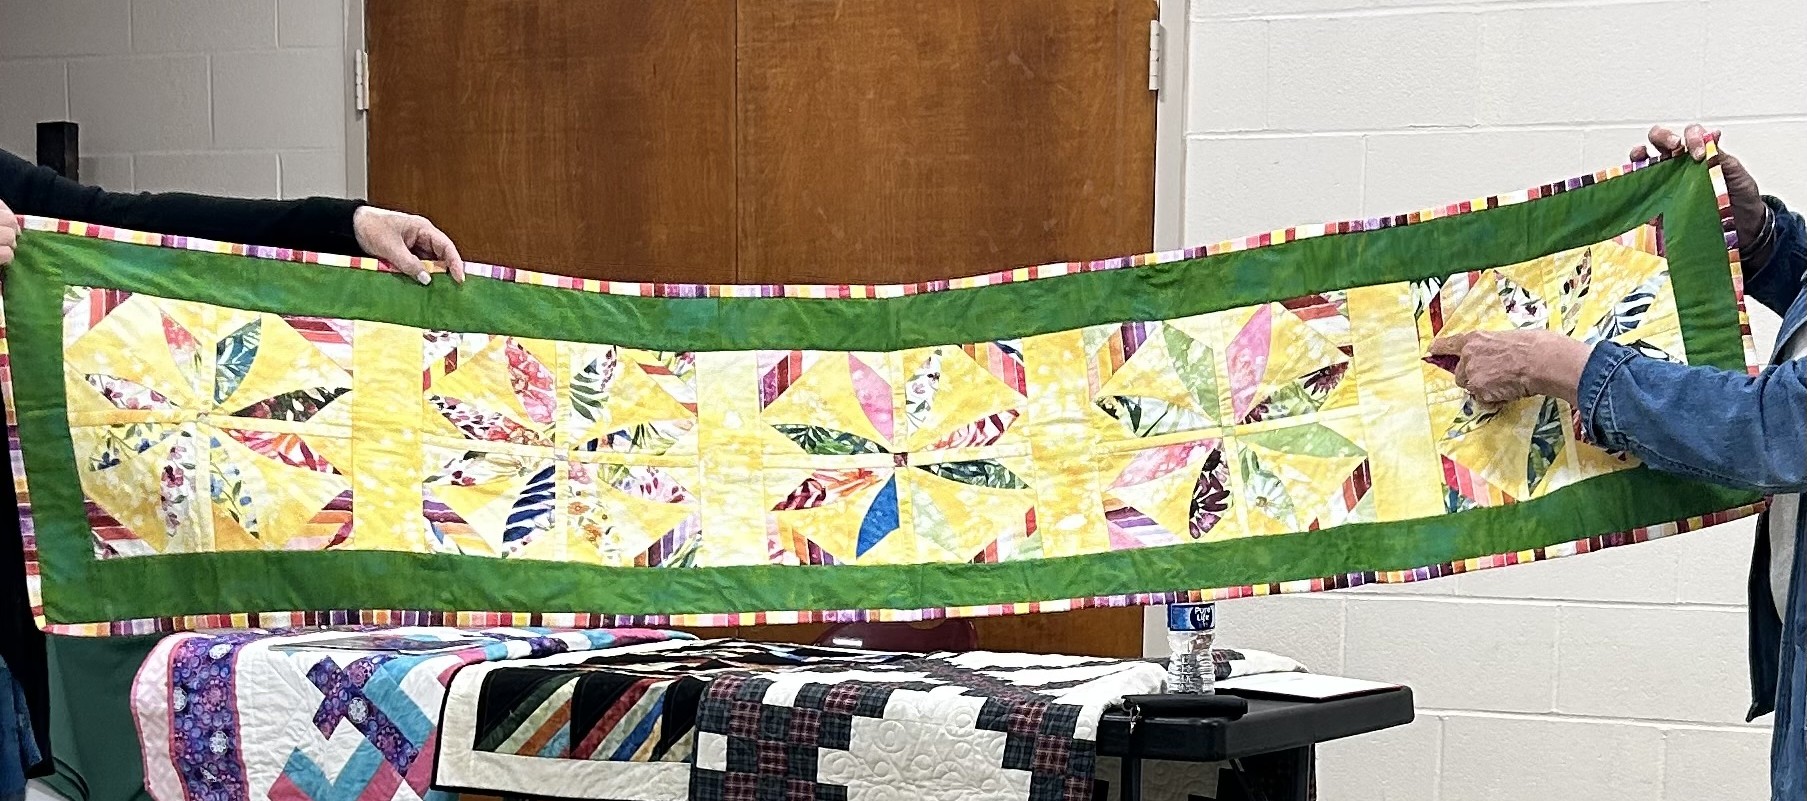
Here are the results!!! I’ll try to remember the books or a little about each quilt. I didn’t take notes since I was the quilt holder 😉 Note the legs and feet behind the quilts.
Lori Lisak’s Sunshine and Shadows from a beginning quilter skills book.
Gail Dodd’s Log Cabin from Quiltmaker’s Gift (her first log cabin and first time using jelly roll strips!)
Diane Zayonc’s quilt with a purple focus fabric for a new baby named Violet!
Nancy Bisceglia’s quilt using only fabrics she had on hand!
Priscilla Mathurin’s quilt from P.S. I Love You (she found she already had the book at home but decided to keep it anyway!)
Lucille Harper’s quilt. She learned how to do a mitered border to finish her Block of the Month quilt from last year!
Karen Malo’s table runner from a book on applique and using templates. Her daughter has already laid claim to it!
Ta Da!!! They ALL did a great job! I’m so happy they took the Challenge. Hopefully we will see more after the summer break.
Tips to do when you are a member of a guild or just for yourself…
#1 – TAKE the Challenge.
#2- Look through “old” books. You might be surprised how you can stretch your knowledge and learn or re-discover a technique!
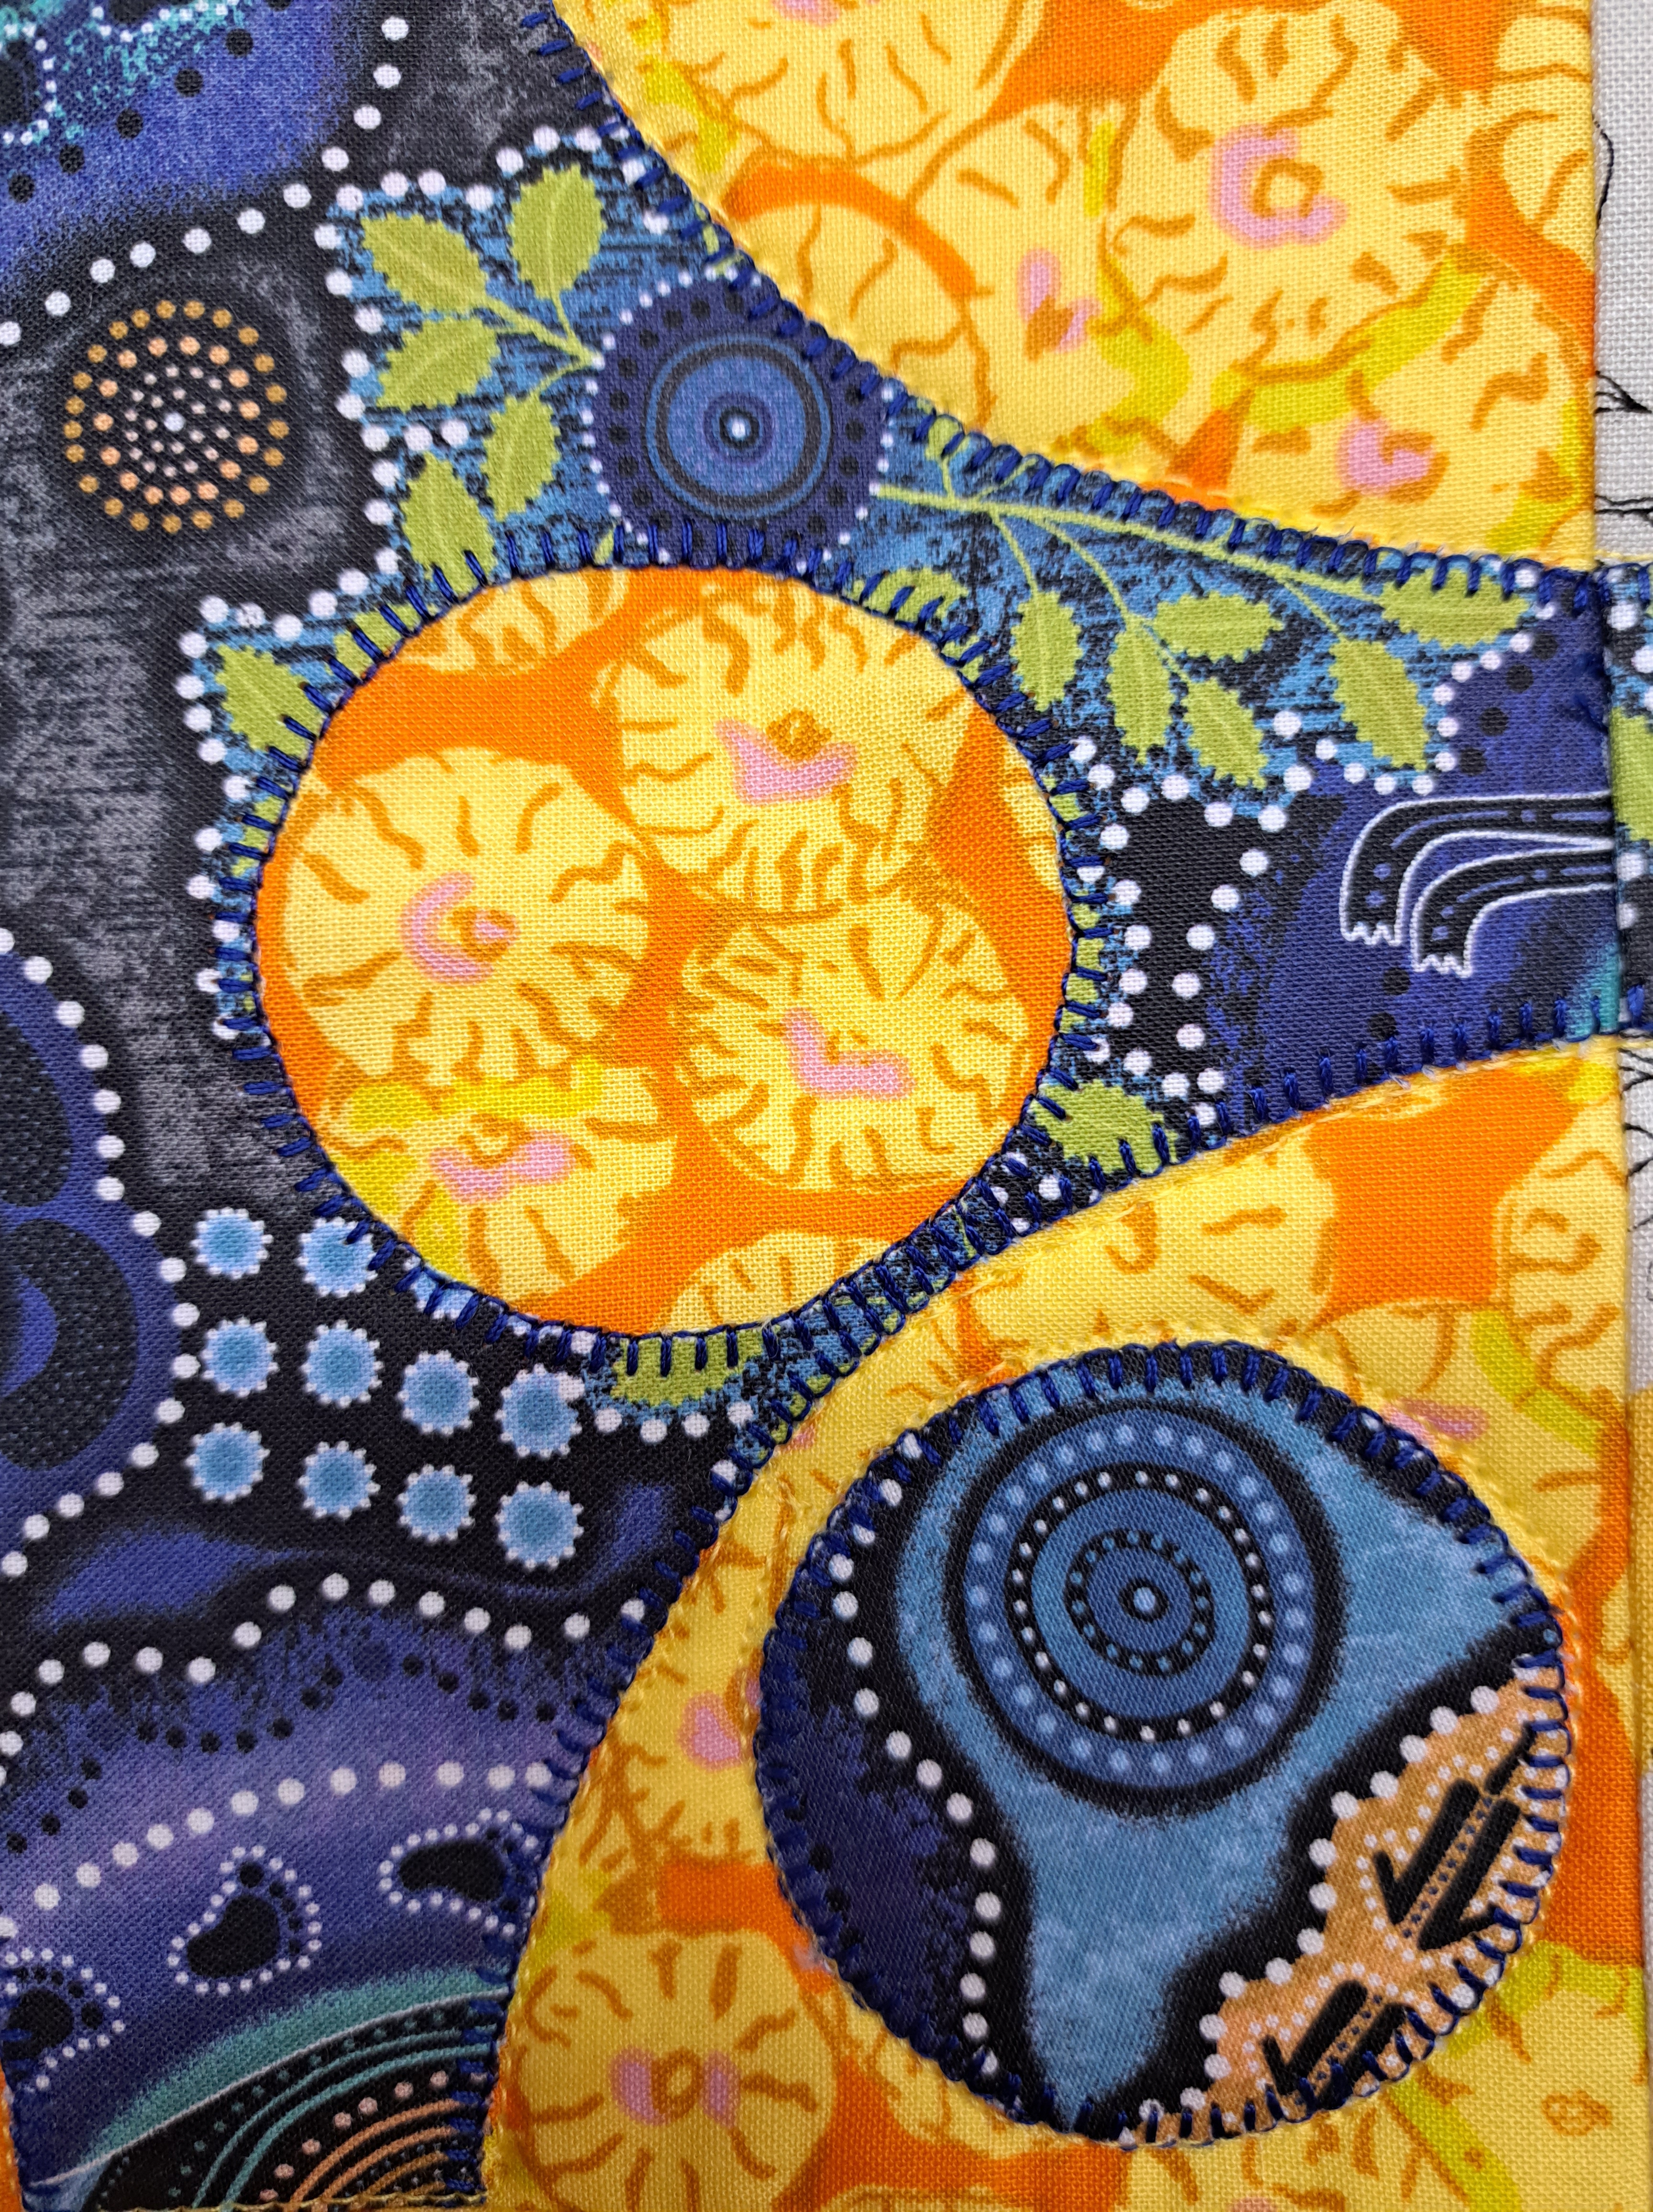
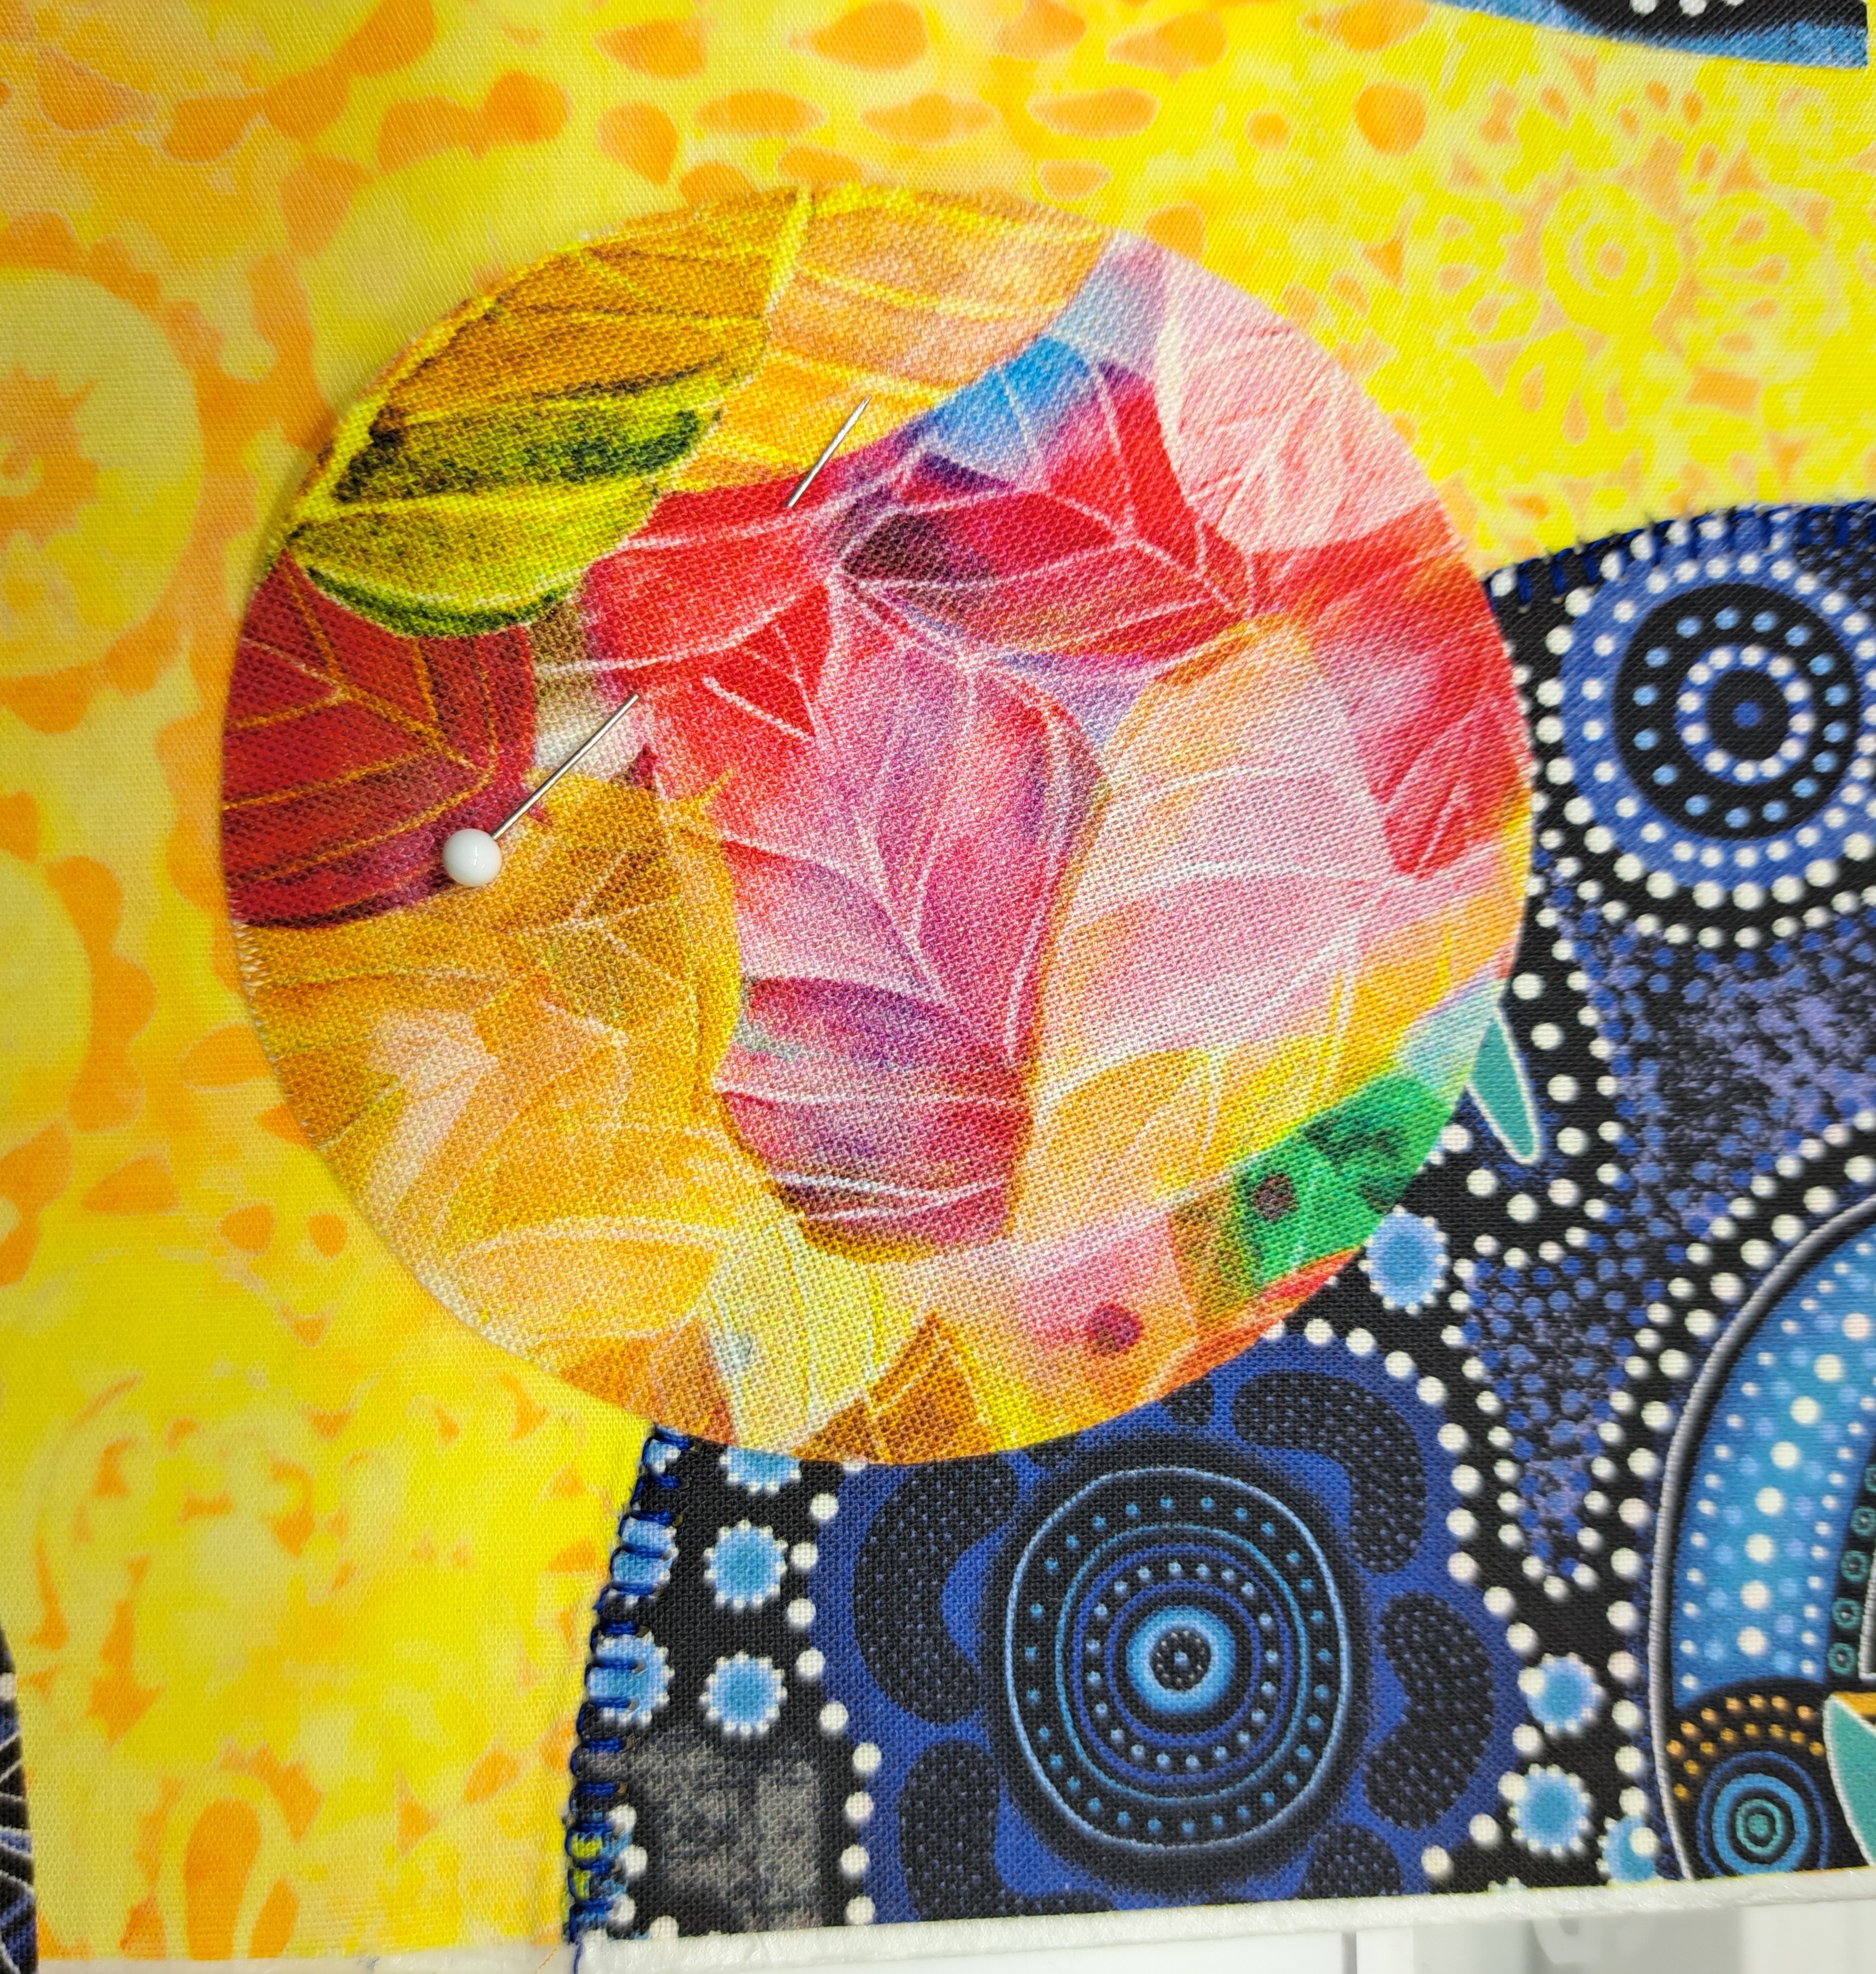
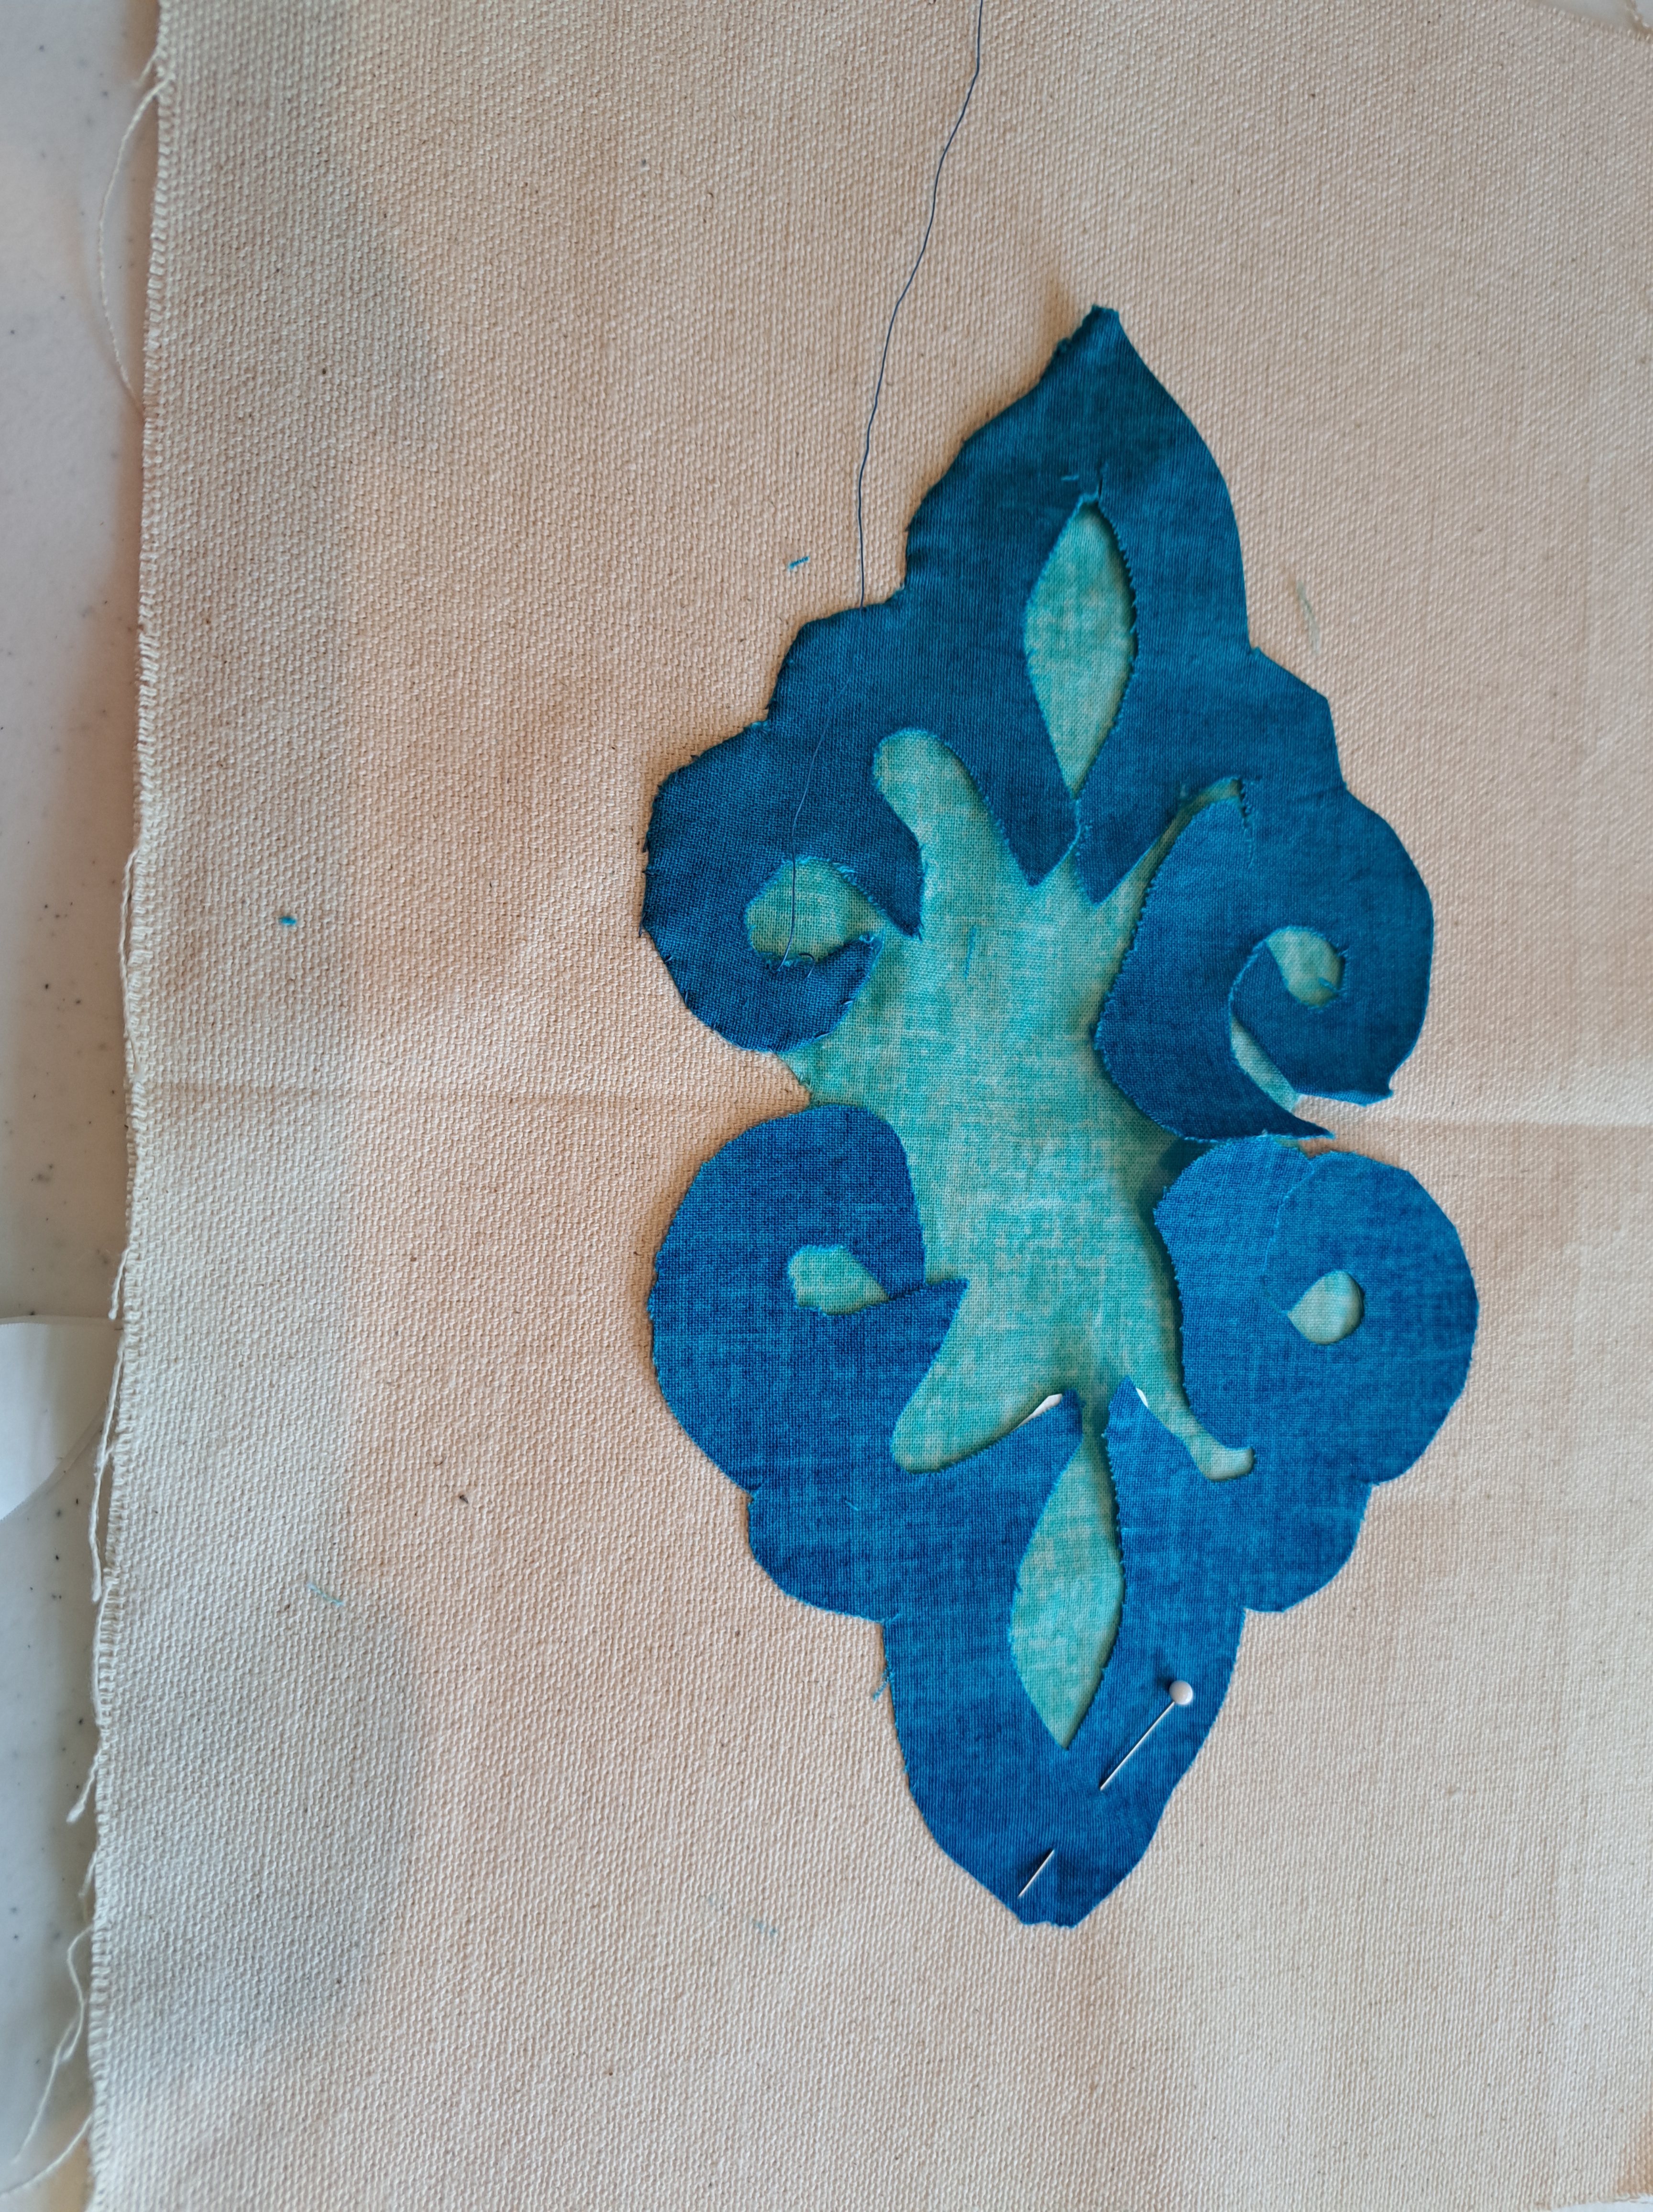
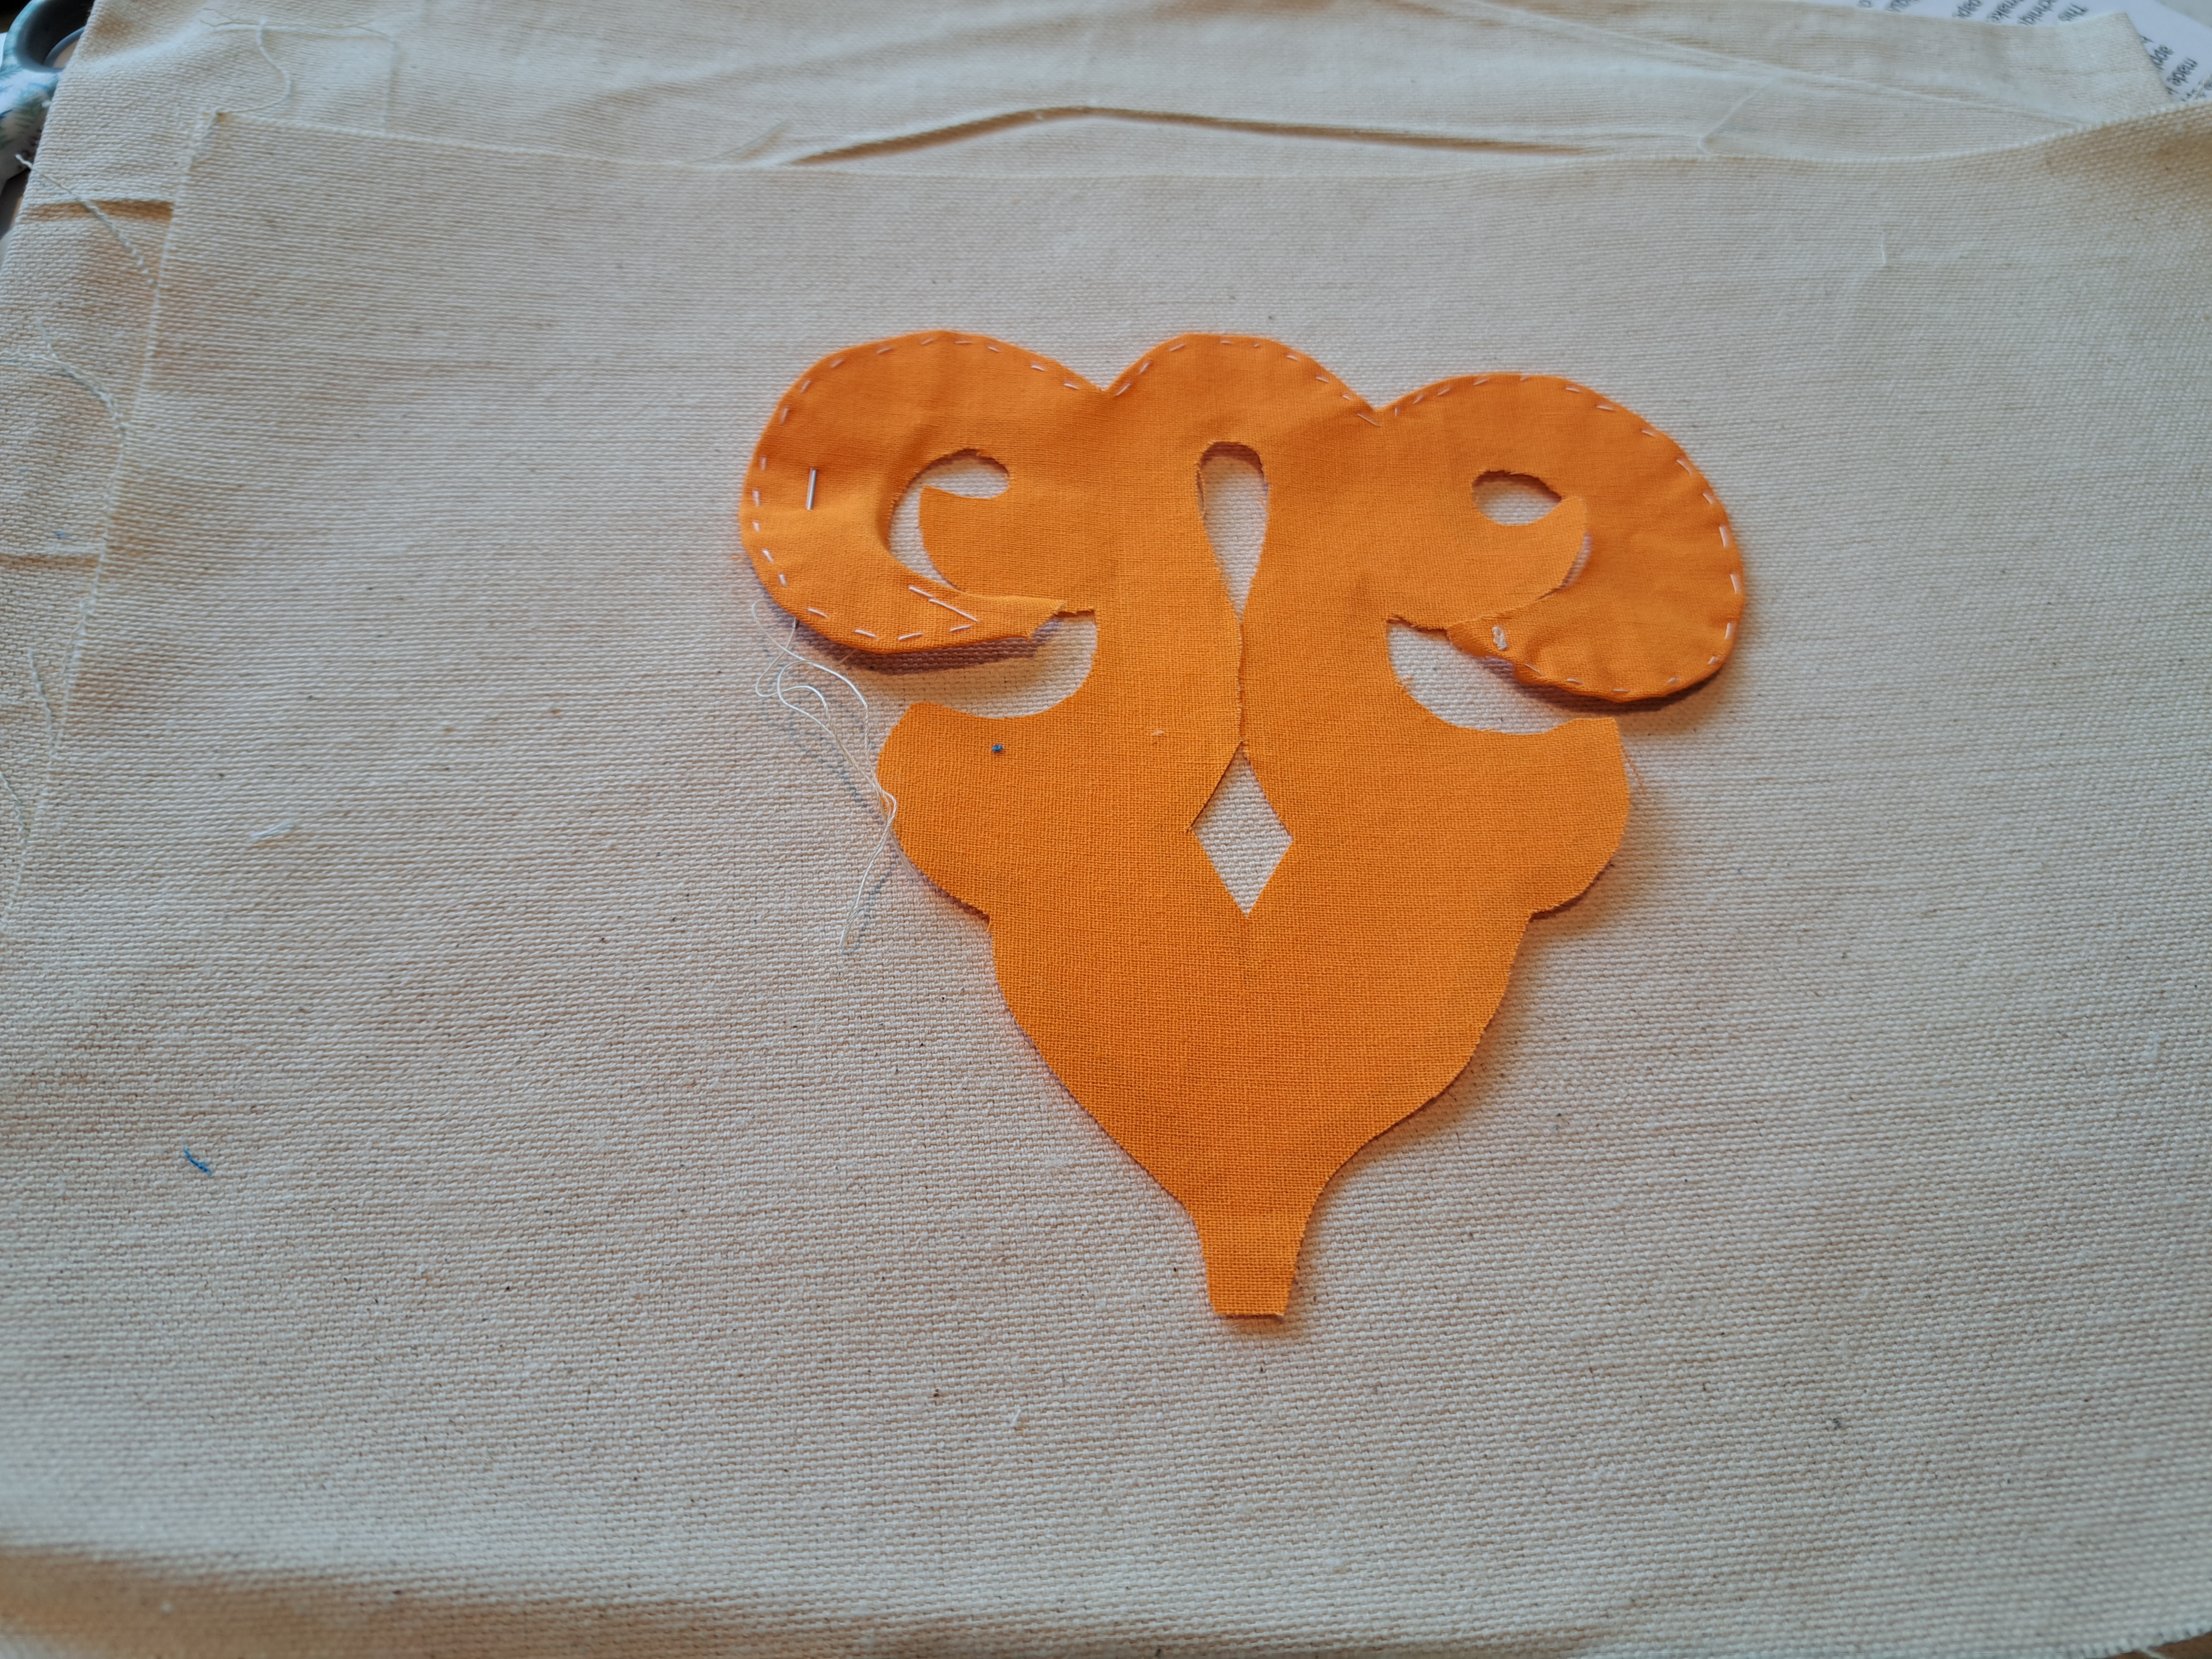
Looking back to a couple weeks ago to the machine applique post, I want to revisit the technique I used. I took a shape and cut it out of another shape. A circle, cut out of the middle of another shape. Both can be used!! Shown below. The “inside edges” are appliqued with a buttonhole stitch. The circle that was cut out was appliqued down in another spot with the “outside edges” stitched down with a buttonhole stitch. The photo below shows an inside circle and a cut out circle. The circle did not come from that particular spot, but I like that it shows both so close together.
The next photos are of a circle cut out of a square. The cutout circle was fused to the same size square. The square that had the circled removed has a smaller square fused to the back. It fills the “hole” where the circle was and is a great use of fabric, no waste! The pieces below were cut using Sue Pelland’s Hearts and More templates. You can see how Sue cuts these circles from fused pieces of fabric on her website. See her videos HERE. Look under Hearts and More Templates and then 7 minutes into that video.
Circle fused to a square.
Cutout left from cutting circle. Second photo is the smaller square fused to the back of the coutout opening.
Whether you freehand cut circles, as I did in the first photo or use templates, enjoy the process.
#1 – You can trace circles and cut them out, using both the circle and the piece with the cutout opening.
#2 – Try something new with applique. Cutting a circle out of a square saves fabric if you use both pieces! (I think I just said the same thing twice….Number 1 is it can be done, while the second is it saves fabric <grin>)
I had the opportunity to be a featured designer in Dessert with Designers this evening. A great Zoom event where I got 15 minutes to share some of my things. Kathleen at Salem Stitches does this event every few months. Check out her website HERE.
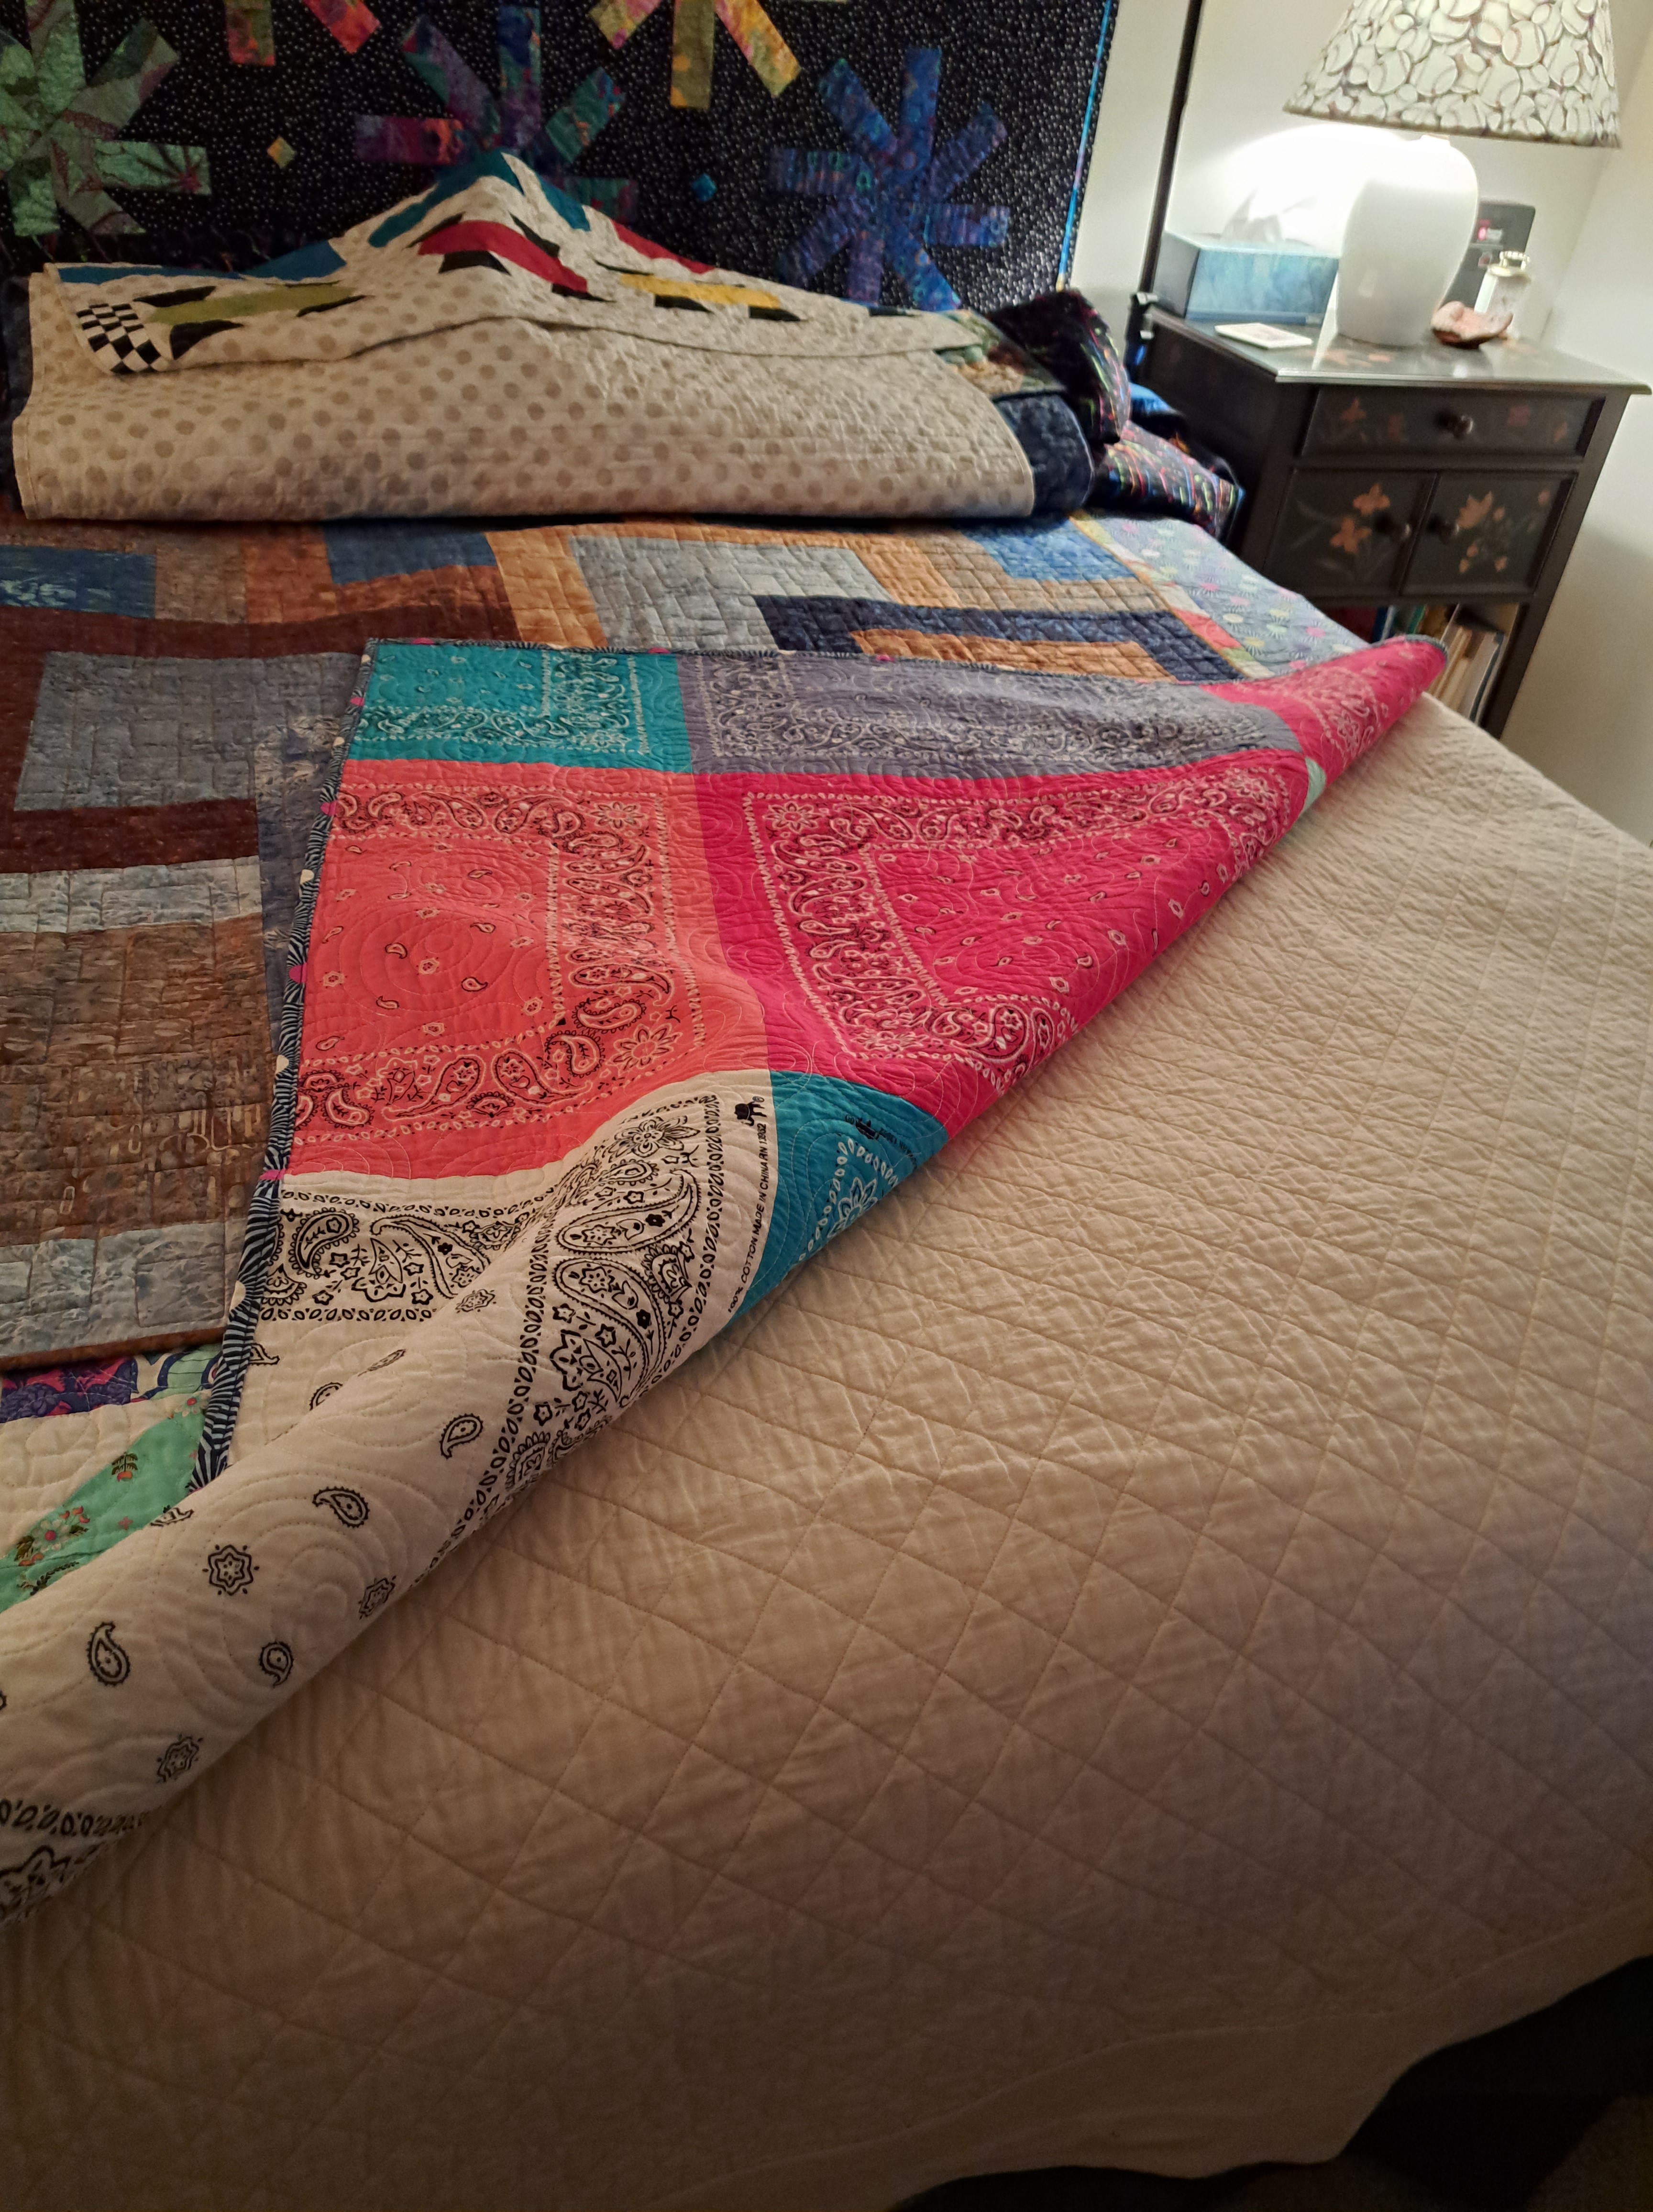
Since I needed a clean slate to share some quilts, I decided to use a bed in a spare room to do a “bed turning” of a few of my quilts. Well, that room needed to be cleared out. So, I spent today doing just that. I have many things to giveaway and it felt good to clear out!! It was fun to share the quilts. I put them on the bed on top of my EXTRA quilts that don’t travel with me. Yes, there are many. My point of telling this story is many quilts live on this bed. I had a situation a few years ago where one of my quilts go sun faded. So now the top quilt (the largest of the bunch) gets turned wrong side up. This keeps the sun off the front of the quilt and the back is muslin, so fading won’t hurt it!! The photos below are the quilts I showed tonight and the backside of the “TOP” quilt that lives on the bed. The quilts I showed tonight will go back into their respective travel suitcases.
A good evening and a good reminder to be careful how you store your quilts. I also shared two of my videos showing how to use Brilliant Bindings and Hex-a-ma-jig. Did you know I have these on my Gallery page of my website? Take a look at Wendt Quilting Gallery Page or on YouTube. One of my goals this summer is to add more videos. I’ve said it out loud, so now you’ll have to hold me to it!
#1 – Store quilts on a spare bed, laied flat to keep the wrinkles to a minimum.
#2 – Cover the top of the stack of quilt with the largest quilt WRONG side up. This will protect the stack from sun fading.
I tried to hit Tuesday but my computer decided to run out of juice. So, just a bit late if you are in the Eastern time zone.
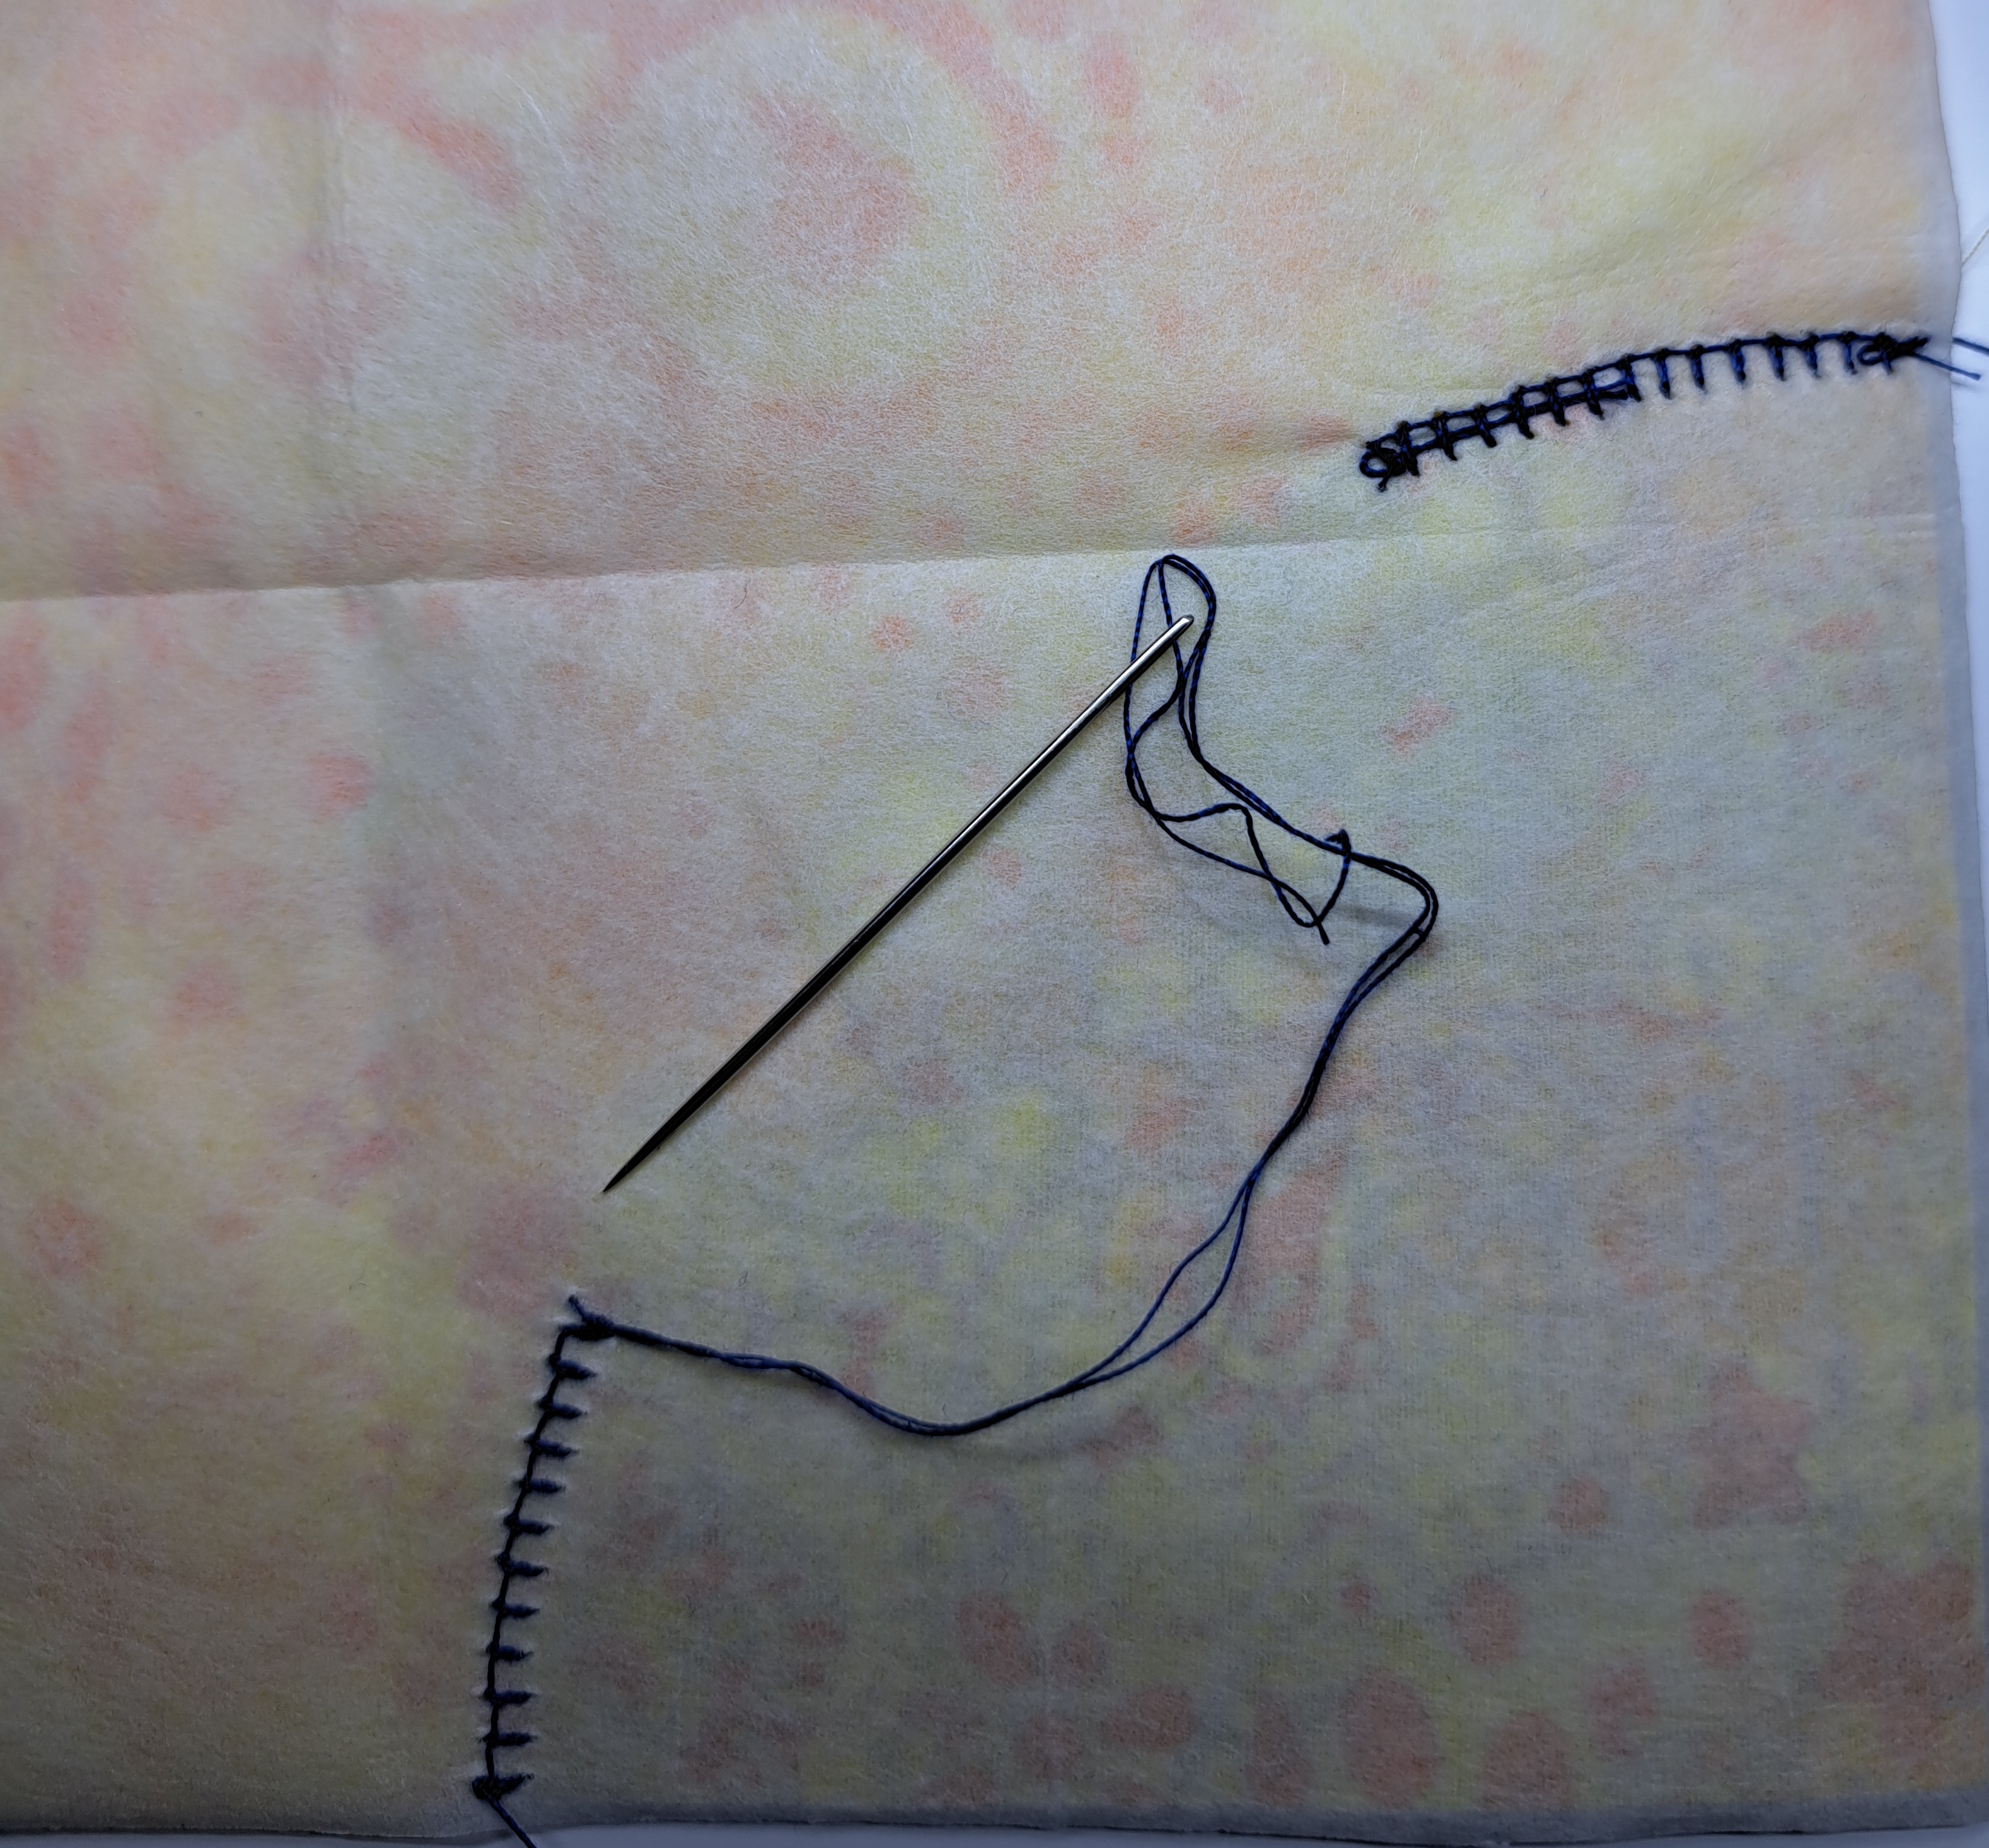
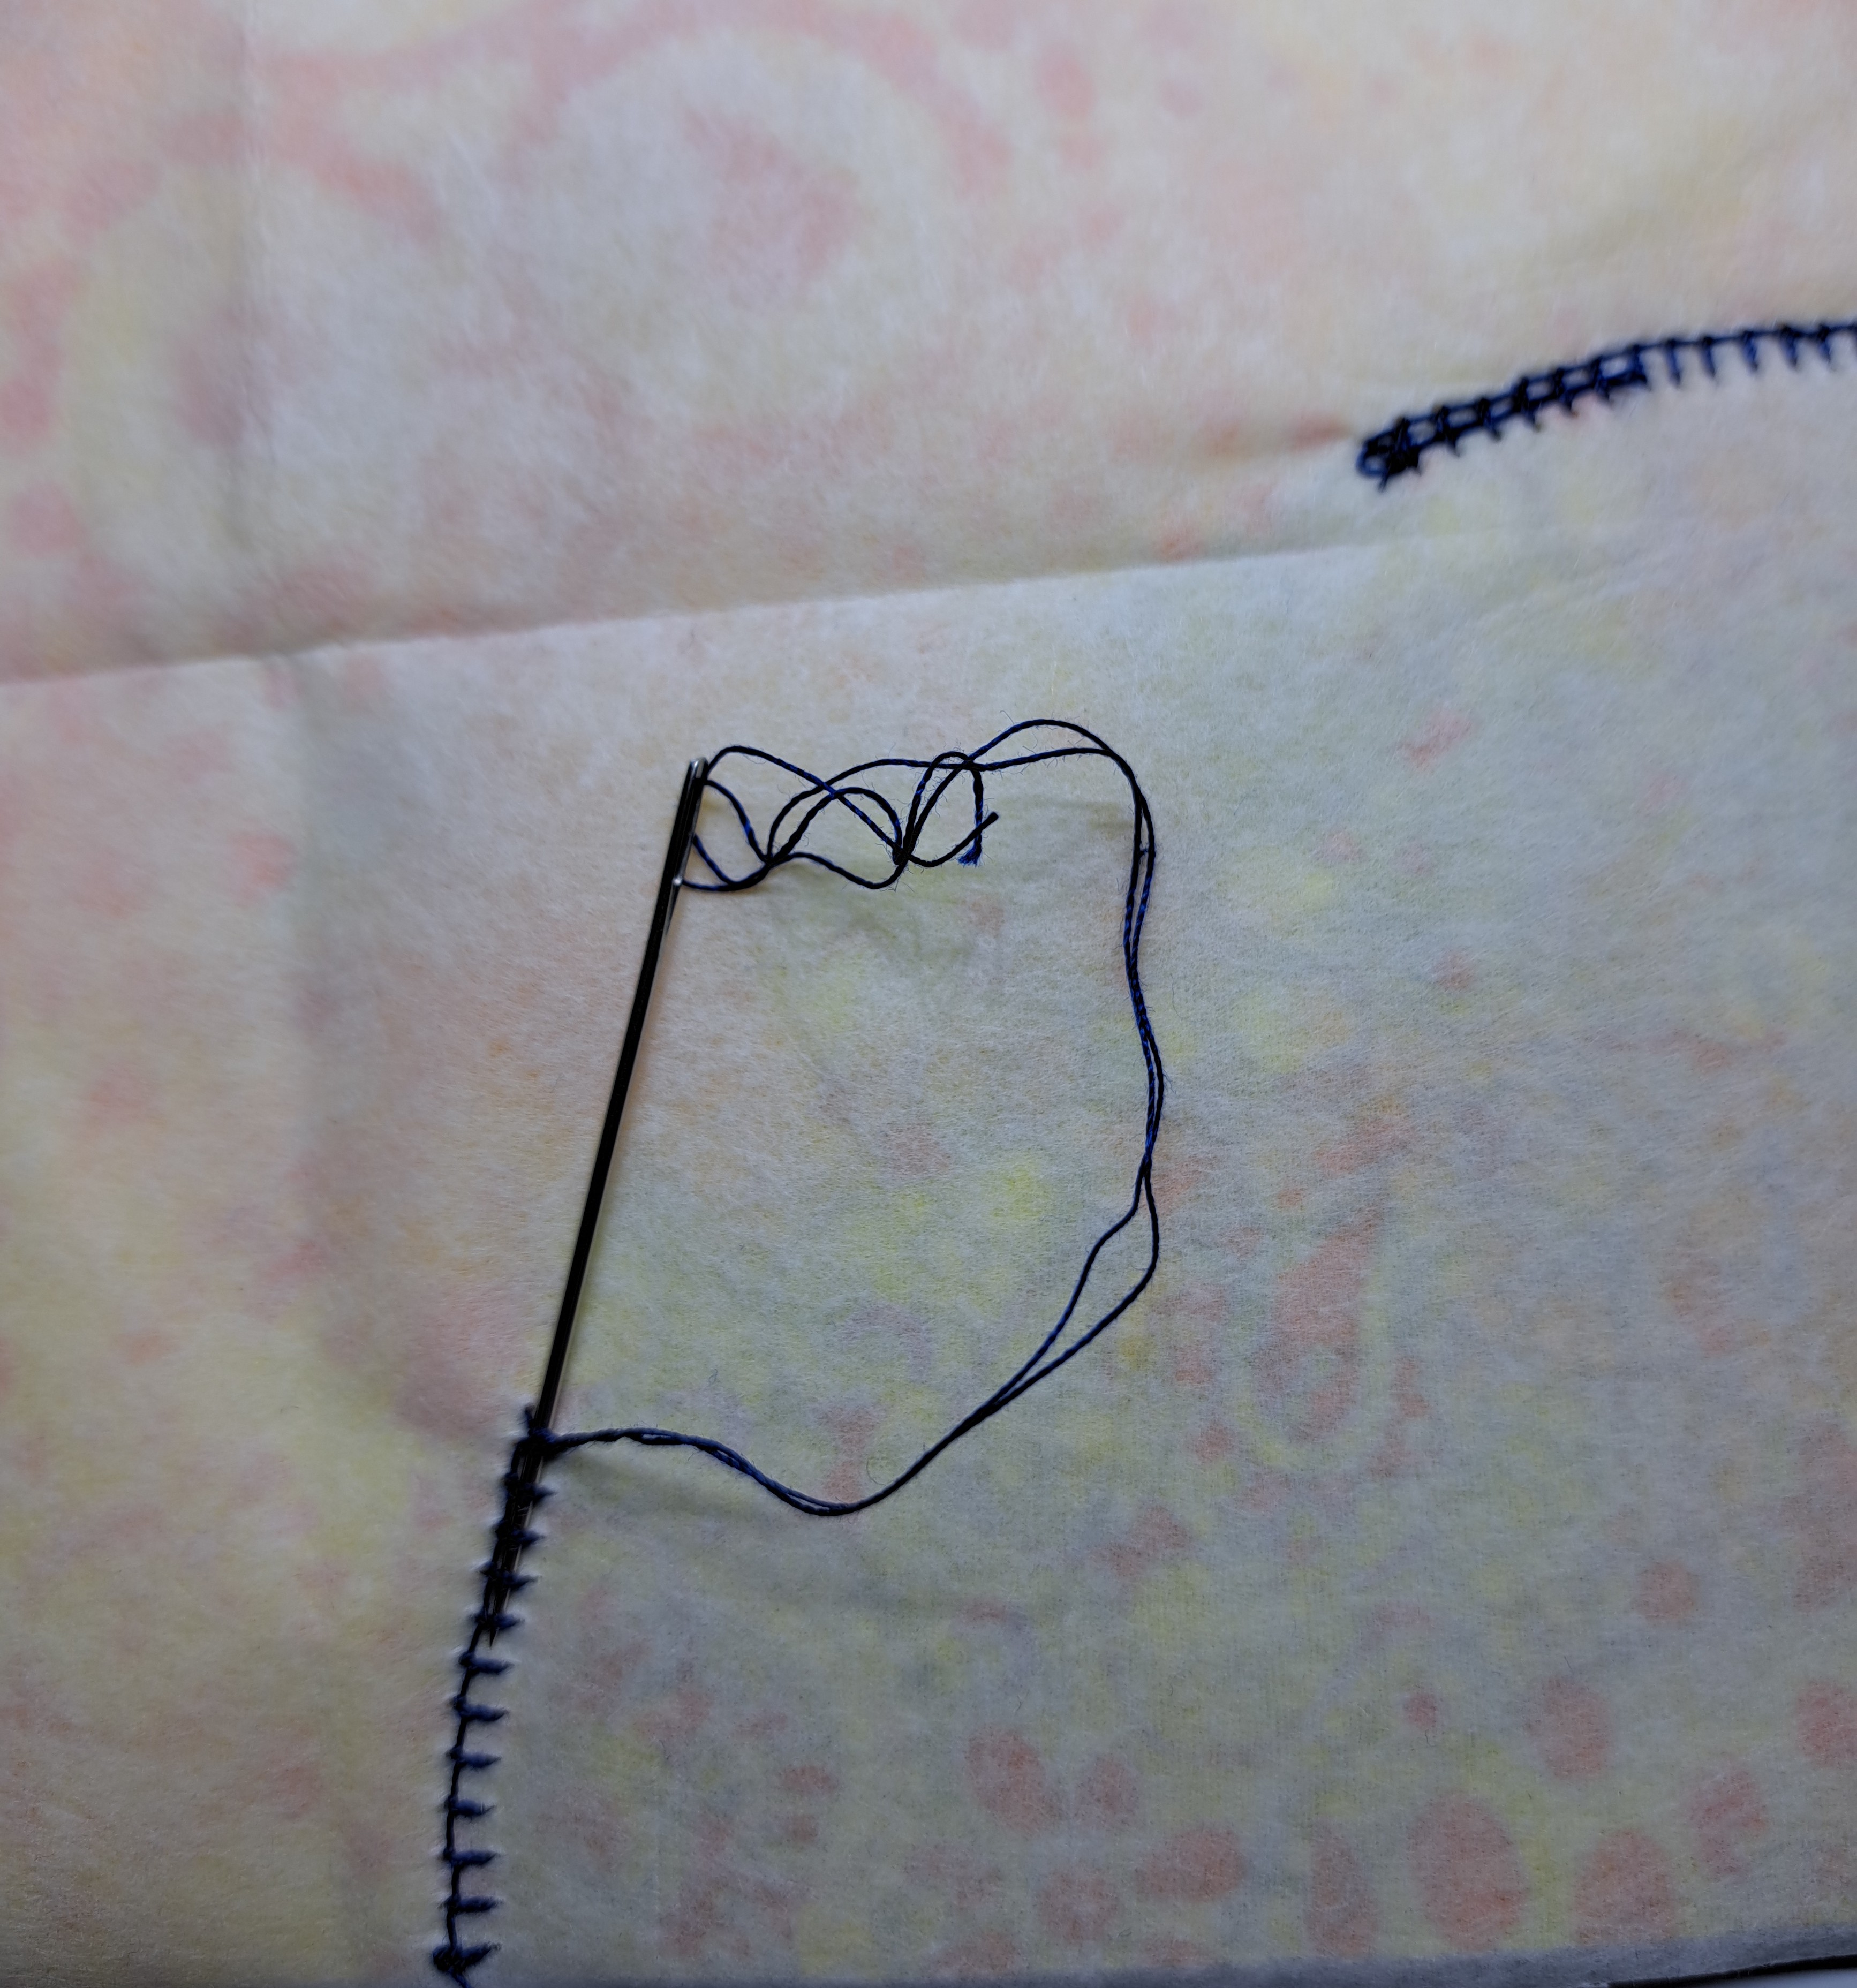
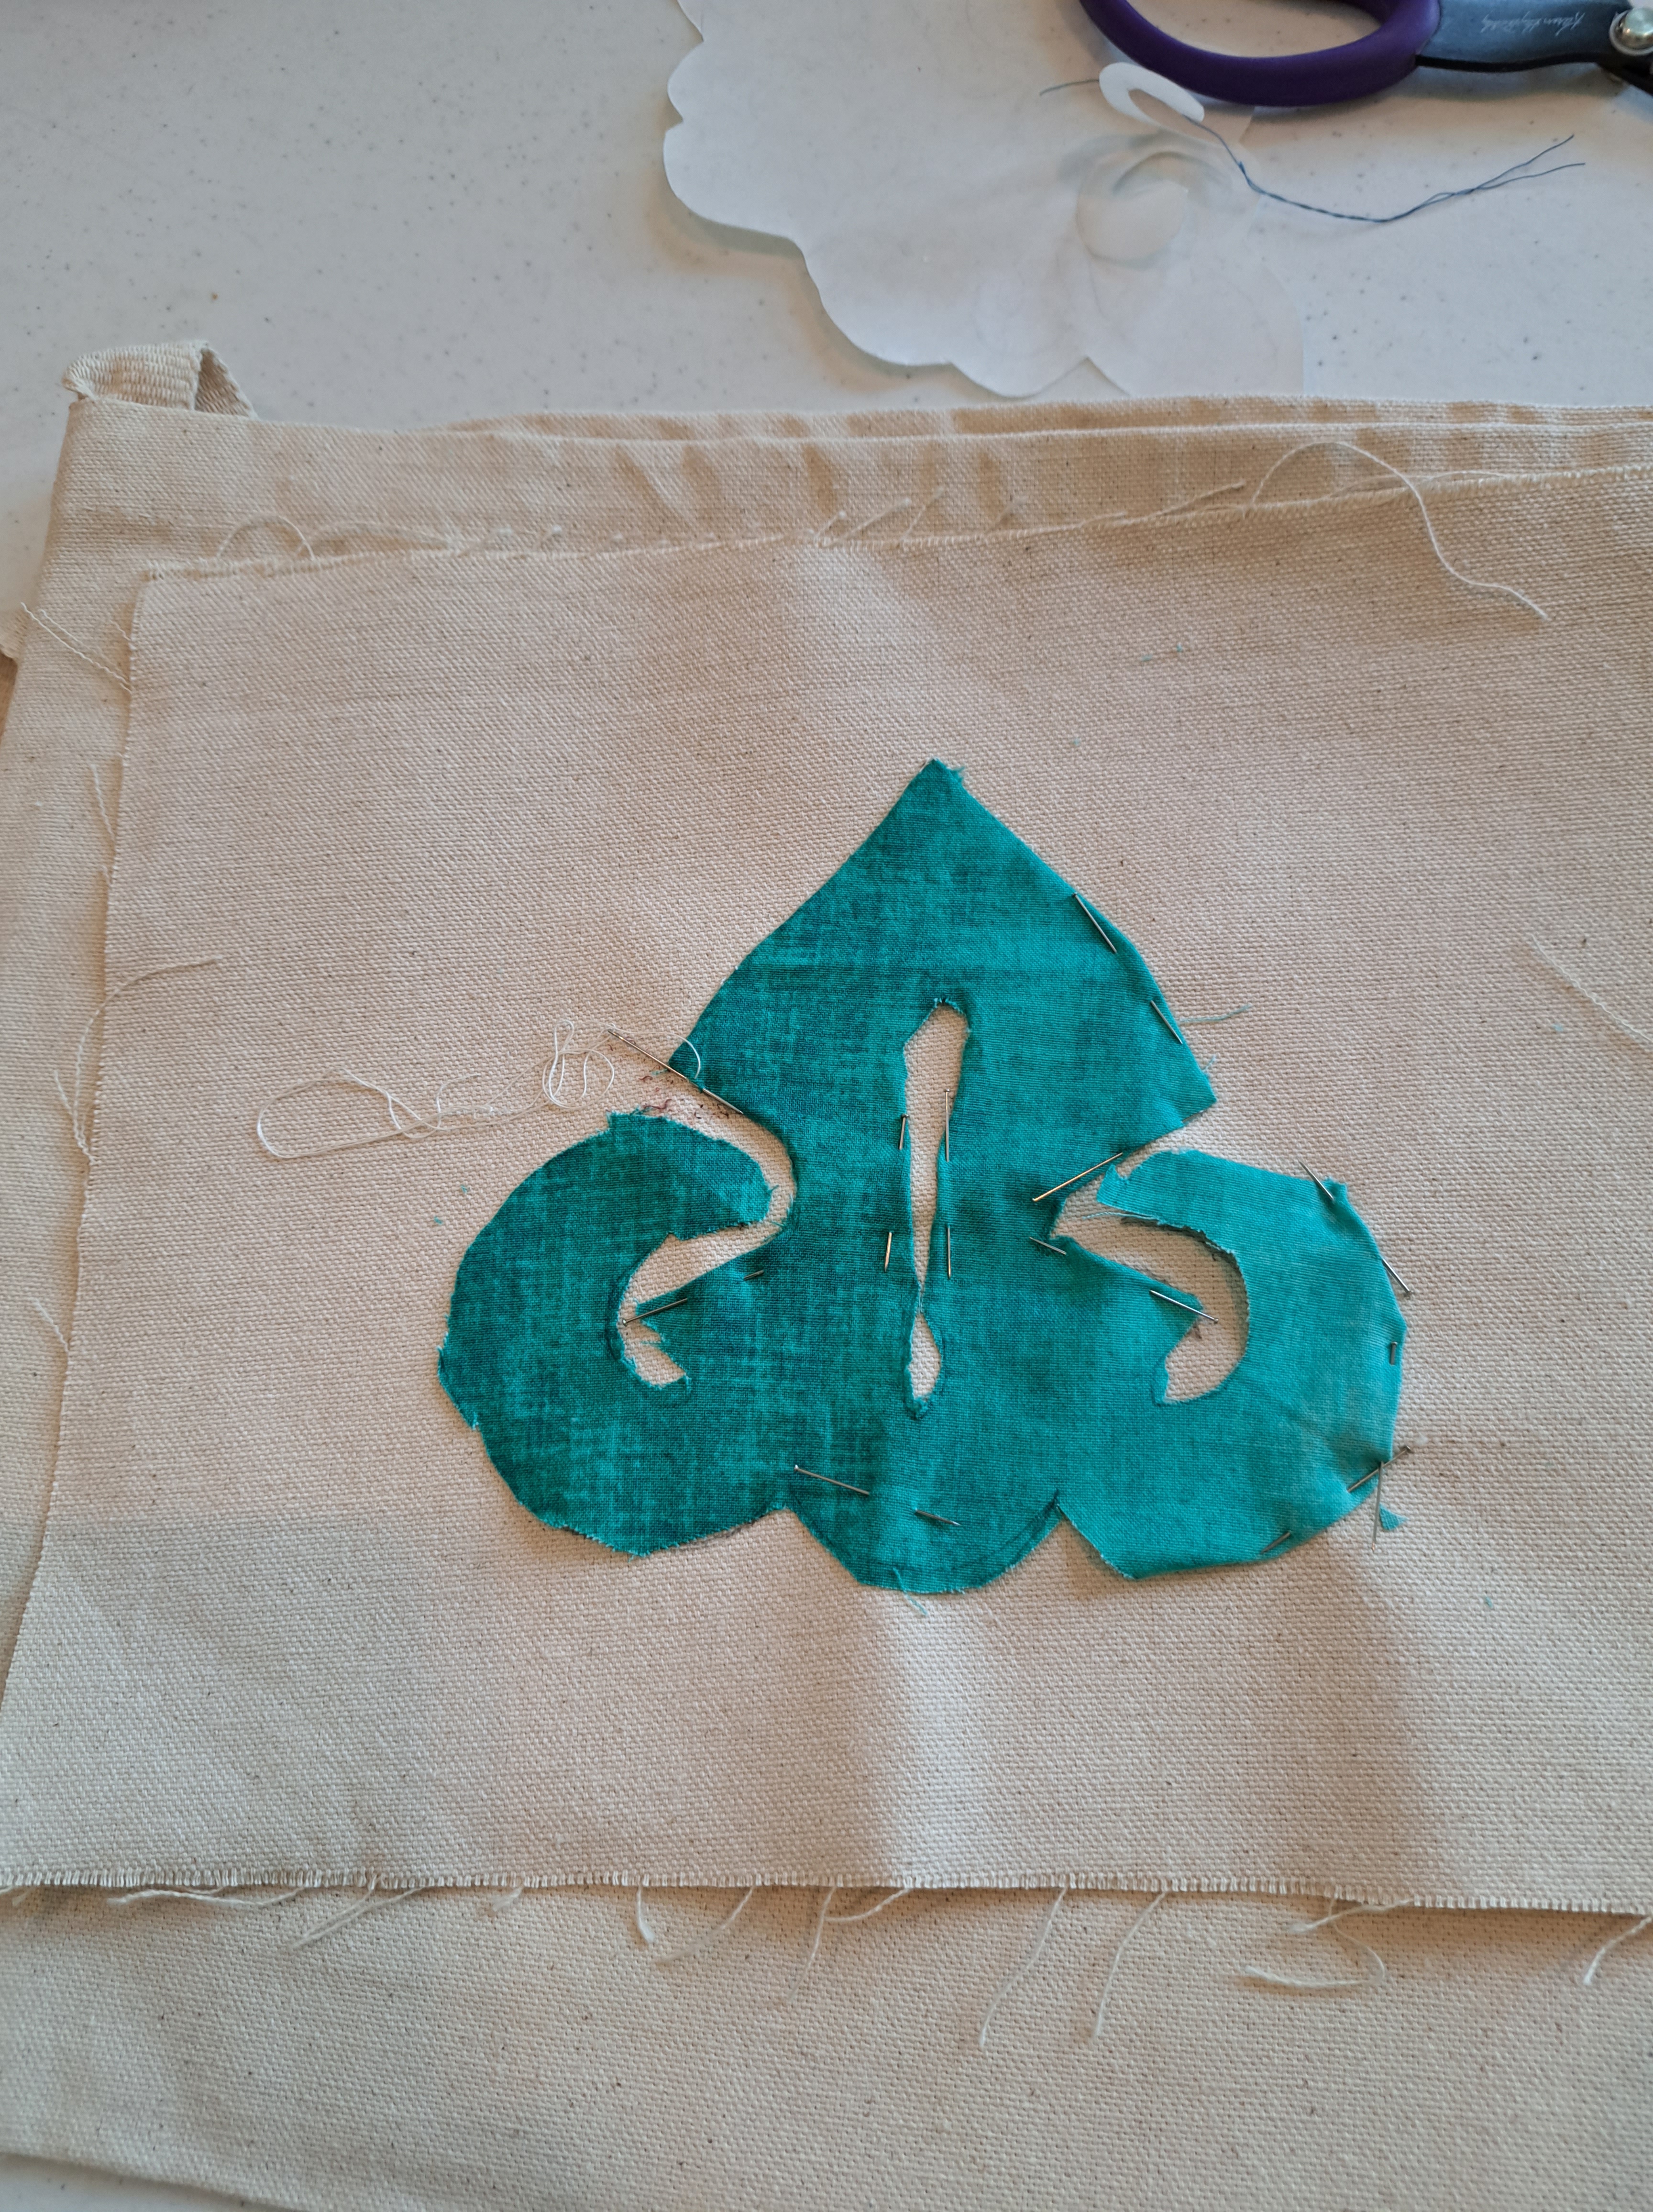
I am working on a project and machine applique is the focus today. A couple sections have one layer of applique on top of another piece. The bottom layer of stitching is showing through…….as the photo below. Not a good look, especially with the navy thread. This placement was an afterthought, so I had to place it over stitching I had already done. I want to share how to prevent the “show through”.
……I do not (try not to!) stitch the buttonhole stitch under any section that will be covered by the top applique. I’m happier with the finished look and no raised can be seen! The steps of how I accomplished this is below. (on another layered section)
First determine where the top applique piece will cover the bottom applique. Stitch the bottom layer of applique onto the background skipping the section where the top applique piece will be covering the bottom layer. Look closely, the buttonhole stitching on the blue is complete but not along the edge where to top applique piece is placed.
After buttonhole stitching is done, on the backside –
A. Tie off your thread on the back, B. Run the threads under the line of buttonhole stitches. C. Trim threads for a neat and tidy back and to prevent the threads from showing through on the front.
Great results! Note, there still may be a hint of the fabric below. This is mostly caused because the bottom fabric is darker than the applique on top. But a much better look that the first photo shown above where there is stitching along the entire edge of the bottom applique piece.
I hope you’ll give these tips a try the next time you are layering machine applique pieces on top of each other. To review…..#1 – Do NOT add buttonhole stitching in the section of the bottom layer of applique if it will be covered by another layer. #2 – Tie off your threads and burry them in your line of stitching. It makes for a neat back of your applique, reduces the chance of stitching pulling out and keeps threads from showing through on the front of your piece!
Two very important parts of a quilt….binding and a label! I finished up my sister’s retirement quilt this past week. As I was sewing on the label with black thread, I realized I had black dye all over my fingers. Yikes! Guess this thread was VERY heavily dyed and maybe even over dyed. I should have switched to a different thread, but I was using it on a black label edge and a black binding. So, It should be protected from the white fabrics on the front. Be aware, any dark threads are like dark fabrics. They use extra dye to get those wonderful saturated colors. See my fingers below…
Now for the label….just do it! I feel it is important for you to “sign your work. Artists do!!! and so should you. My sister loves books so I found a great book shelf fabric and used books to represent her 38 years in education on her label. She started in vocal music and then moved to be a school counselor. She is going to have fun with her grandma duties next year!!
So the tips…
from an airport on my way home…
#1 – check your thread! If there is a load of dye, don’t use it! Or make sure is does not run on other fabrics. I use a thimble and a rubber grabber on my thumb. It sure helps save the fingers!
#2 – Label your quilts. I’ve said this a few times but I hope you do! And fun lablee add so much interest!
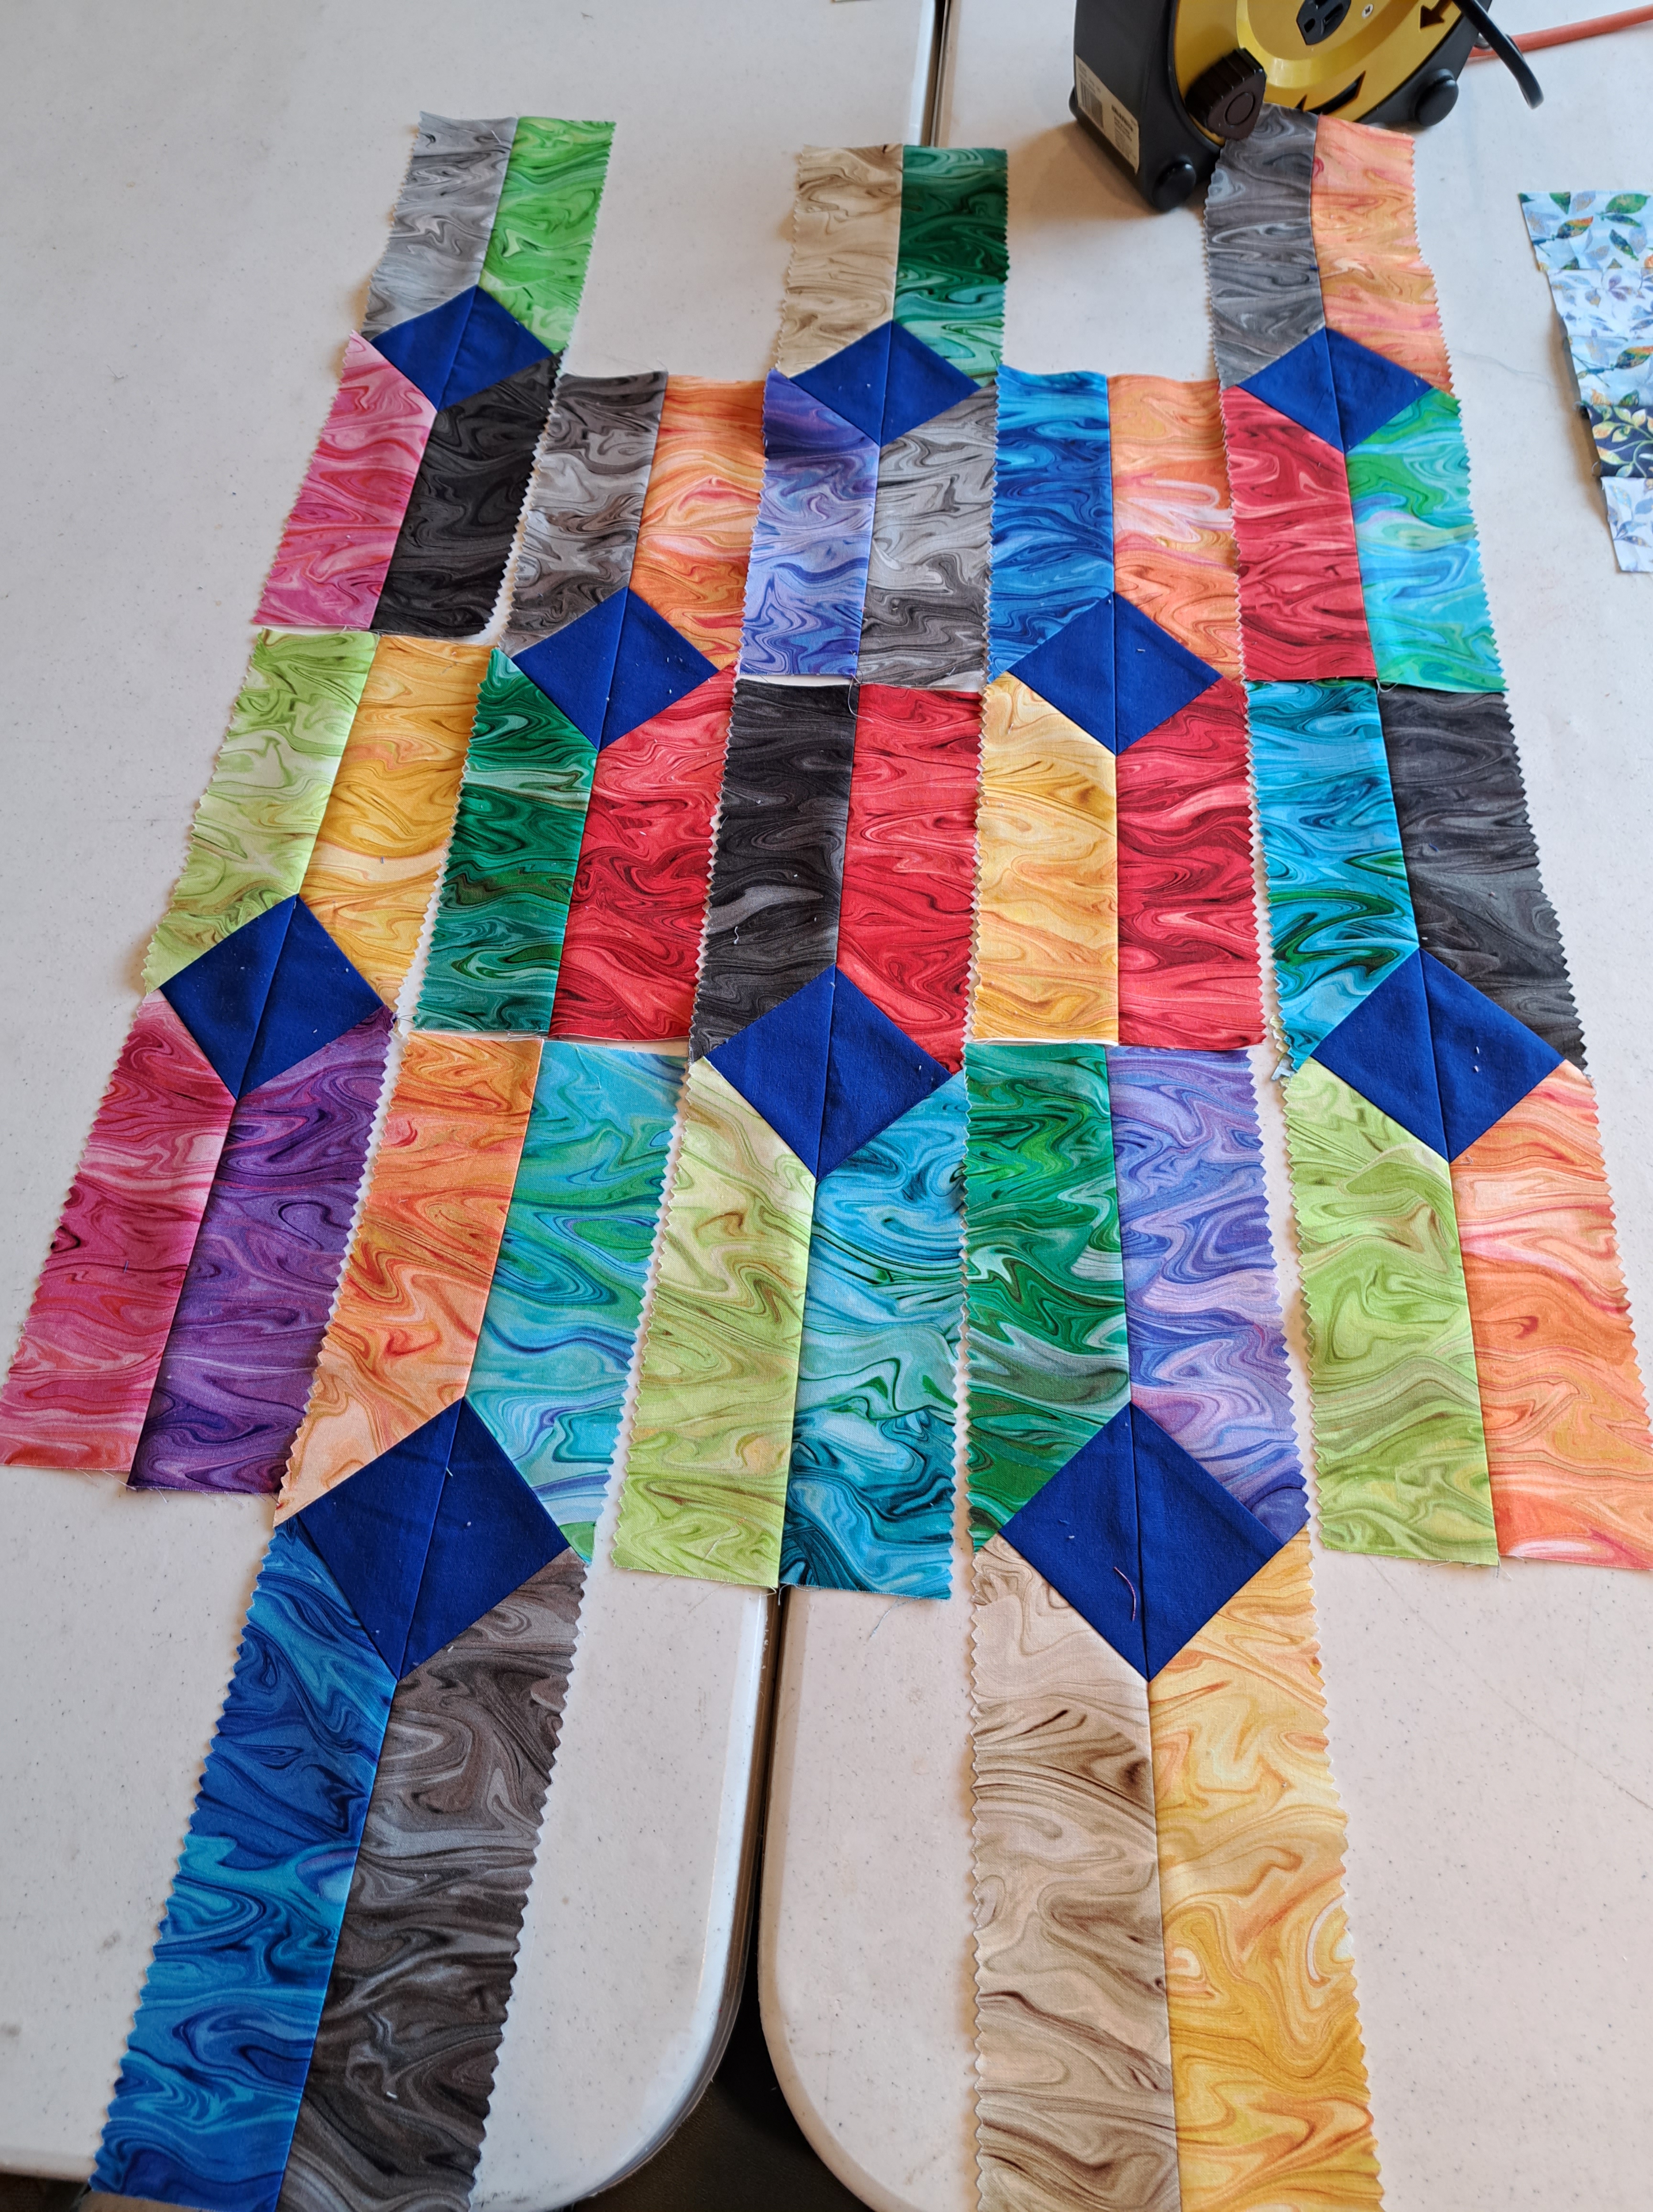
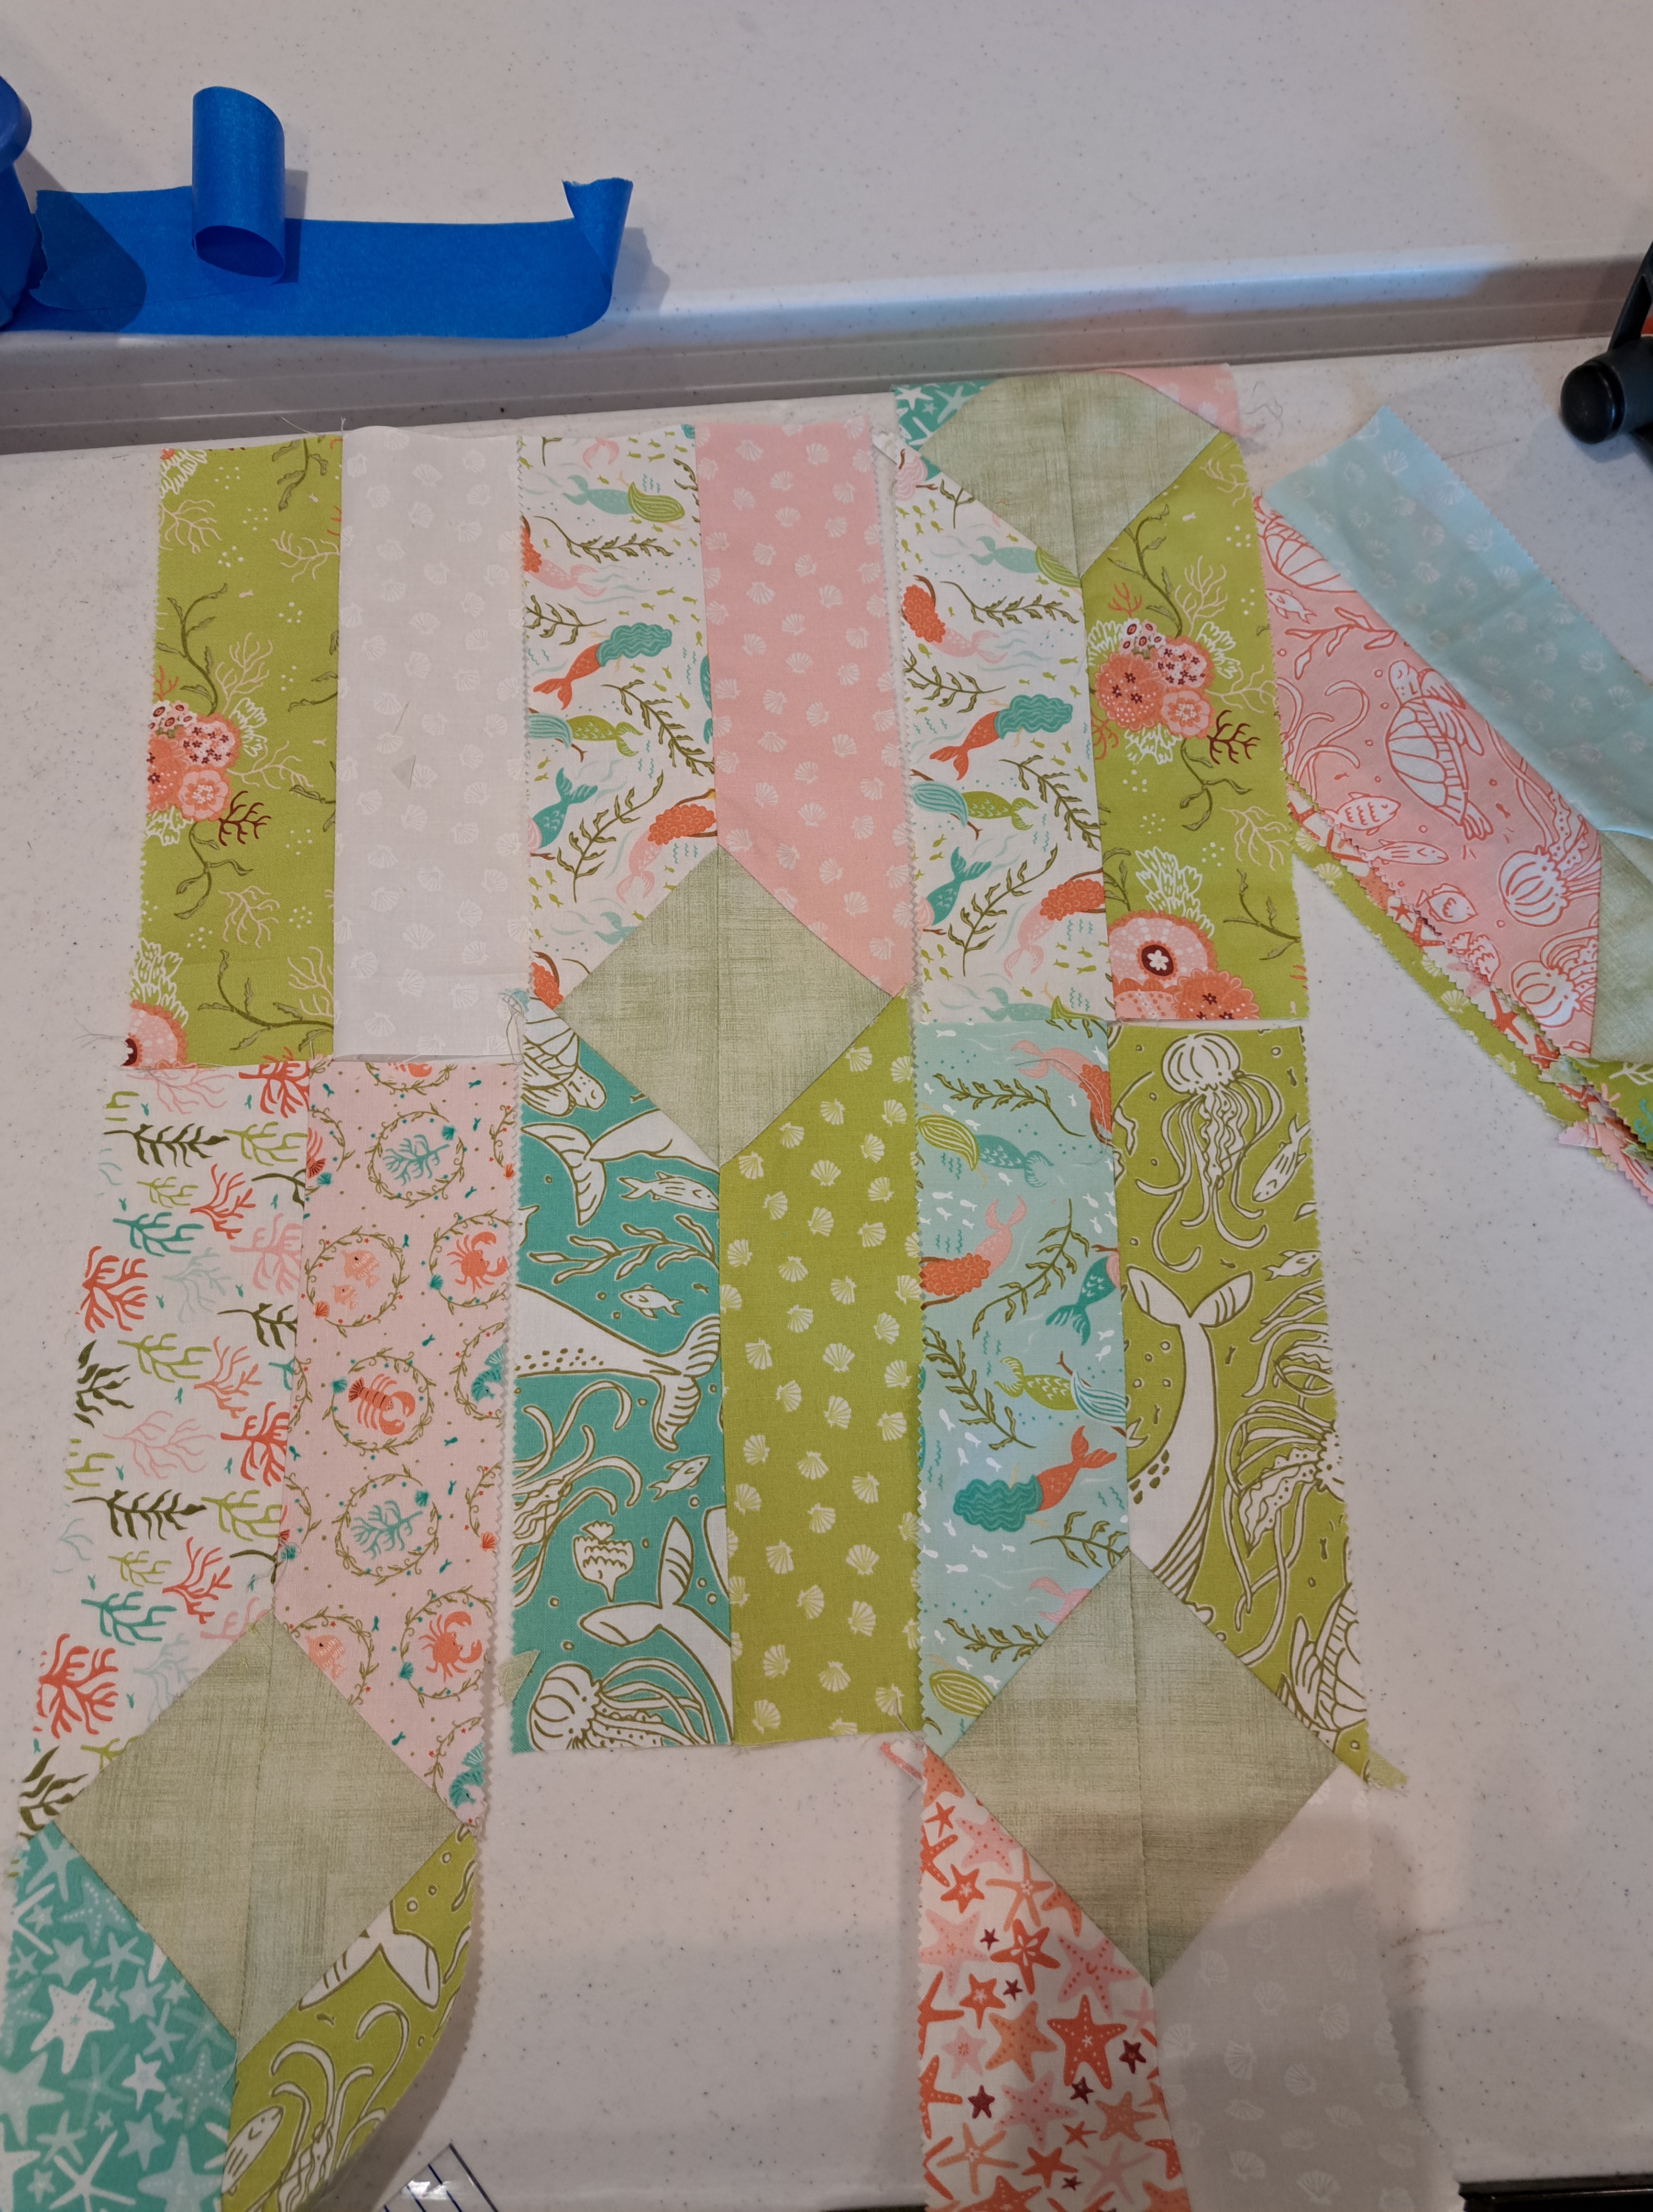
A HUGE shout out to the QUILT Inc. guild in Delmar, NY!!! Thank you ladies and gentleman. I spent two very full wonderful days with their guild. We had my Diamond Tipped Tools Workshop, my lecture Teaching the World to Quilt and a half day workshop of Pharaoh’s Messenger Bag (hand applique).
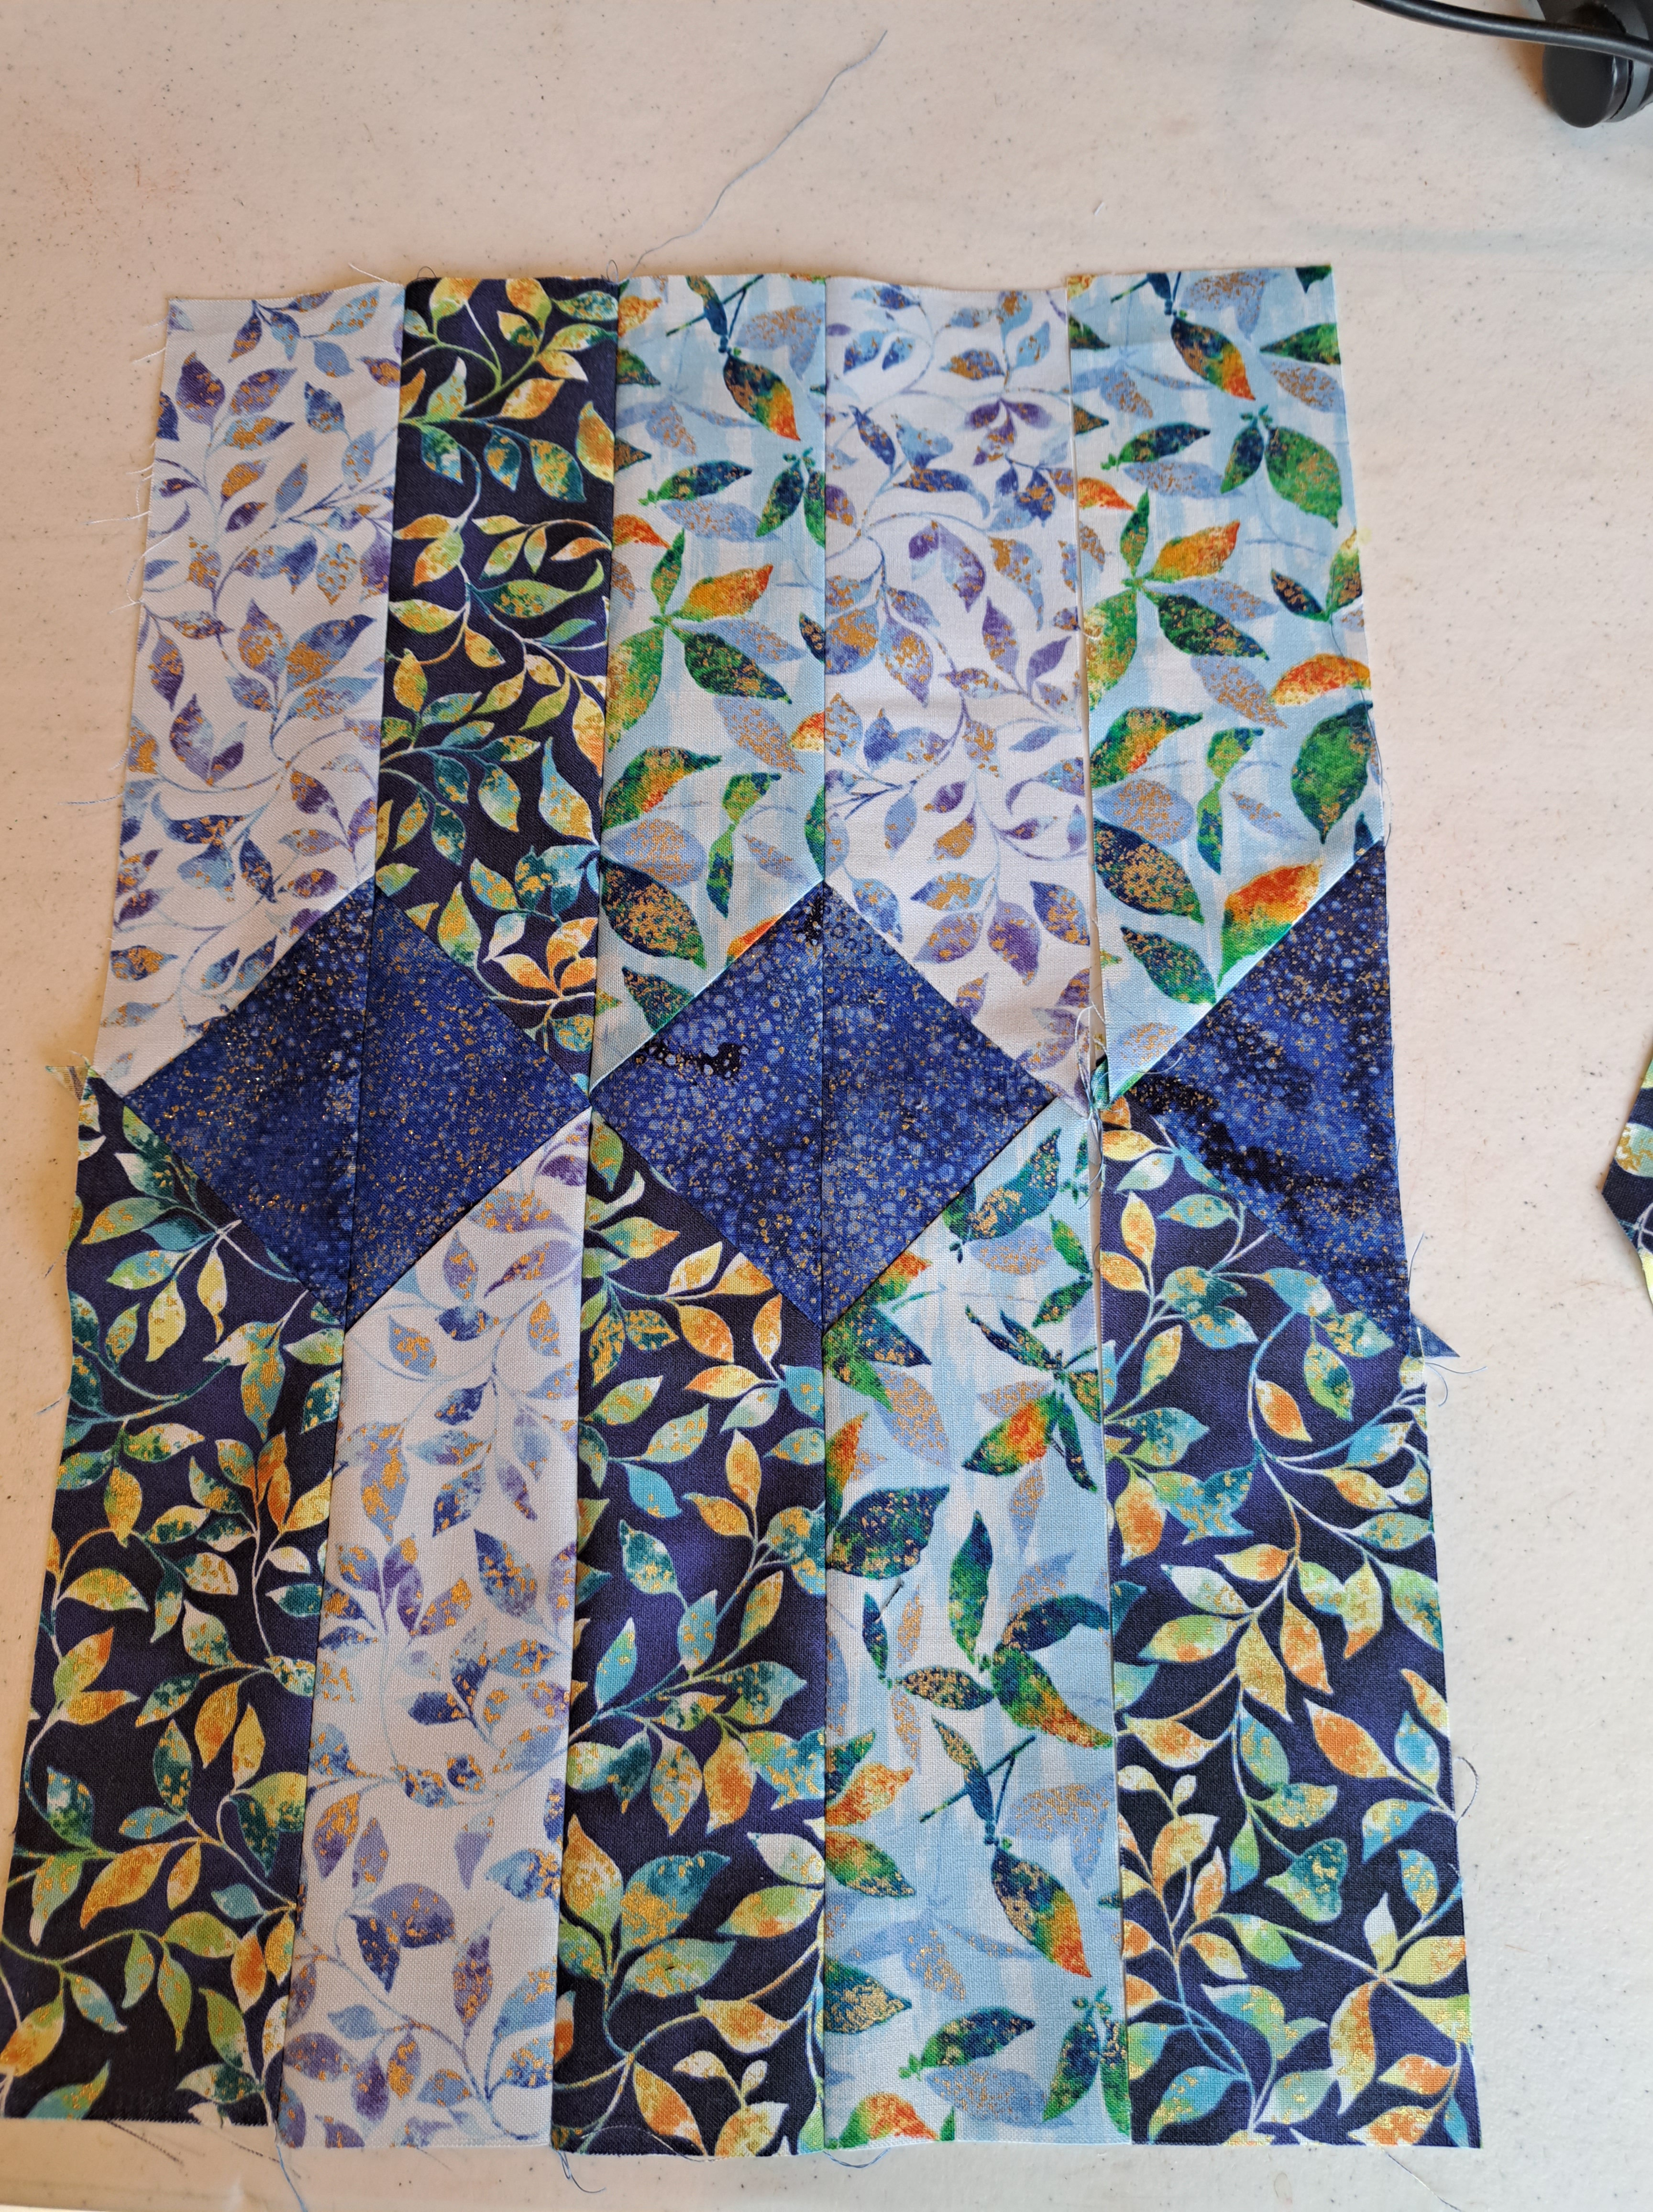
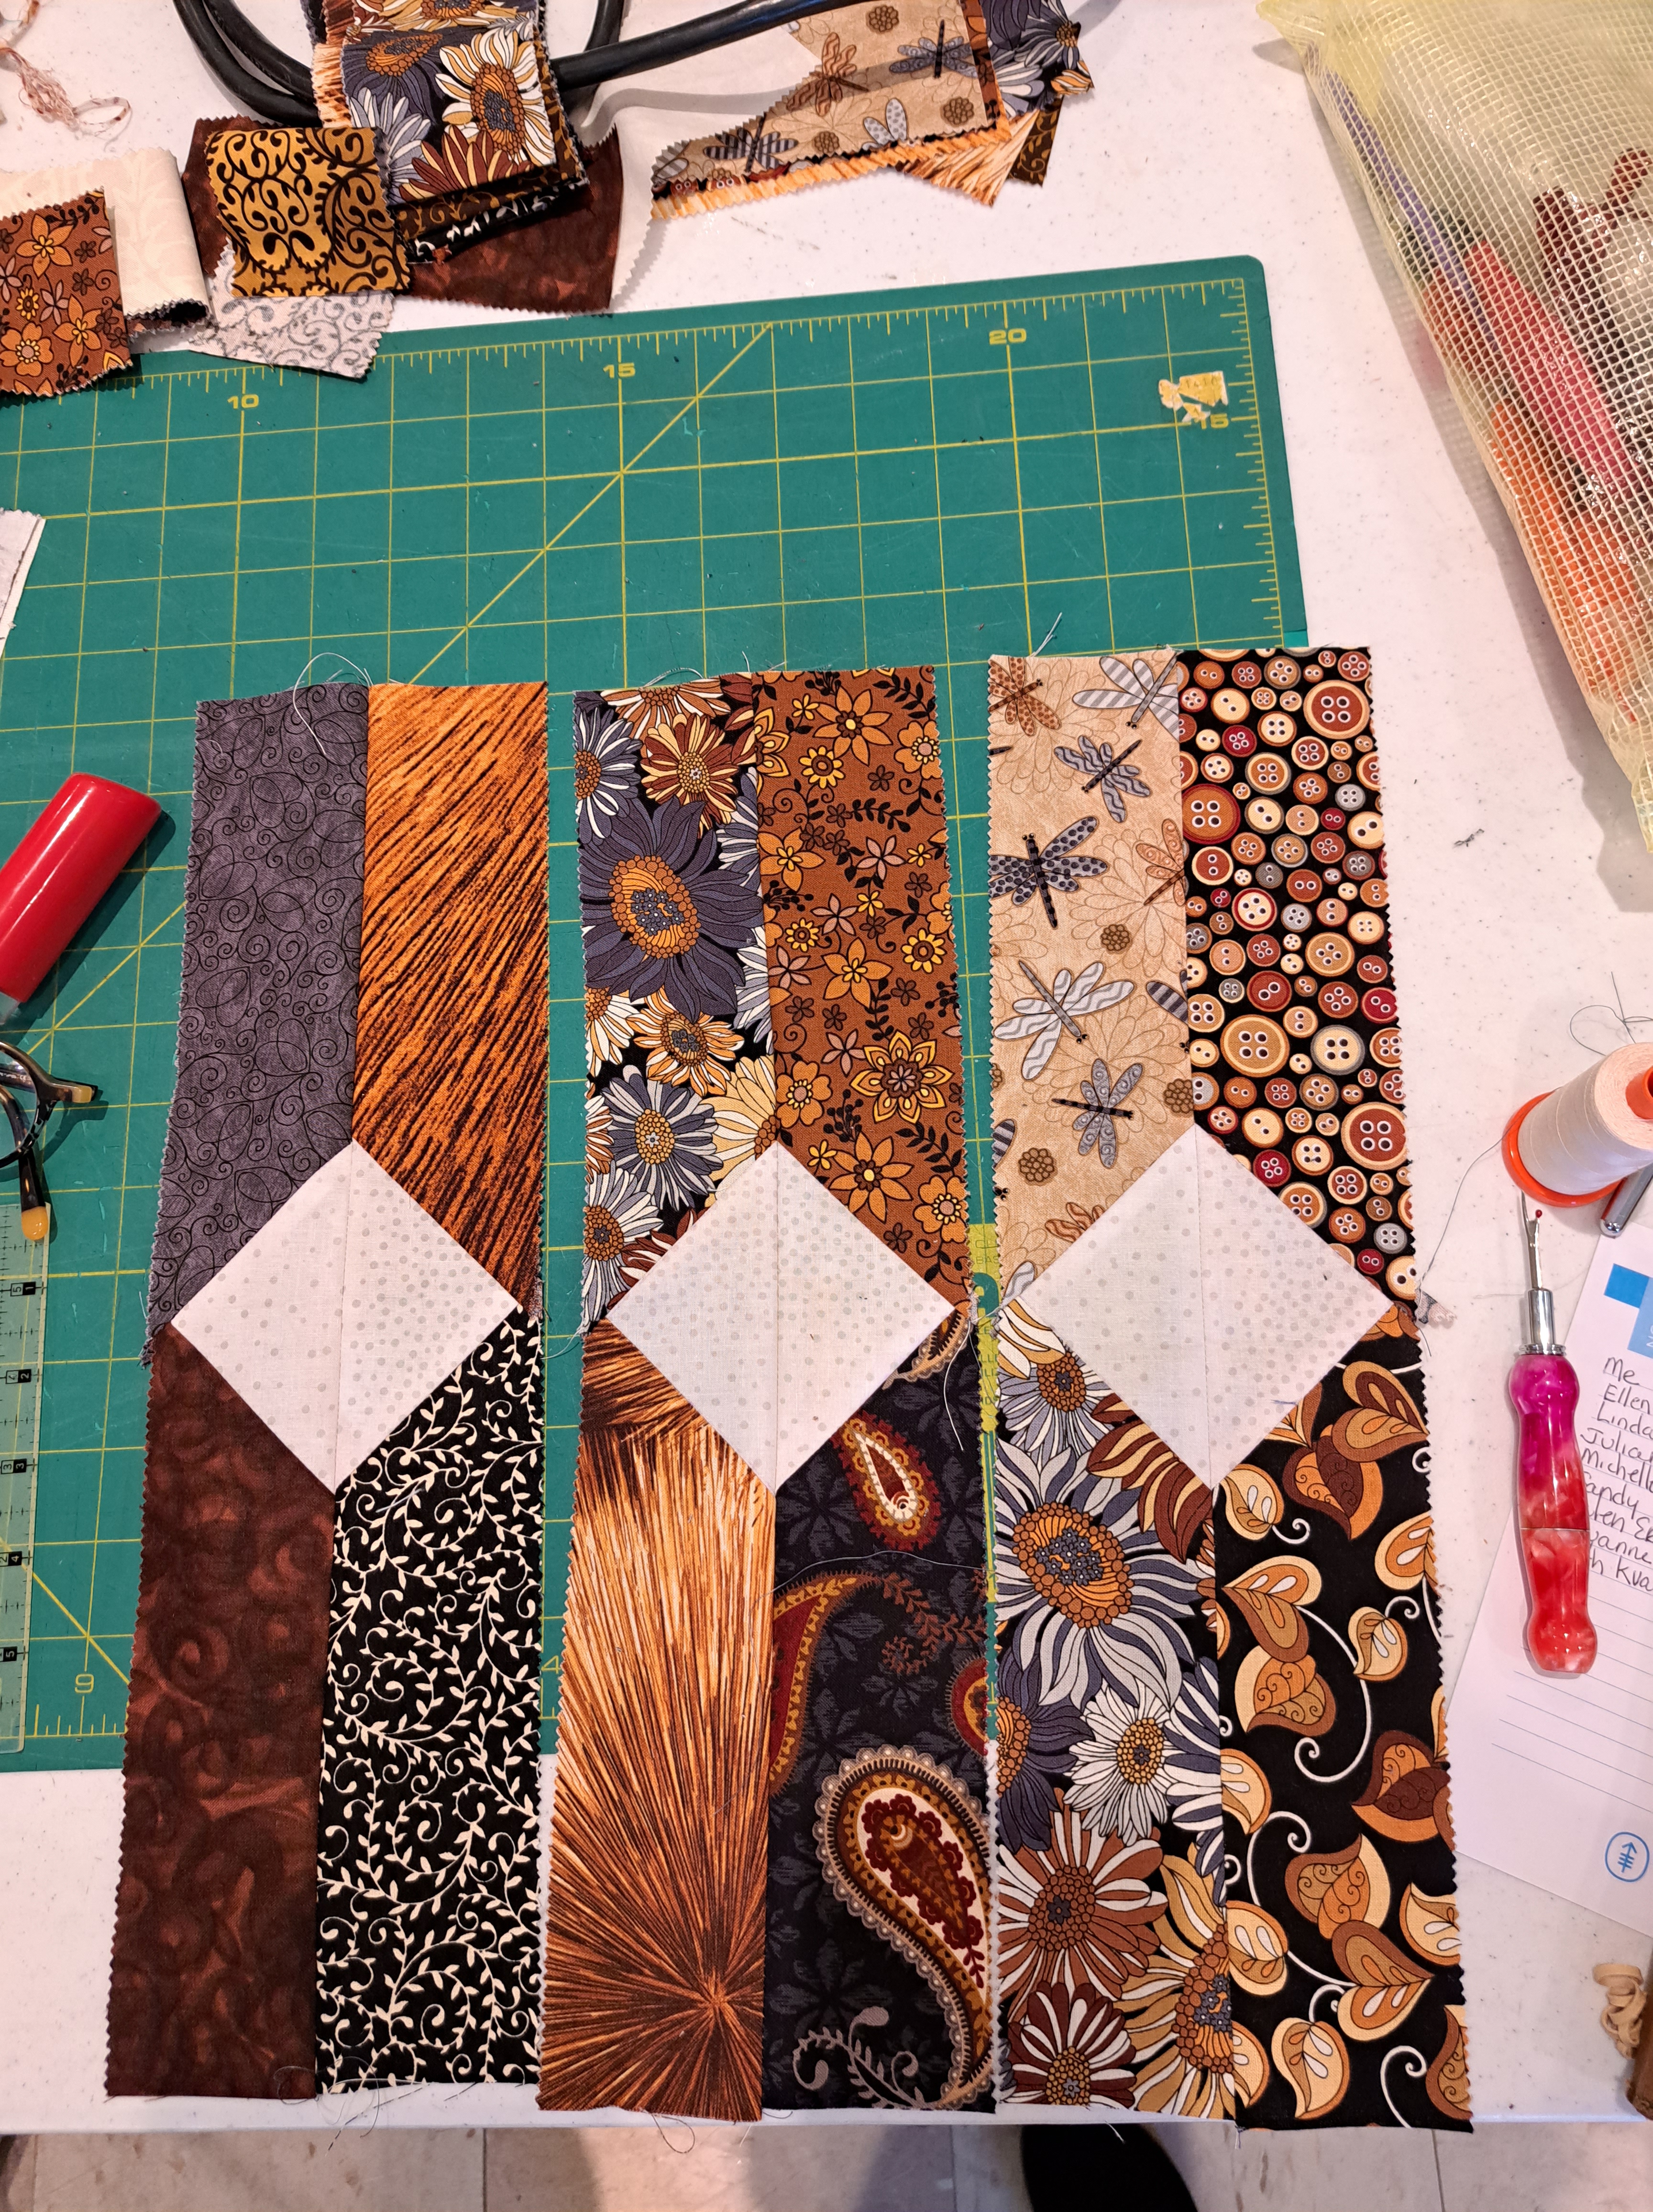
I love attending other guilds and meeting new quilting friends! Thanks Candice for your hospitality! Let me get straight to the photos of progress in the Diamond Tipped Tools workshop. This pattern uses my Brilliant Bindings tool as a cutting template.
I’ll start with Michelle Young’s modeled brights…… We decided it best to wait until all her blocks were finished to do the arrangement. What a great start!
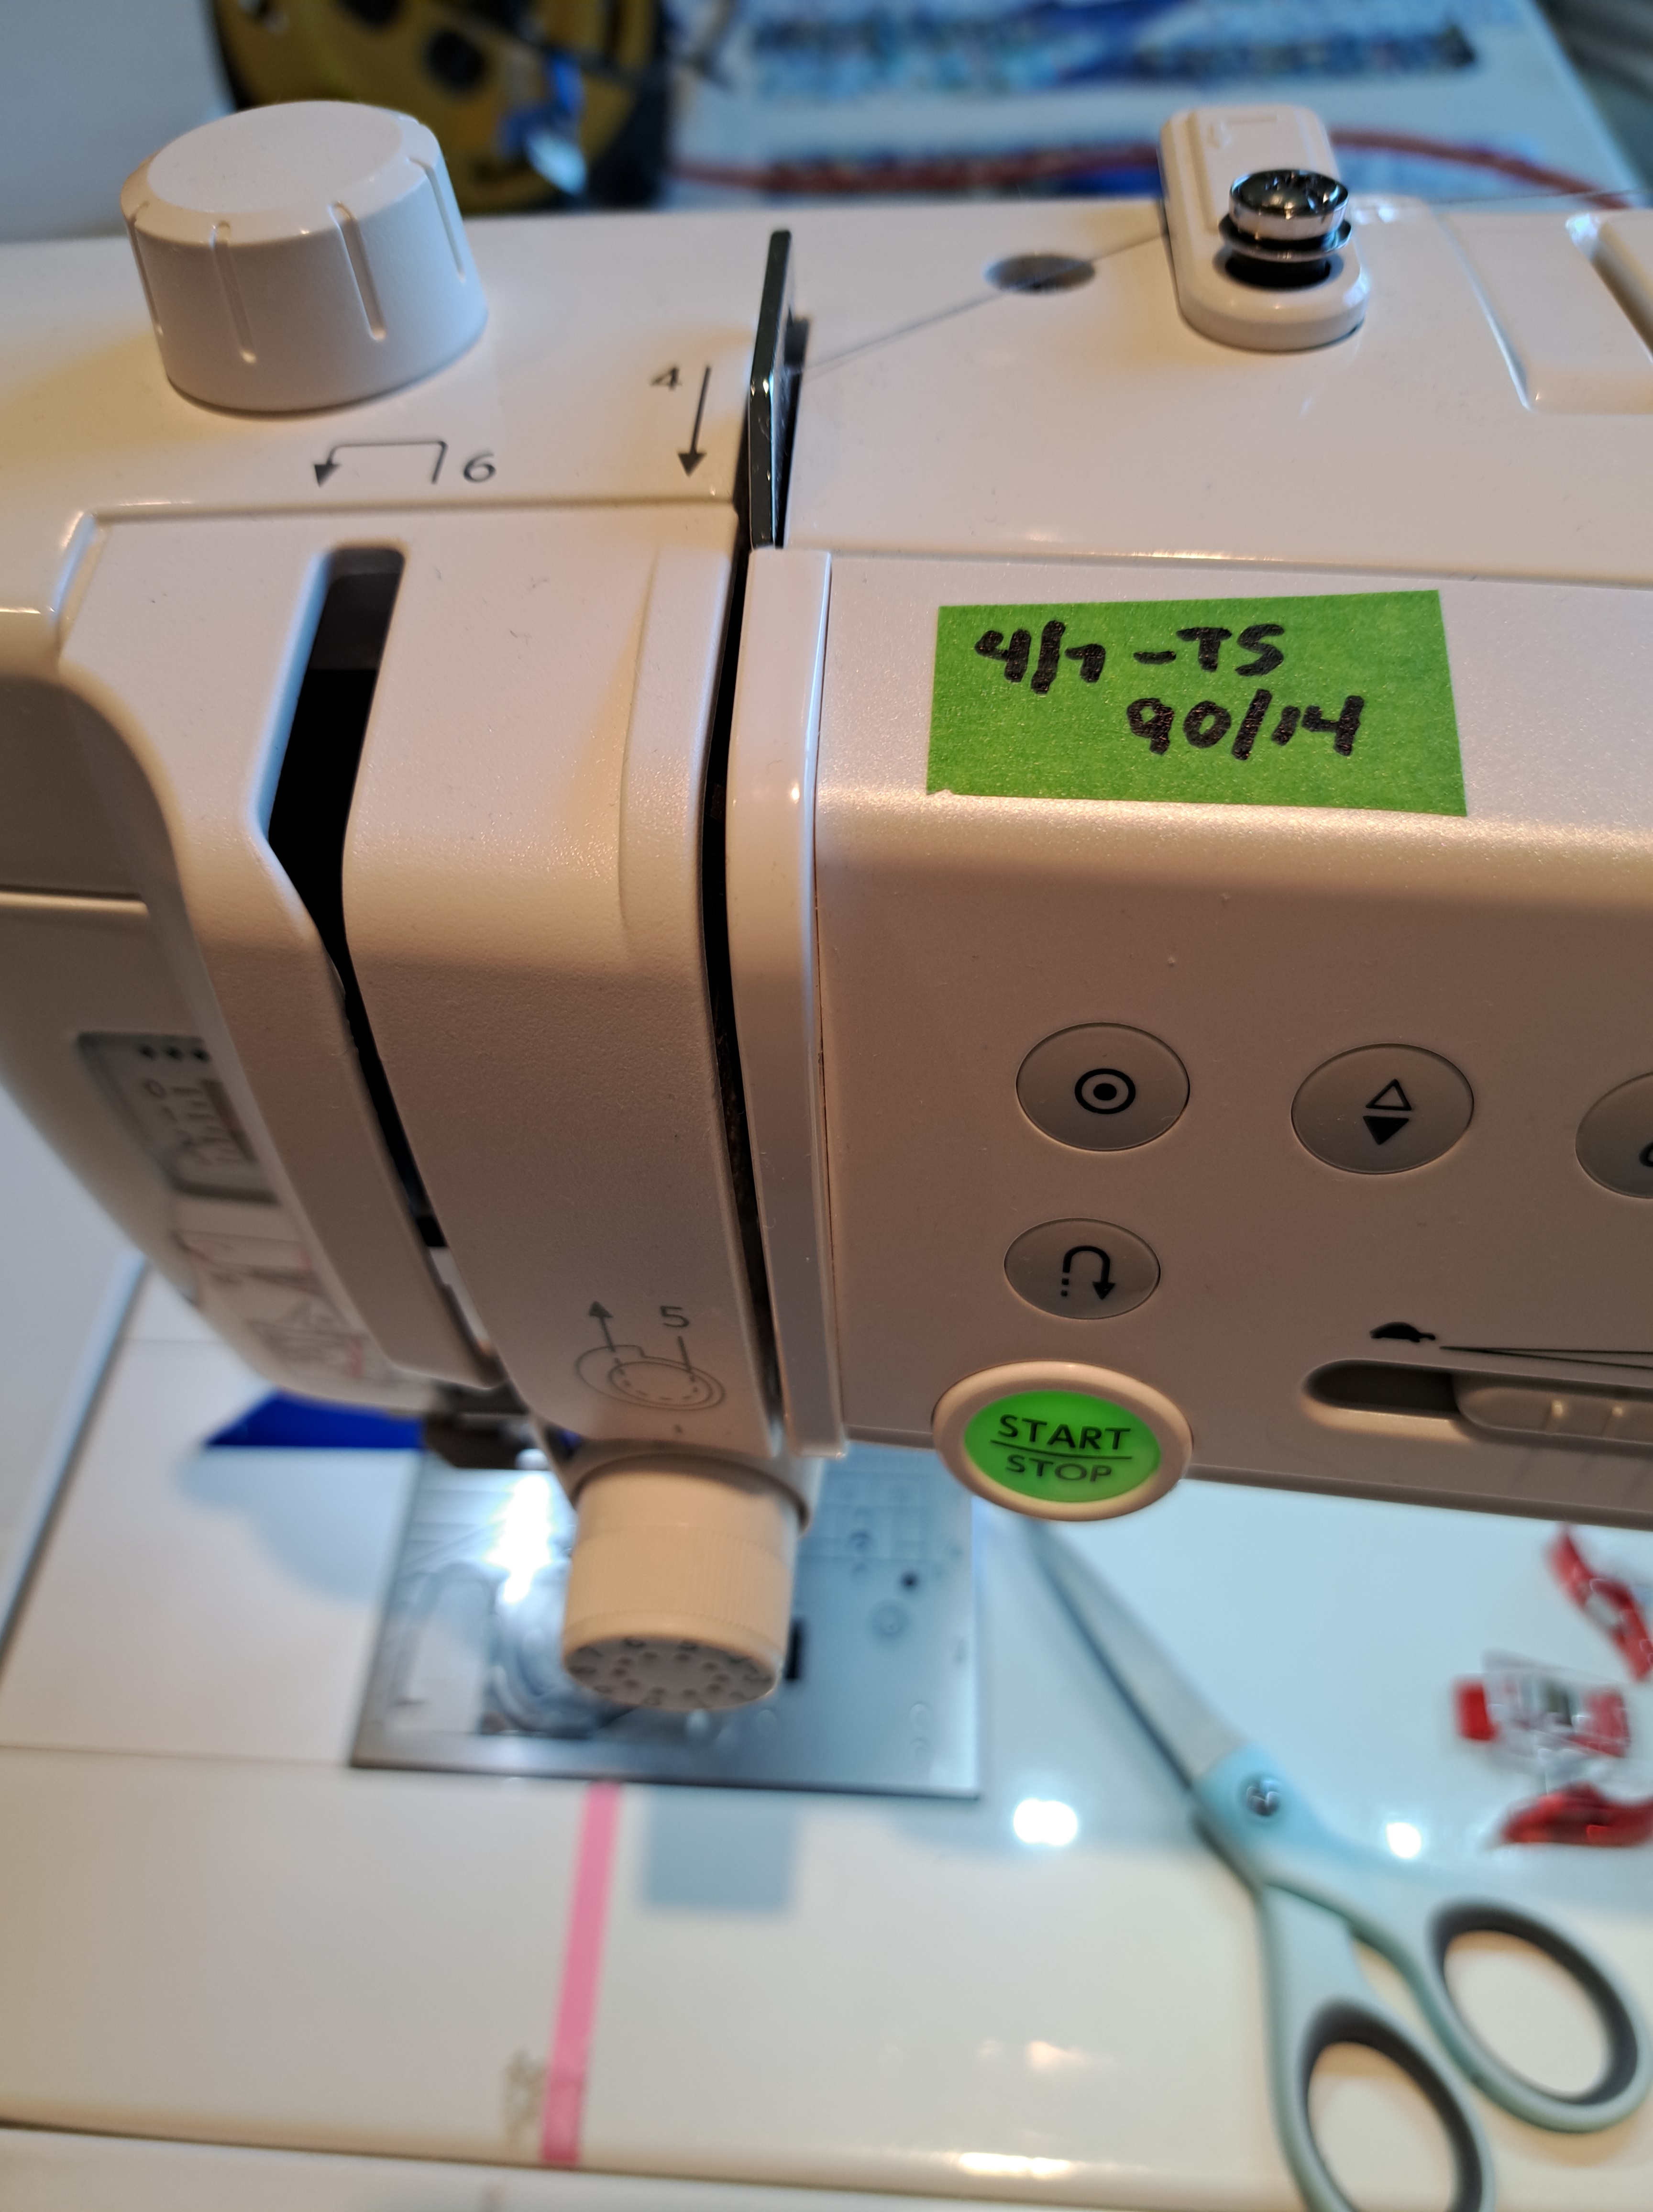
AND she has our two tips for today. During class, I always walk around to look at what everyone is doing, answer questions and discuss “things”. Michelle had two pieces of “green tape” like blue painter’s tape on her machine. #1 – When her machine was last serviced! and #2 – which needle she had in the machine and date she put it in. Brilliant! Thank you Michelle for such great tips in keeping track of important sewing machine information!
These next photos are from Ruth and Lou Ann. I picked these to be side by side to show how different they can look with just a few fabrics vs. a whole “jelly roll”.
Sandy and Lorraine also have quite the contrast in fabrics. I love them BOTH!
Ellen choose Halloween theme fabrics. Can’t wait to see if this turns out spooky or sweet!
Helen had these adorable sweet prints. However, the strips had directional printed motifs. She will put it together across the quilt instead of vertically to show off those wonderful fabrics.
Linda had all her blocks packed up before I could get a photo. So did Julie-Ann. BUT Julie-Ann came to the meeting the next morning with her table runner size all put together!
I hope I got the correct name with the right fabrics. I made notes and managed to forget to list who had which fabric…..oops!
If you are interested in making this quilt or table runner, you can find the pattern HERE and Brilliant Bindings tool HERE.
The half day workshop was on hand applique in the style of Tentmaker’s Applique. The gals had an afternoon of deciding which applique technique they wanted to use, which fabric and which thread and needle best suite their chosen applique technique. The design was put on a FLAP that will later be attached to a messenger bag…..thus the name of the class….Pharoah’s Messenger Bag!!
Thank you for allowing me to share a few days in the life of a traveling quilter!
Last week I introduced you to a pattern by my friend Nancy Hinds called “Happy Hexagons!”. If you look closely at the hexagons she put in the quilt some could be fussy cut. What is fussy cut? When you feature an item, character, flower, word, etc. in a shape. Nancy used Hex-a-ma-jig Jr. for her quilt that was hanging in my booth in Paducah.
She had same samples of how the blocks go together using some fabric with Marvel characters. FUN! So off to a store that I knew carried similar fabric. Many of the license fabrics can be found at box stores. I wanted to be sure the characters would fit inside my Hexie shapes. So, I made a template of all three sizes of my Hex tools. Now I can see what size would work best! The template is below. I used card stock and carried it with me to the store in a plastic sleeve.
I found several options of the Marvel characters. Hmmmm, which to do???? See how I used my card stock template to see which would be the best size.
I have not decided which size I like best. It might be determined by how fast I want to make the quilt. A bigger shape will get done quicker! As I mentioned, Nancy used “Jr.”. This will have to go on the back burner as I have other promised quilts to finish first. But in saying that, this would make a great leader and ender project. I could get everything cut and then feed it in my machine between a MUST do project. Now, I like that idea!
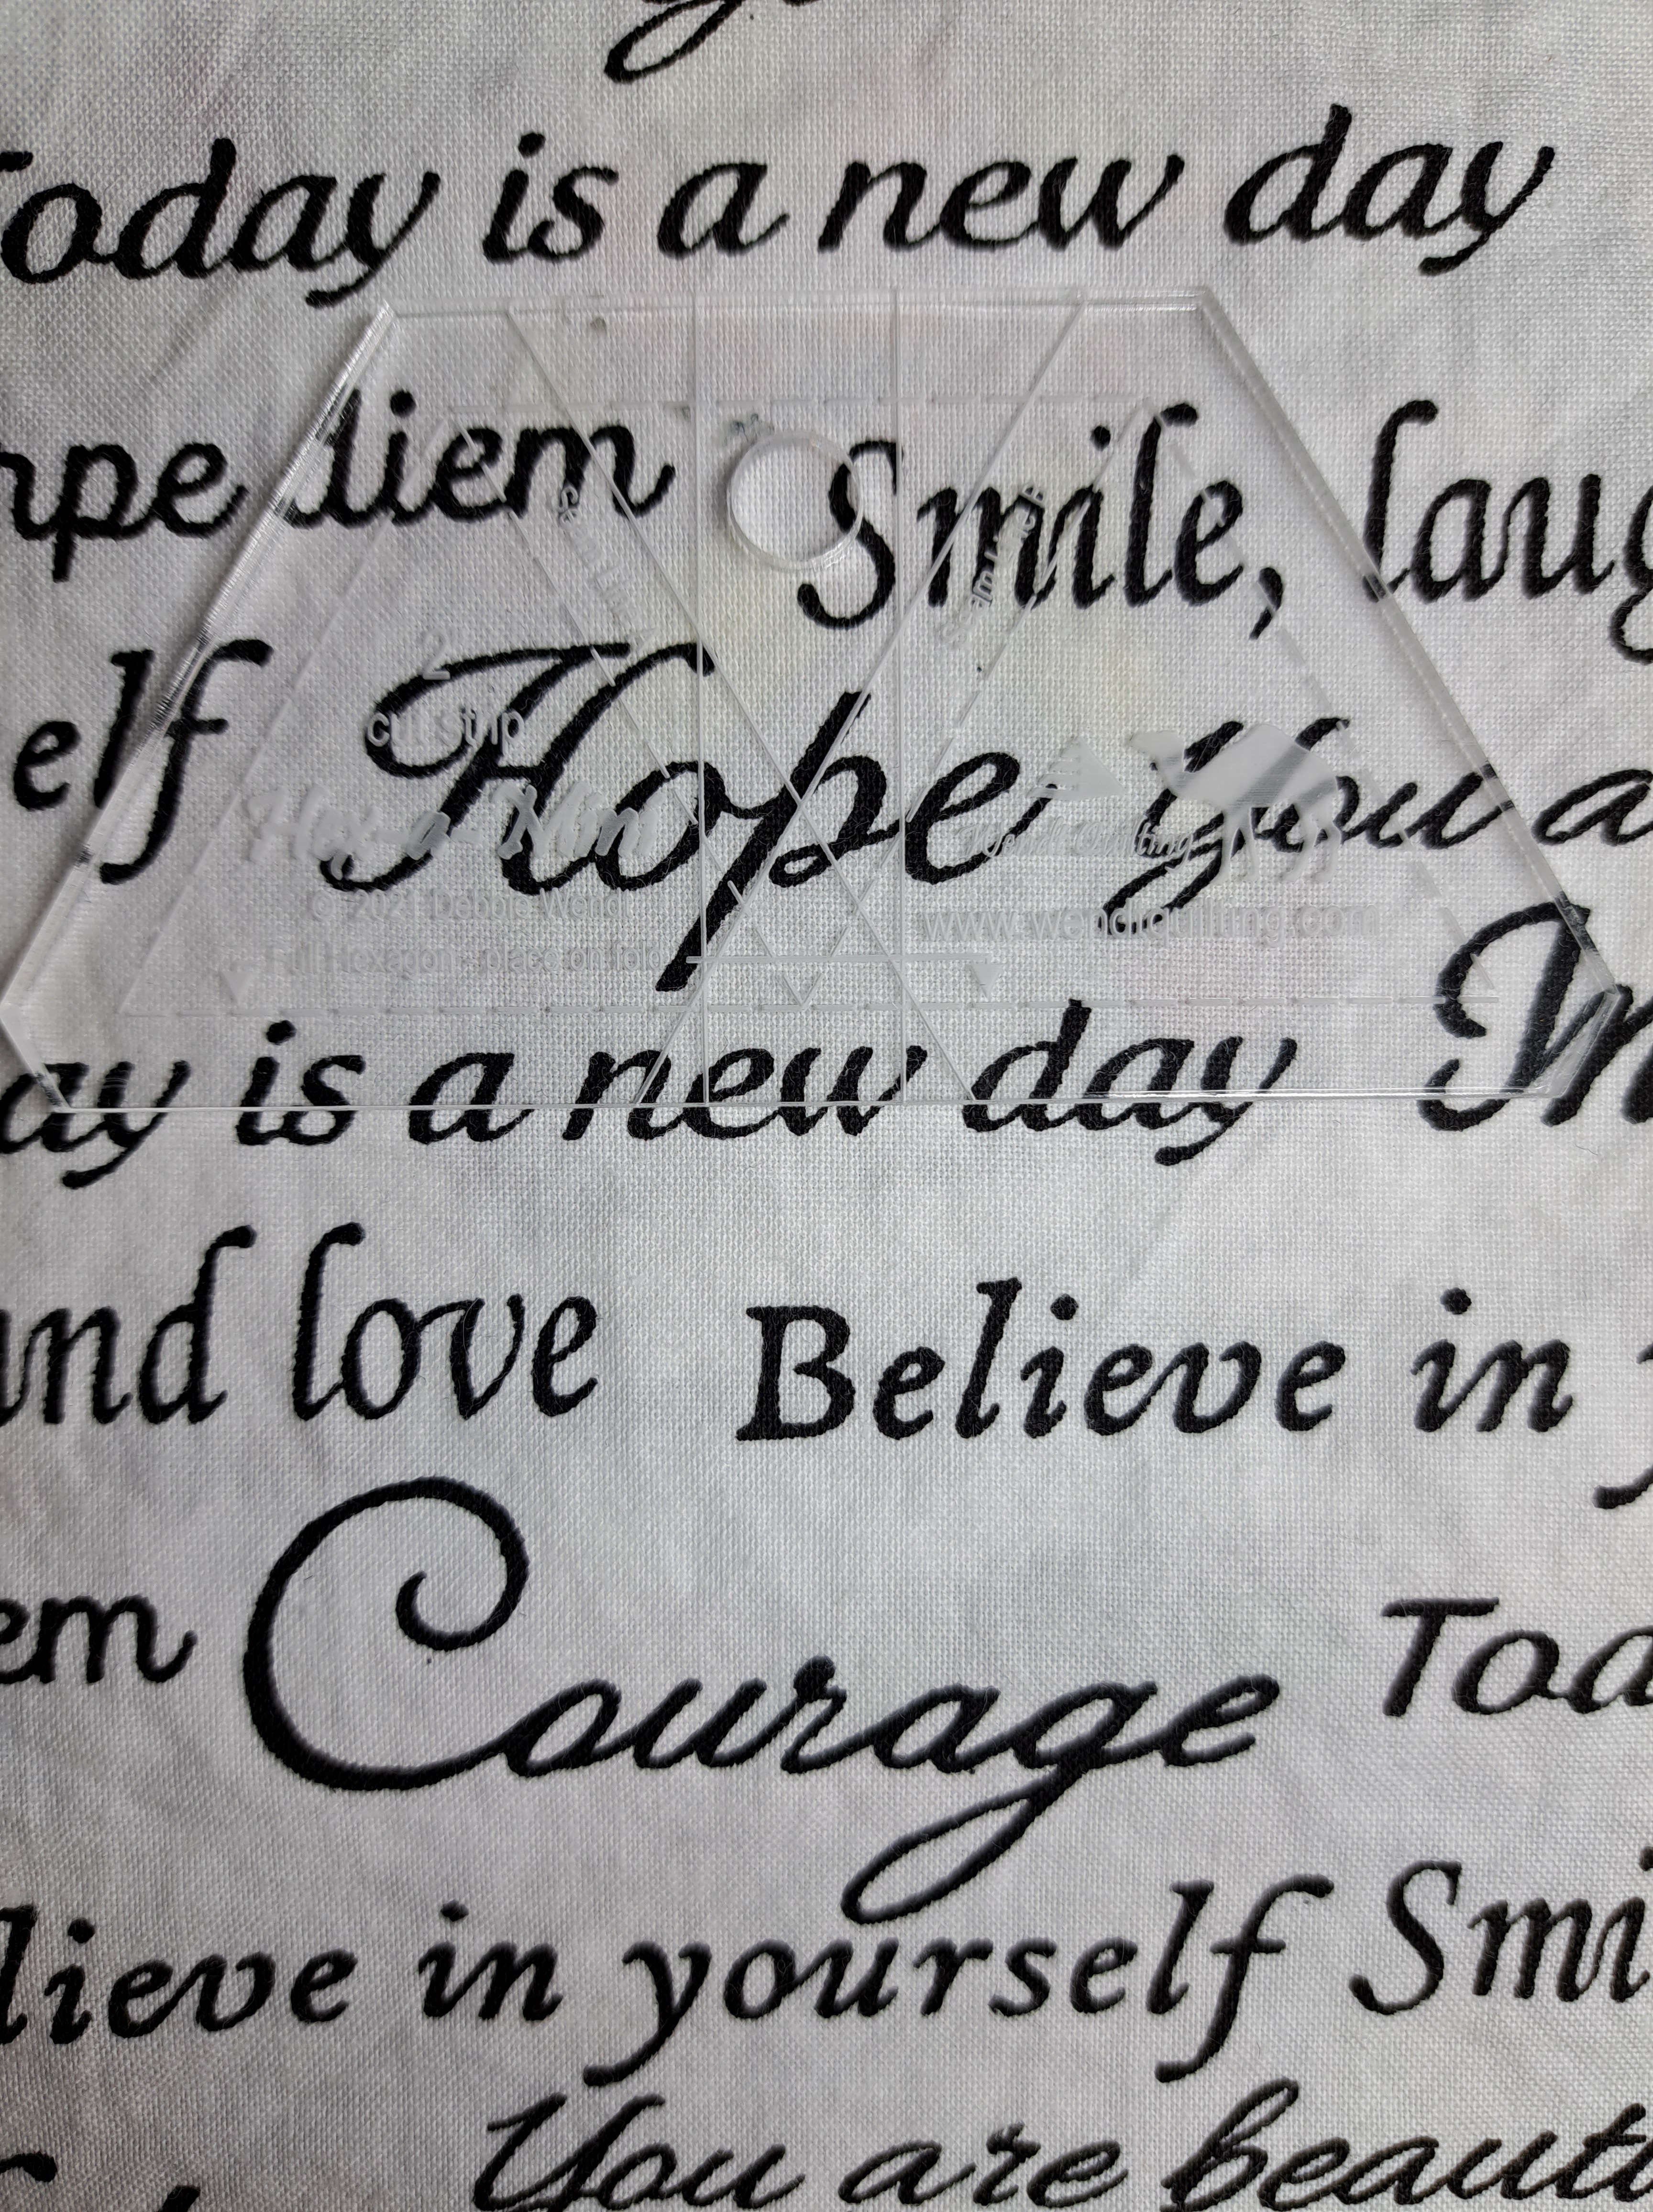
I had words on fabric leftover from a guild challenge last year. I used Hex-a-Mini to focus on just a word or two at a time. As you can see, Hope was several time across the fabric. I like it with laugh underneath it better than what is shown in the template. Fussy cutting the words was fun.
#1 – Make yourself a template to test fabrics you want to fussy cut.
#2 – If you have a project with small seams, use it as a leaders and enders. I bet you will be HAPPY sewing them and you’ll get two projects done at once without much extra work.
(I realized I made a pun with the pattern name being “Happy Hexagons”….So, I went back and made it all caps in tip 2) I love a good unintentional pun!!
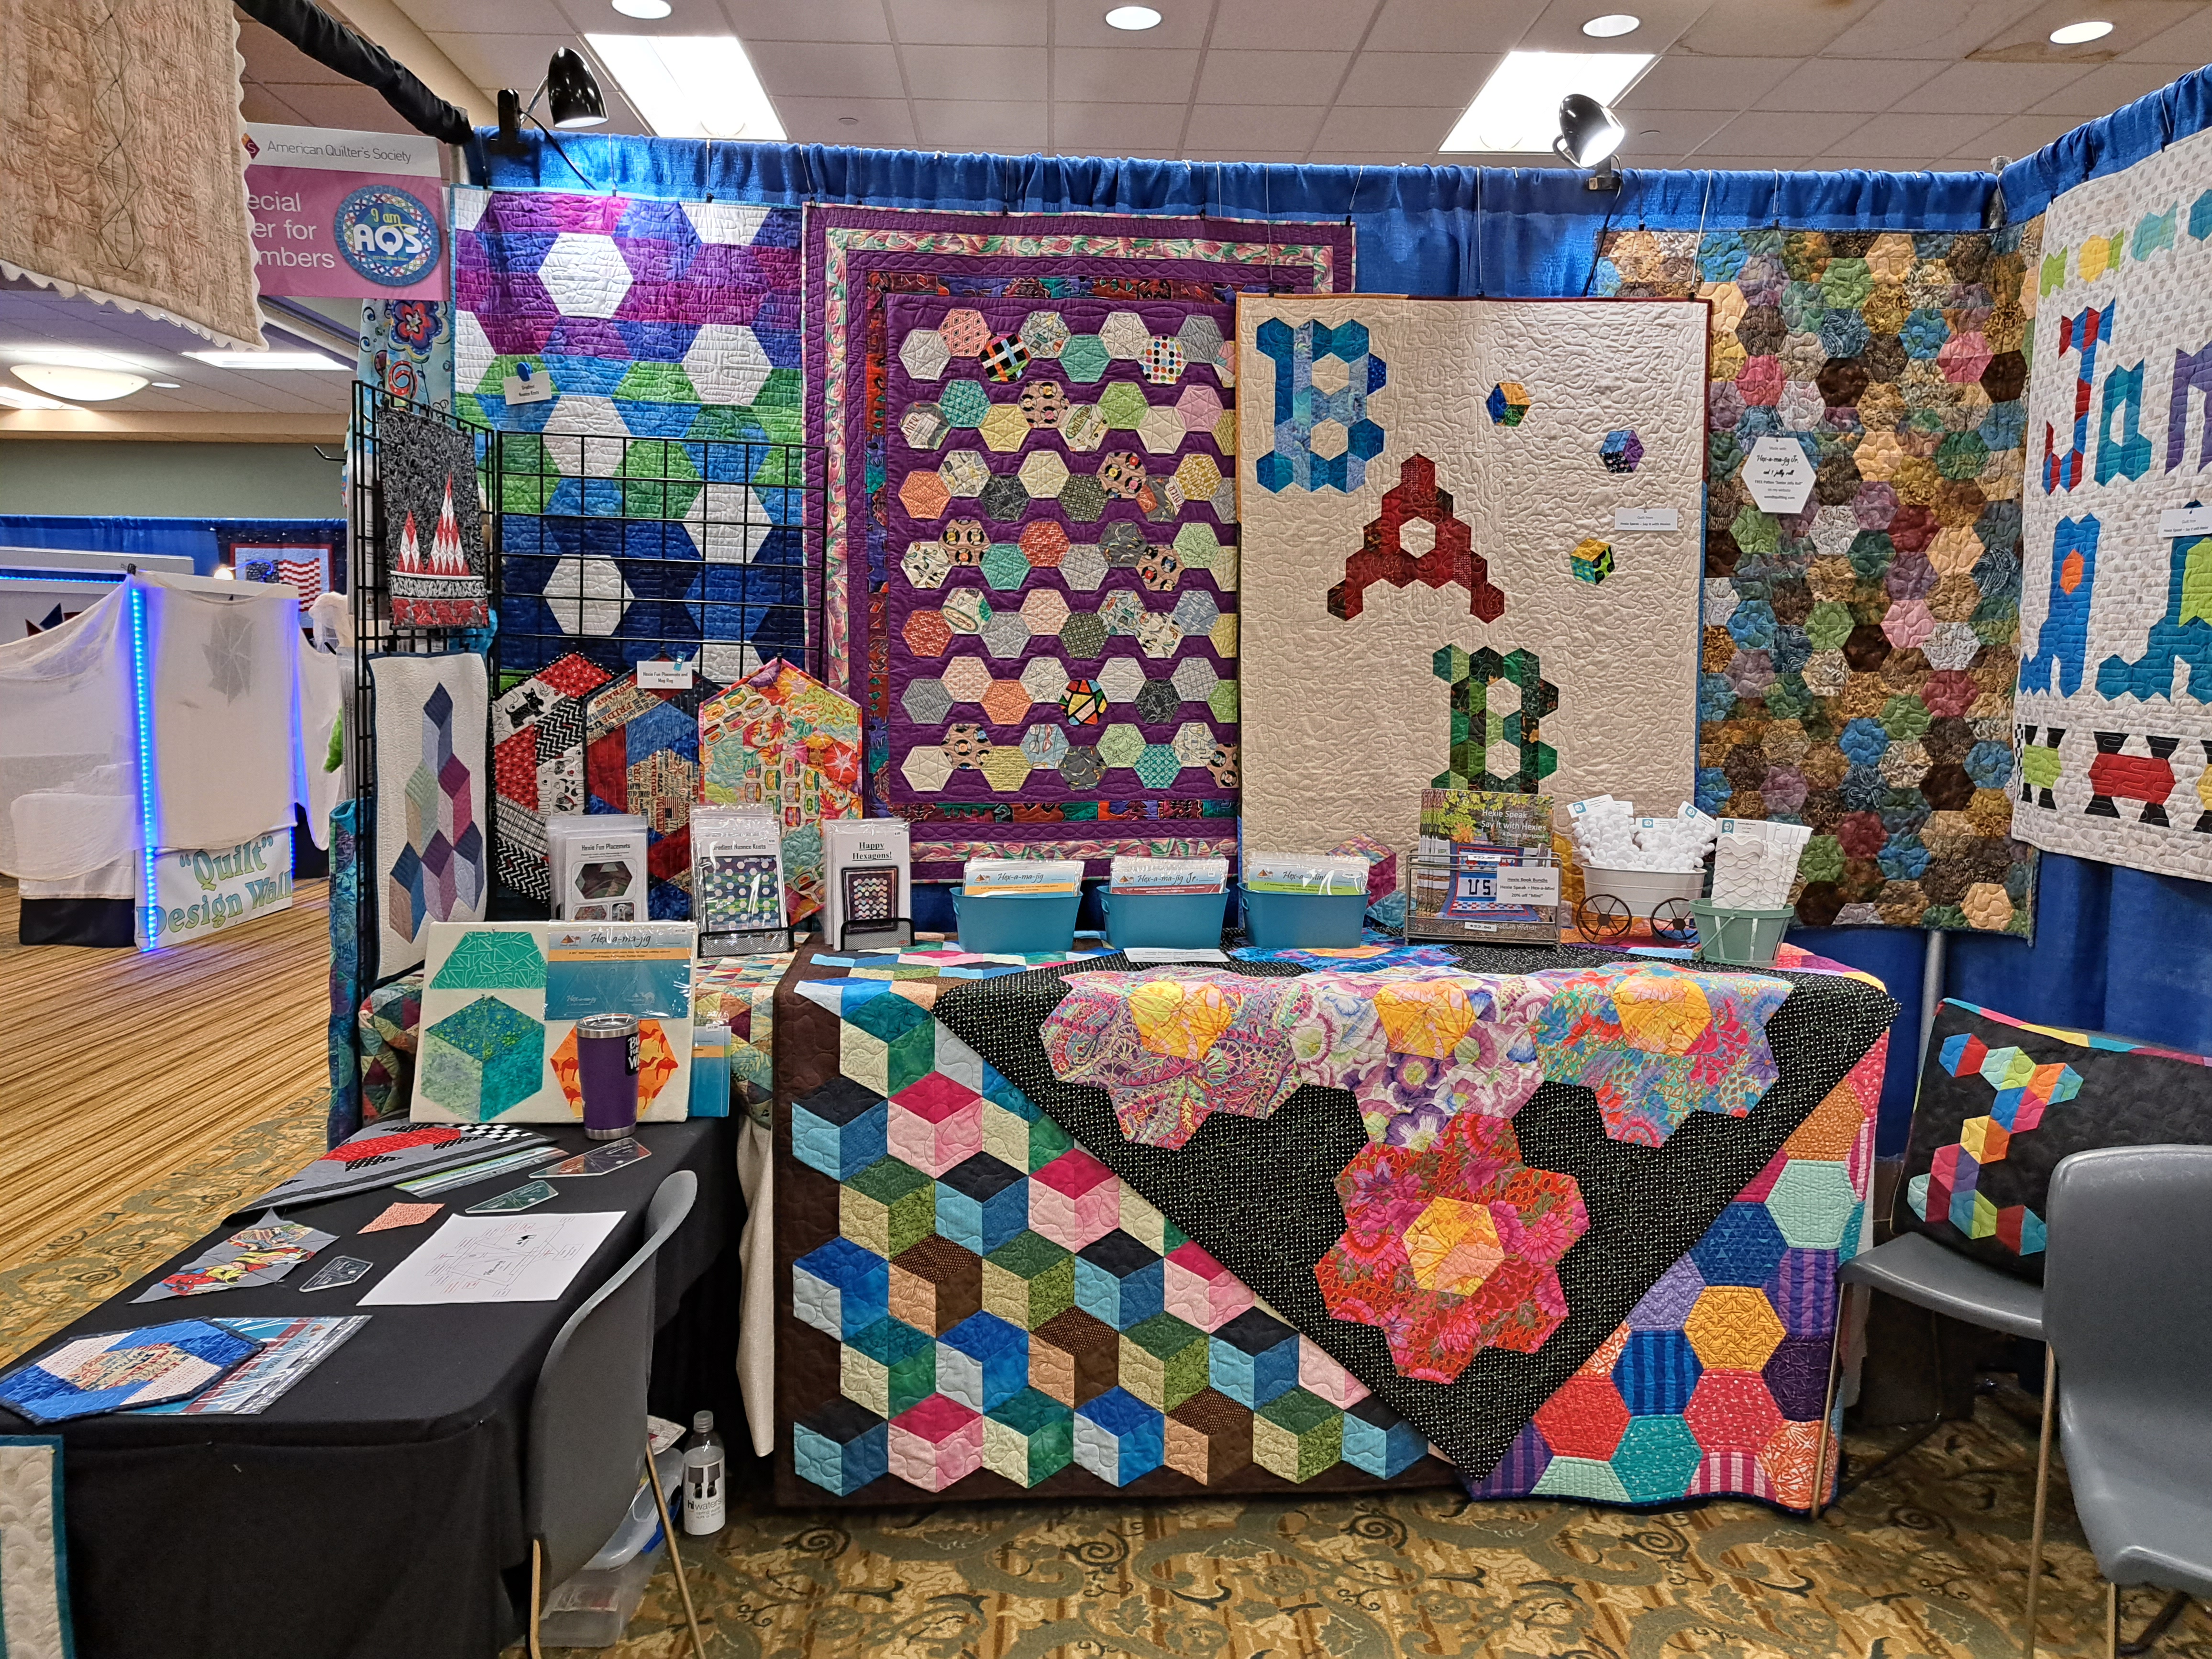
YAY! A great AQS Quilt Week in Paducah! Last week I was busy setting up my booth and having it ready for the Preview Night on Tuesday. I’m back home relaxing from the drive home. Many thanks to all who visited and shopped in my booth. See my booth below!
Many thanks to Nancy Hinds and Carol Vogel for helping in my booth this week. Nancy did demos on my Hexie tools, patterns and new Hexie Speak book while I did demos on Brilliant Bindings and the patterns that use the tool as a cutting template. Carol helped our customers. Nancy designed a quilt and pattern using Hex-a-ma-jig Jr. that can easily translate to all Hexie sizes… Happy Hexagons I was thrilled to debut it in the booth. You can see it to the left of the “BABY” quilt. It was great to share so many quilts in my booth!
Interestingly the focus at the show was sewing hexies and half hexies in rows for my letters, borders, quilts and now Nancy’s Happy Hexagons. Her pattern will be available on my website very soon. All of my hexies can be found at wendtquilting.com!
If any of you purchased my Spa Therapy pattern, please check that it has the Eye Sinus pattern. Please email me. Also, the Sudoku Sampler had a printing error, check your pattern and contact me. Apologies these slipped past me.
Tips for ….after the show….
Check your items, be inspired and get those projects started!!
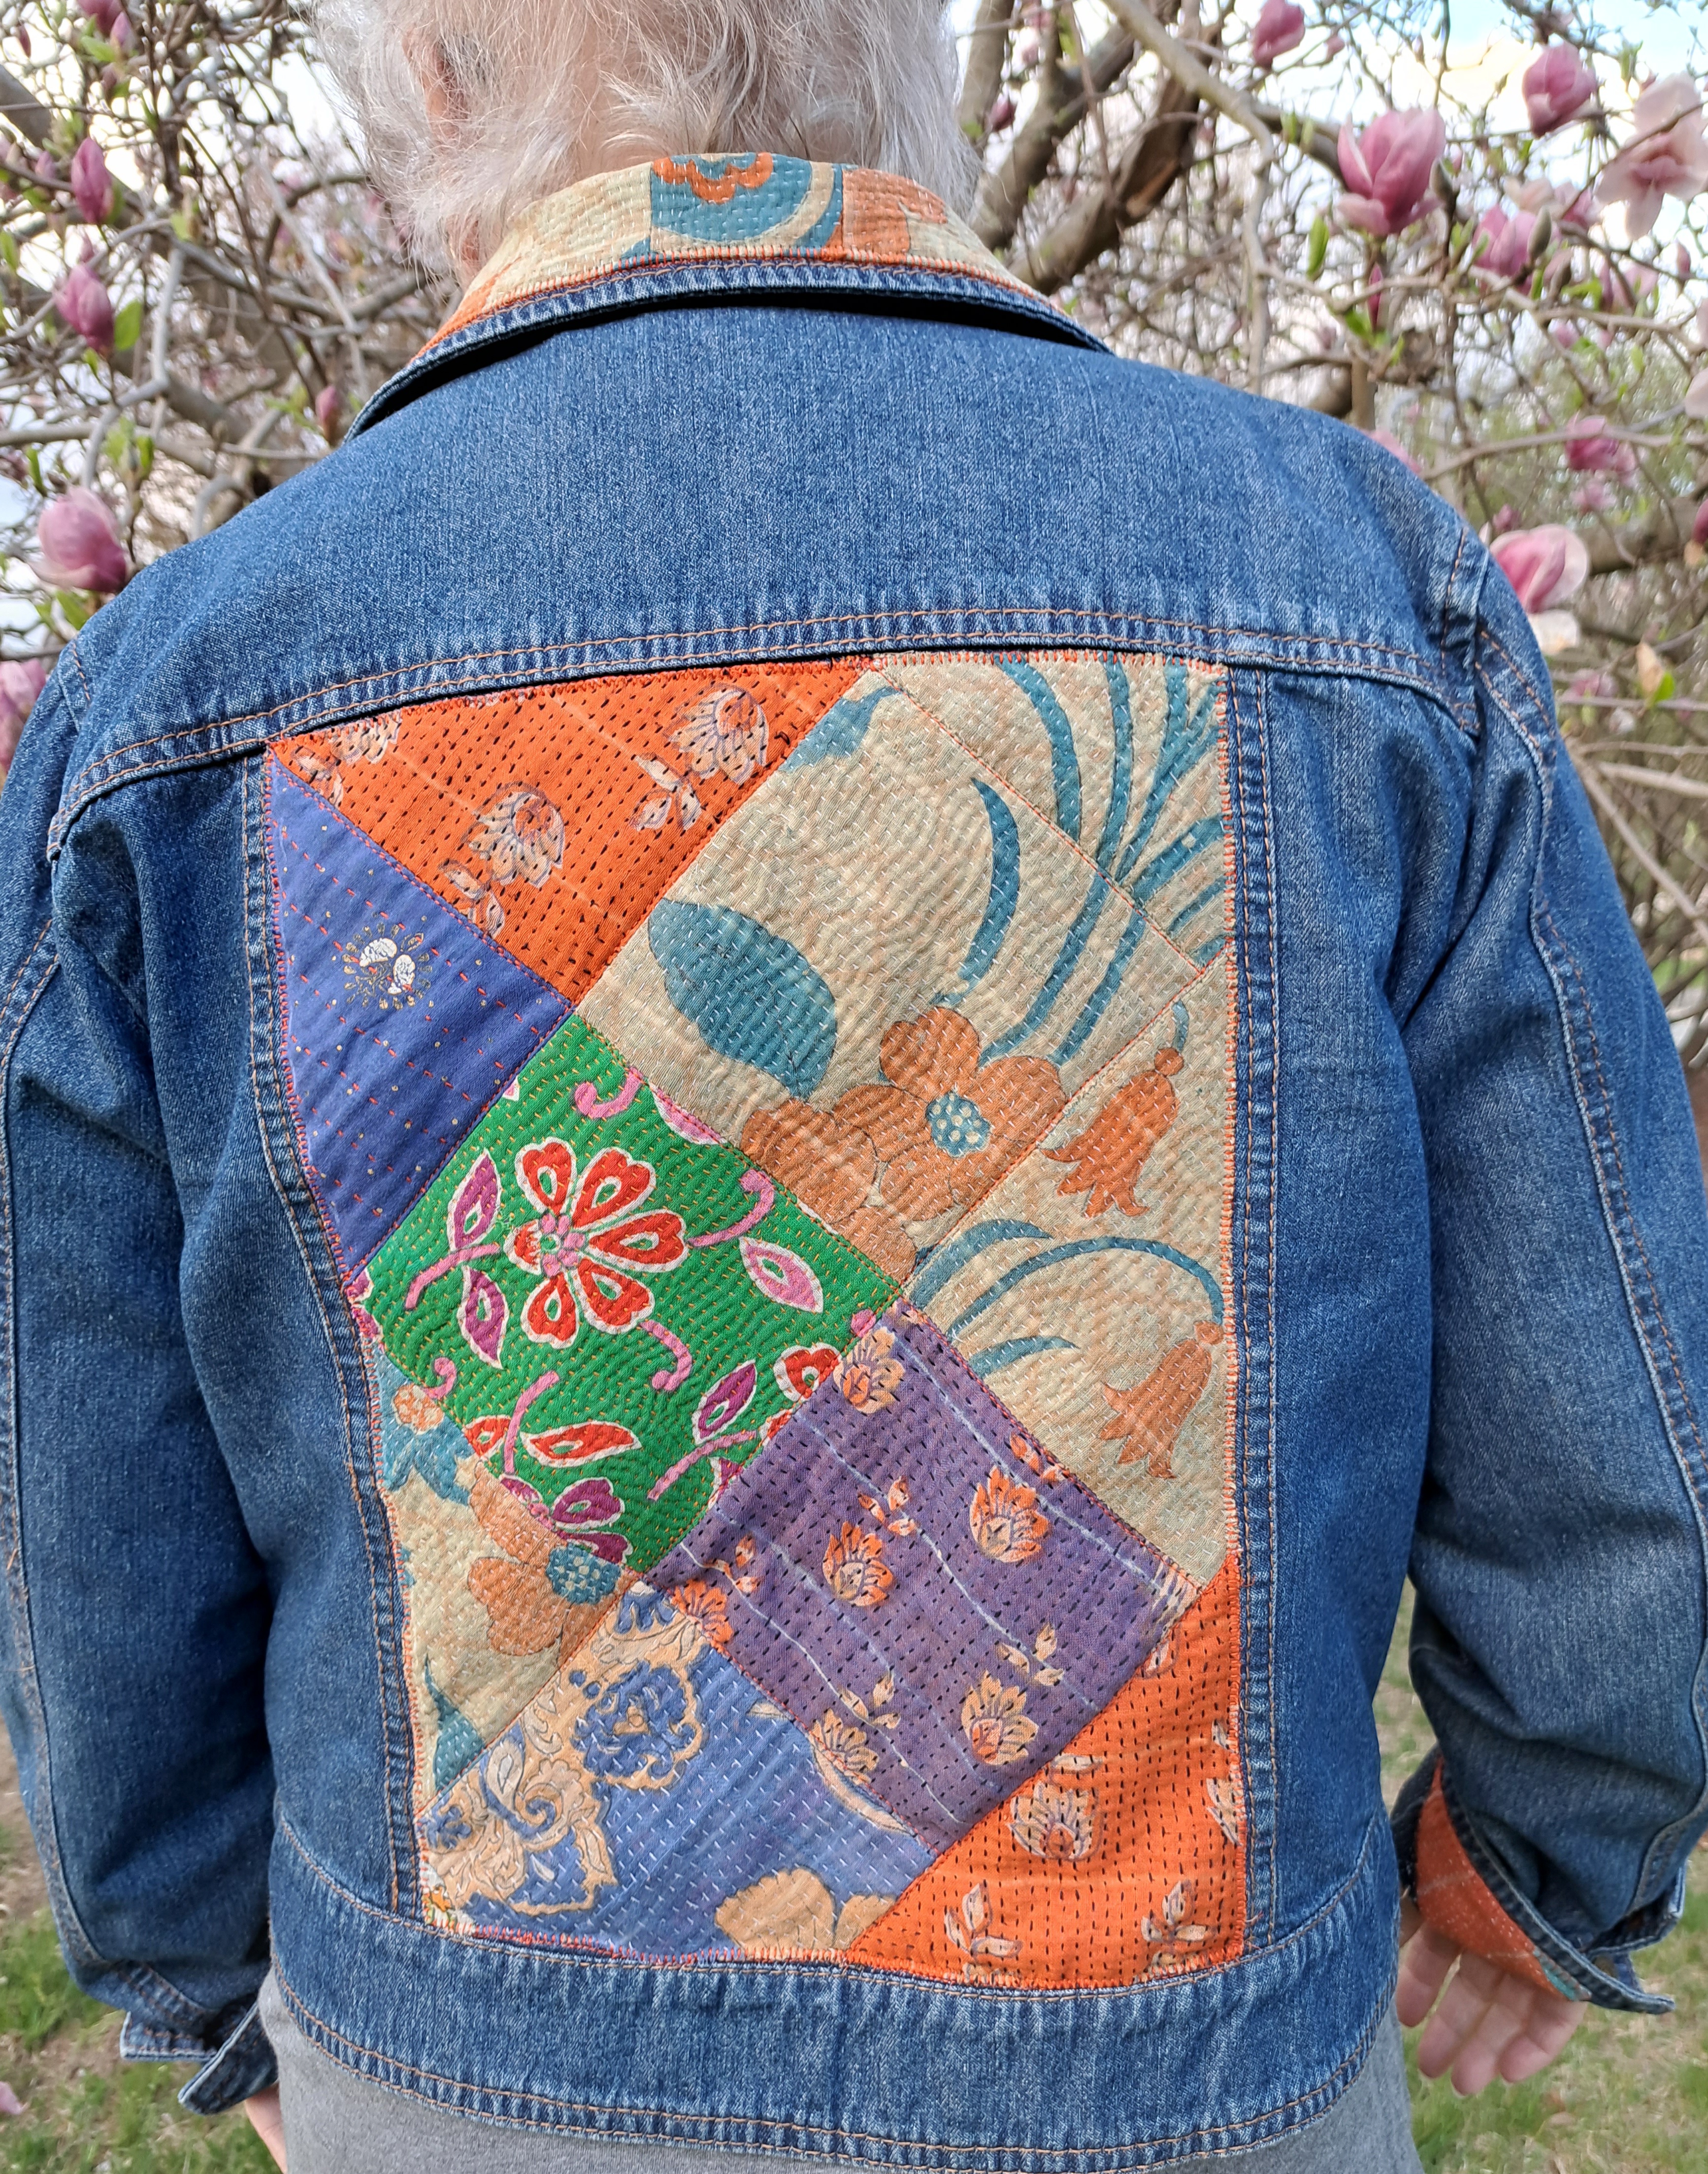
I’m excited to report, I have a finish!! I took my “old” denim jacket and 5″ Kantha squares to a Getaway this past weekend. Look what happened…
I’m so happy with how it turned out. I’m still debating if I should add more to the front or pockets. For now, it will be as is. Simple and done!
It started out with arranging the blocks for the placement I liked. Once I got the arrangement, I cut it to size of the center of the back center of the denim jacket.
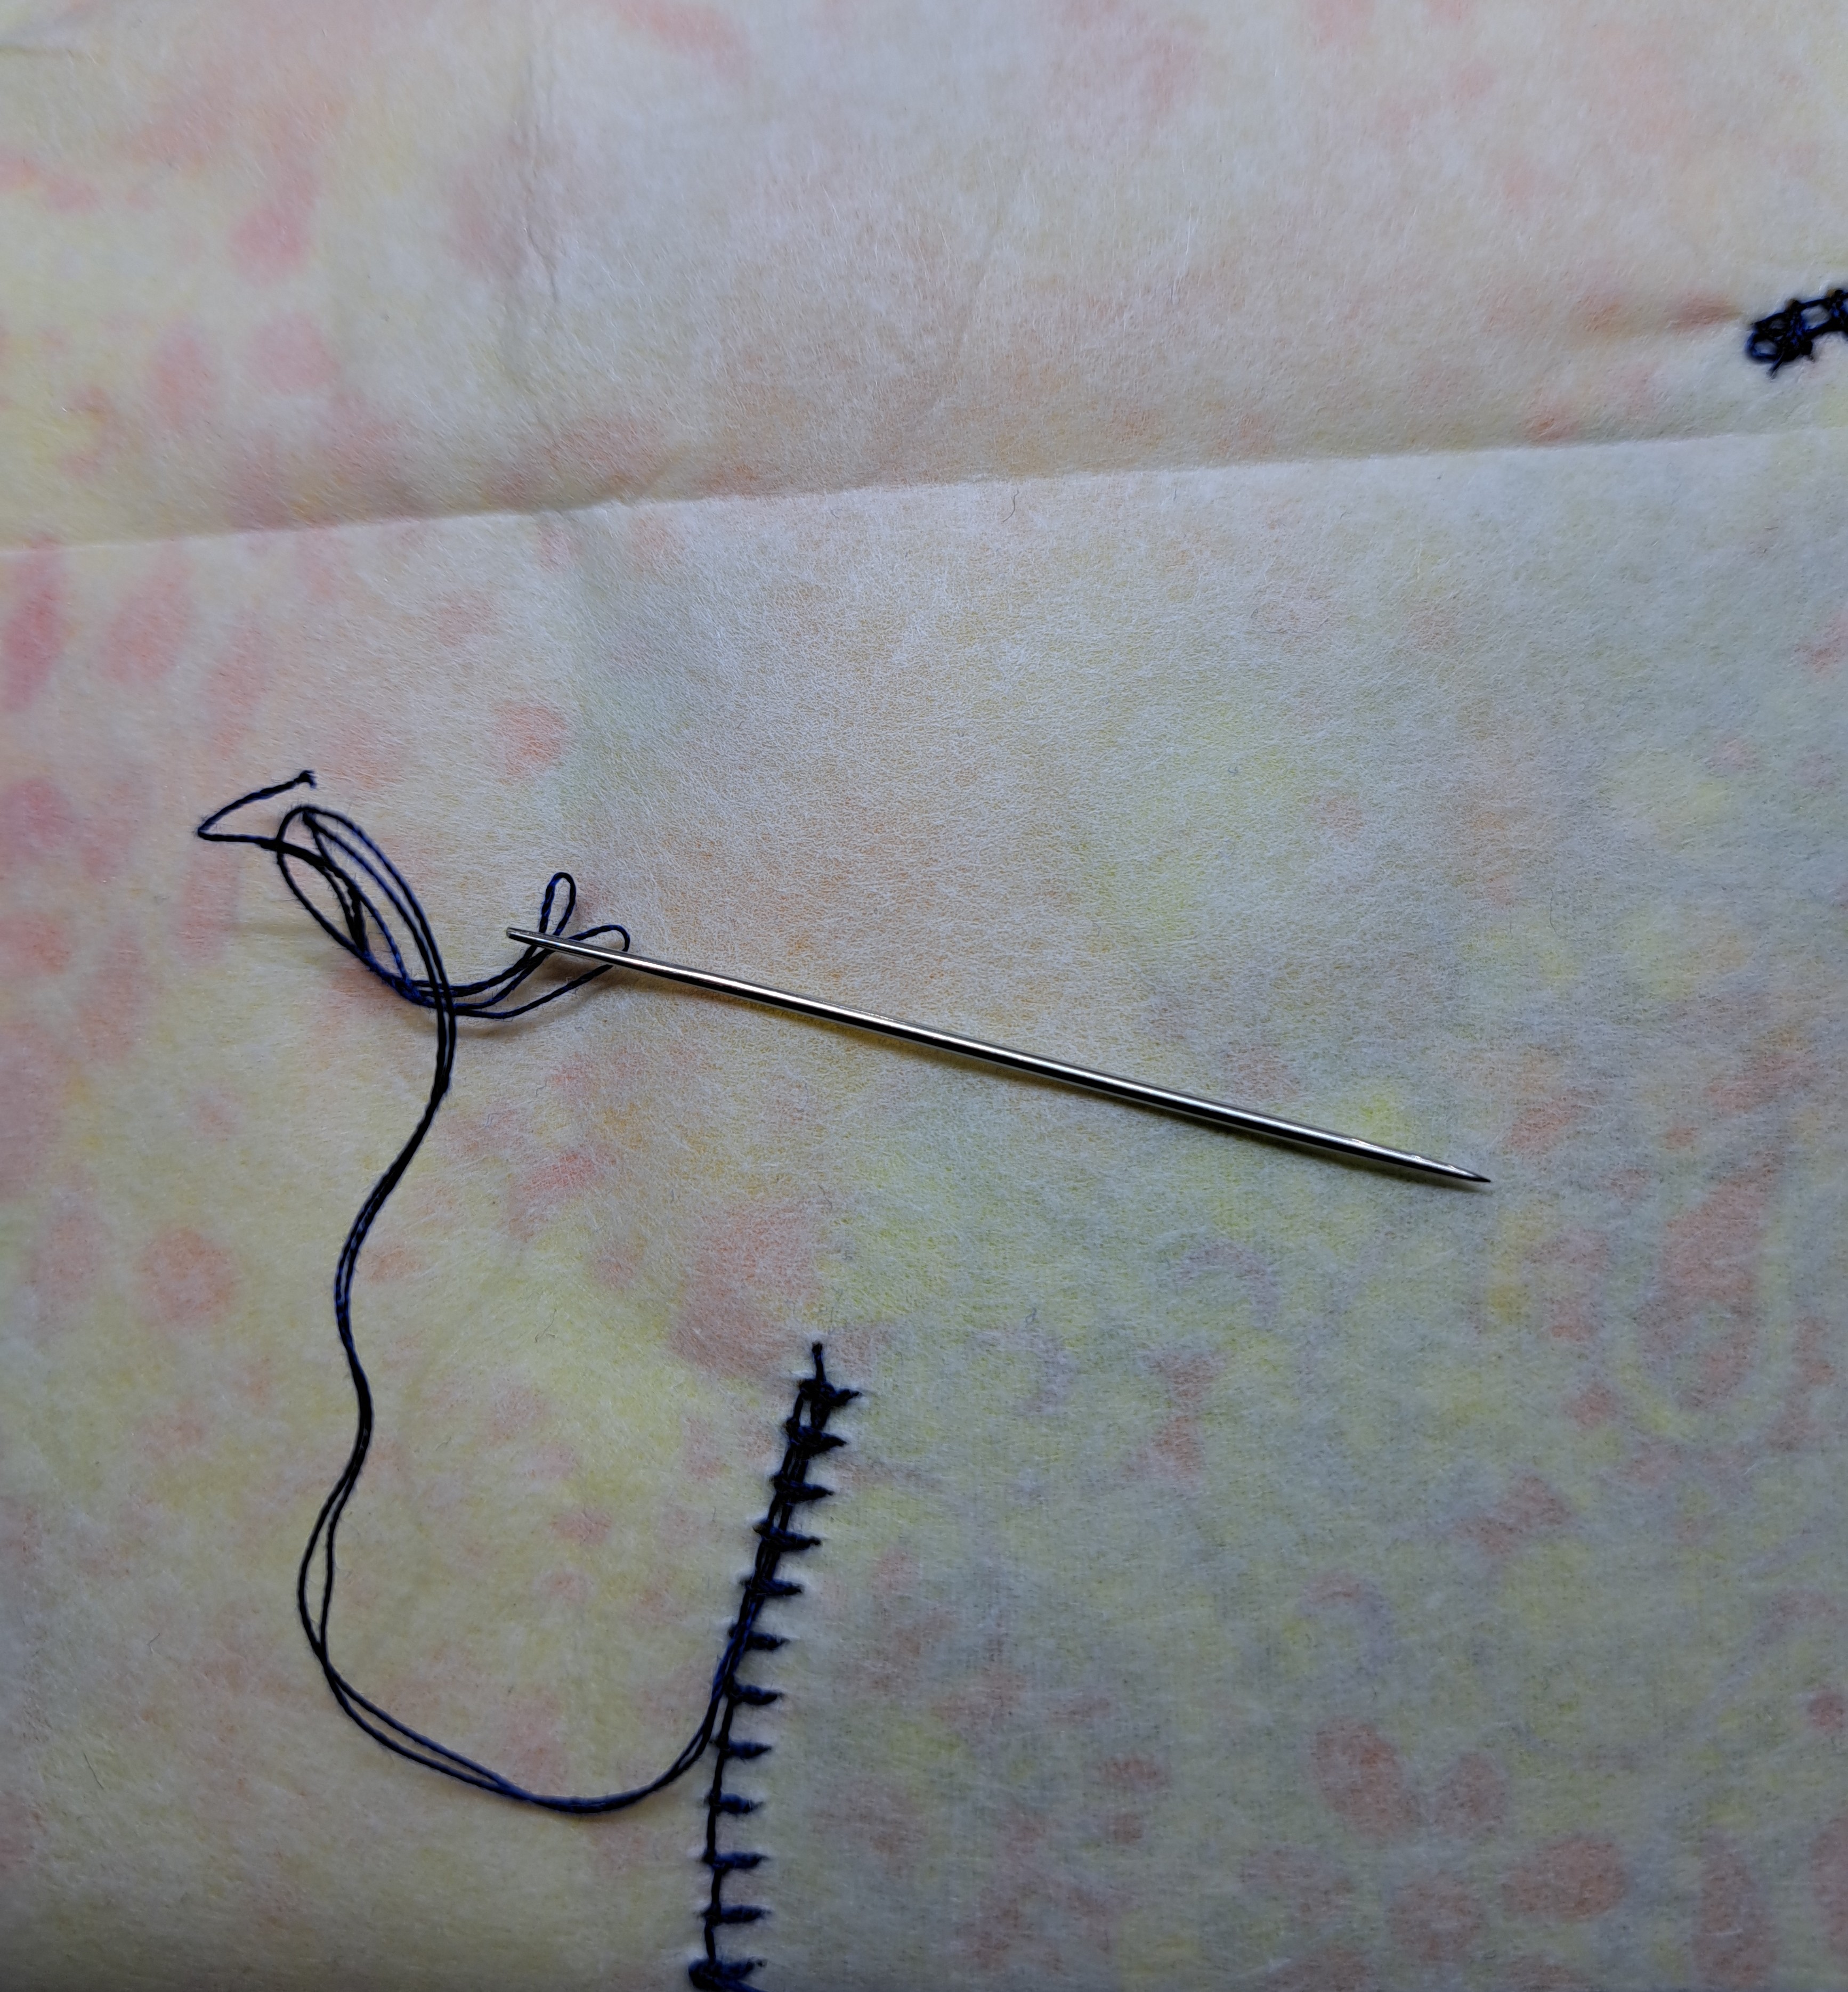
I attached the back panel with raw edge applique. I used a blanket stitch on my sewing machine. I added a few quilting lines to hold the panel in place so it wouldn’t become floppy. The collar and cuff/sleeve pieces were turned under with a 1/4″ hem. I attached the cuff pieces with a hand sewn blanket stitch. The collar was machine sewn with a blanket stitch. The hand stitching is shown below.
I was concerned about having both machine stitching and hand stitching on the jacket. But, then I realized, it would help me finish it…so, I used the machine stitching to get it done!
#1- Take time to arrange and REARRANGE until you like the layout.
#2 – When hand stitching a blanke stitcht, work to keep it even……in length, width to the next stitch and height of the stitch.
I’m happy to have this project/jacket DONE! It will be fun to wear in Paducah next week at Quilt Week! Come by my booth #3500. We’ll be up on the second floor of the Convention Center.