Two Tip Tuesday

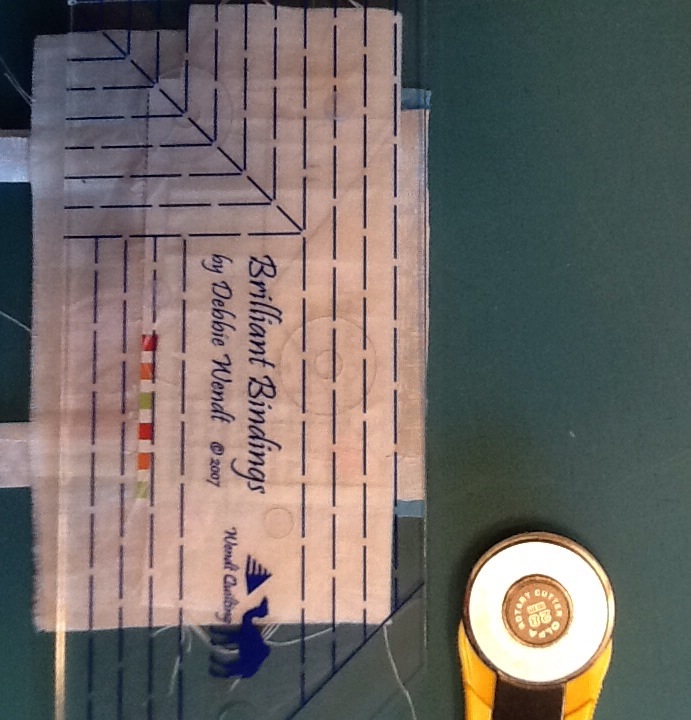
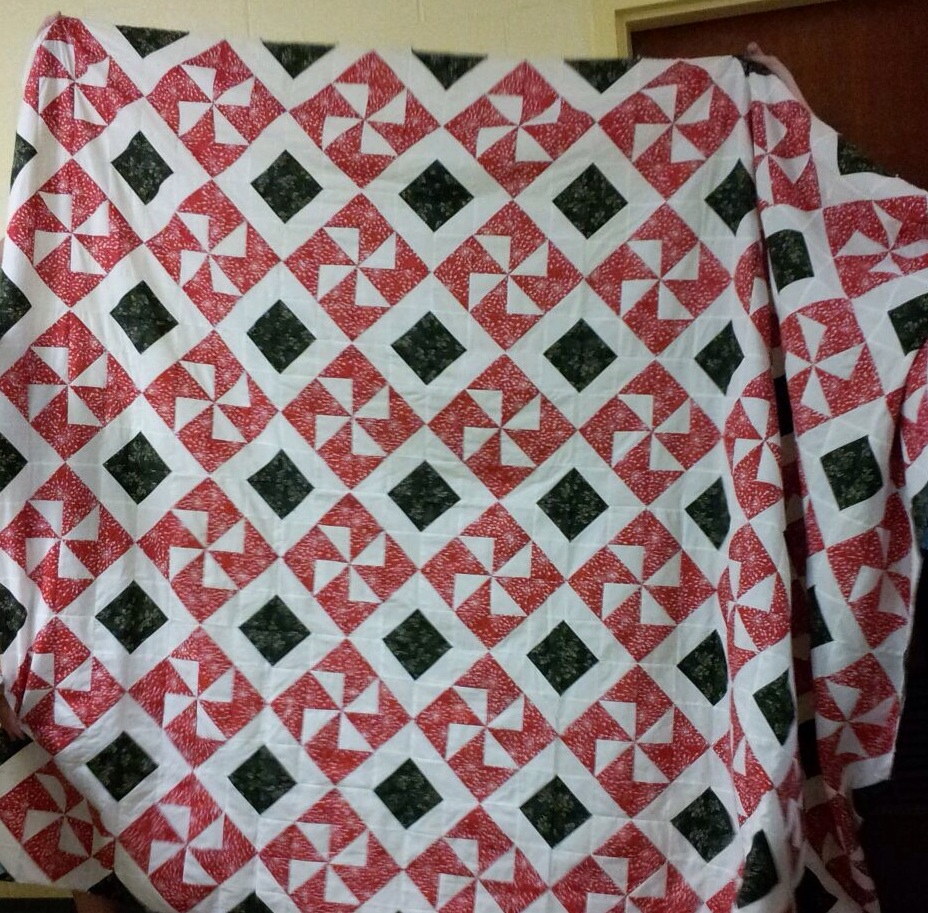
Today’s tips are coming to you from Syracuse, NY!  I spent the day setting up my booth for the AQS Quilt Week.  The show opens tomorrow and runs thru Saturday.  Come on by booth 713!  I’ll be demo-ing Brilliant Bindings and have several of my new Snuggle Tails on display!

I’m going to follow up on my hand quilted challenge from last week.  I talked about keeping those hand quilting stitches even, but what about starting a new line of stitching?  Do you know about popping the knot?   When I first learned to hand quilt (many moons ago), I thought this was a silly term.  But, you can literally hear the knot pop into the fabric if you listen for it.

Thread your needle, I use about an 18″ length of quilting thread.  Tie a knot at one end.  If making a quilter’s knot, I wrap about 2-3 times around the needle.  You don’t want the knot too large.  I put the needle in the top, keeping the needle running between the layers of the quilt sandwich, and exit the fabric where you want to begin your line of quilting.  Pop the knot and quilt.  The images below will show ending the line of stitching and popping the knot at the end.

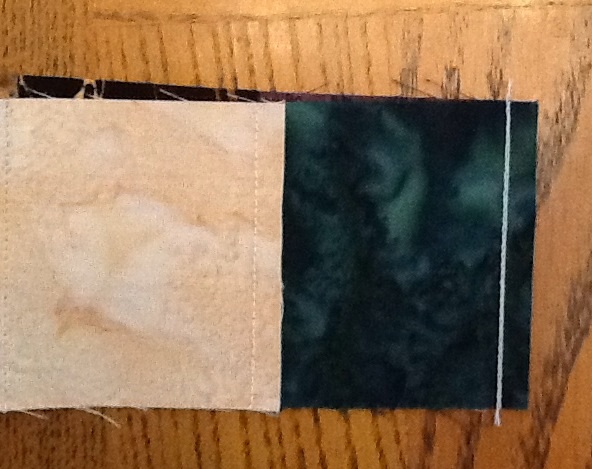
Look just above my finger and you can see the knot at the seam line.

image


If you give a slight tug on the needle thread that knot will pop in between the layers!

#1 – If having trouble popping the knot, lift up on the quilt top layer with your needle.  It helps the knot pop easier.


Photo below is the knot almost popped between the layers.

image


Now, how about the rocking stitch?  I found when I first started quilting that I had my fabric too tight in the frame.  It needs some give so you can work the fabric.

image

#2 – Find a thimble you like!  My personal favorite is a flat top thimble.

Wear your thimble around to get comfortable with it!

in quilting,

Debbie    ~ Wendt Quilting


Posted in Handwork, Quilting, Uncategorized | Leave a comment

Two Tip Tuesday

Another deadline met!  July is the Thimble Pleasures guild’s challenge reveal.  This years challenge was “Heritage”.  I combined several ideas to create mine.  I started with my quilting history and did hand appliqué, hand quilting, and used one of my favorite designer’s patterns as a jumping off point.

The pattern I choose is one by Lori Smith of “From my heart to your hands”.  I fell in love with her style years ago!  Every so often, I find a design I just have to have.  I used one of her small quilts from “Quilt Squares #5” as my inspiration and pattern for parts of my piece.

image

I couldn’t pick just one nationality of my ancestors!  I’m a bit Welsh, Irish, English and German (and probably some others).  So, I used the logs of the log cabin surround to show how many different pieces/nationalities come together to become a wonderful whole!  The tree represent my family tree and strength of family ties.  The blue bird is often a symbol for happiness.  I changed the house to a schoolhouse as I am from a family of teachers going back several generations!  I have always said teaching is in my blood!  Teaching is my passion and teaching quilting makes me very happy.

I enjoyed every step of this project.  As I came to different steps, my quilting mentors and friends were whispering tips and memories in my ear.   I dug through my stash for just the right fabrics to make me smile.  I have always been a fan of freezer paper appliqué , but I did some back basting (shown to me a few years ago by my friend Kathy H.).  I did some reverse appliqué for the schoolhouse windows to give it the feel of looking into the schoolhouse.  I thought about putting a school name on the sign but decided to leave it blank so it could represent any of the many schools my family and I have taught at and attended.  (Bueker Middle School in Marshall, MO is named for my Great Uncle Armin…how cool is that!?!). I even hand quilted it.  I tend to go in high gear most of the time, it felt good to slow down and enjoy the needle and thread in my hand.

To add to the heritage part of all of this.  I spent some time with both my parents looking at their family trees/charts, paperwork, land grants and certificates.  Amazing to think about all the history that got us to this point in time!

lets talk tips…

#1 – Use the designs in your fabric to enhance appliqué pieces.

#2 – Keep quilting as even as possible.  (Even is you need to take longer stitches, keep them the same length and they look nice and neat!)

image


This piece is a 12″ square, so a 12″ square worked beautifully.  I did not want the bulk of a traditional binding so I applied a single fold binding to the front and pulled it all the way around to the back.  I also stitched the entire piece onto foam core board to keep it flat and secure in the frame.

image image image


In quilting,

Debbie   ~ Wendt Quilting

Posted in Brilliant Bindings, Handwork, Quilting, Tips, Uncategorized | 1 Comment

Two Tip Tuesday

Did you know there is a calendar with all kinds of “national days”?  I found it after seeing some posts about National Tape Measure Day today.  Today is also listed as Grand Marnier and Nude day.  Hey, does that mean we should run around nude drinking Grand Marnier and Measuring things?  Uh, not this girl!  Too scary!  I think I’ll focus on the Grand Marnier…ha…maybe I better pick the tape measure, better for quilting tips.

How many tape measures do you own?  Short ones?  120″?  Metal?  Cloth?  Cute animal shapes?  Do you carry one in your purse or bag?

image

A cute turtle has been one of my favorites.  ( it is hiding in my supplies, so I don’t have a picture of it)  It is my 120″ that I reach for the most!  I have one hanging on my Longarm, one upstairs always ready when laying out quilts and another in my Flat Mat Bag  that I take on all getaways and sewing events.  The little heart tape measure had traveled in my purse for years.  I downsized what I carry, so it now stays at home most of the time.

Do you measure your quilt top with a metal tape measure?  Somewhere along the way I heard it was recommended because it did not stretch.  I have used one at times, but much prefer my 120″.    Fabric moves and I find I can smooth things out as I measure a large quilt for the borders.  I typically use my family room floor to lay out a quilt to measure.  I do use the same tape measure to then measure and cut my borders.  BEST to get the most accurate “same” measurement.

#1 – Use the same measuring tool for measuring borders and then measuring to cut the length for that border.

When measuring for borders, do you take several measurements and compare?  I DO!!  And I’ll tell you why.  If you only measure the edge, it tends to stretch as you smooth it out.  Only measure the middle?  If there is more pieced seams across the center it is more “stiff” and does not stretch much at all when smoothed.  So, measure in several spots and use the average.  This helps keep the top nice and “square”.  If you add borders without measuring first, your machine tends to push the fabrics.  (Actually the operator also pulls and pushes…don’t do that!).  If you do not measure and whack off the extra and then do that again on the other side, I am almost certain each border will measure a different length.

#2 – Measure in several spots across a quilt when determining border lengths.  Taking the average keeps a square neat quilt.

So, grab a tape measure and MEASURE!

in quilting,

Debbie    ~ Wendt Quilting

Posted in Borders, Tips, Tools, Uncategorized | 1 Comment

Two Tip Tuesday

Today I celebrate!  I gave a commitment to this blog, and I have reached just past  the half year mark!  I missed a few week’s posts along the way, but for the most part I posted!  It might seem like a little thing, but for me it is huge!  Thank you for following me this far!  I am inspired to keep up and bring you more tips for the second half.

and speaking of halves…how about those Royals!  We are nearing the All-Star game and that is considered the halfway point of the season.  I know many of you have your hometown favorites and mine is the Kansas City Royals.  Living in New England, I enjoy following the Red Sox and with a husband from Chicago; the Cubs have been the constant.  Notice with all these teams you don’t have to always win to be loved!!!  I’ve had the good fortune to attend many of the Royals games when I am in KC, my hometown.  (Thanks Mom and Dad!). The excitement at “the K” is fantastic.  I had a blast sitting next to my dad on Father’s Day enjoying the game.  We got a little wet (while my mom escaped to the mezanine for shelter.  It was a miserable loss to the Red Sox but a great day none the less.

My dad and me!

My dad and me!

...and then it rained.

…and then it rained.


Why bring up sports on a mainly quilting blog?  Well, how about looking at teams for color choices of a quilt?  Take my favorites…

the Royals. ~. Royal blue, white, and a bit of powder blue mixed in.

the Cubs. ~. Royal blue, red and white.

the Sox (RED Sox, that is). ~. Red and white.

Each of these are great color combinations and a great starting points.

#1 – Use sports team colors in a quilt.

OR

#2 – Let nature inspire your color combinations.

image image image


the Monarda have exploded into bloom this last week.  Good timing for 4th of July celebrations!  And hummingbird attractions.  The rose is full bloom and shows the great color variation in the petals.

inspirations

in quilting,

Debbie


Posted in Tips, Uncategorized | 2 Comments

Two Tip Tuesday

Before and After!  Myself and 3 others in the Thimble Pleasures quilt guild participated in a mini Round Robin.  We did give ourselves a few rules to give structure.  One being that we had to include appliqué on someone’s round and to keep the size to maximum 12″ (as I recall).  I am thrilled with mine and had a blast working on the others!

BEFORE

TP Mini Robin Centers

TP Mini Robin Centers

Mine is the mini 3″ Twirl-A-Tool on the bottom right!

AFTER

TP Mini Robins

TP Mini Robins

WOW!!!  I love the changes that happen!  The influence of what others do/did effects what the next person does!  I am so impressed!  Nicely done Marcia, Christine and June!!!

…..so some tips in working in a robin group…

#1- Set some rules!  It really helps to not be all over the place.  (I was in another round robin several years ago and we had rules for each round.)

#2 – spread your creativity wings!  (Someone in our group said she didn’t think she liked handwork, yet she did it on a couple here and enjoyed it!). You never know what new technique you might find you like.  And if you do it on someone else’s it might be less threatening.

There are many different robins our guild has done, not only “round” robins.  How about…

~ block robins

~ row robins

~ embellishment robins

Get a group of quilting friends together and make some plans!  I highly recommend you add to what has happened before.  Don’t put a bunch of bits in a box and have the owner put it all together later.  I think the creativity and challenge comes in adding to what is already there.

Look at our simple blocks BEFORE they were passed and then AFTER they were done…WOW!

So, just in case you are wondering which rounds I did…  The flying geese around the house, the outside squares and small appliqué circles on those squares of the top right and the simple bright inside borders around the flowers.

in quilting,

Debbie

Posted in Uncategorized | 1 Comment

Two Tip Tuesday

Have you heard about the Row by Row Experience?  It started yesterday!  The theme this year is H2O. Many, many shops across the USA and Canada will have a free row pattern for you to pick up in person!  Many will have kits to purchase, no need to worry about what fabrics to use.  And licence plates for sale with quilty sayings.  I think the plates are my favorite part.  Some of my Snuggle Tails are on display at Sturbridge Quilting and Sewing in their Row by Row H2O display!!

Sturbridge Quilting and Sewing

Sturbridge Quilting and Sewing

The free patterns run through September 8th.  So hit the road and have fun collecting and making your quilts!  I’ve talked about supporting your local quilt shops.  This is a great “excuse” (not that you need an excuse) to search and find quilt shops as you travel this summer.  How about getting a car load of quilters together?  Road Trip!!!


As you visit the shops, do me a favor, make a purchase!  Add a fabric to an existing project, find a new tool, look for a pattern, pick up the batting or thread to finish a quilt.

My tips today are from my Wonderful Little World little houses quilt.  I did a lot of stitching in the ditch to highlight the houses and trees.  My preference is to stitch IN the ditch, not on top.  You decide what you like.  Which ever you choose, be consistent as possible.

#1 – Keep your ditch stitching consistent.

image


Staying with quilting stitches, I like to match my bobbin thread to the top thread.  This will help disguise any pokies.  Tension is very important to make sure your stitches lock in the middle of your batting.  By using the same thread or at least the same color, if the tension is off it is less noticeable .

#2 – match top and bottom thread.

image

in quilting,

Debbie

Posted in Uncategorized | 1 Comment

Two Tip Tuesday

One of the guilds I belong to, Blackstone Valley Heritage Quilters, does not meet in the summer.  So, this time of year all the year long projects are due.  A couple weeks ago, I showed the Half Square Heyday challenge quilts.  Last week our Block of the Month projects were due.  I was the chair for the BOM and I want to share the quilts.  The theme was “What a Wonderful World” with piecing on a muslin foundation.  I had stamps made using blocks from the Electric Quilt program.  AND I made them miniature!!  LITTLE 3″ houses and a variety of trees were stamped and given out each month.  The final layout was presented but they were free to arrange as they like.  My LITTLE Wonderful World is below!  (Before quilting)

My LITTLE Wonderful World ~DW

My LITTLE Wonderful World ~DW


Piecing on a foundation is very similar to paper piecing, but you don’t remove the foundation!  Using the numbered areas,  pieces are added in numerical order.  I used a business card to fold the foundation back to expose the excess seam allowance.  (A post card was too big for these tiny pieces!).

image


imageimage


I also used my favorite tool, Brilliant Bindings  for trimming the excess seam allowance!

You may notice the chimney sky section in the right corner starts again with #1.  This little 1-2-3 section is copied onto a piece of paper and pieced as a separate section.  Then added on the opposite side of the roof from #11 as #12.  Much easier than making another stamp and stamping that chimney section on a separate piece of muslin!

#1- Use a business card for smaller paper piecing projects.

#2- many tools are multi-purpose.  Use Brilliant Bindings anytime you need a 1/4″ cutting or marking tool!

Below are the results of our show and tell for the Block of the Month!!!  Nice work ladies!  (I know they are thrilled for you to see them.)  please do not copy these without permission!

in quilting,

Debbie ~ Wendt Quilting

ENOY THE SHOW…

BVHQ - Wonderful World

BVHQ – Wonderful World

BVHQ - Wonderful World

BVHQ – Wonderful World

BVHQ - Wonderful World

BVHQ – Wonderful World

BVHQ - Wonderful World

BVHQ – Wonderful World


BVHQ - Wonderful World

BVHQ – Wonderful World

BVHQ - Wonderful World Wool Appliqué!

BVHQ – Wonderful World
Wool Appliqué!

BVHQ - Wonderful World

BVHQ – Wonderful World

BVHQ - Wonderful World

BVHQ – Wonderful World

BVHQ – Wonderful World

image

BVHQ – Wonderful World

image

BVHQ – Wonderful World When time runs short to finish!


Posted in Uncategorized | Leave a comment

Two Tip Tuesday

I doubt that this will make Tuesday, so late tips in the wee hours of Wednesday this week.

Today (I mean yesterday!) I helped a friend make a quilt.  In doing so, several things we did are great tips.

We had a very long border to add…you better believe I measured several times!  (Remember my very first tip, measure twice, cut once!)  When putting any border onto a quilt I mark center and then halfway between the center from both edges.  This helps to be sure nothing scootches (moves as we sew).  When sewing the border on, keep any fullness in between the pins!  That is the reason for marking and pinning in the first place.

The photo below shows us making sure the border is fitting between the pins.  (The pins are a bit hard to see.). We “walked our hands between the pins to help keep the border in place since we we working between some large areas.

image

#1 – divide both the border and top into equal sections with pins.  Match pins and ease fullness between pins.

By the way, it fit beautifully!

We were adding a pieced border.  The pieced border was made of 2″ finished squares.  We were 1″ long. :(. And we did not want to chop off the extra because our end square would no longer be a square.  We did not pre design this quilt.  We were making it as we went with the look and fabrics we had available.   So, what to do?  My solution is to take in a few seam by 1/16″ – 1/8″.  (Add 1/8″ by eight seams and you have 1″). We took in seams until we had the correct length!!  By taking in several seams, the eye will see squares.  It is doubtful when the quilt is done and quilted that you will see the slight variation.  AND the border “reads” as  squares!

Below is the little bit we took in on many of the seams.  Some we took in 1/8″ and others just a thread width.  Over the entire length of 40+ squares it is not noticeable!

image

#2 – you can make slight adjustments in seam width to make things fit.

image


BUT…..This can work as a disadvantage when piecing regular blocks.   An 1/8″ over several seams add up!!!  And that is why we stress 1/4″ seams or scant 1/4″ seams!

in quilting,

Debbie.  – Wendt Quilting


Posted in Uncategorized | Leave a comment

Two Tip Tuesday

I’m happy to report the show and tell of my guild’s Half Square Heyday Challenge was a success!  We had 19 people bring quilts for a total of 3,812 half square blocks!  (Also referred to as Half Square Triangles ~ HST).  My friend Priscilla had the most with 768 with more to come when she adds her final border!  NICE!  Her quilt is below.

Priscilla M.

Priscilla M. (768 HST)


The photo below is what I made for those who participated.  A useful half square to add to their collection.

Half Square key chain

Half Square key chain

I missed pictures of the first two quilts (apologies to Marietta-144HST and Faye-184HST).  I’ve added the rest below.   Some are blurry as I was trying to take them quickly.  (Note to self, slow down and make sure they are in focus!). Kudos to my guild challenge participants!  Blackstone Valley Heritage Quilters!  Some of the counts included HST on the labels!

Janene Z. (48 HST)

Janene Z. (48 HST)

Joy (253 HST)

Joy (253 HST)

Gretel (164HST)

Gretel (164HST)

image

Linda (320 HST)

Nancy

Suzanne (80 HST)

Suzanne (80 HST)

Carol V (96HST)

Carol V (96HST)

Sue (64 HST)

Sue (64 HST)


Sue (40 HST)

Sue (40 HST) her second!


Mary (144 HST)

Mary (144 HST)

Cathy (52HST)

Cathy (52HST)


Gert (576 HST)

Gert (576 HST)


Linda (117+6 HST)

Linda (117+6 HST)


Debbie (100+22 HST)

Debbie (100+22 HST)


Cheryl (380 HST)

Cheryl (380 HST)


#1 – participate is those challenges!  It expands your knowledge, might get you to try a new technique, and I bet you will have fun!

We had a few make quilts they have always wanted to make and others play with fun fabric and different layouts.  One of the questions during each member’s presentation was telling how they made their half squares.   Several different techniques were used …

  • sewing  1/4″ on each side of a line drawn across center of squares placed right sides together
  • drawing the sewing lines using a half inch template
  • sewing larger and trimming with “Tucker Trimmer”
  • pre-cutting all triangles
  • sewing four at a time using larger squares
  • drawing a grid on fat quarters and sewing a bunch at a time
  • using tangles

Did you know there were so many different options?  I’ll share a link I found to the grid sewing (http://www.quiltchat.com/lessons/halfsqr.html ).  Julie Owen’s Half Square Triangle Directions

#2 – Try different techniques !  There is more than one way to sew a half square block!

Do you have a favorite method to sew half squares?  First 5 to reply will get one of the extra half square key chains!

In quilting,

Debbie  ~  Wendt Quilting

Posted in Half-squares, Tips, Uncategorized | 1 Comment

Two Tip Tuesday

The big reveal for one of my guild’s challenges is tomorrow night.  My Egyptian Half Square Heyday quilt has been quilted, bound, labeled and ready for the meeting!  I love it when I finish early and I’m not madly stitching minutes before it is due.  Procrastination is my middle name most of the time…..it feels very good to be ahead!

YES!  I said the label is on!  That hardly happens.  Do you label your quilts?  Please do!  It identifies your quilt and gives well deserved credit to the maker.  See my label below.  Notice I even used half squares for the label.  I’ve started doing fun labels!  It makes me happy and ties the front to the back.

image

#1 – Label your quilts!  Identify name of quilt (if you have one), who it is for, who is the maker, where and when it was made and any other information you want to add.


We’ve talked about quilting and picking designs to enhance the quilt.  The design for this quilt was about keeping it simple.  I used a panto from MeadowLyon.  It disappears on the busy fabrics.  It was probably not the best choice but I like how it plays peek-a-boo in and out of the fabrics.

Egyptian half square heyday

Egyptian half square heyday

The lotus flowers mimic the designs on the fabric.  This quilt is about being fun, making half squares and getting it DONE!  It will be a good snuggle quilt for my family.

To add to the yummy-ness, I used 100% bamboo batting from Winline Batting!  You can find them at http://www.winlinetextiles.com.


This quilt’s binding was stitched onto the front and hand sewn to the back.   I could have sewn it by machine but I wanted the hand sewn look for the back.   (You can see the back on the label photo). Since I used a fat quarter bundle for the top, I didn’t have much fabric leftover.  I did not put on any borders so I wanted the binding to be the frame.  I found a great black with gold stars that complement the fabrics.  It was the perfect frame.

#2 – Choose binding to complement the quilt!

Egyptian Half Square Heyday

Egyptian Half Square Heyday

In quilting,

Debbie.  ~ Wendt Quilting

Posted in Brilliant Bindings, Half-squares, Quilting, Tips, Uncategorized | 1 Comment