
Can a blog get hacked? Thinking maybe so. Do NOT open any strange emails looking like they are coming from my blog. Always check the “from”. Don’t open them and Delete them! I would never send you anything like that.
in quilting,
Debbie
Can a blog get hacked? Thinking maybe so. Do NOT open any strange emails looking like they are coming from my blog. Always check the “from”. Don’t open them and Delete them! I would never send you anything like that.
in quilting,
Debbie
I’m back after the brief vacation. I was an exhibitor at Quilt Market, took a mini vacation, then another 2 trips for family happenings and went to a quilting professional retreat. Now, here we are! I’m back on track for Two Tips and to continue sharing my quilting journey. With all the changes to facebook and compliance with opt in notifications, I have noticed “things” don’t always happen as in the past. My posts here are not always showing up on my FB page. ;( I’m working on correcting that. I loved meeting everyone at Market! My focus was on the new Hex-a-ma-jig template and all the quilts included in the booklet included with the tool. Fun to share!
So on to photos and Two Tips…
The view going into Portland and my booth in Portland at Spring Quilt Market.
Spring Market 2018 D.W.
Two quilts I made for my niece’s baby shower.

Mountains for Baby by D.W.

Flannel Squares with wide Cuddle
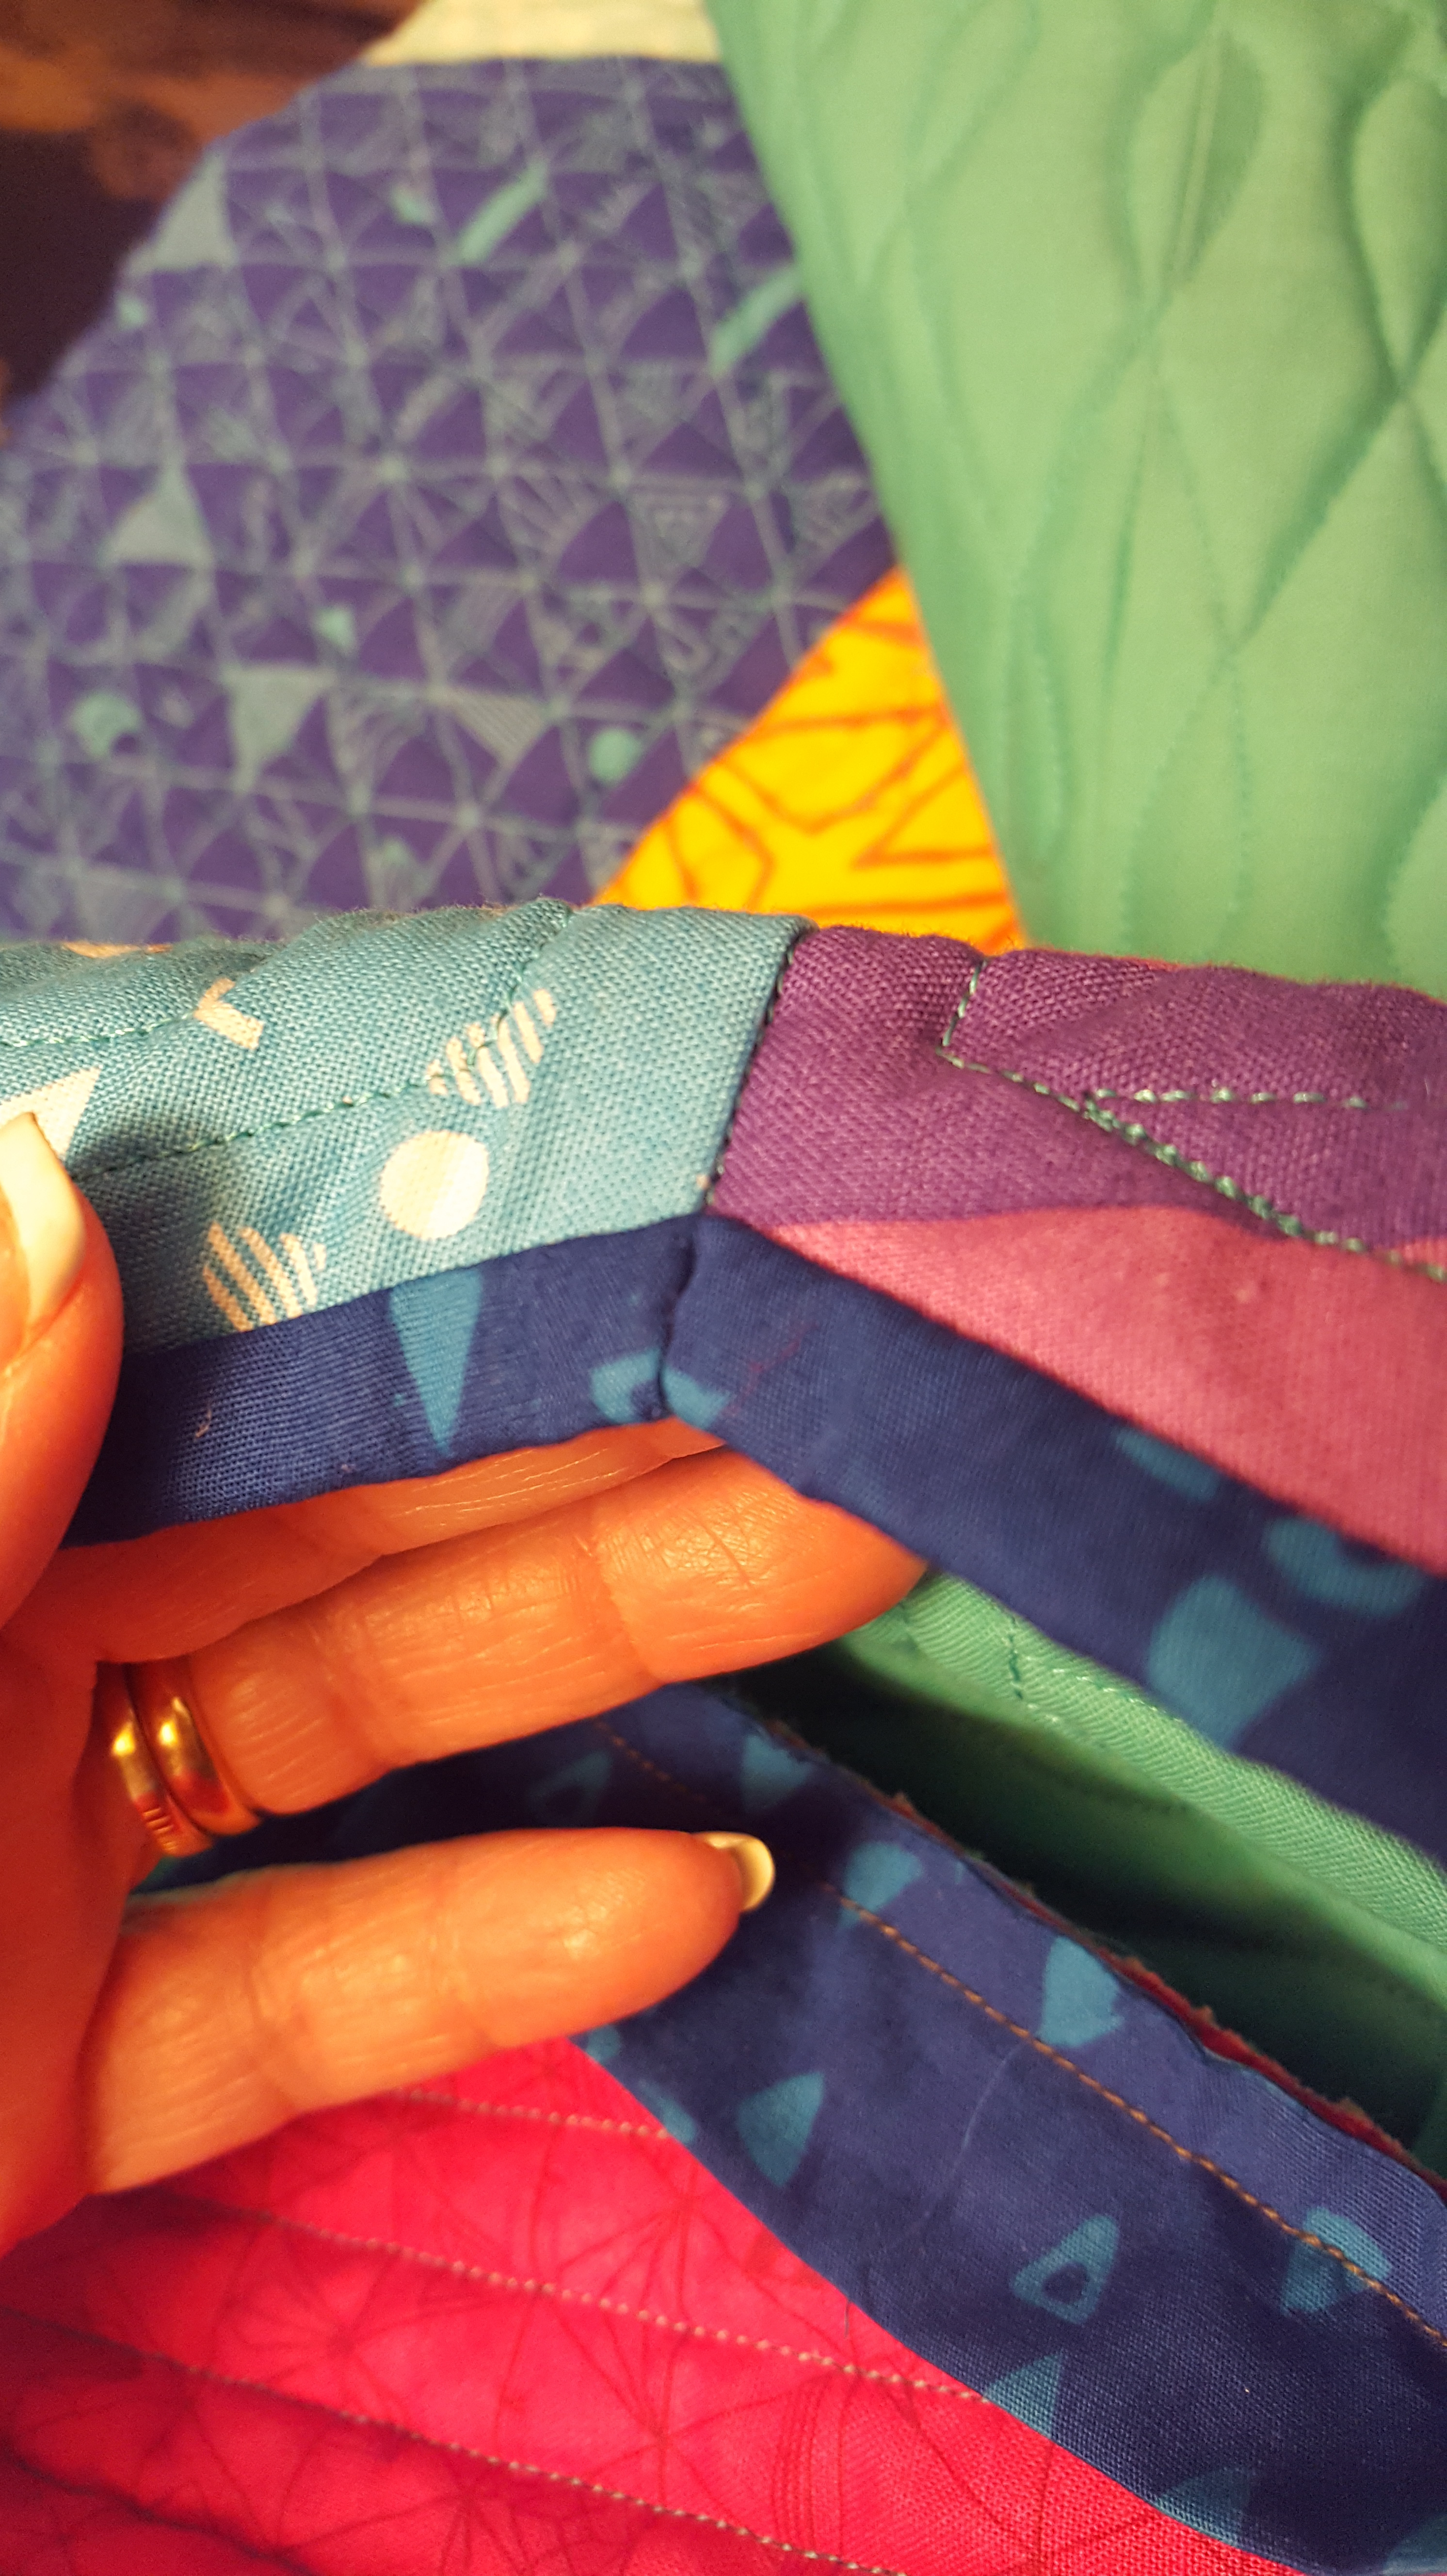
back to front binding D.W.
I love it when you have enough thread of the perfect color to make it all the way around the quilt binding!
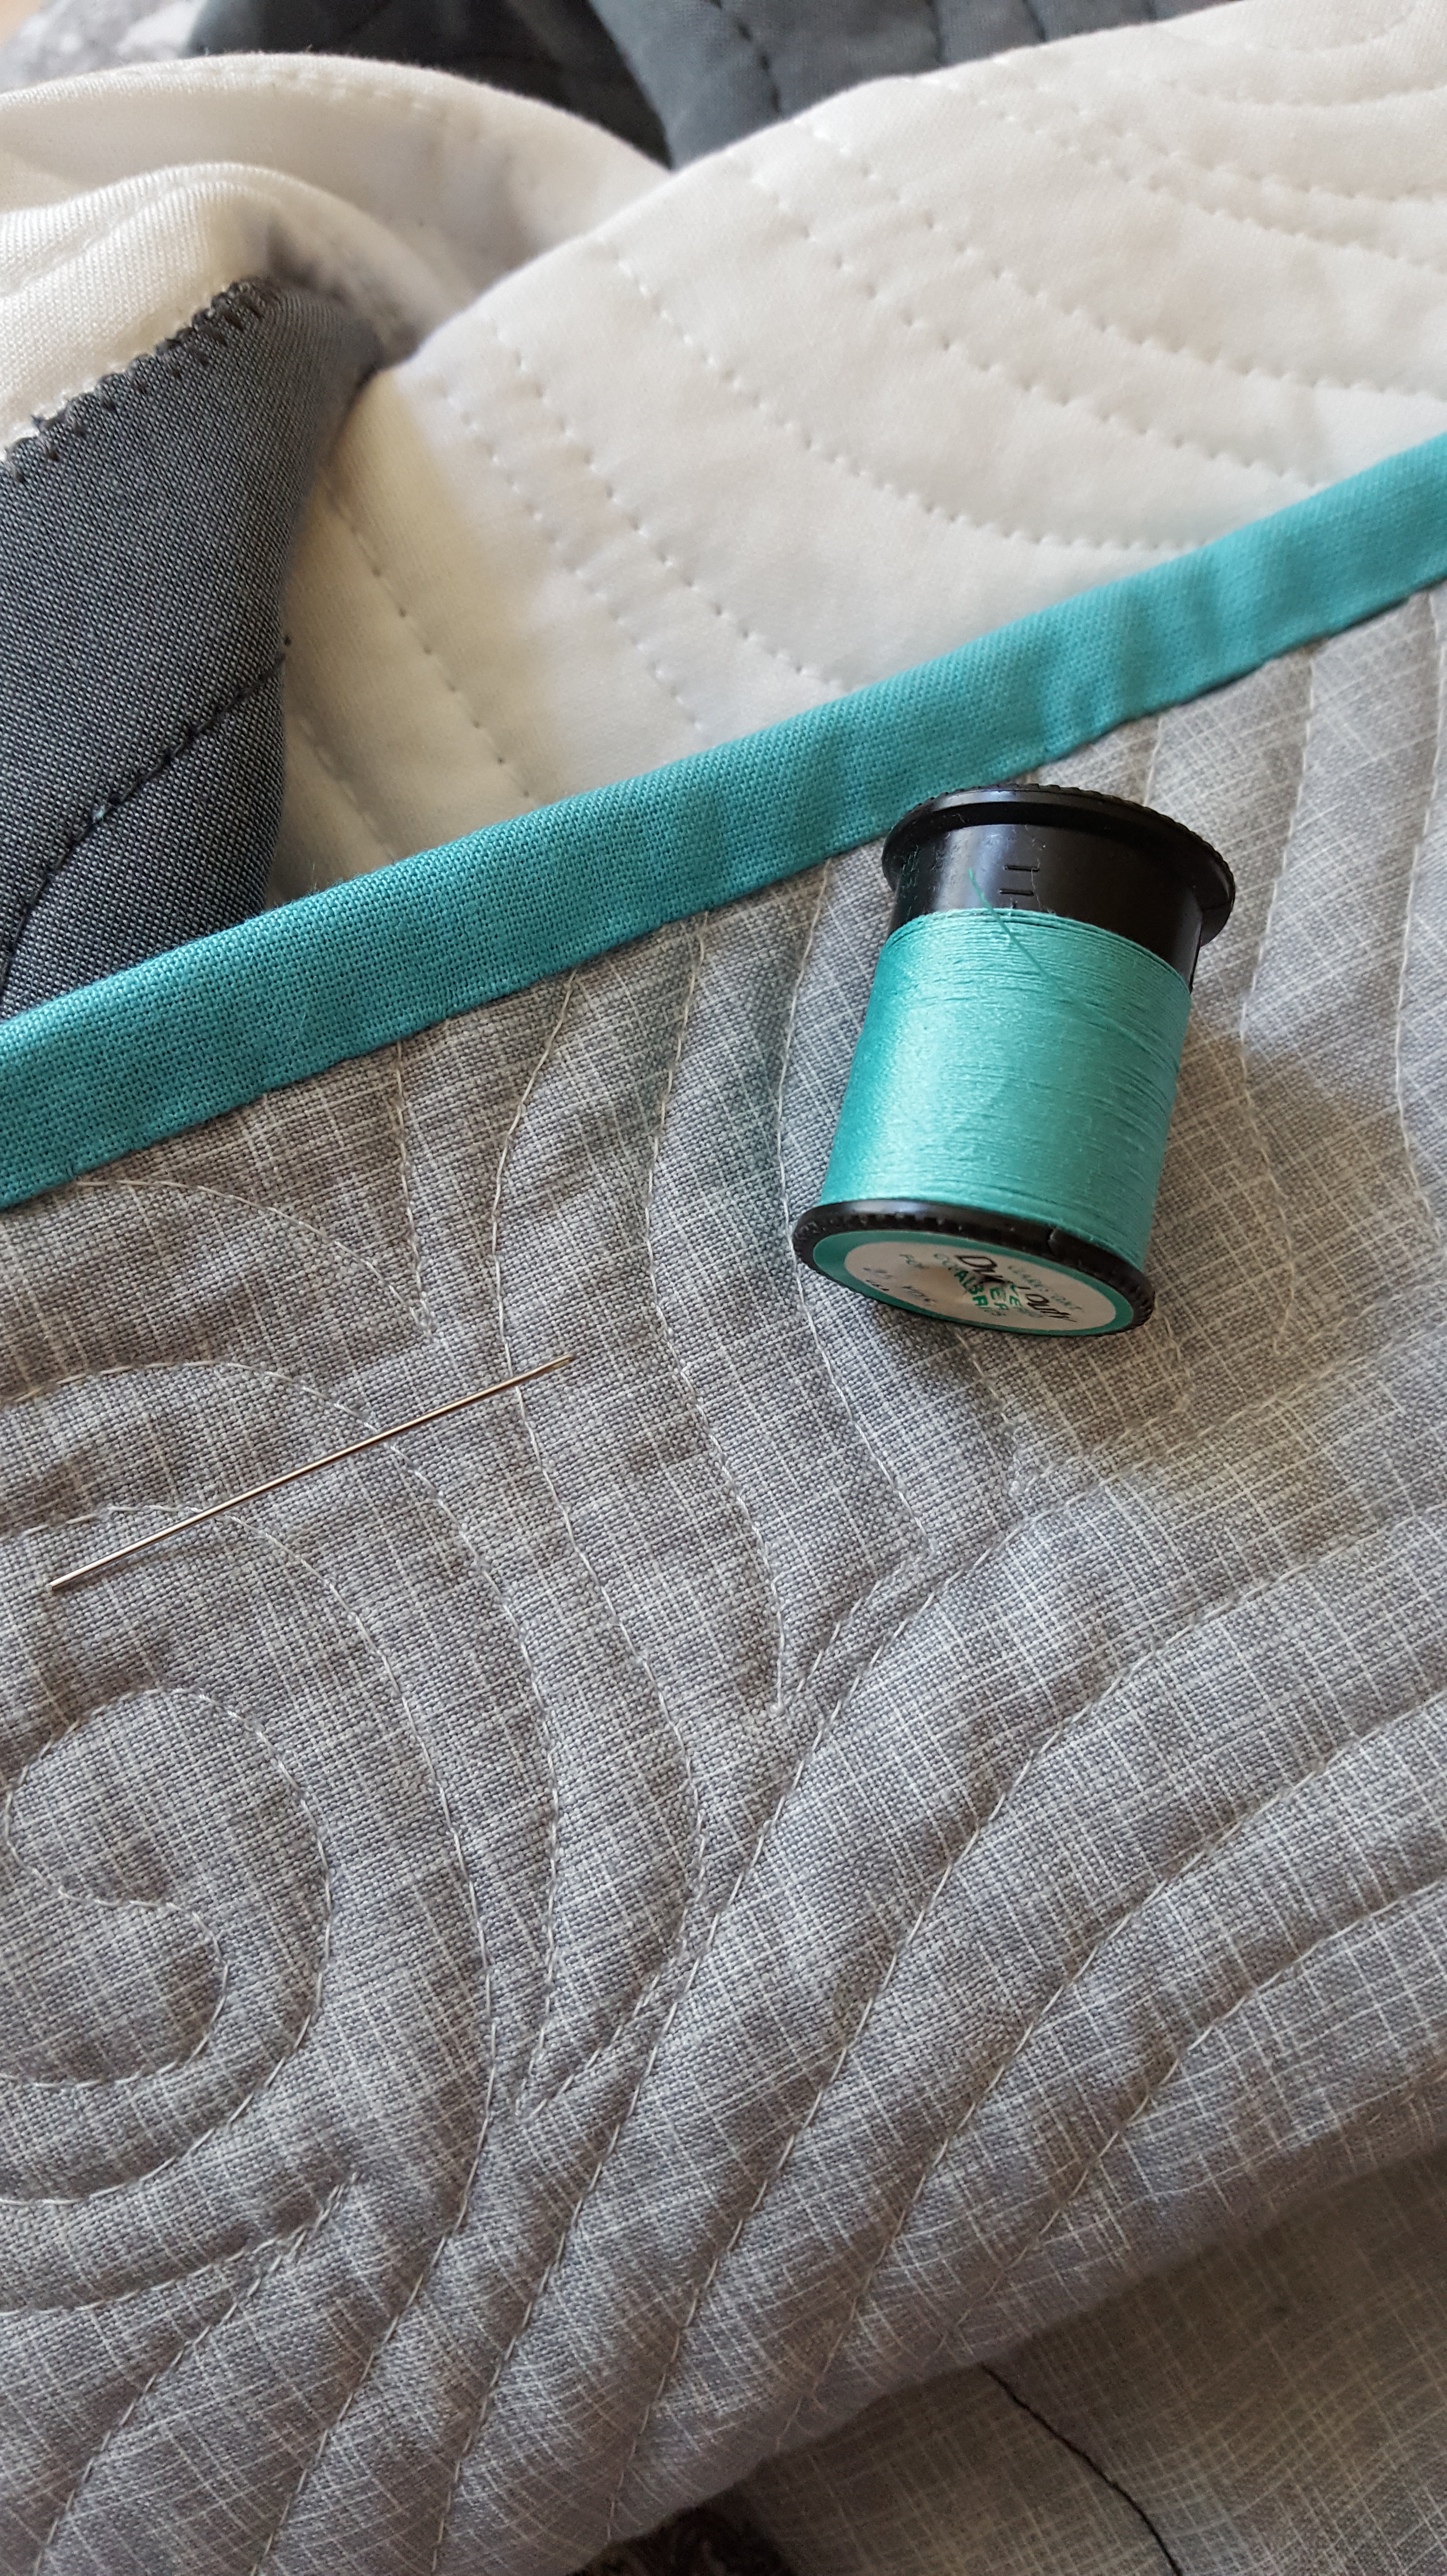
Made it around! D.W.
With the Cuddle backing, I didn’t want to add a label, so I put it on the front. Cleverly hidden in one of the fabric squares!

Label on front. D.W.
#1 – A label doesn’t have to be on the back. Add to the front!
#2 – Cuddle makes a wonderful backing and back to front binding. The edge does not ravel. A straight topstitch was done to finish.
I’ll show more of the back to front Cuddle binding next week!
in quilting,
Debbie
As promised I took a photo of my Half Hexie quilt. All those miters took some time but I love the result!

Half Hexies with
Hex-a-ma-jig
I’ve been busy quilting several other Hex-a-ma-jig quilts. These quilts/designs are included in the Hex-a-ma-jig instructions. One tool, six quilts right off the bat. Hex-a-ma-jig is on my website! Hex-a-ma-jig I will be featuring the tool and quilts at Spring Quilt Market next week in Portland, OR. Three others are shown below. YES! I love to quilt feathers. I had a lot of fun with these feathers.
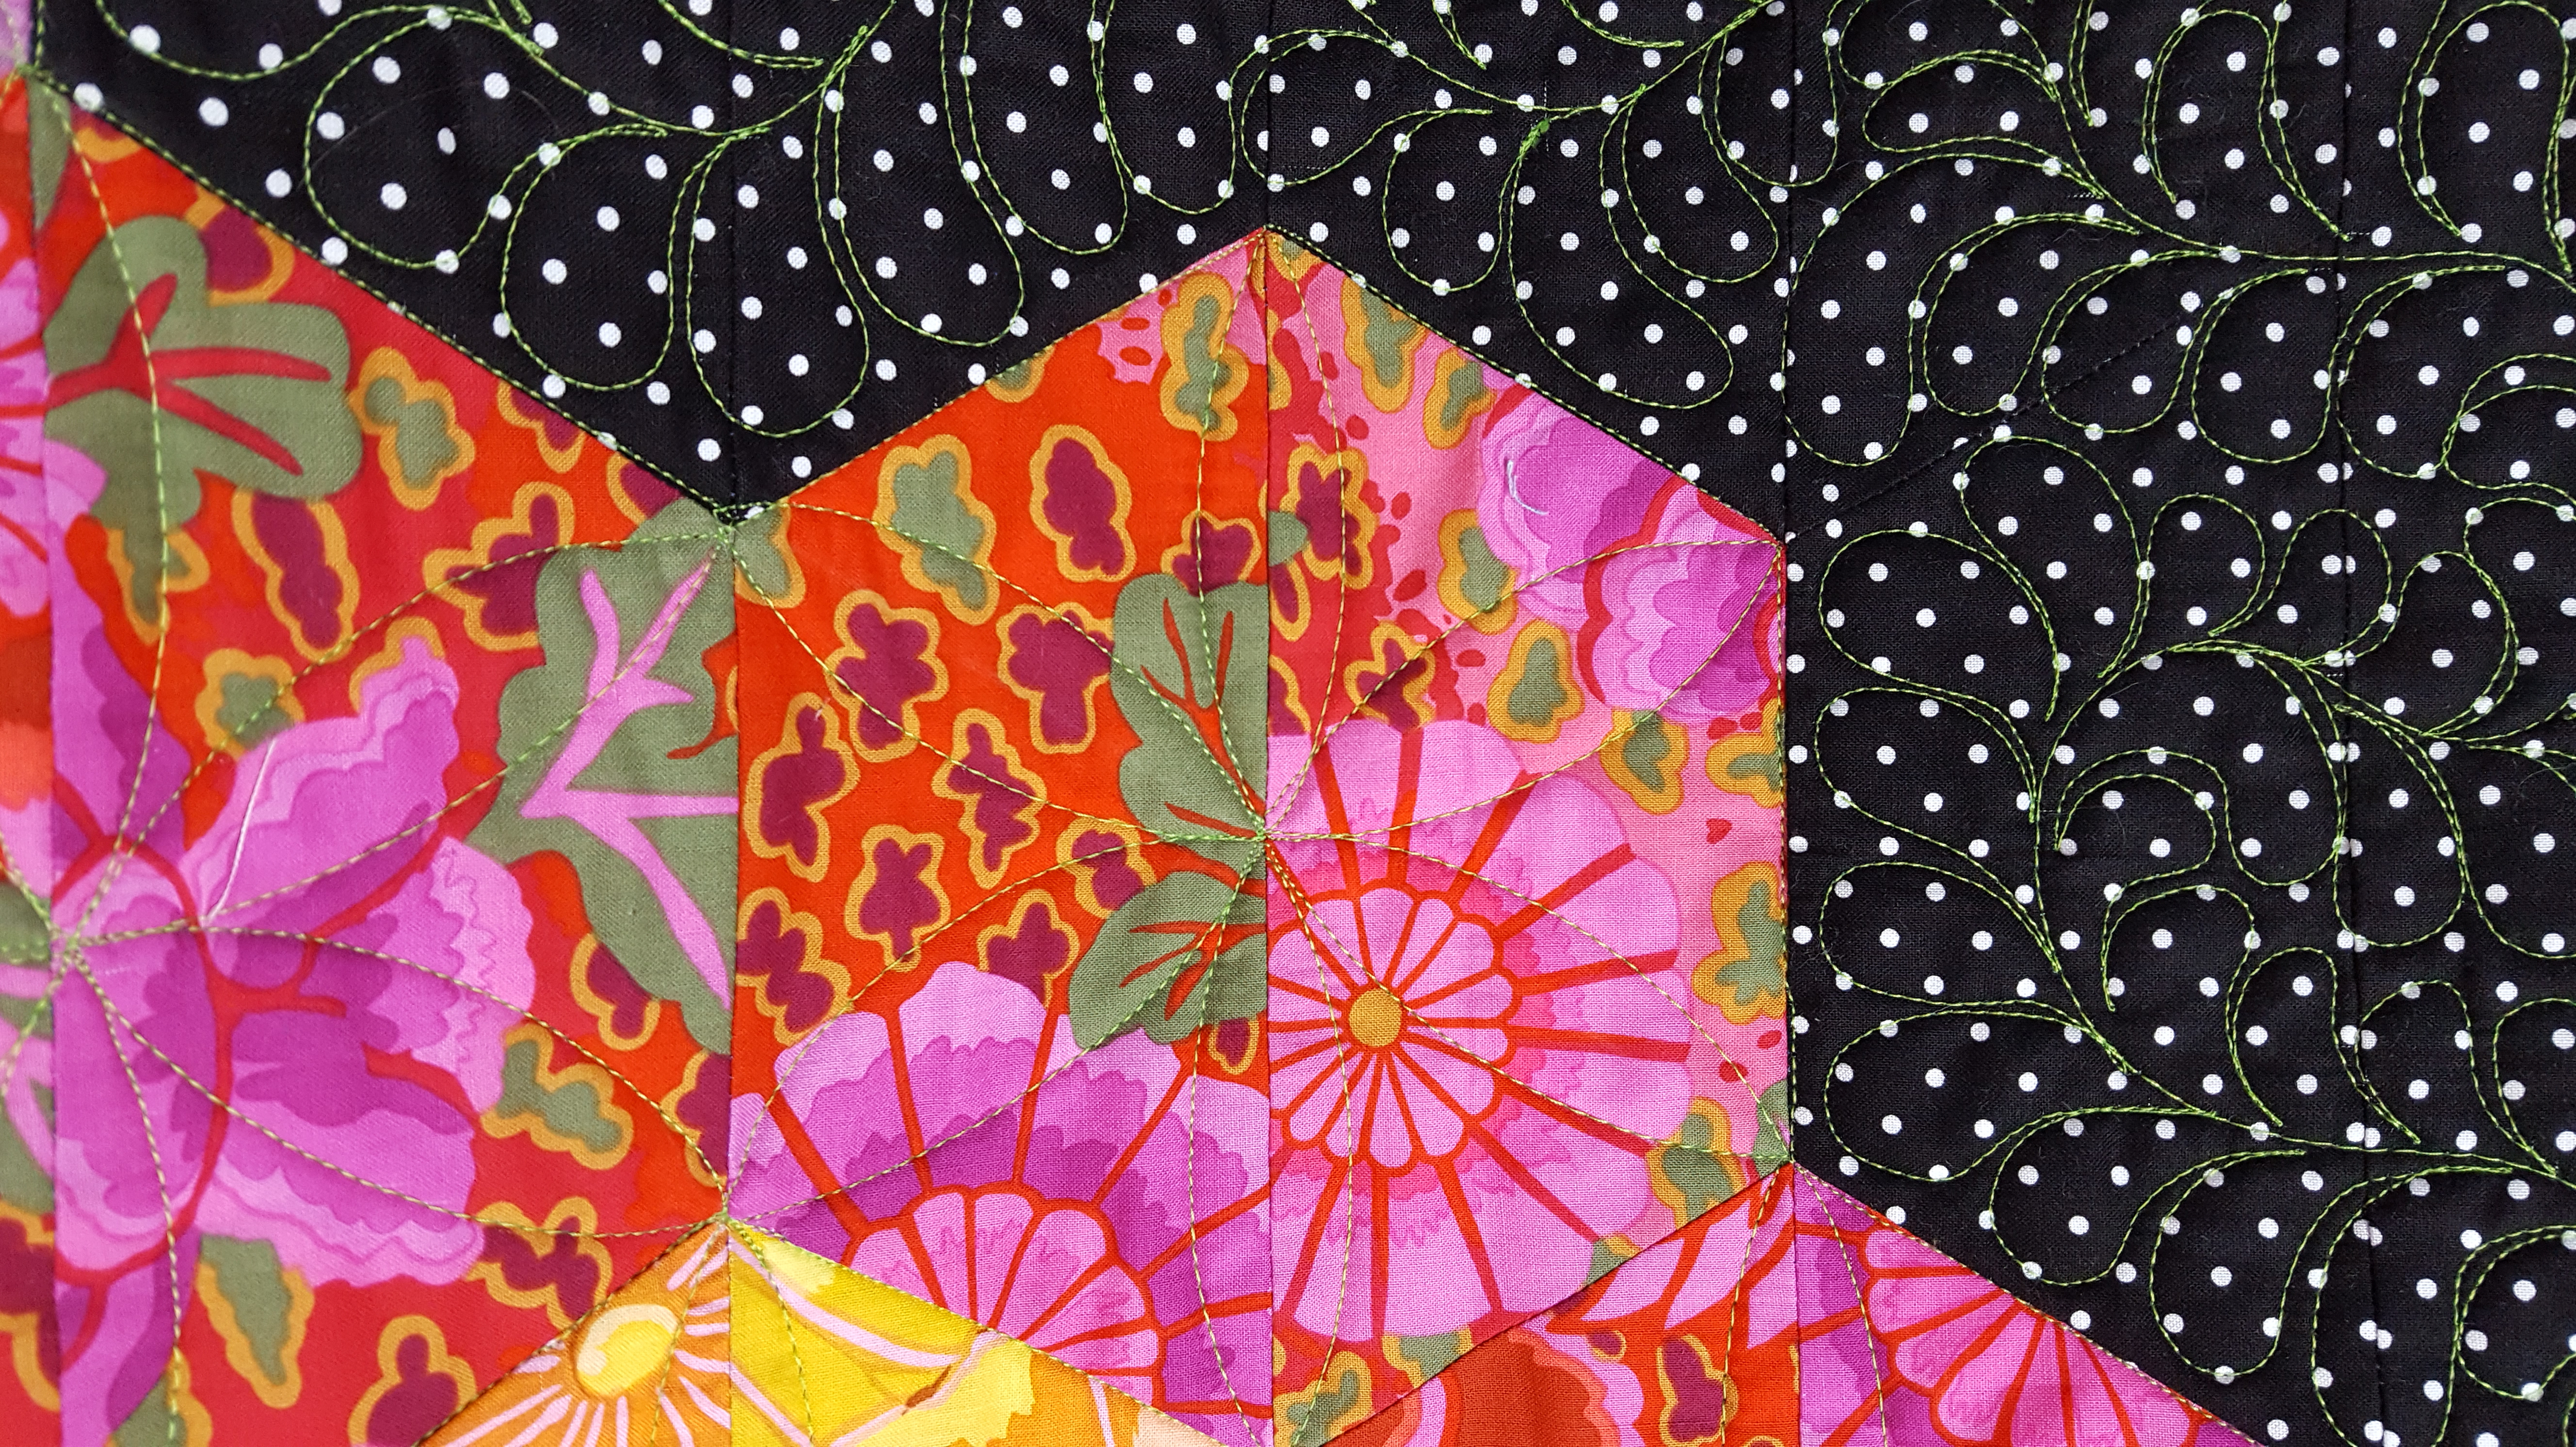
Flower Garden

Mixed FlowerGarden
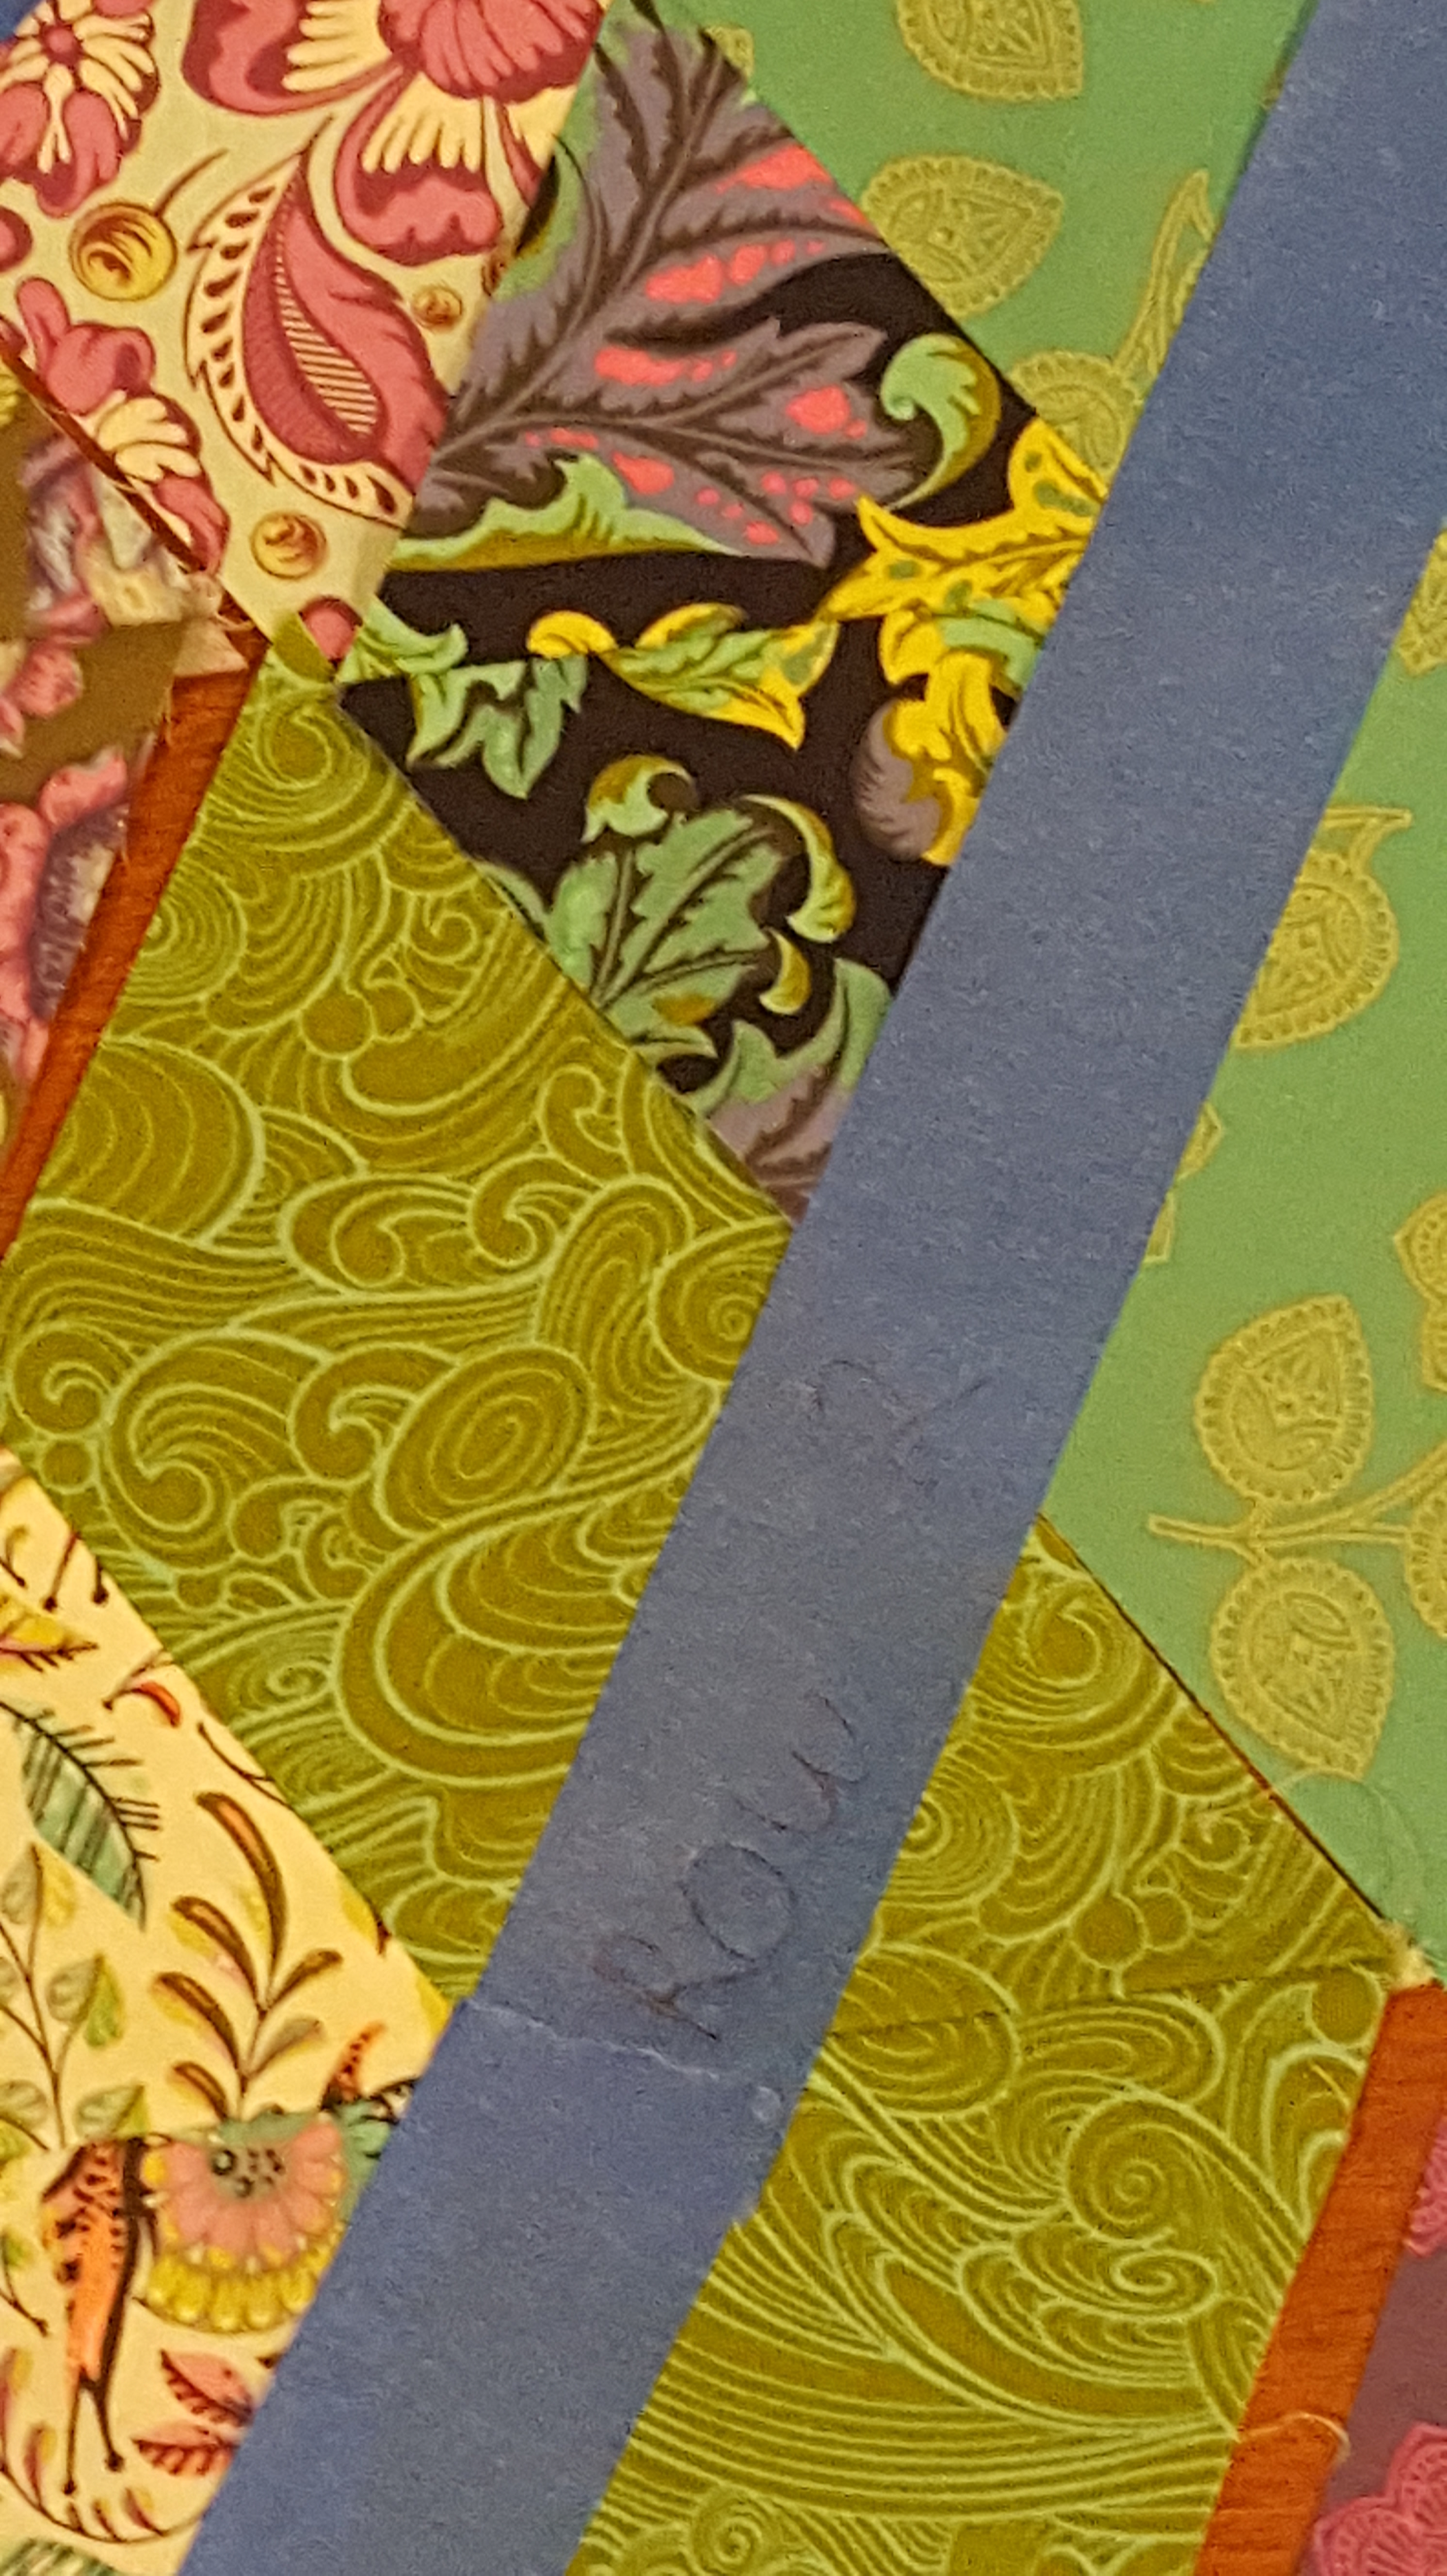
And with the Baby Blocks (or Tumbling Blocks) I took a straight approach, literally. The front of the block is a “Zentangle” inspired design called “paradox”.

Hexie Baby Blocks
with “Paradox”

Hexie Baby Blocks
My tips today were inspired by my dear friend Kim. She layed out her quilt blocks while we were in Paducah so we could give her advice on the layout. She had her blue painters tape in hand. My question to her, “what will you do with the tape, mark the rows”. “No, to tape the blocks together in the row,” ….BRILLIANT! I told her I’m stealing the idea for Two Tips! And then as most of us do, mark the row number to keep track. She marked it right on the tape. After rolling up the rows we realized she needed to have the number on the outside edge to be sure to find it.
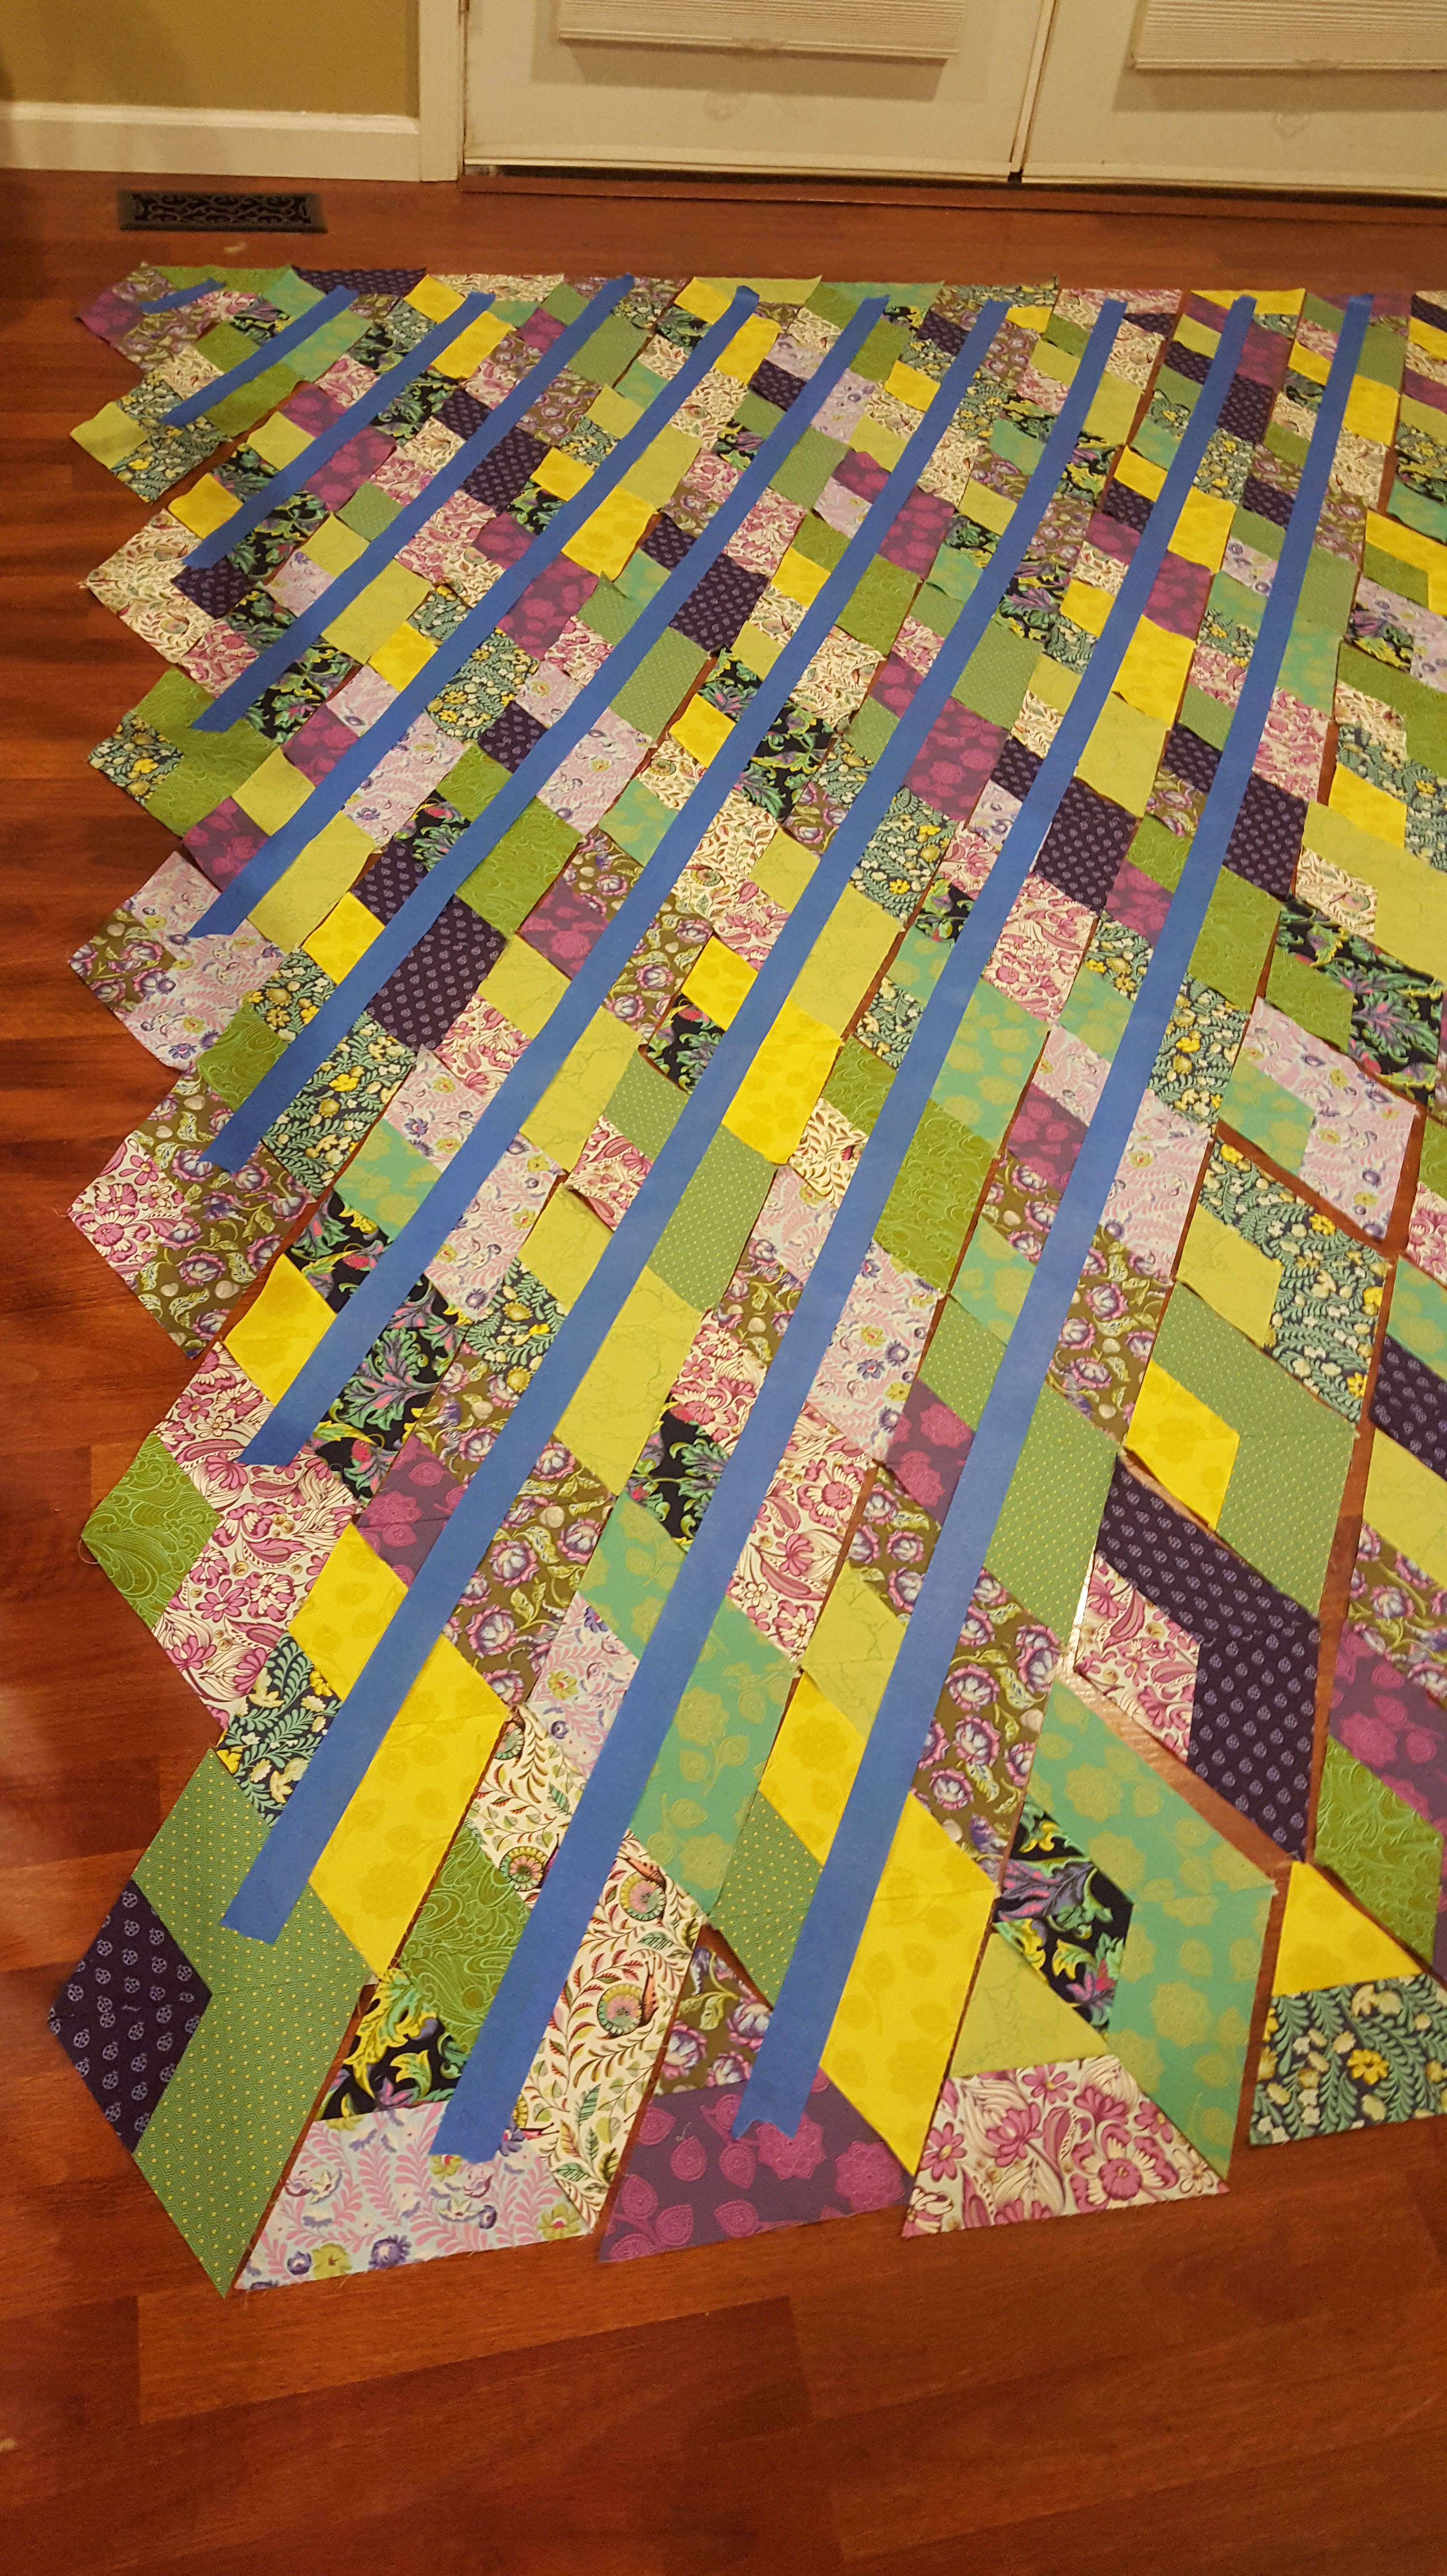
Blue Tape on blocks
Row number on blue tape
#1- Use Blue tape on blocks to keep then in their row.
#2 – Mark Row # on the blue tape.
I’m looking forward to meeting those attending Quilt Market! I’ll be on the “road” next week on Tuesday, but I hope to check in with some tips.
in quilting,
Debbie
The binding on the Half Hexie quilt is DONE! All the miters took some time but I love the look it gave this quilt. Photos next week when I can get outside in the sun.
I’m back to piecing and quilting. Some days it is good to turn on some music and quilt. One of my favorites to quilt to is Sting and photo to verify! Love his music and love that I got to see him in concert in Egypt, YES, really! Concert was in front of the Giza pyramids and Sphinx!!!
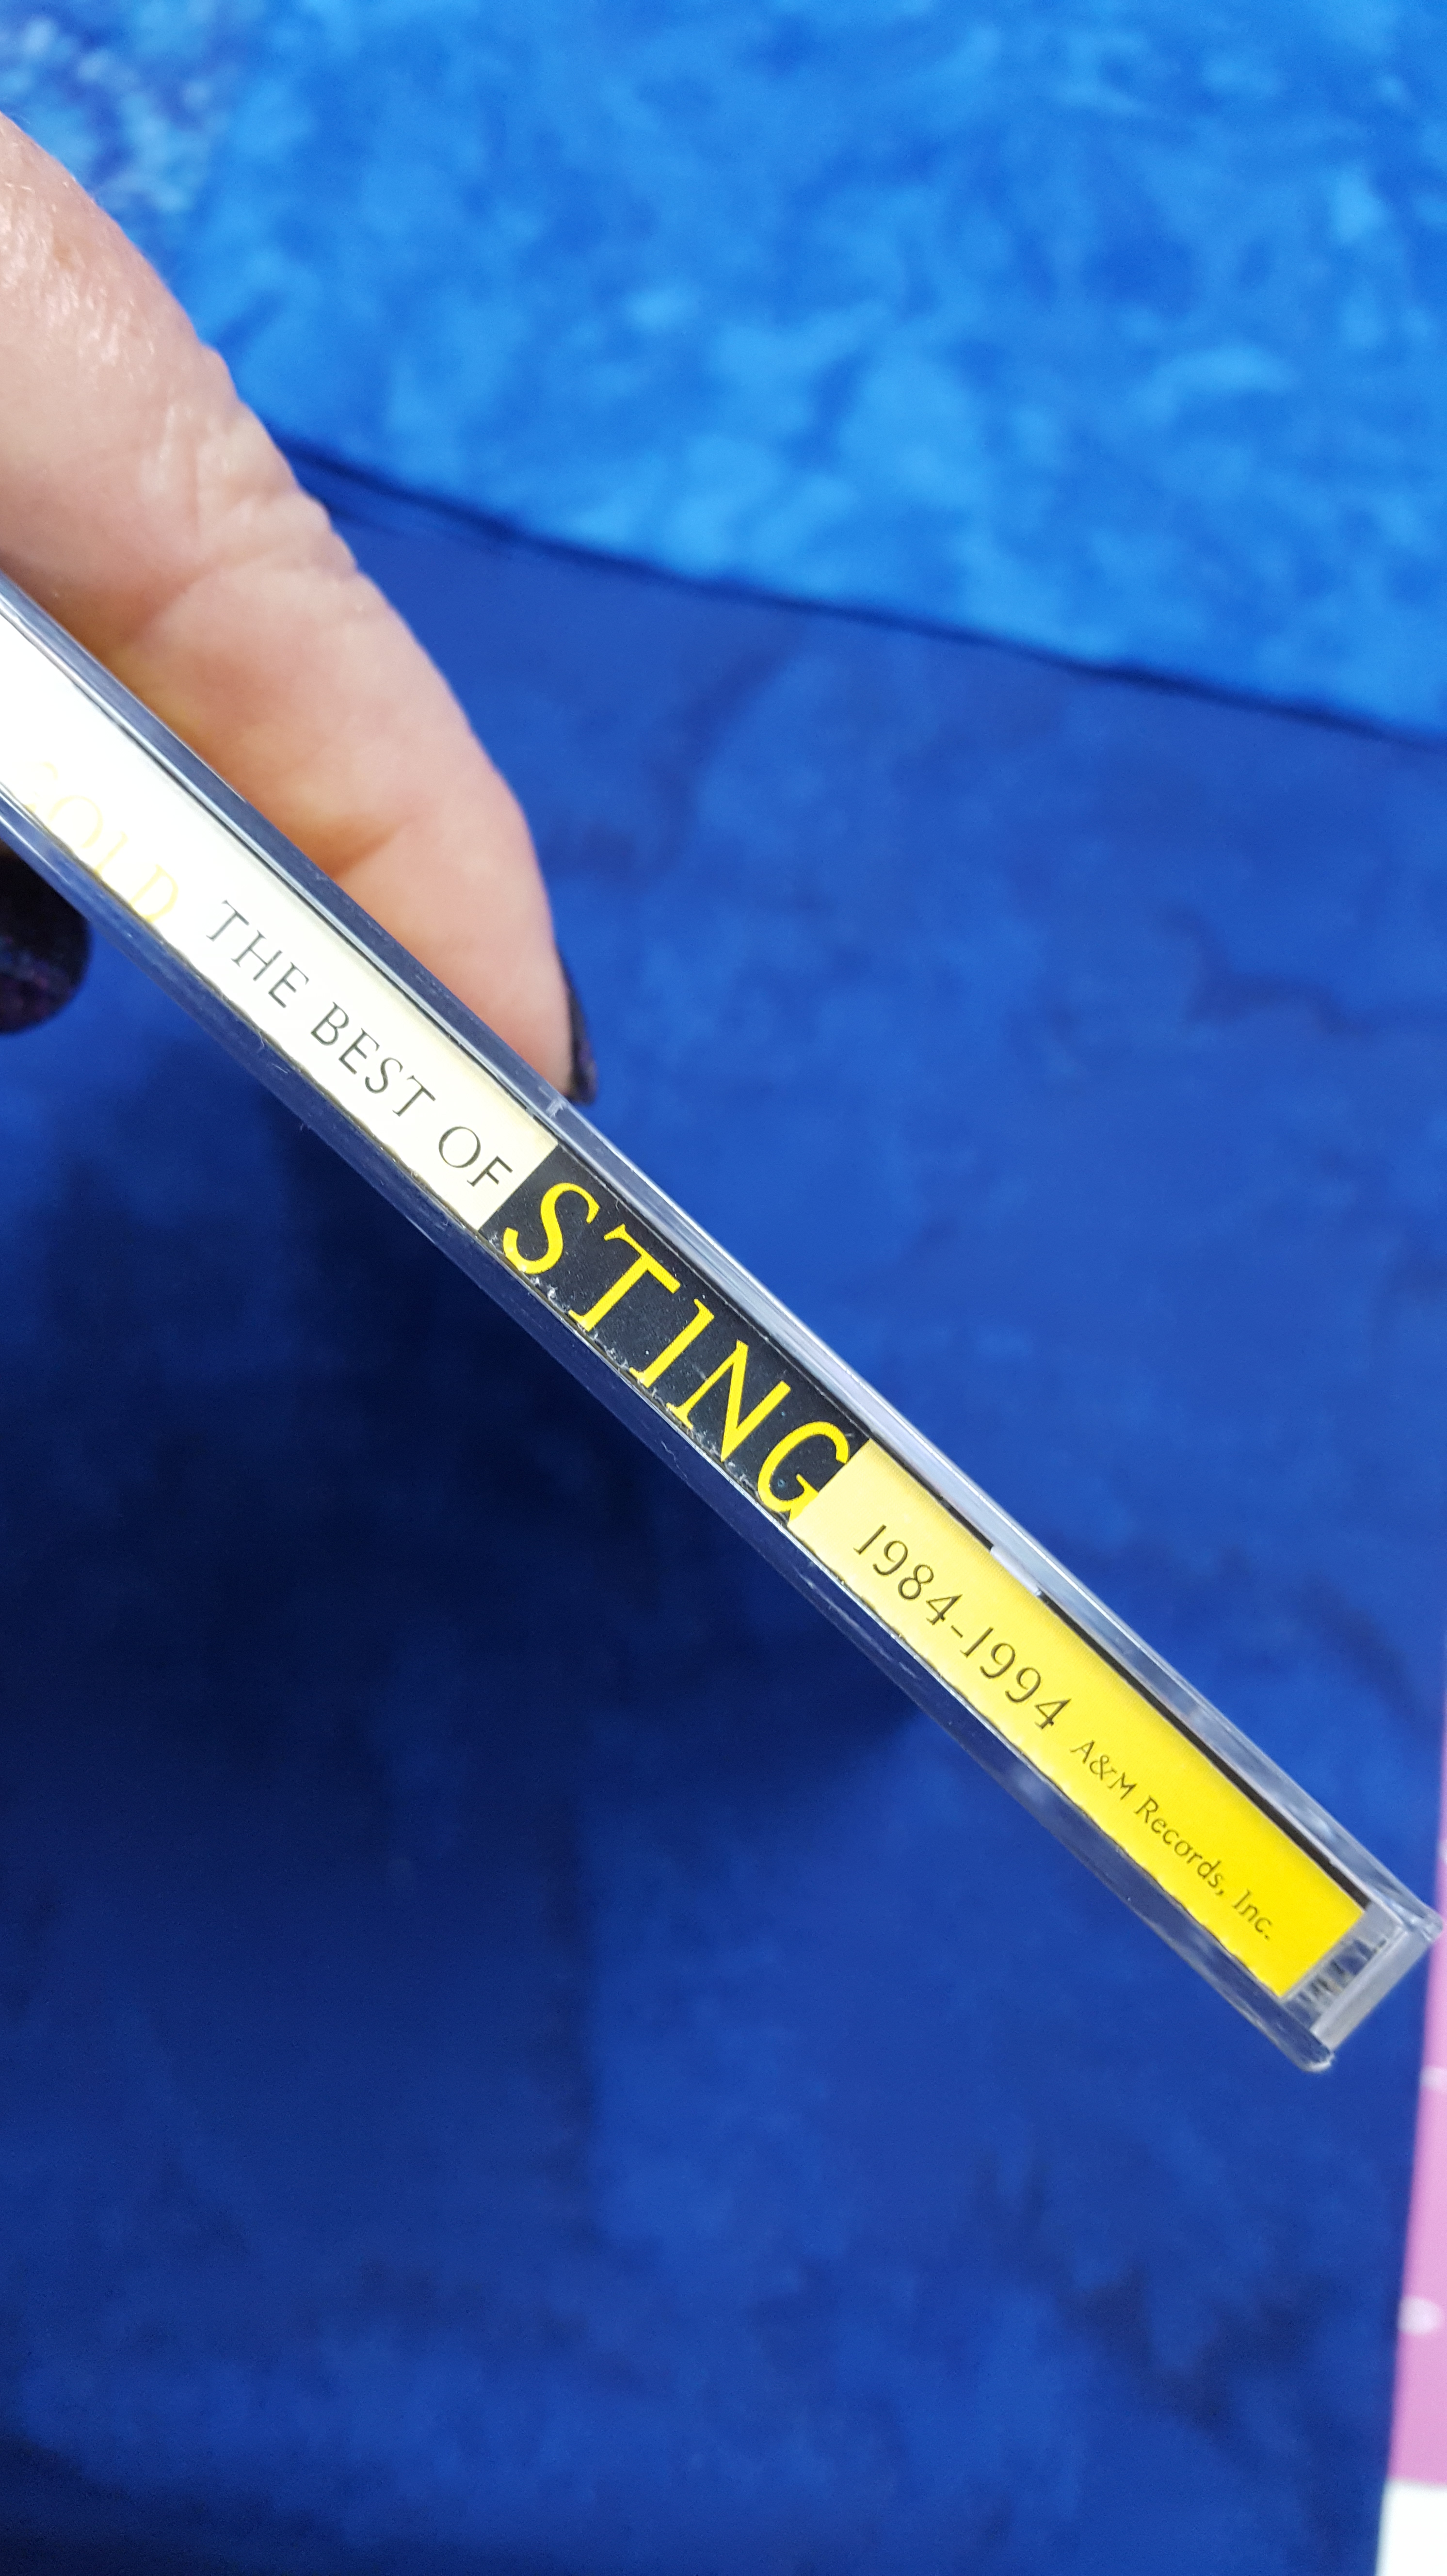
Best of STING!!
When I need mindless quilting, I pick a pantograph or a favorite freehand design. My music helps me “dance” with my longarm. I’m not trying to be corny. Seriously, I can relax and follow the line. No thinking needed.
One of my favorite pantographs is Feather Strippy Bar by Kathie James. It is a number of years old but great for putting on a simple strippy quilt. (Note the magnets on my Nolting longarm table. They are the freebee frig magnets you get in the mail. I use them to hold my pantos in place.)

Feather Strippy Bar
by Kathie James
And one of my new favorite things to freehand quilt is meandering boxes. Over and over and in and out. Doesn’t matter which way I go, as long as my lines are relatively straight and I quilt a box and on to the next.
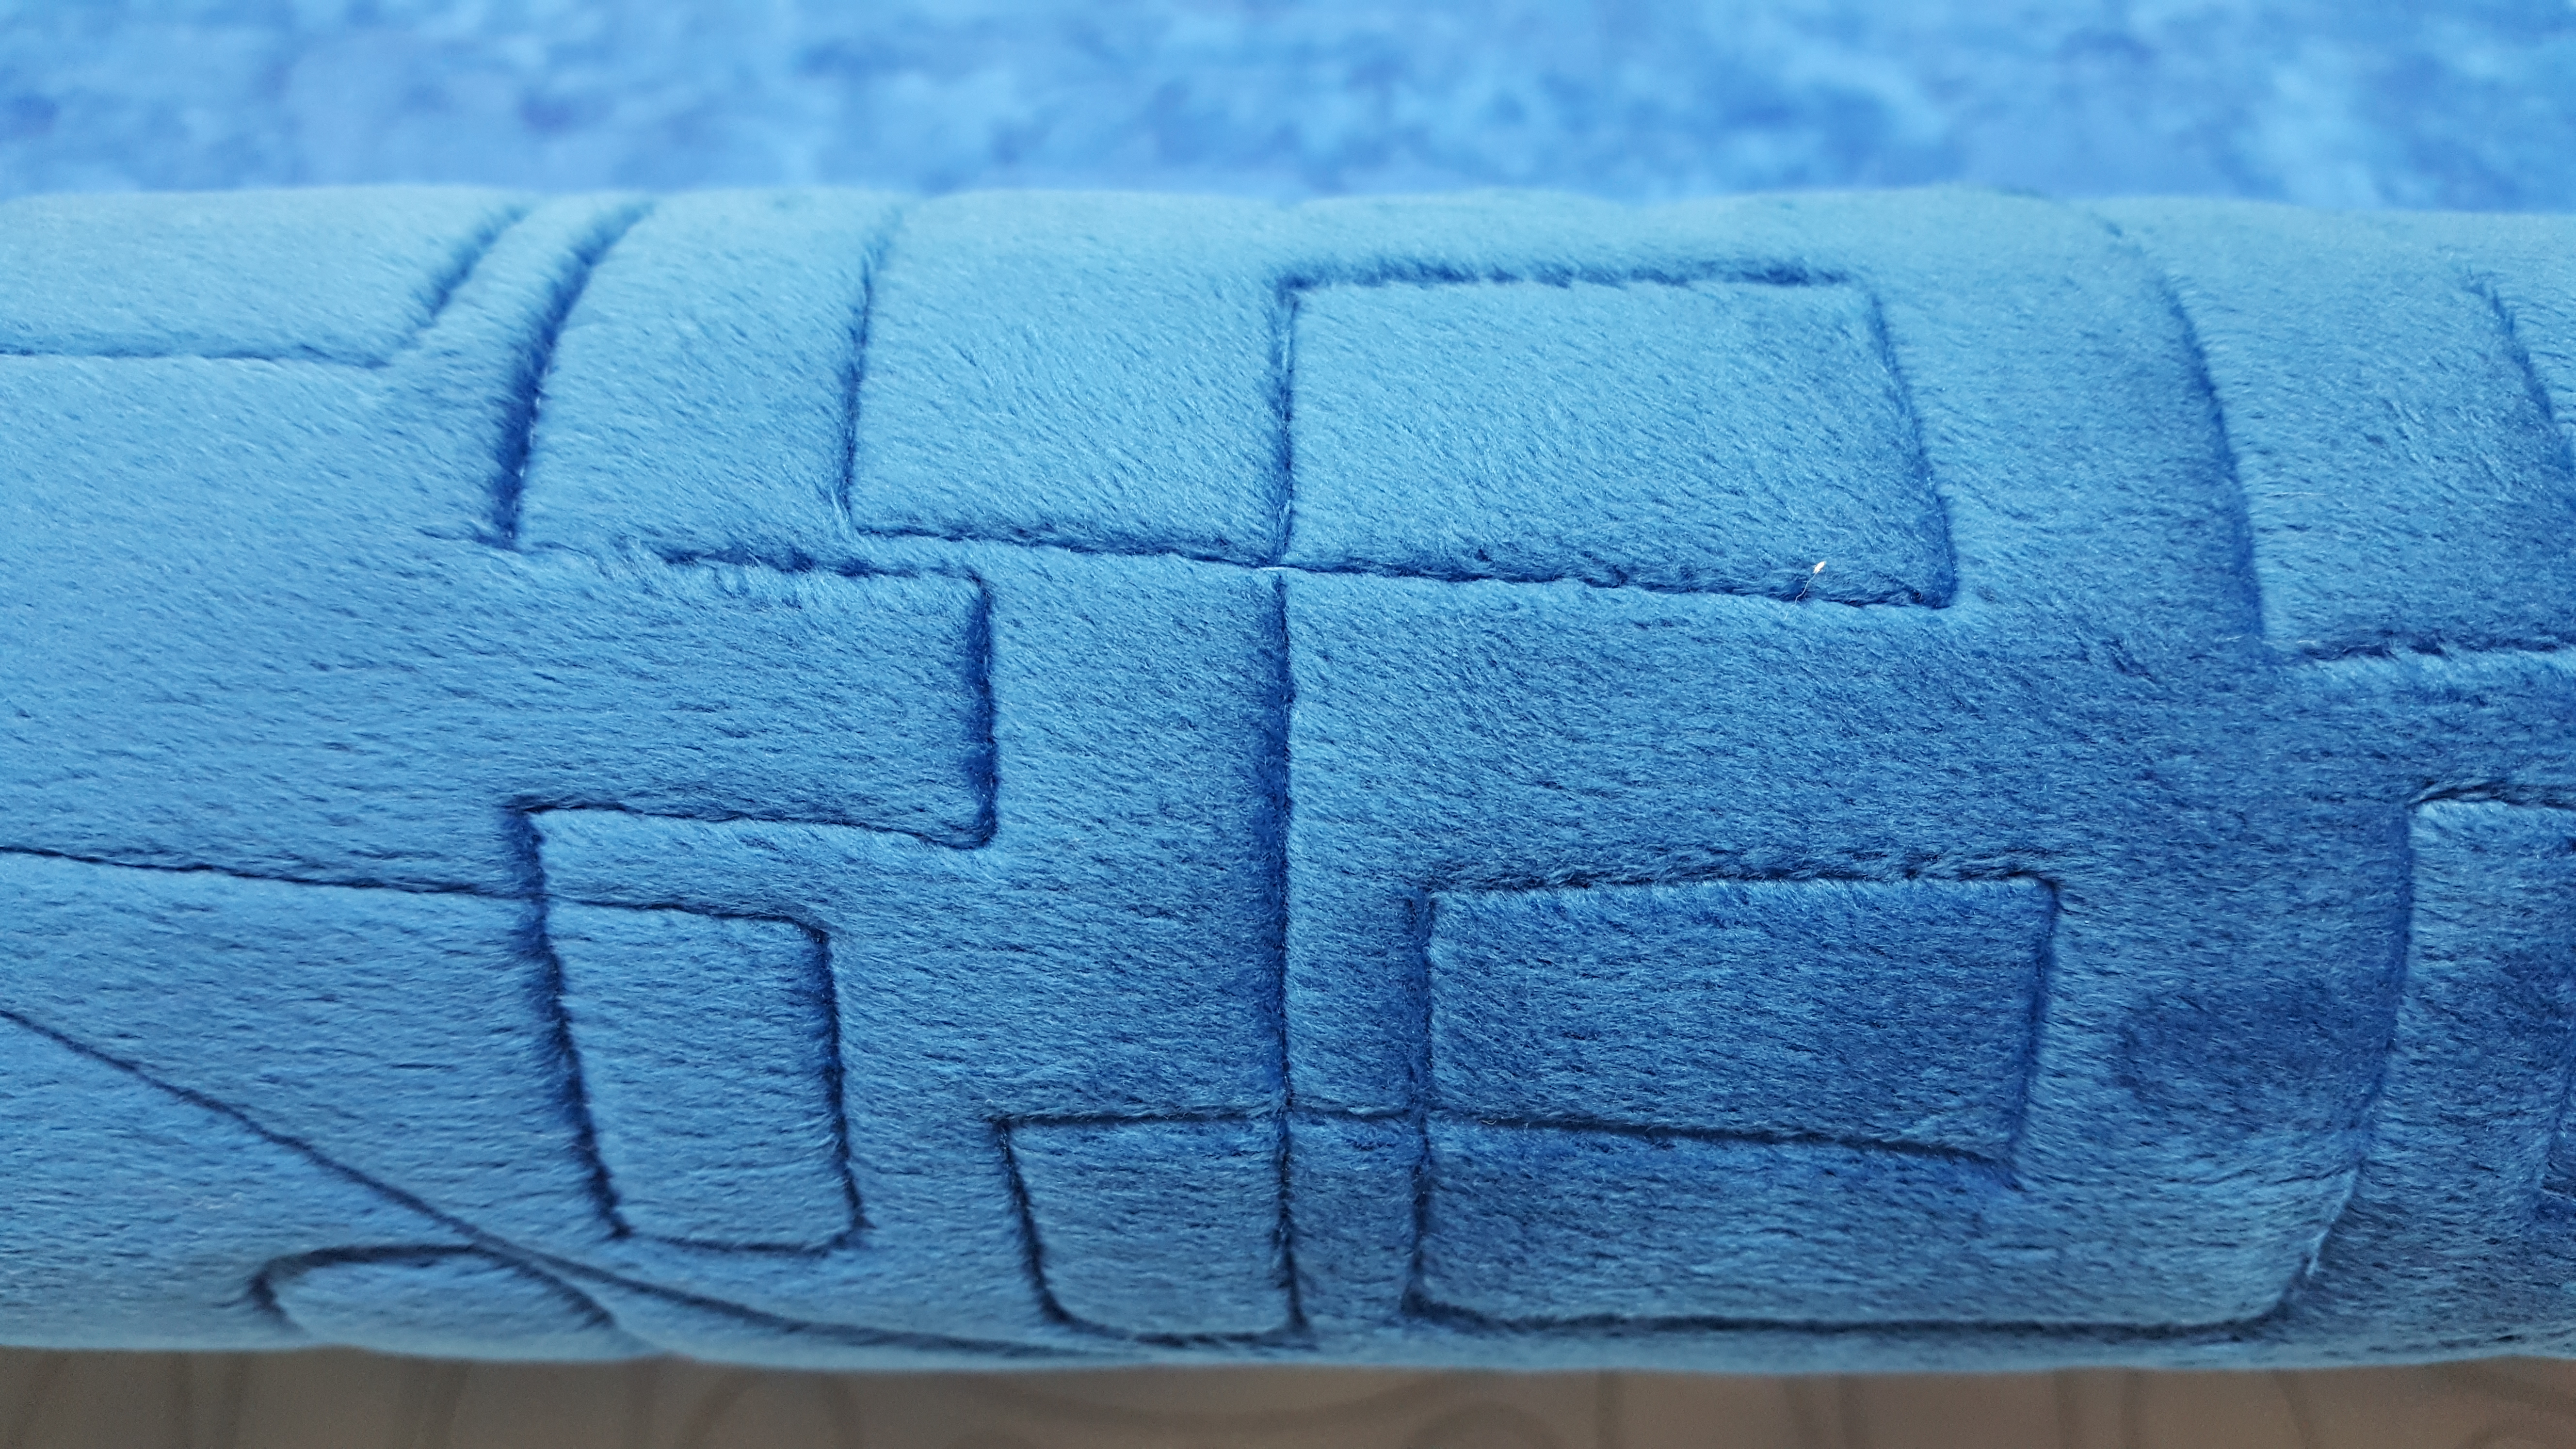
Boxes quilting, on Cuddle!
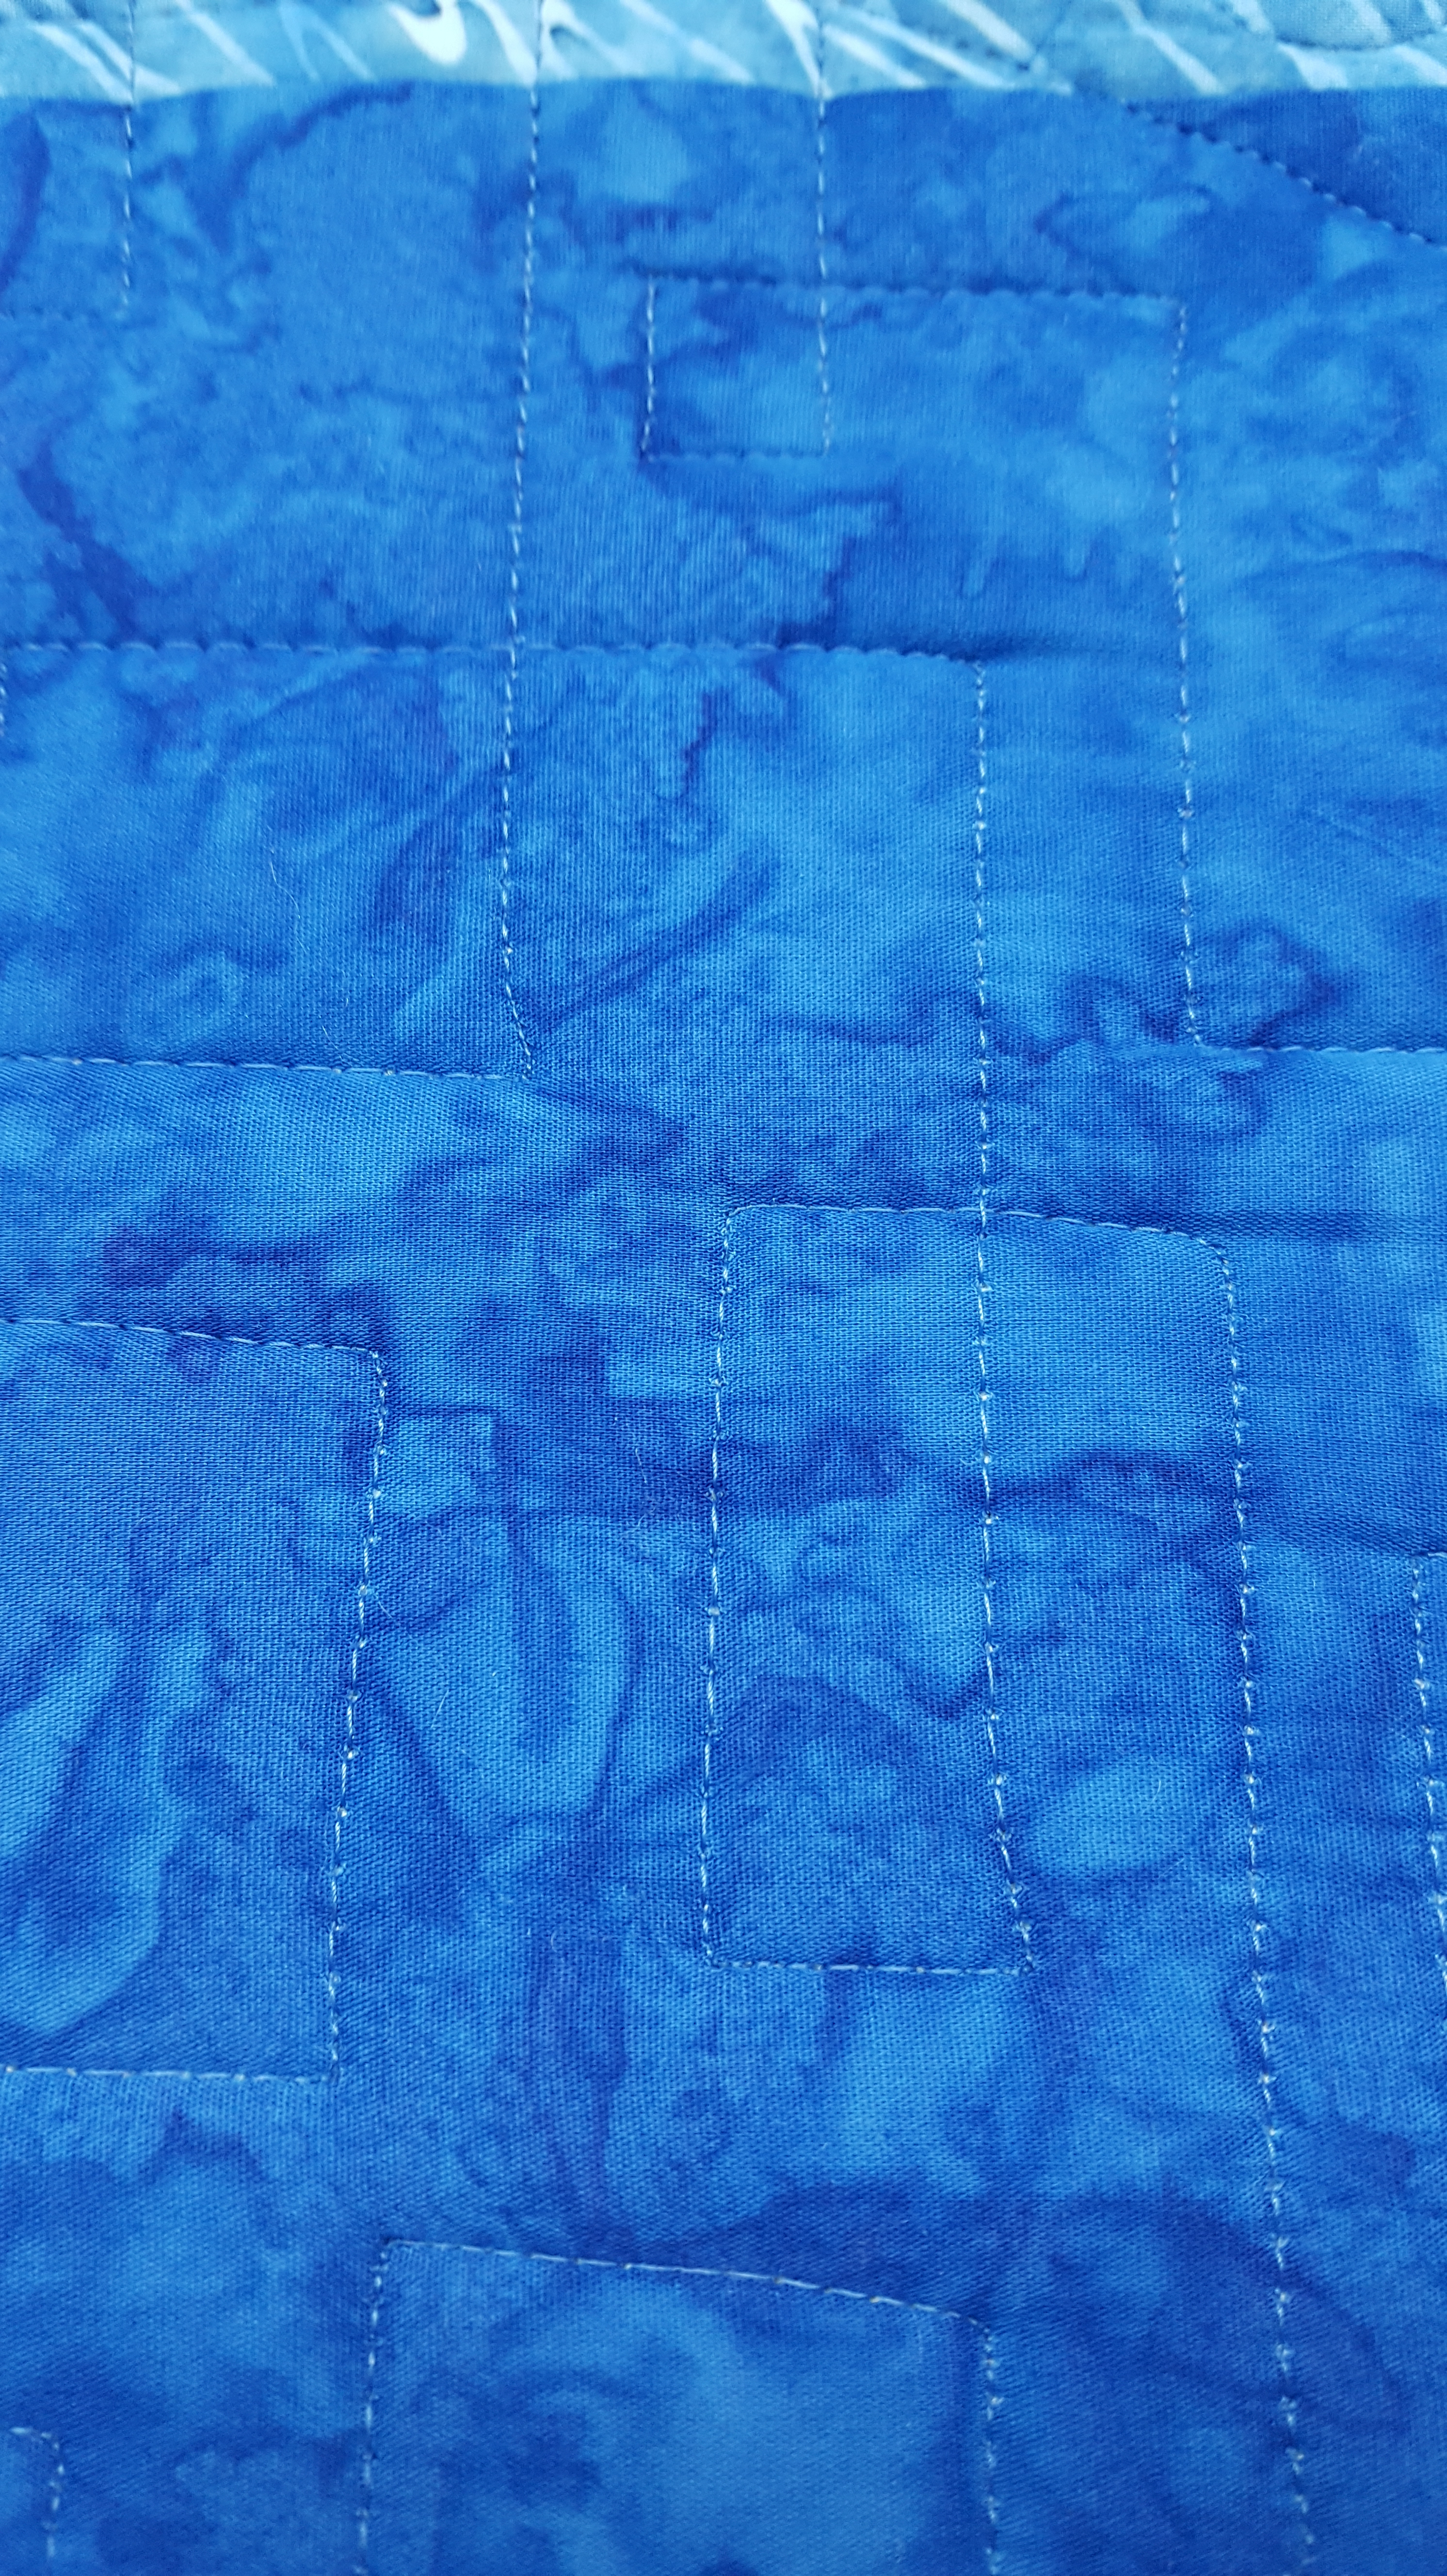
Boxes quilting, on batik.
What is under your machine or longarm?
#1 – Music helps keep time with your quilting. And I prefer smooth, nothing loud and aggressive. (But, listen to what you like!)
#2 – Relax when you quilt! Pick something you LOVE to quilt. It doesn’t have to be fancy, it needs to be fun for YOU!
I can’t show you the quilt just yet. Maybe in a couple weeks once I’ve been “home” to KC. (wink, wink!)
in quilting,
Debbie
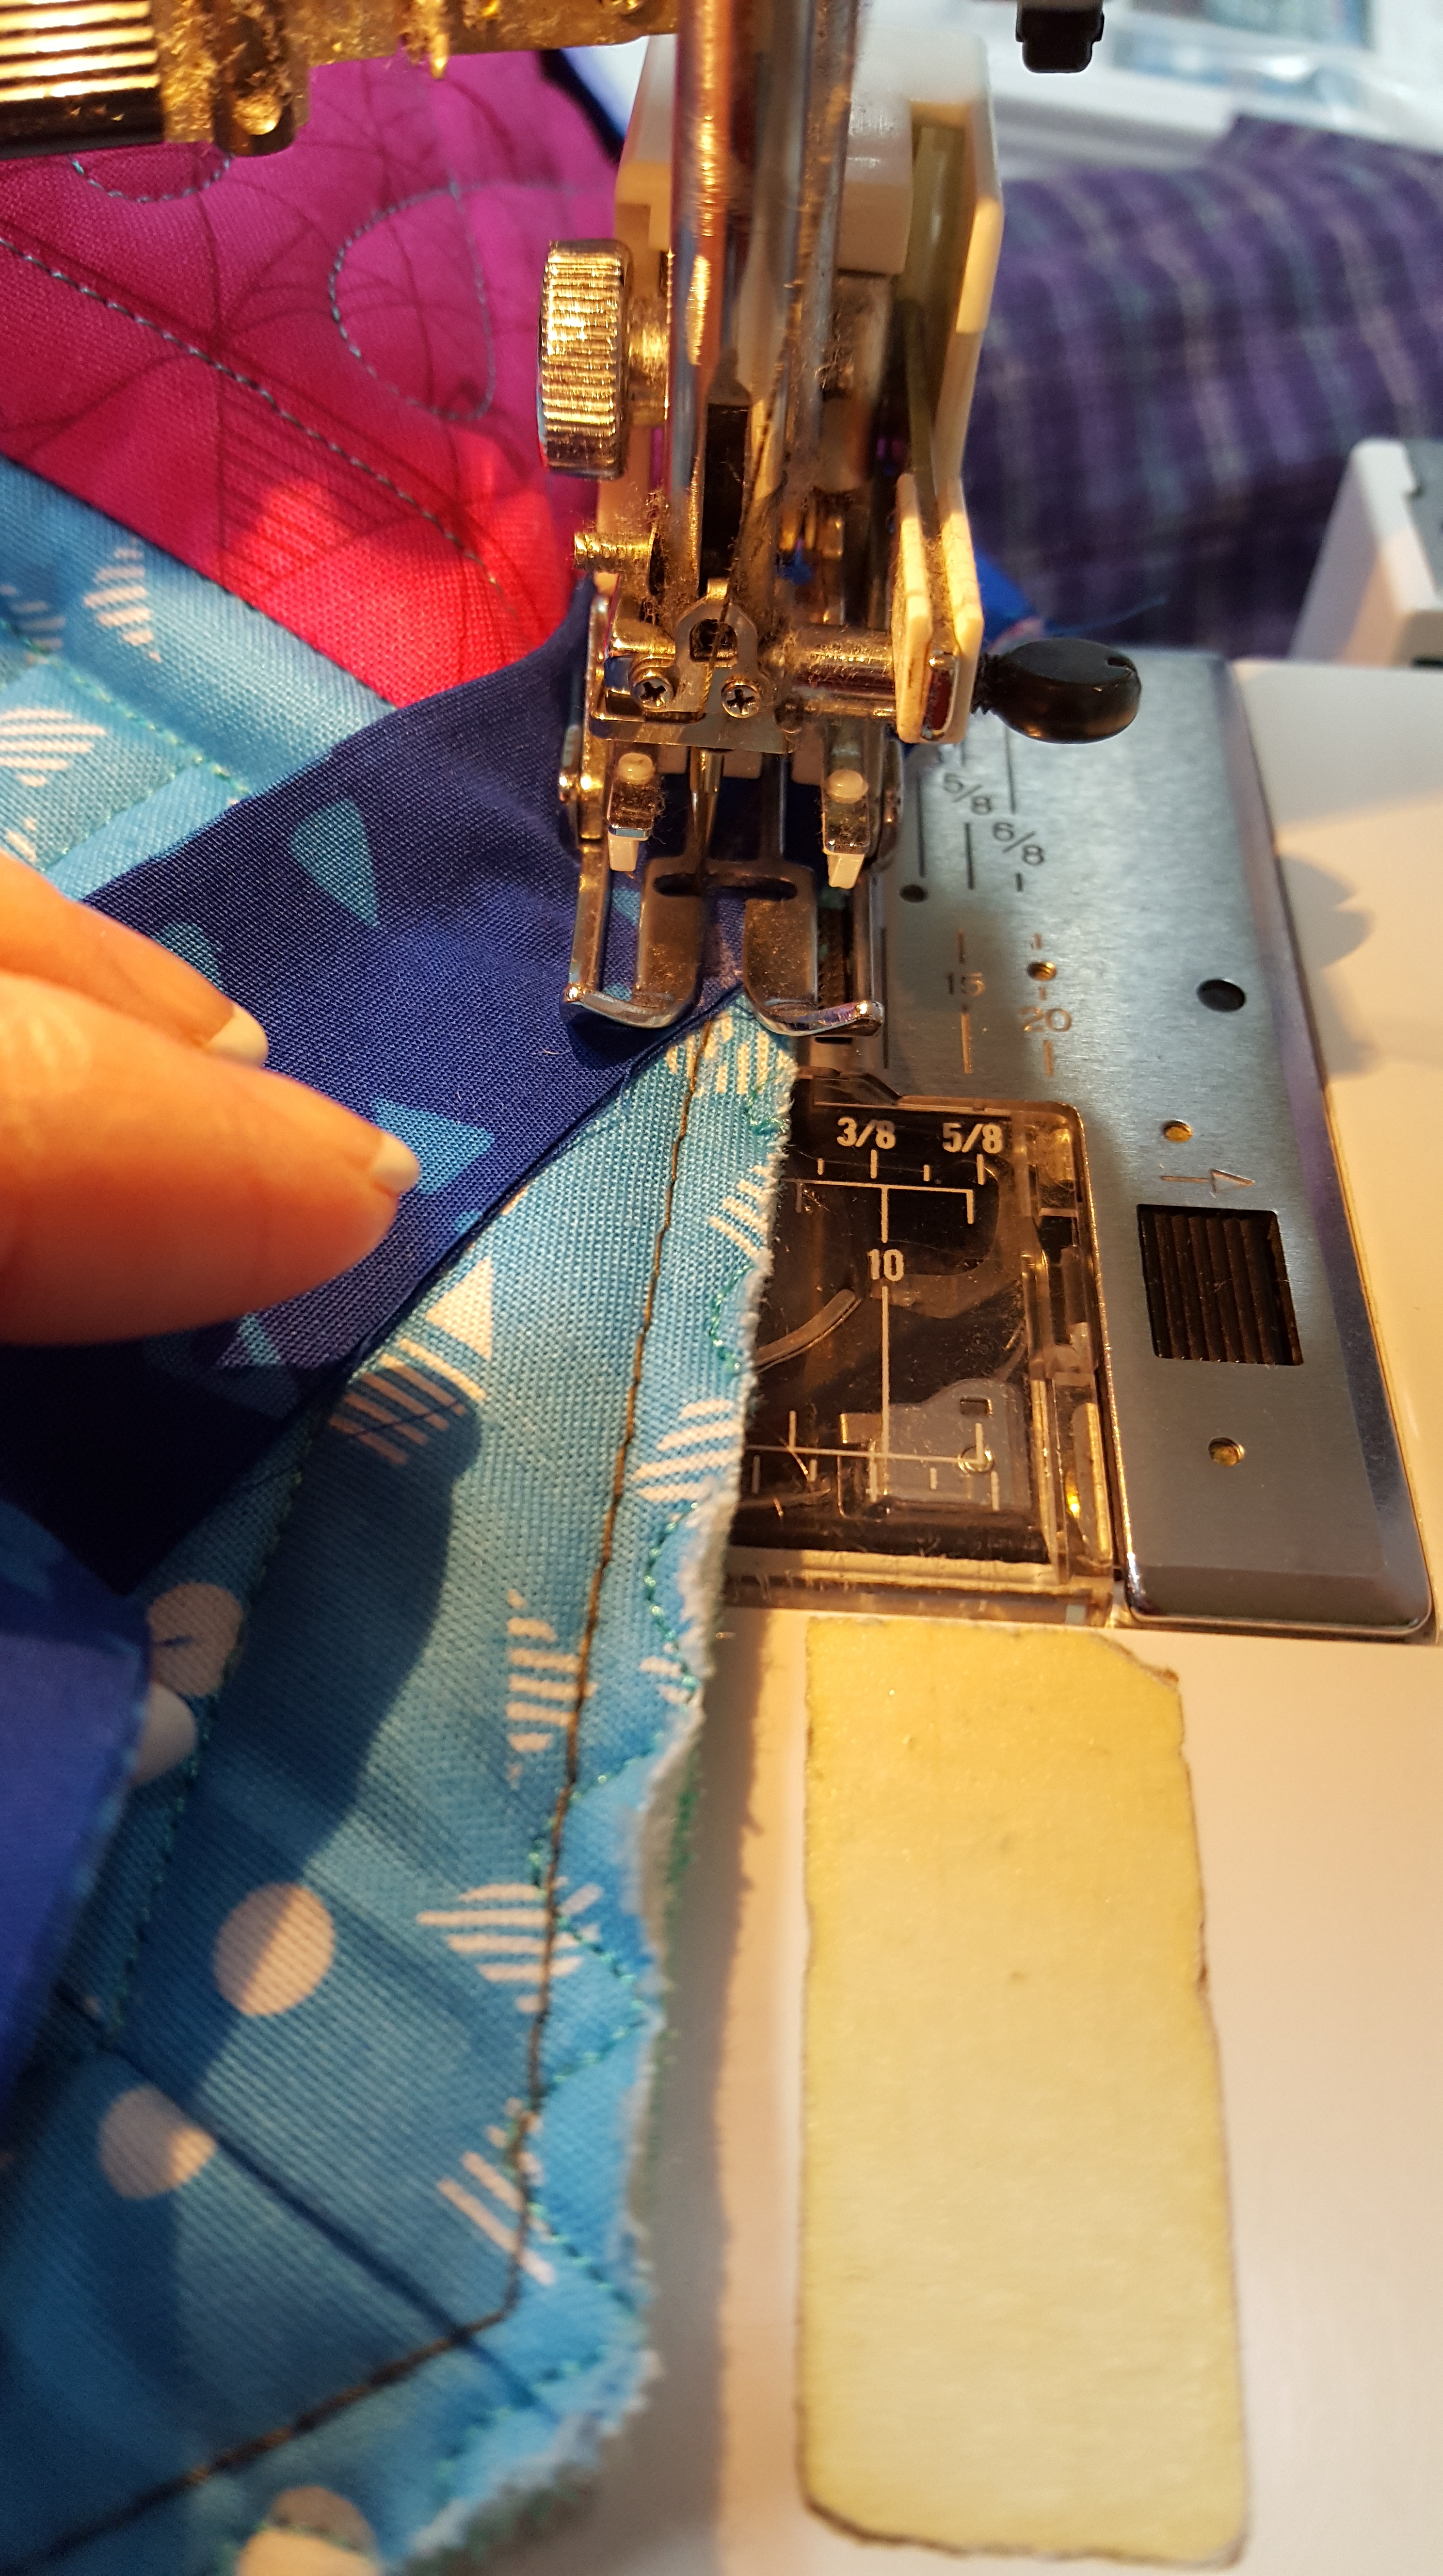
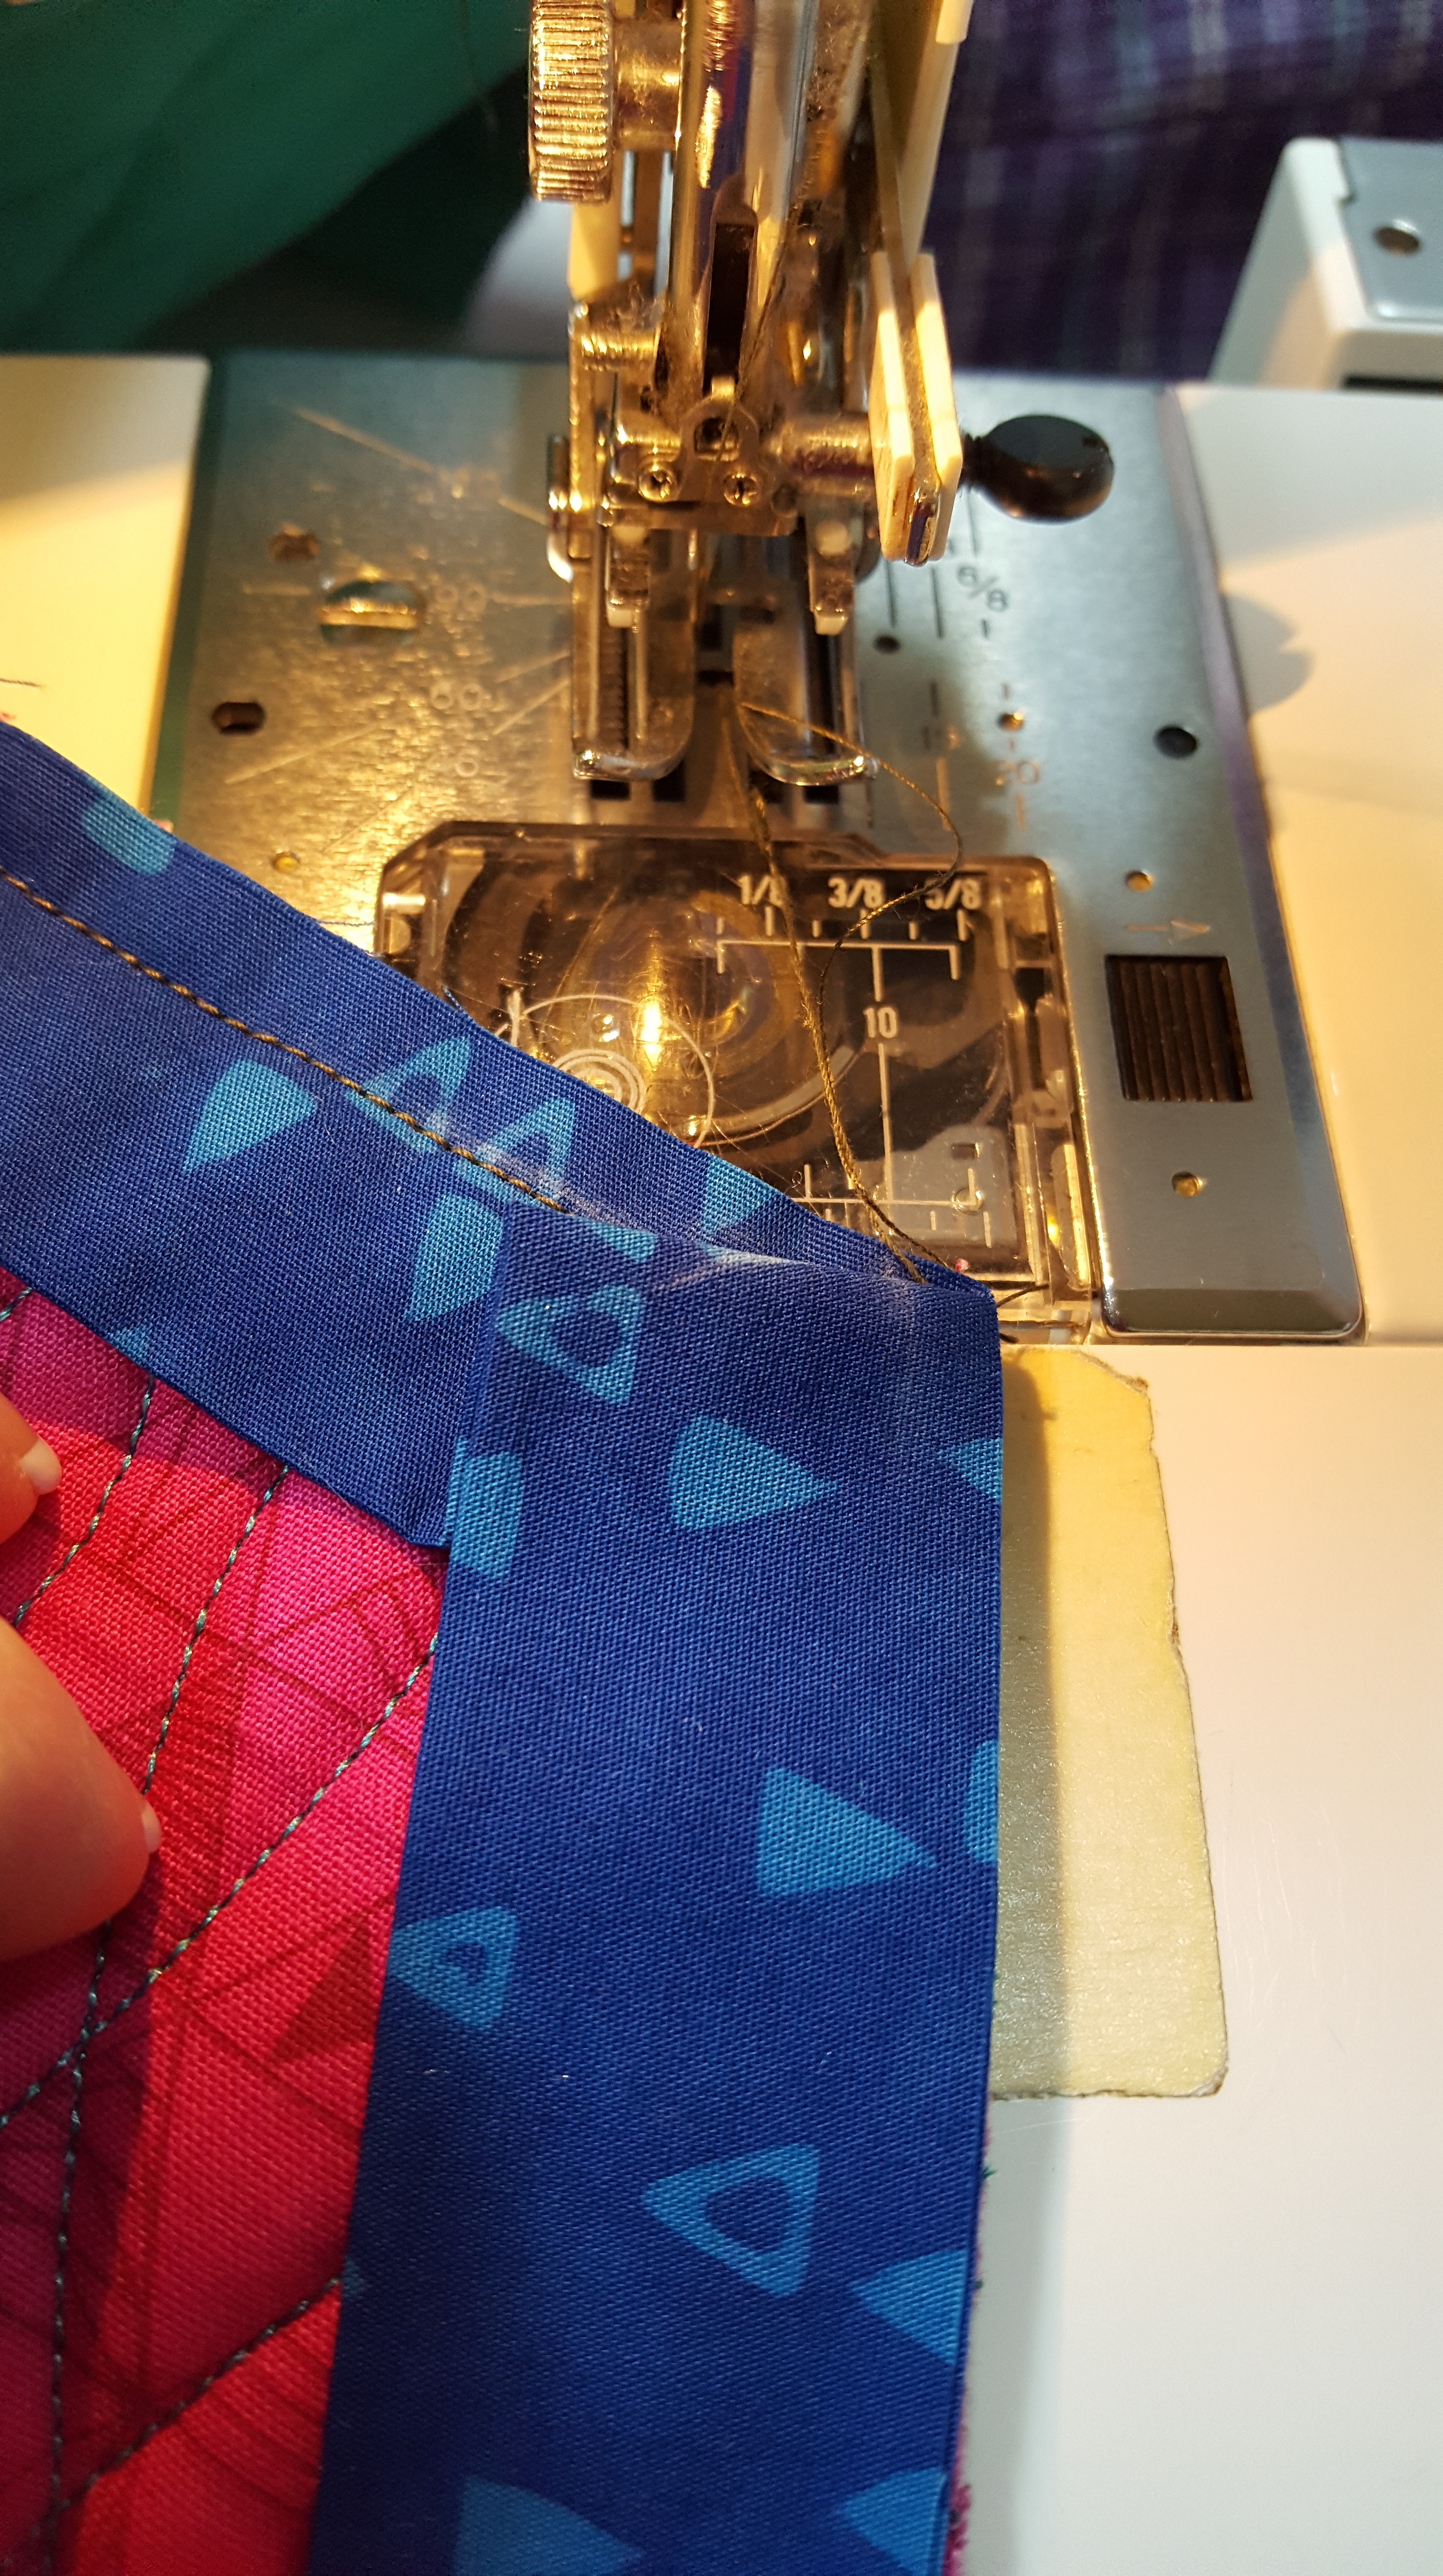
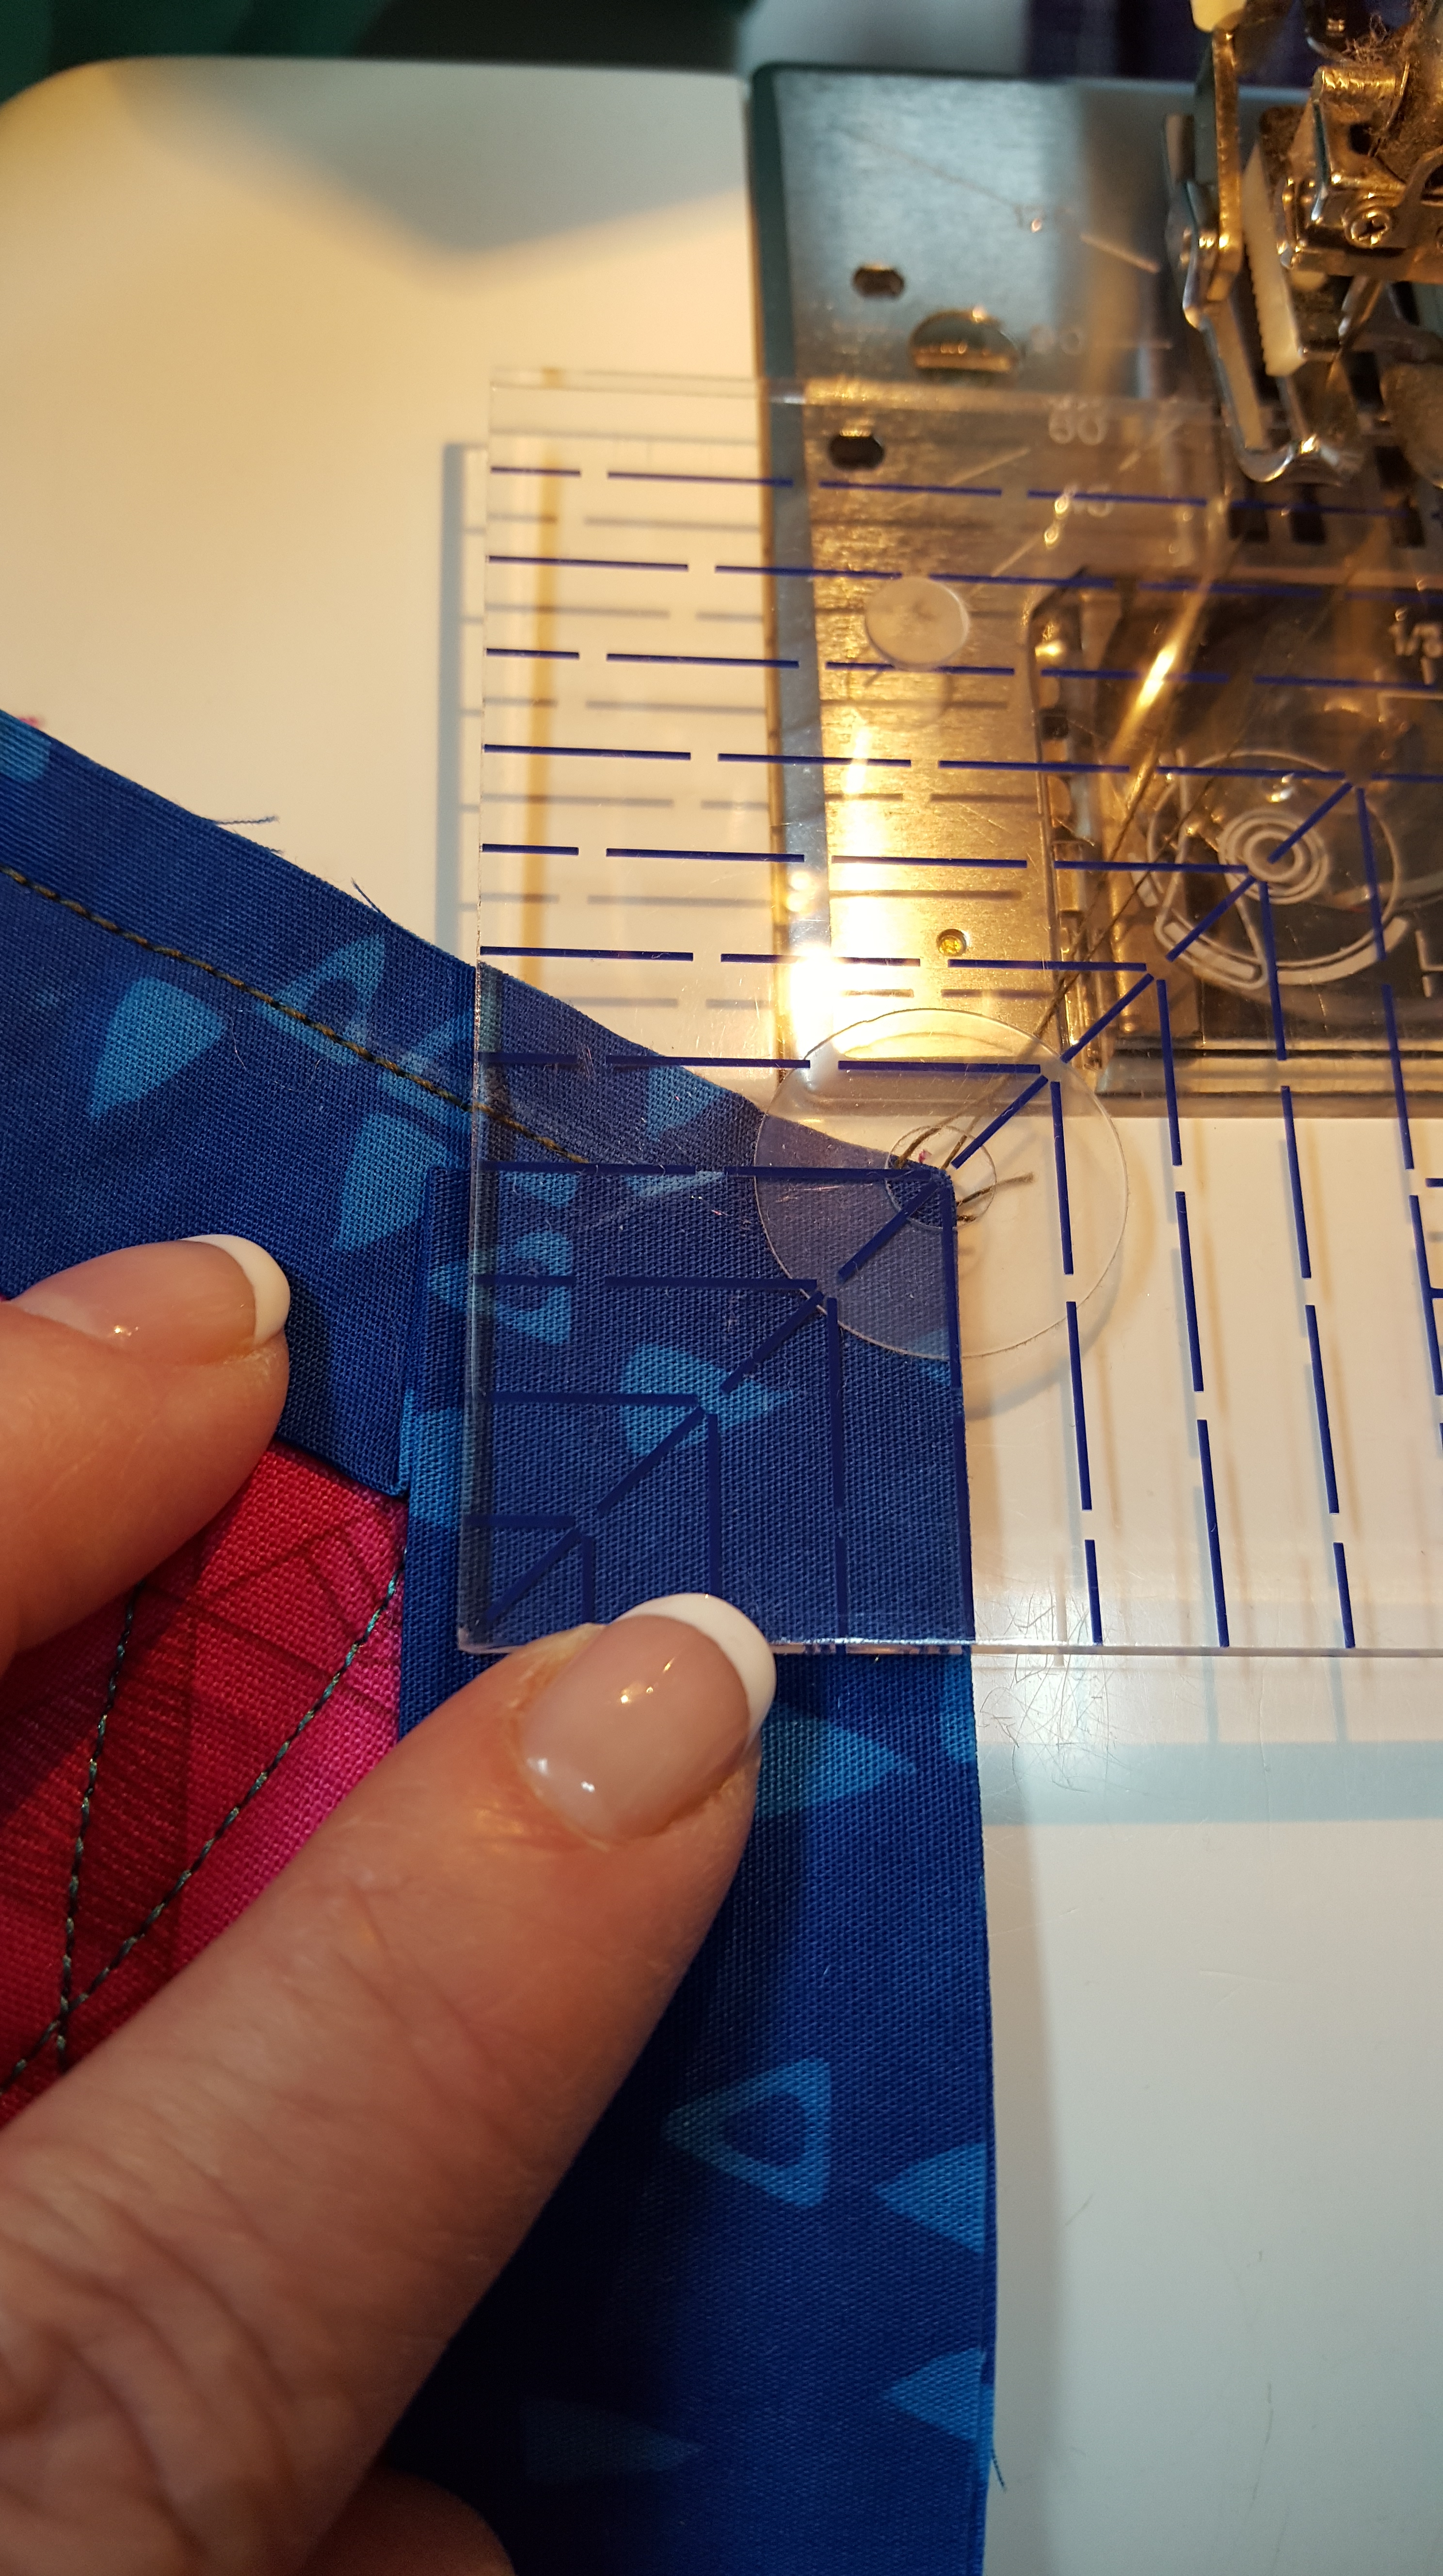
Today, I’ll finish the odd angle binding instruction. Paducah got busy last week, grin! And I was not able to get back to my computer. The inside angle of an odd angle binding is just as important as the out side point. There is a couple thoughts about inside corners. One is to stitch up the miter, the other is to not stitch and leave “open”. I will show how to machine stitch the binding to the front and hand sew to the back.
For the best results, I like to staystitch just inside the seam line around the entire edge. Add the binding sewing a 1/4″ seam (or as wide as you want your binding).

Inside binding corner
As you approach the inside corner, clip to but NOT through the staystich line. Also mark the stopping point on the binding.

Clip inside binding corner
Stop with the needle down at the inside corner point. Open up inside corner, where it has been clipped and align the binding and continue sewing. NO turning needed.

Inside corner, open clipped corner

Mark stopping point
Stop with needle down
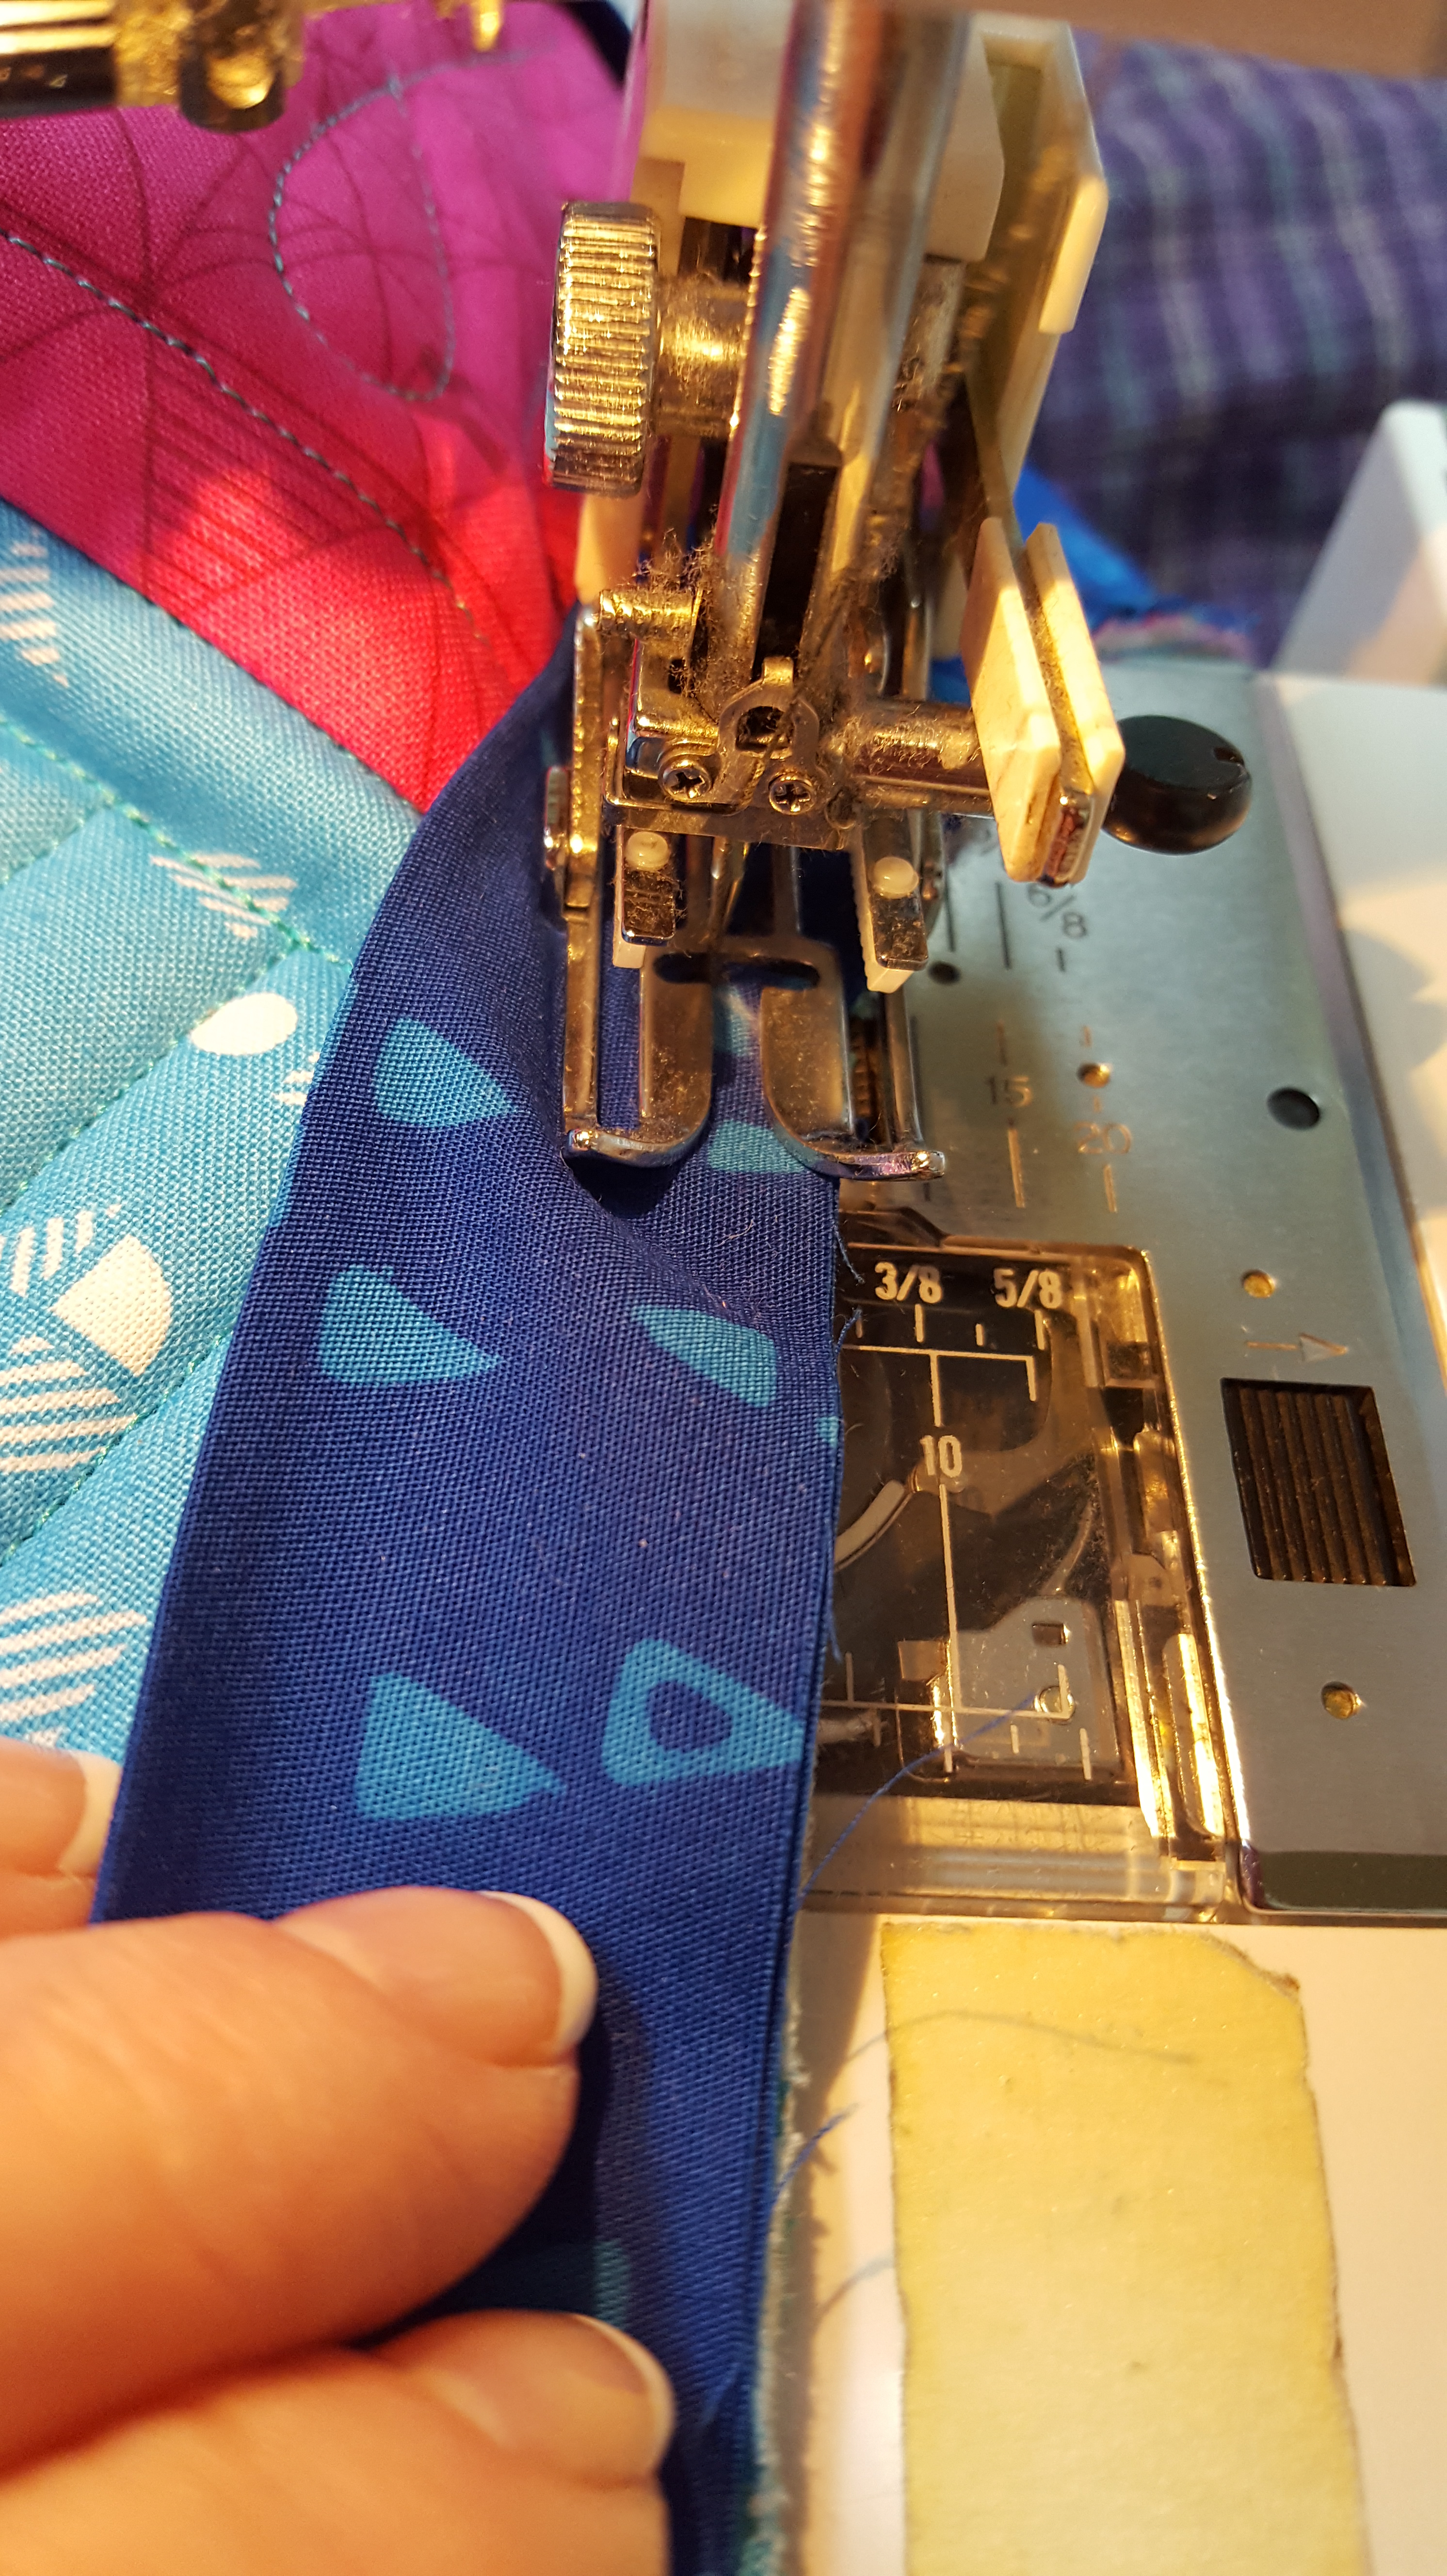
Continue sewing beyond inside corner point
Turn the binding to the back and hand sew in place. The first set of photos have NOT had the miter sewn. The second is sewn. You decide what look you like.
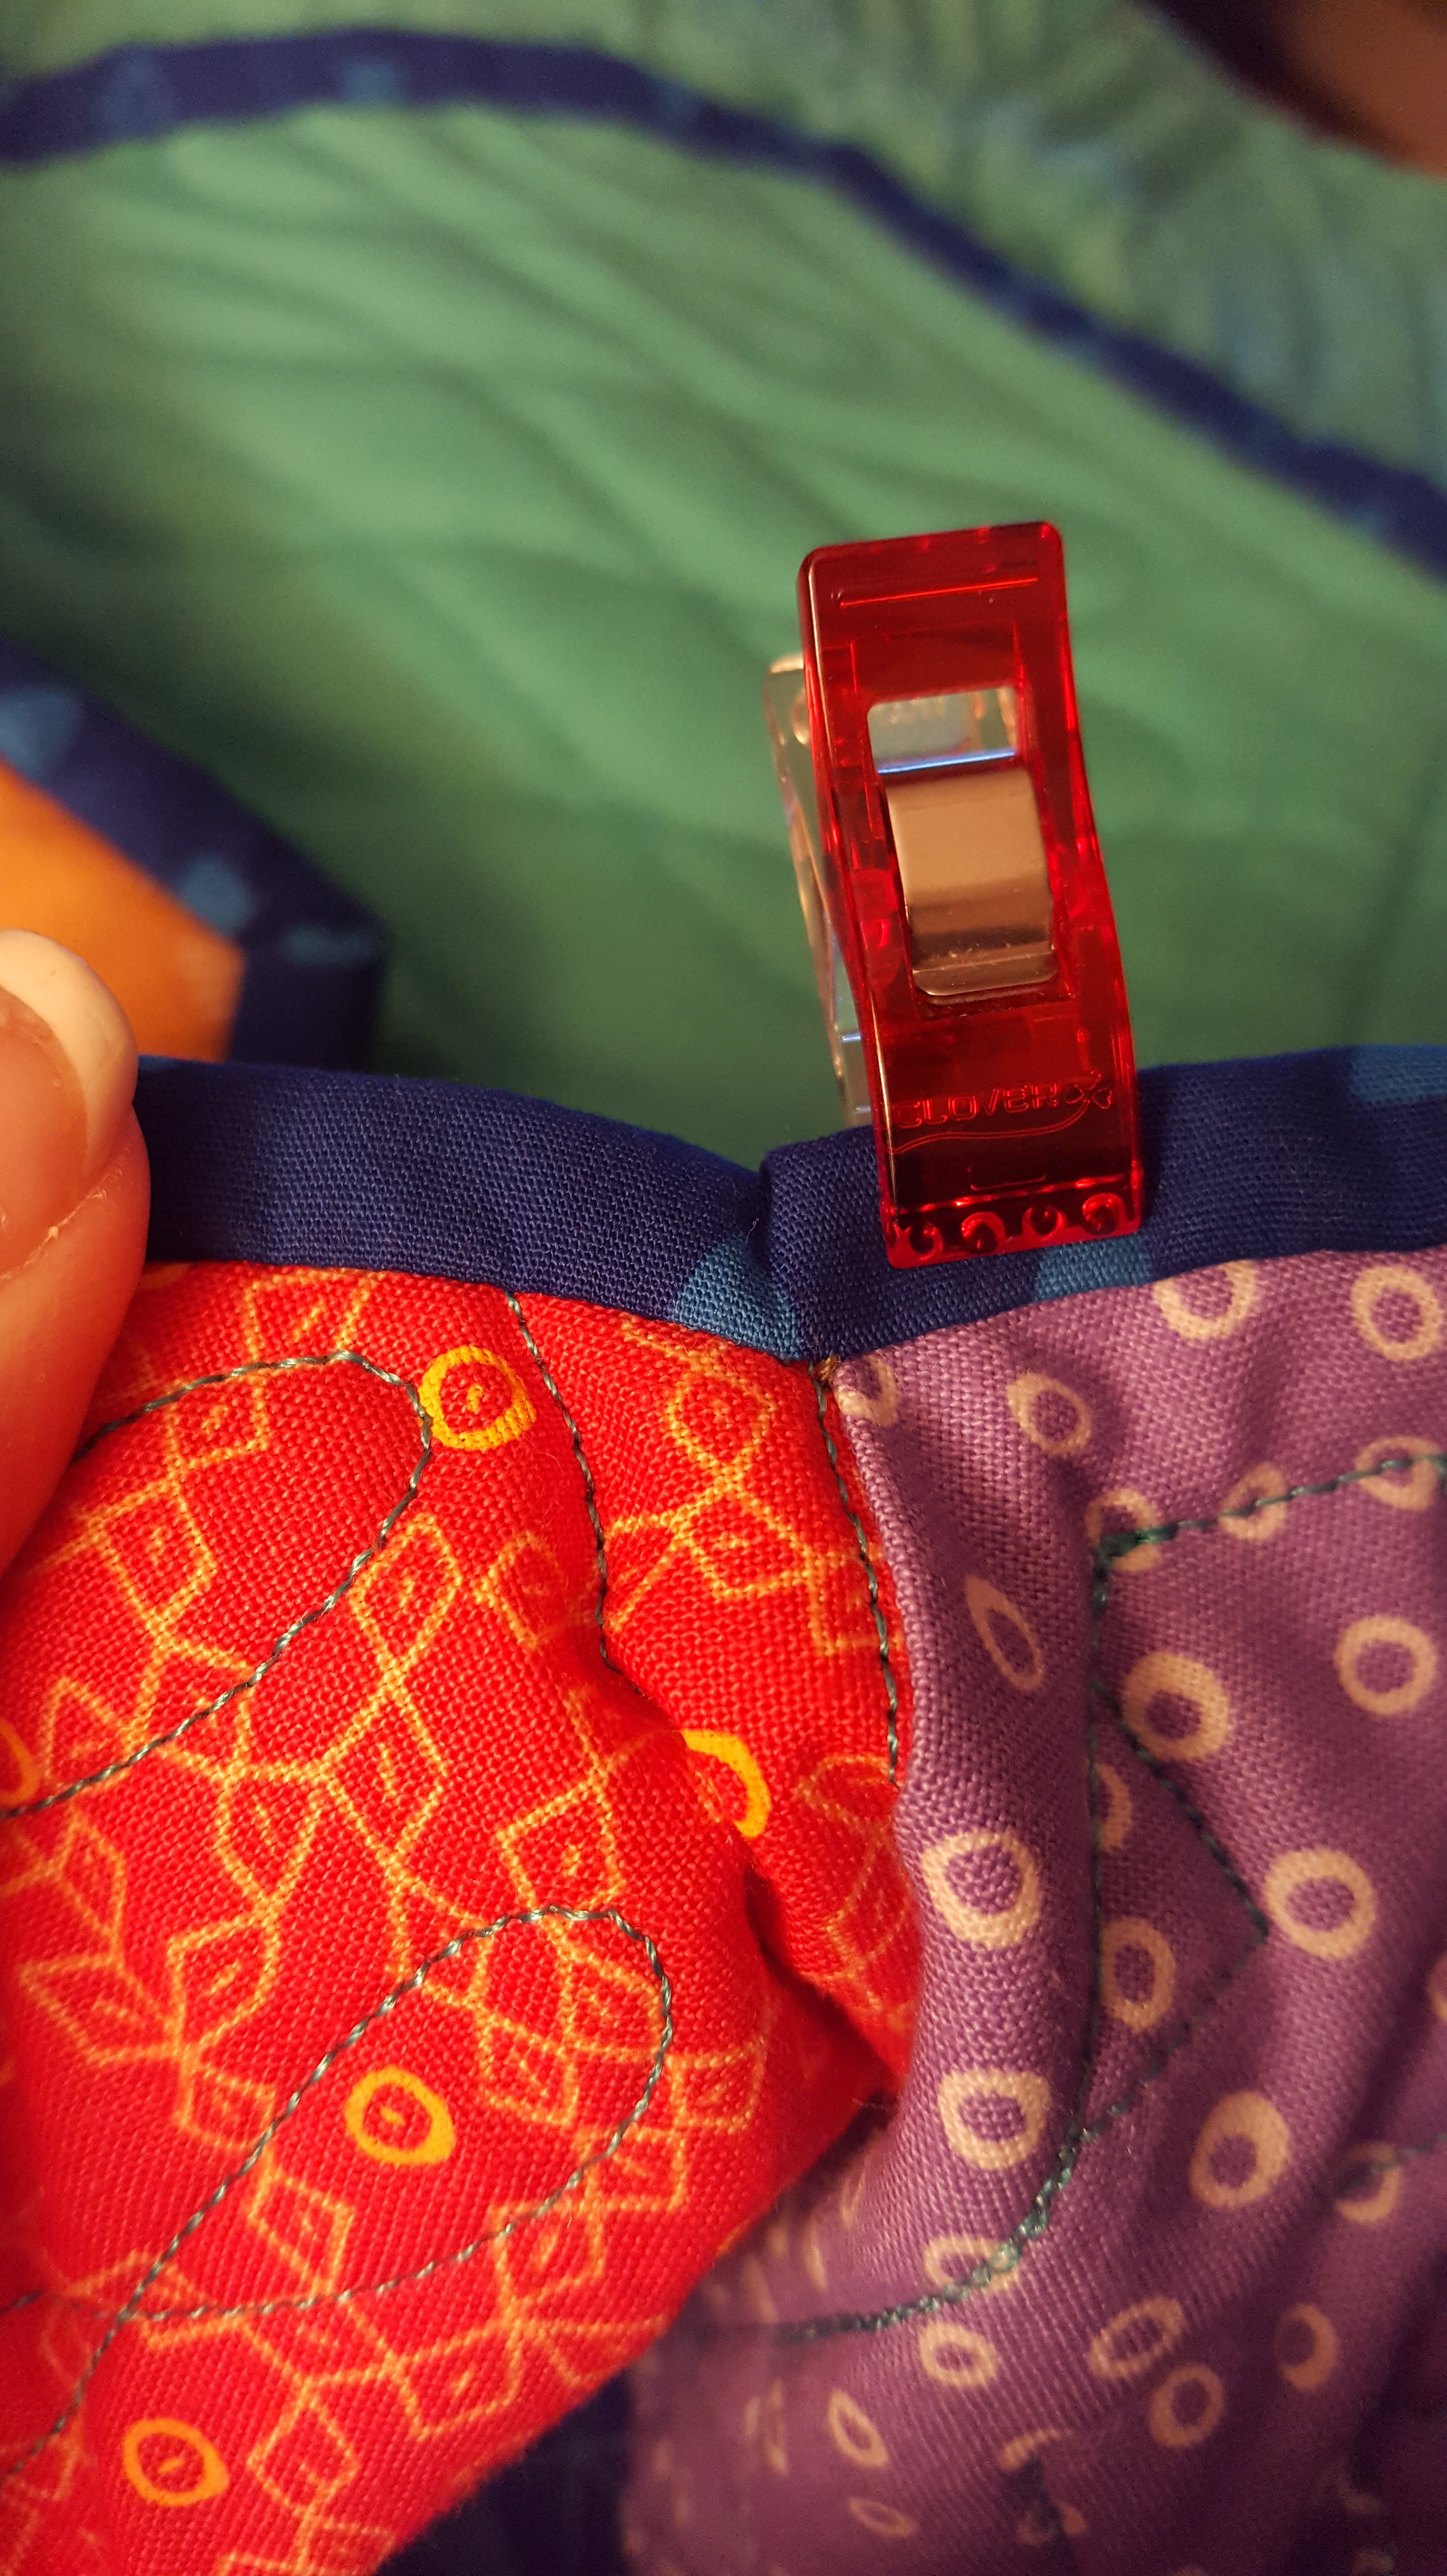
Front of hand sewn inside
corner, miter not sewn
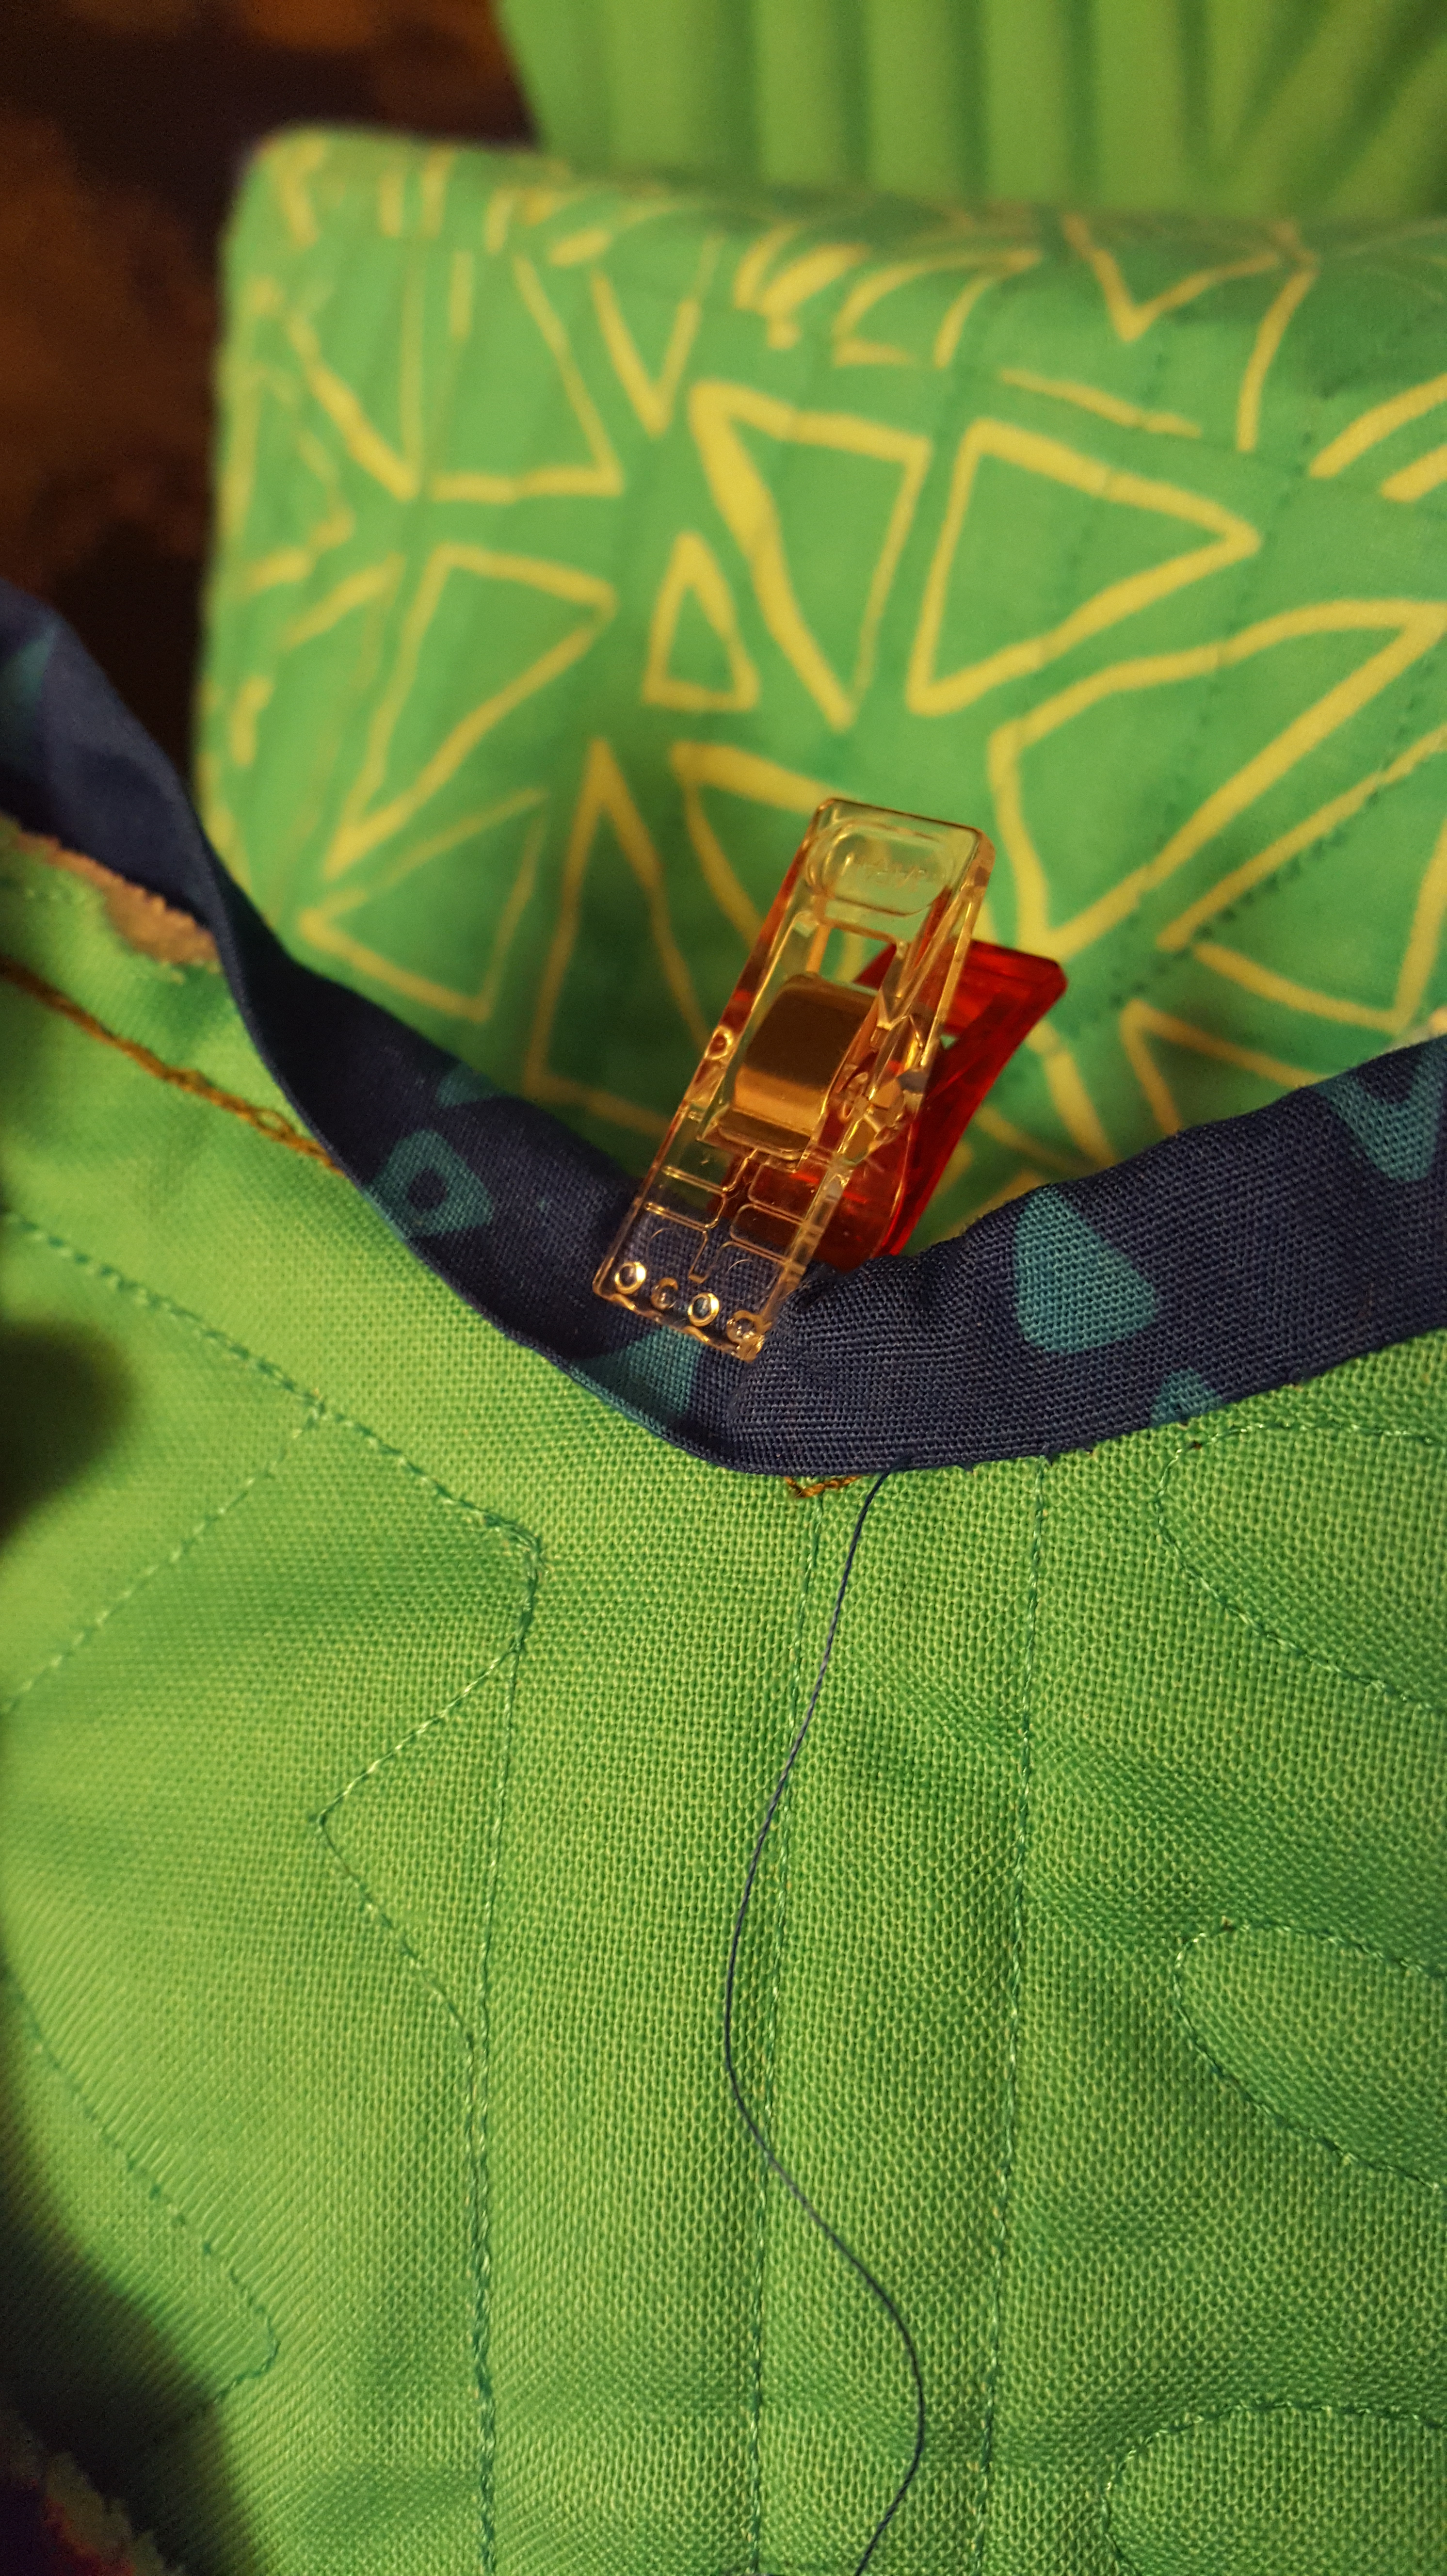
Back of inside corner

Back, miter sewn
Front, miter sewn
#1 – Staystitching, marking, and clipping make for a good inside corner!
#2- You choose to sew the inside miter, or not. But judges do want to see them sewn!
in quilting,
Debbie
P.S. Thank you Paducah! Wonderful time with great customers and friends!
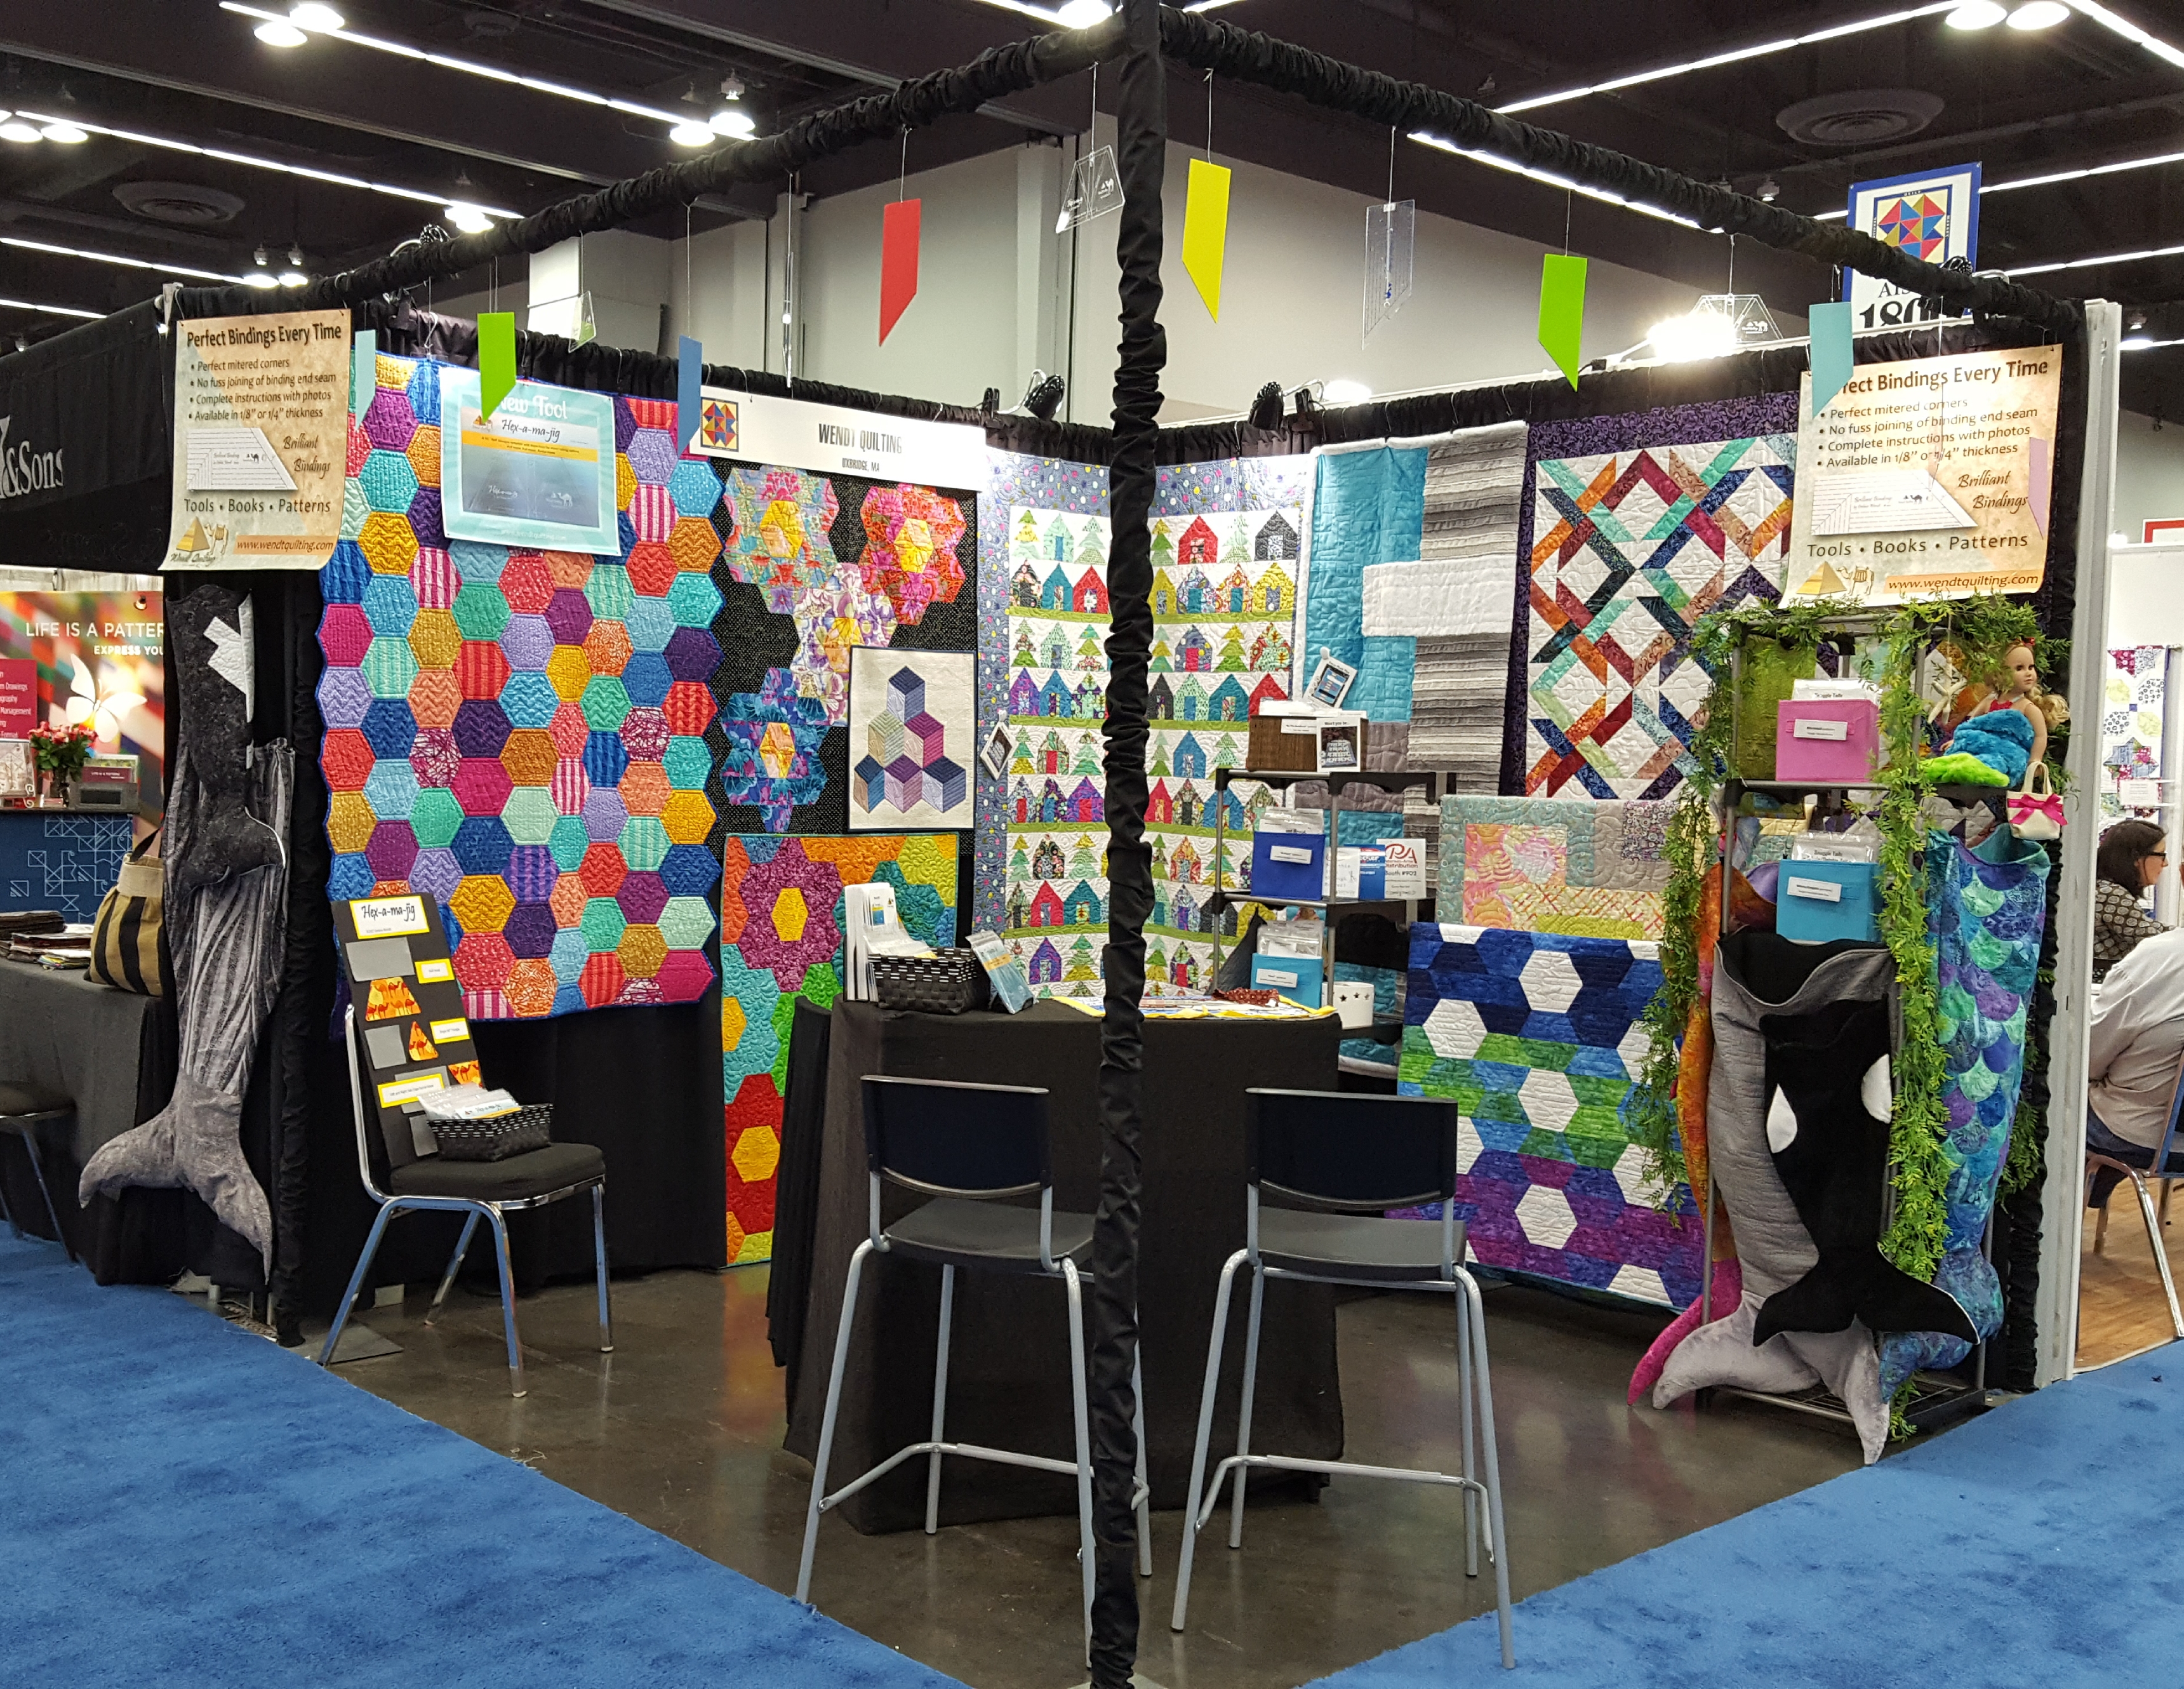
First, HELLO Paducah!! My booth is setup and ready for the show! Come by and say hello and see all of my patterns, the quilts and tools. I will be giving demos and talk everything quilting. It was great to see four of my students today and this evening of preview! Thanks for sharing your progress.
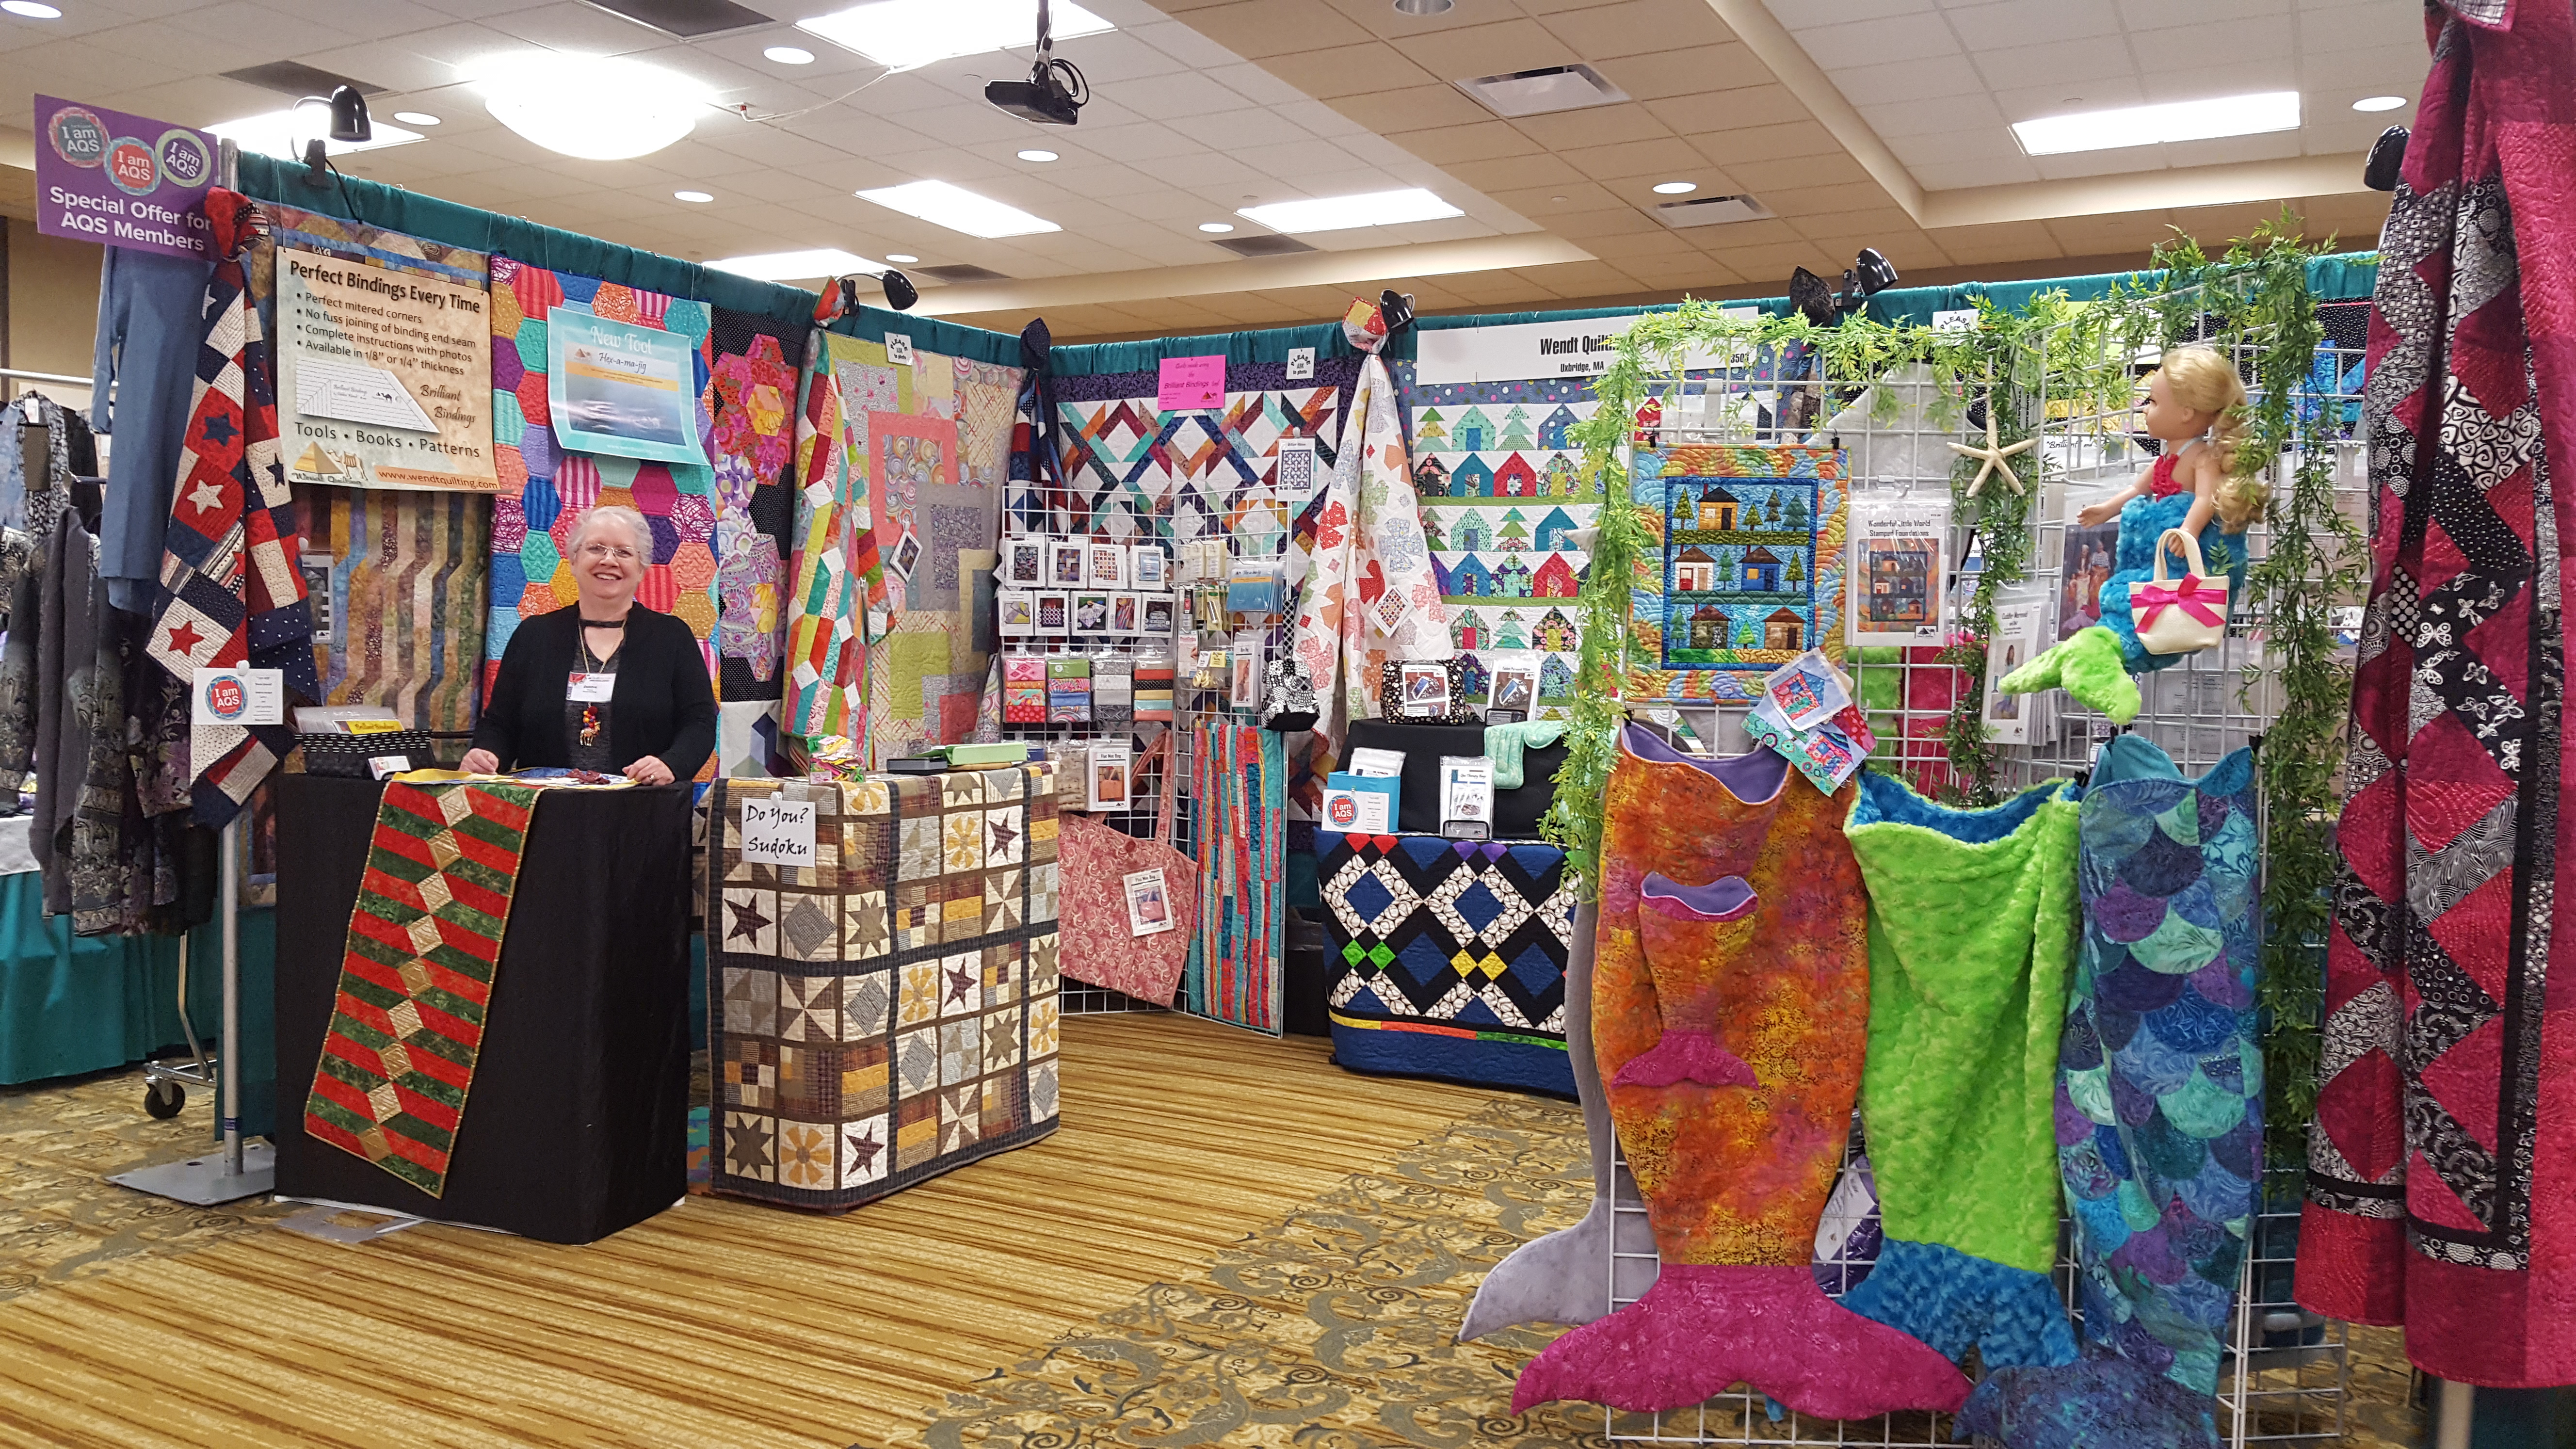
Wendt Quilting Booth #3506 Paducah
Since today is a very late night with preview, I will give the tips tomorrow on to odd angle bindings. Thanks for your understanding.
in quilting,
Debbie
My Hex-a-ma-jig quilt I showed last week now needs a binding. I will be going to Paducah next week for AQS Quilt Week! I’m really looking forward to the show and seeing quilting friends! Because I’m busy packing quilts and patterns and tools, I will take the next two weeks to give some tips on sewing the odd angle binding of the Hex-a-ma-jig quilt.
Today I will show the outside odd angle corner…
I have made a continuous binding, 2 1/4″ wide, folded in half for a double fold binding. The quilt has been trimmed and I basted a scant 1/4″ line around the entire edge of the quilt. My binding seam will be a “chunky” 1/4″ seam.
As I approach the corner, I mark the stopping point. Since I am sewing a “chunky” 1/4″ seam I mark both edges with a “chunky” 1/4″ line from the outside edges.
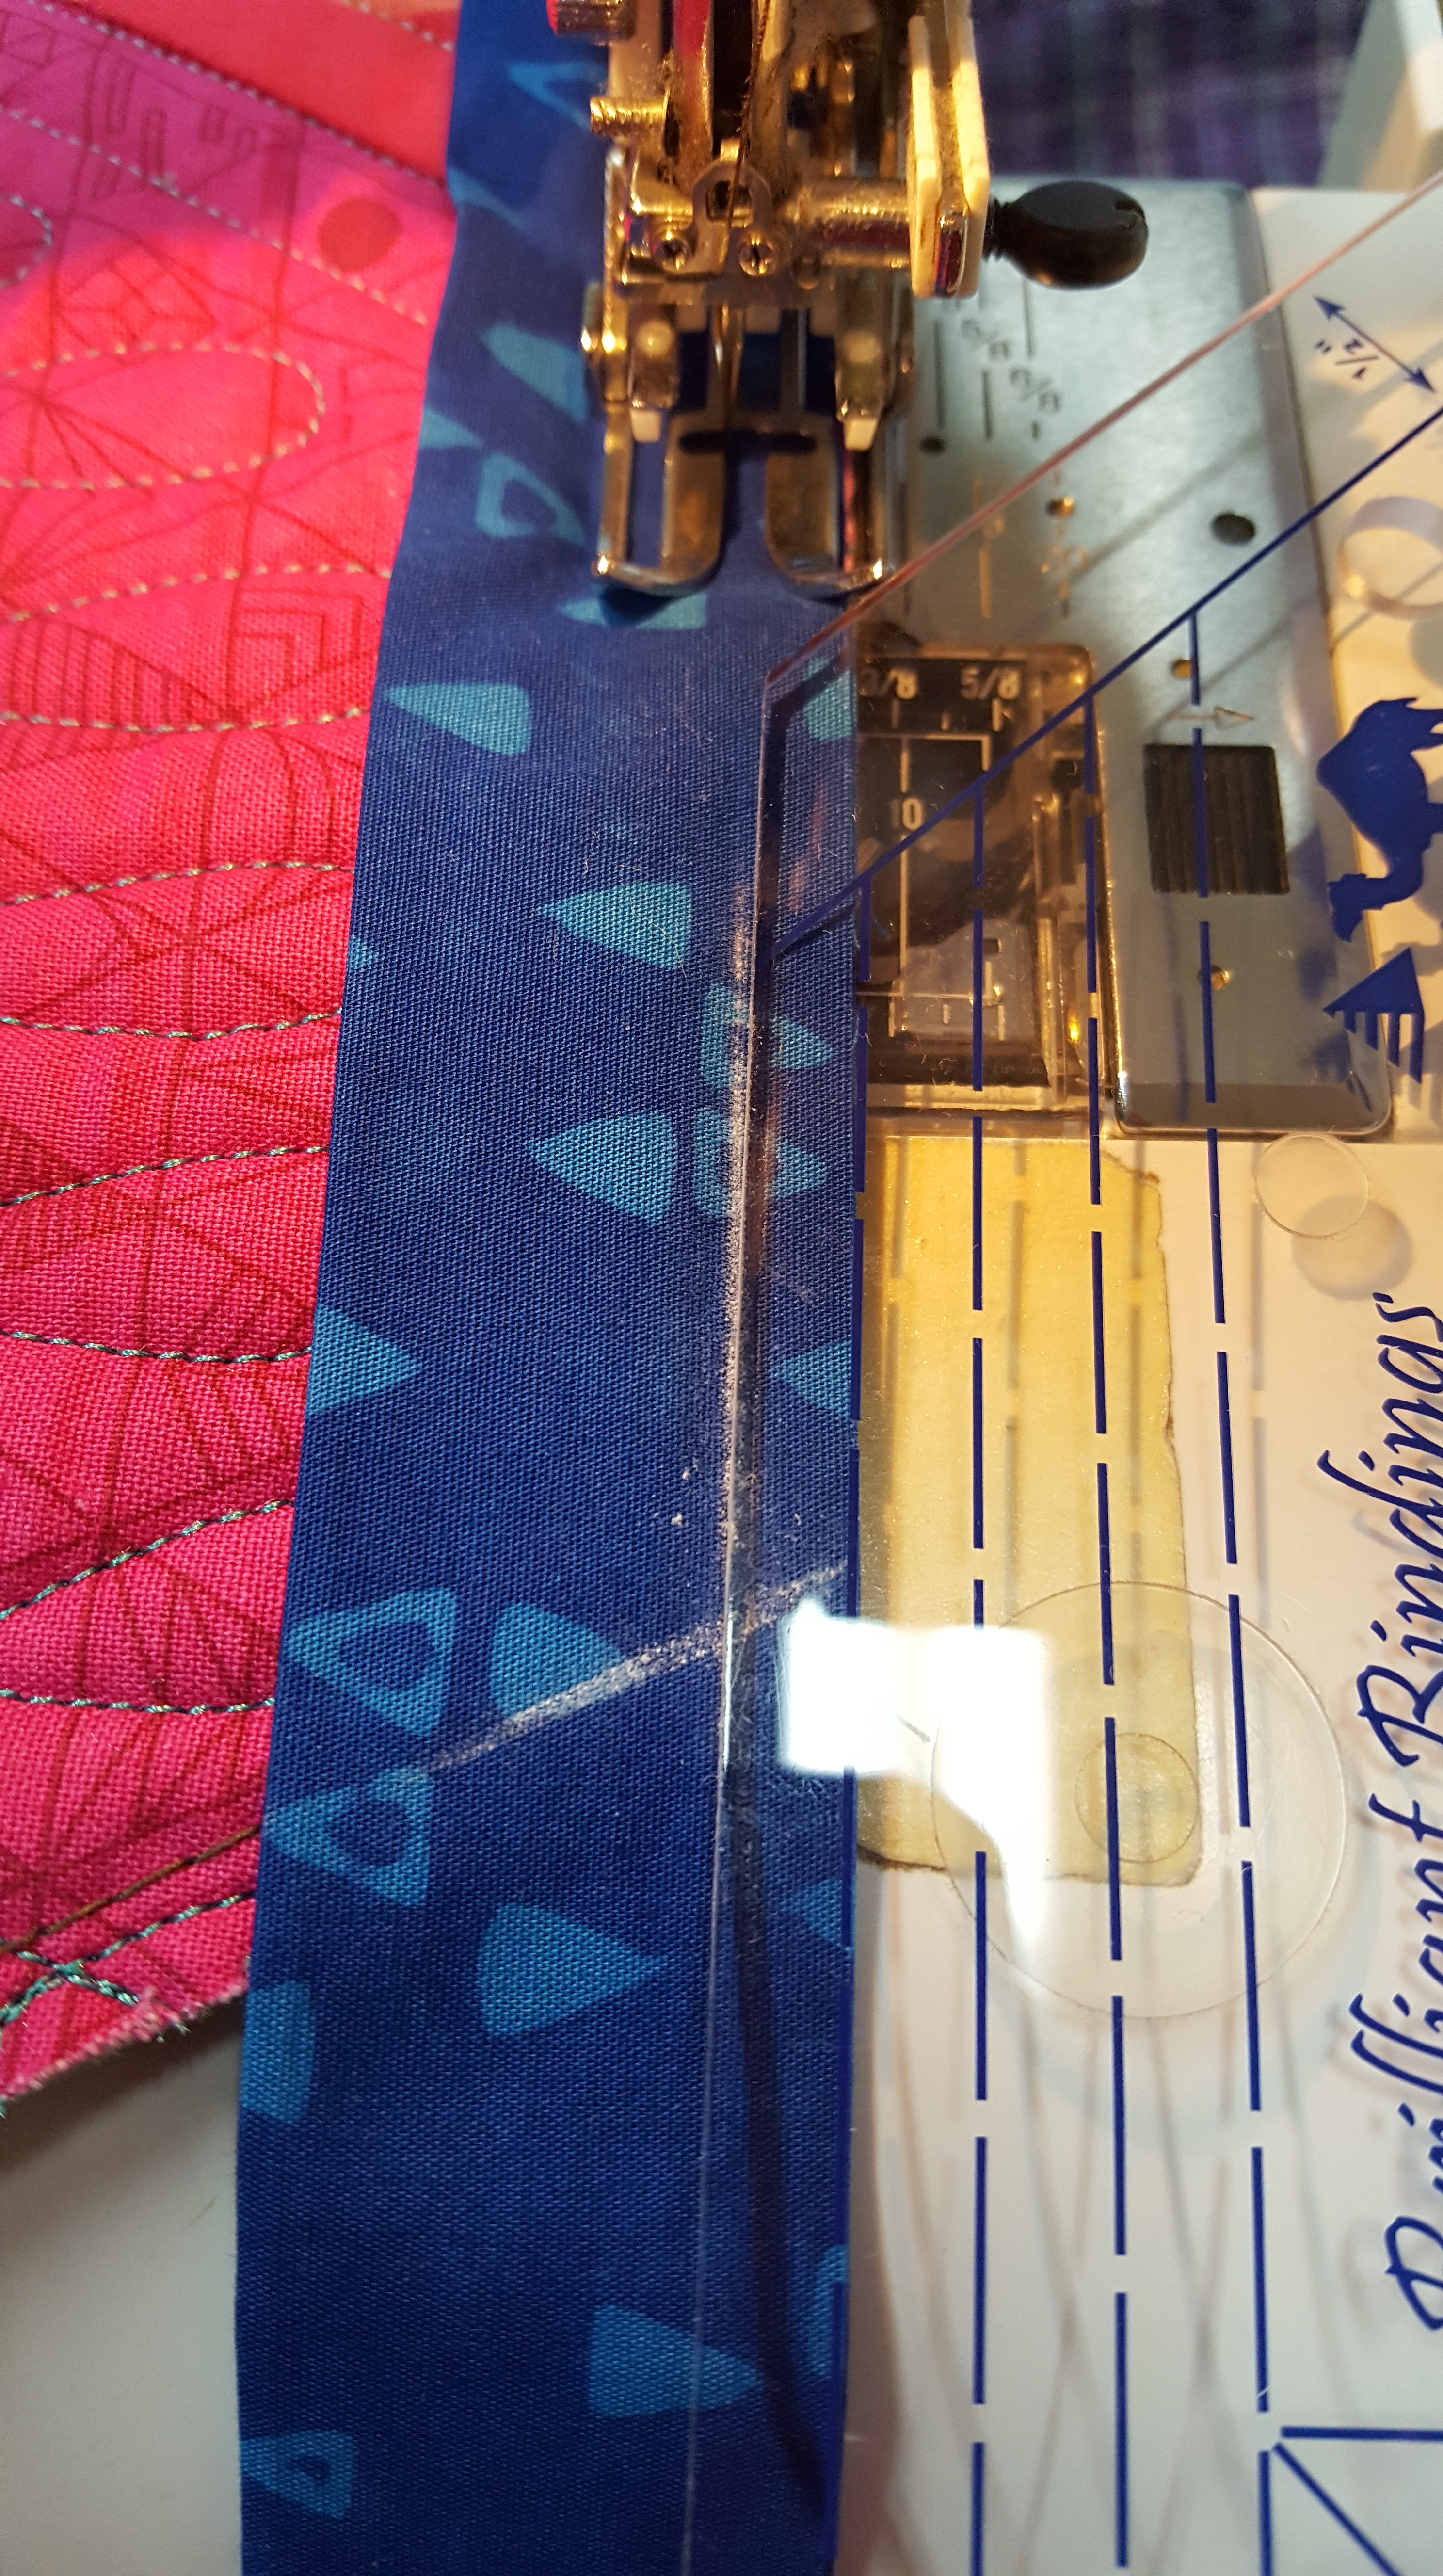
Mark “chunky” 1/4″ seam

Mark “chunky” 1/4″ seam
Marked corner stopping point
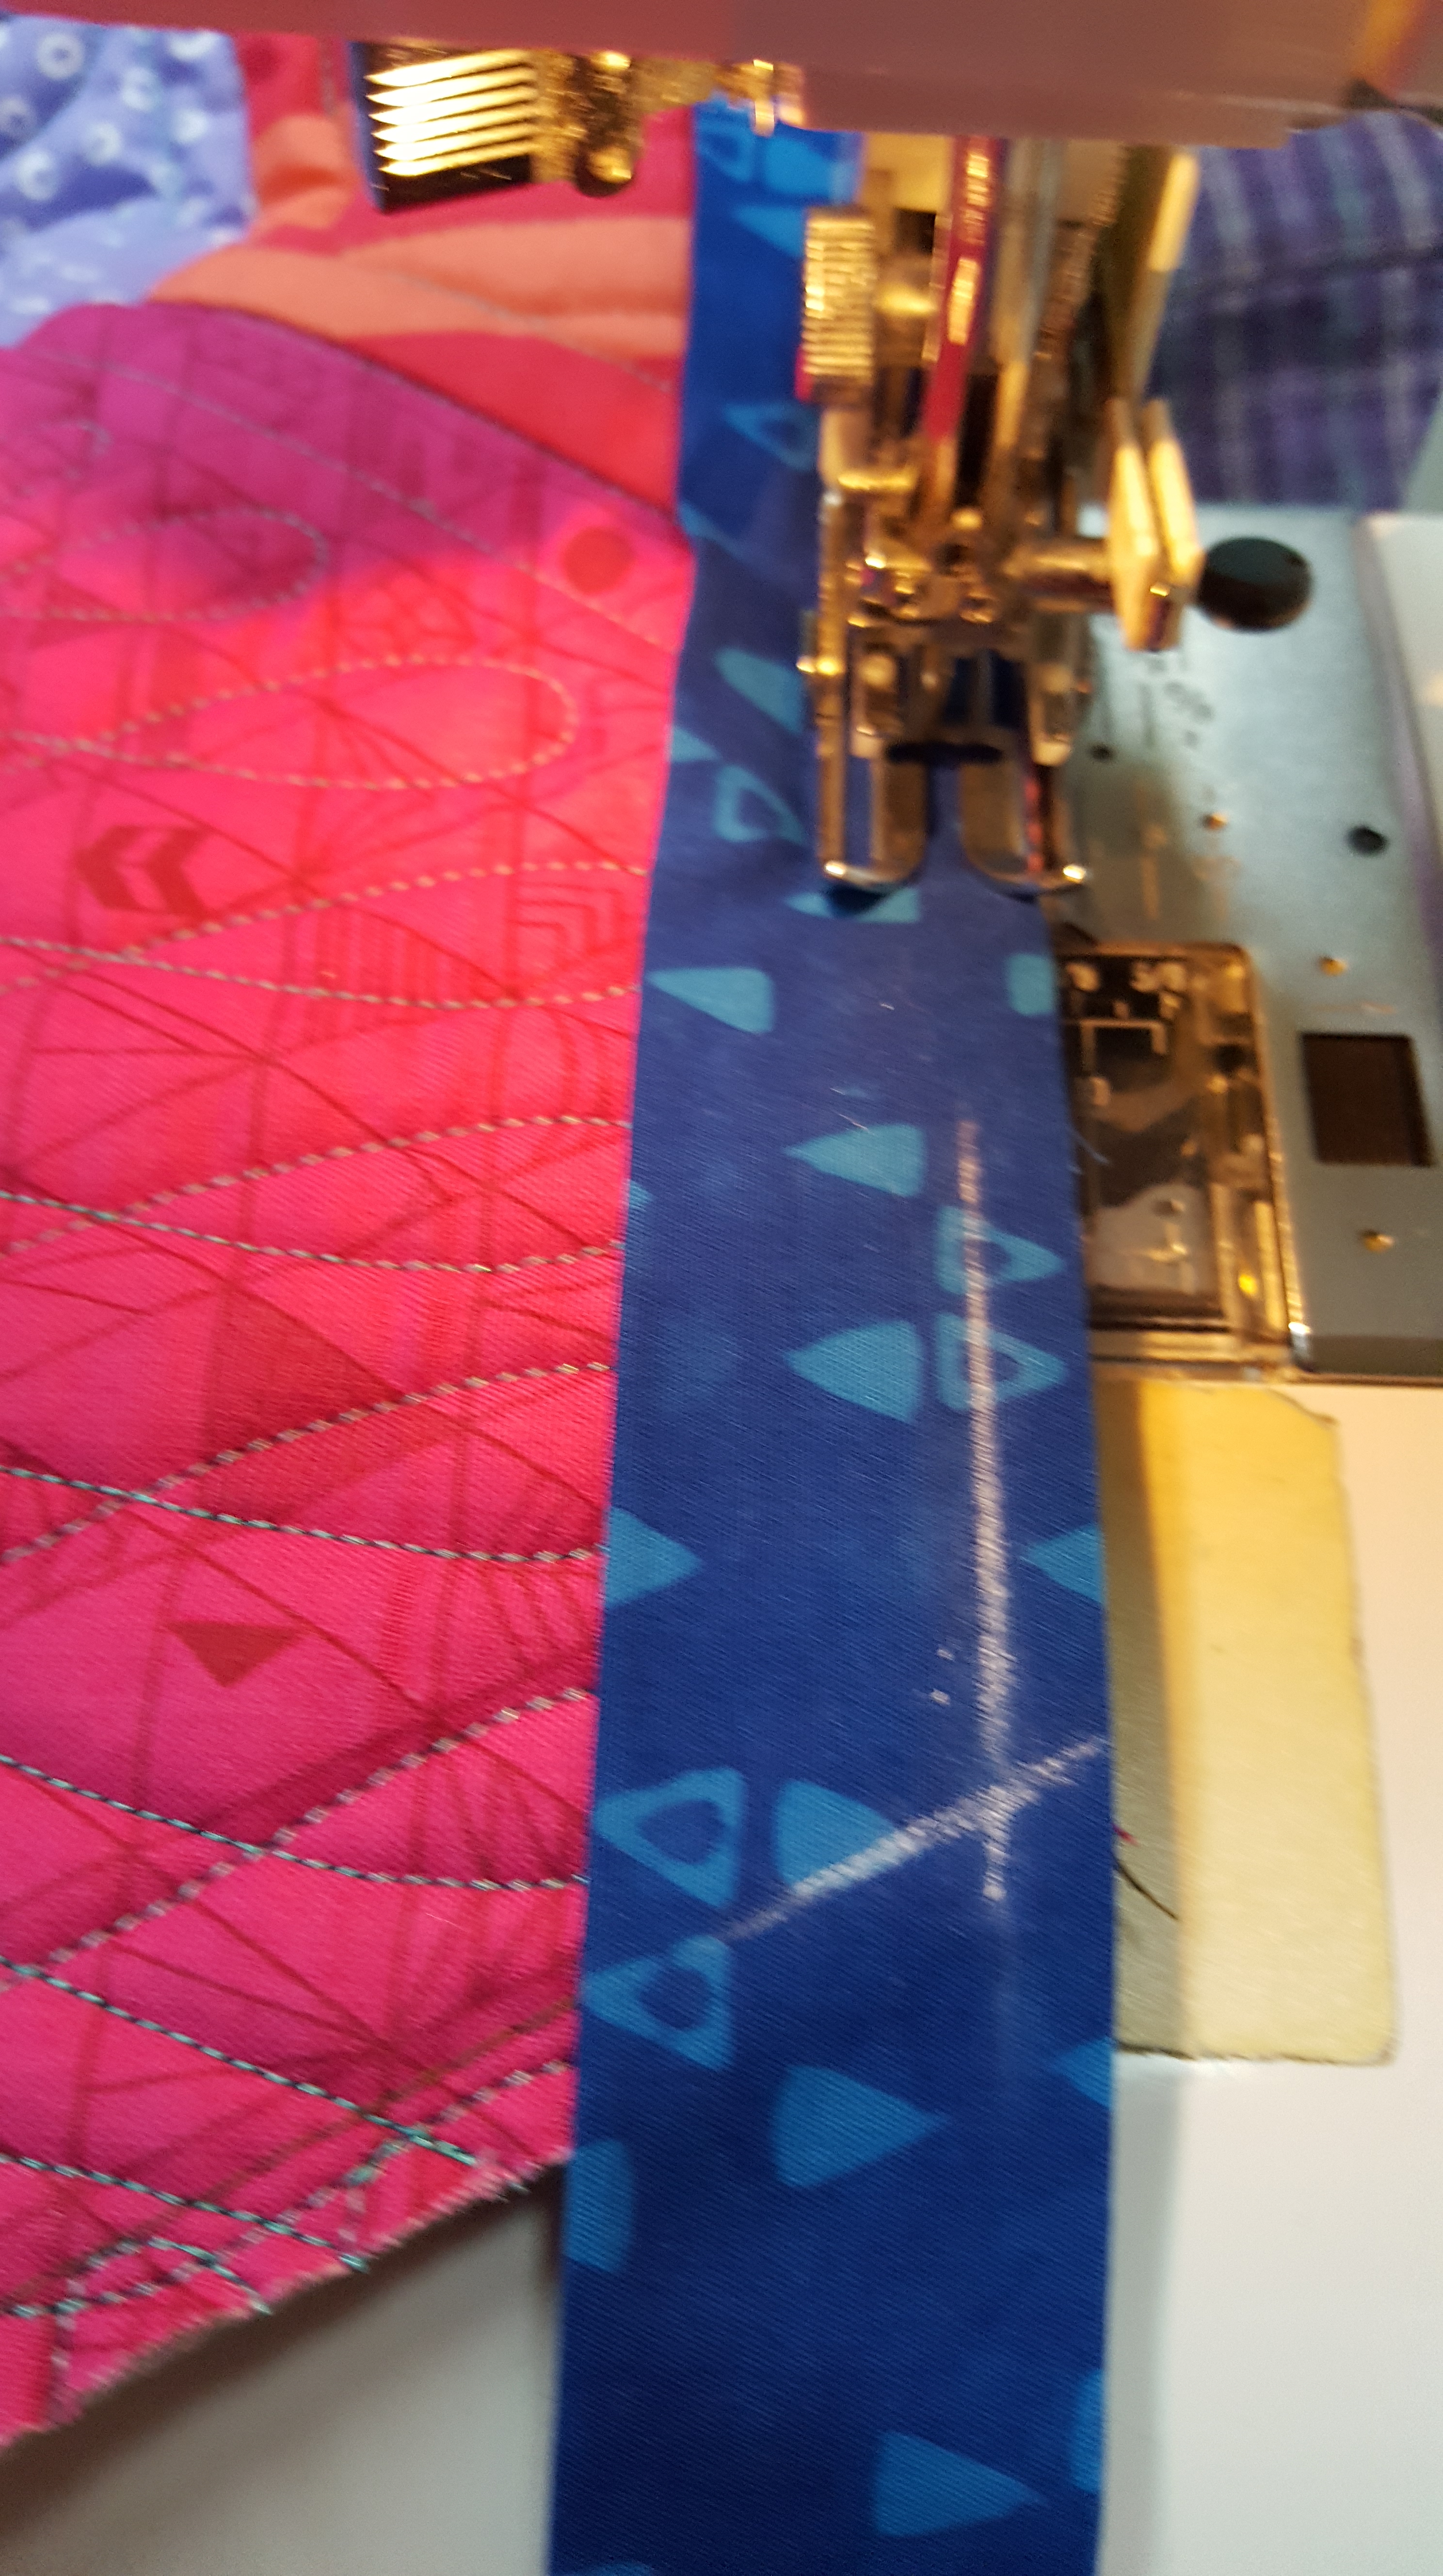
Leaving the needle down at the marked corner point, raise the presser foot, turn and sew off the corner. I love this tip of sewing off exactly to the corner. It helps create the perfect miter. The binding is flipped back, keeping the raw edges straight in line with the upcoming edge. Then flopped in the new direction creating a 90 degree fold from the corner point. I call this the “miter flip-flop”!! Each step is shown in photos below.

Needle down at corner point

Turn and sew to corner
(look closely, corner is peeking
between walking foot toes)

Miter flip
(keeping straight in line
with new edge)
Miter flop
(fold at 90 degrees to new edge)
Checking 90 degree of
“miter flip-flop”
Continue sewing in the new direction on to the next corner or in this quilt’s case inside corner point. Join me again next week for a detailed look at sewing the binding on an inside corner.
Take away tips…
in quilting,
Debbie
Hello my quilty friends! I had a birthday since last week. I’m still a bit of a goof and my friends help me add to my “goof-dom”. Me on my birthday! I’m a huge minion fan, oh and I like glow in the dark things! TeeHee! So you get to see me having birthday fun.
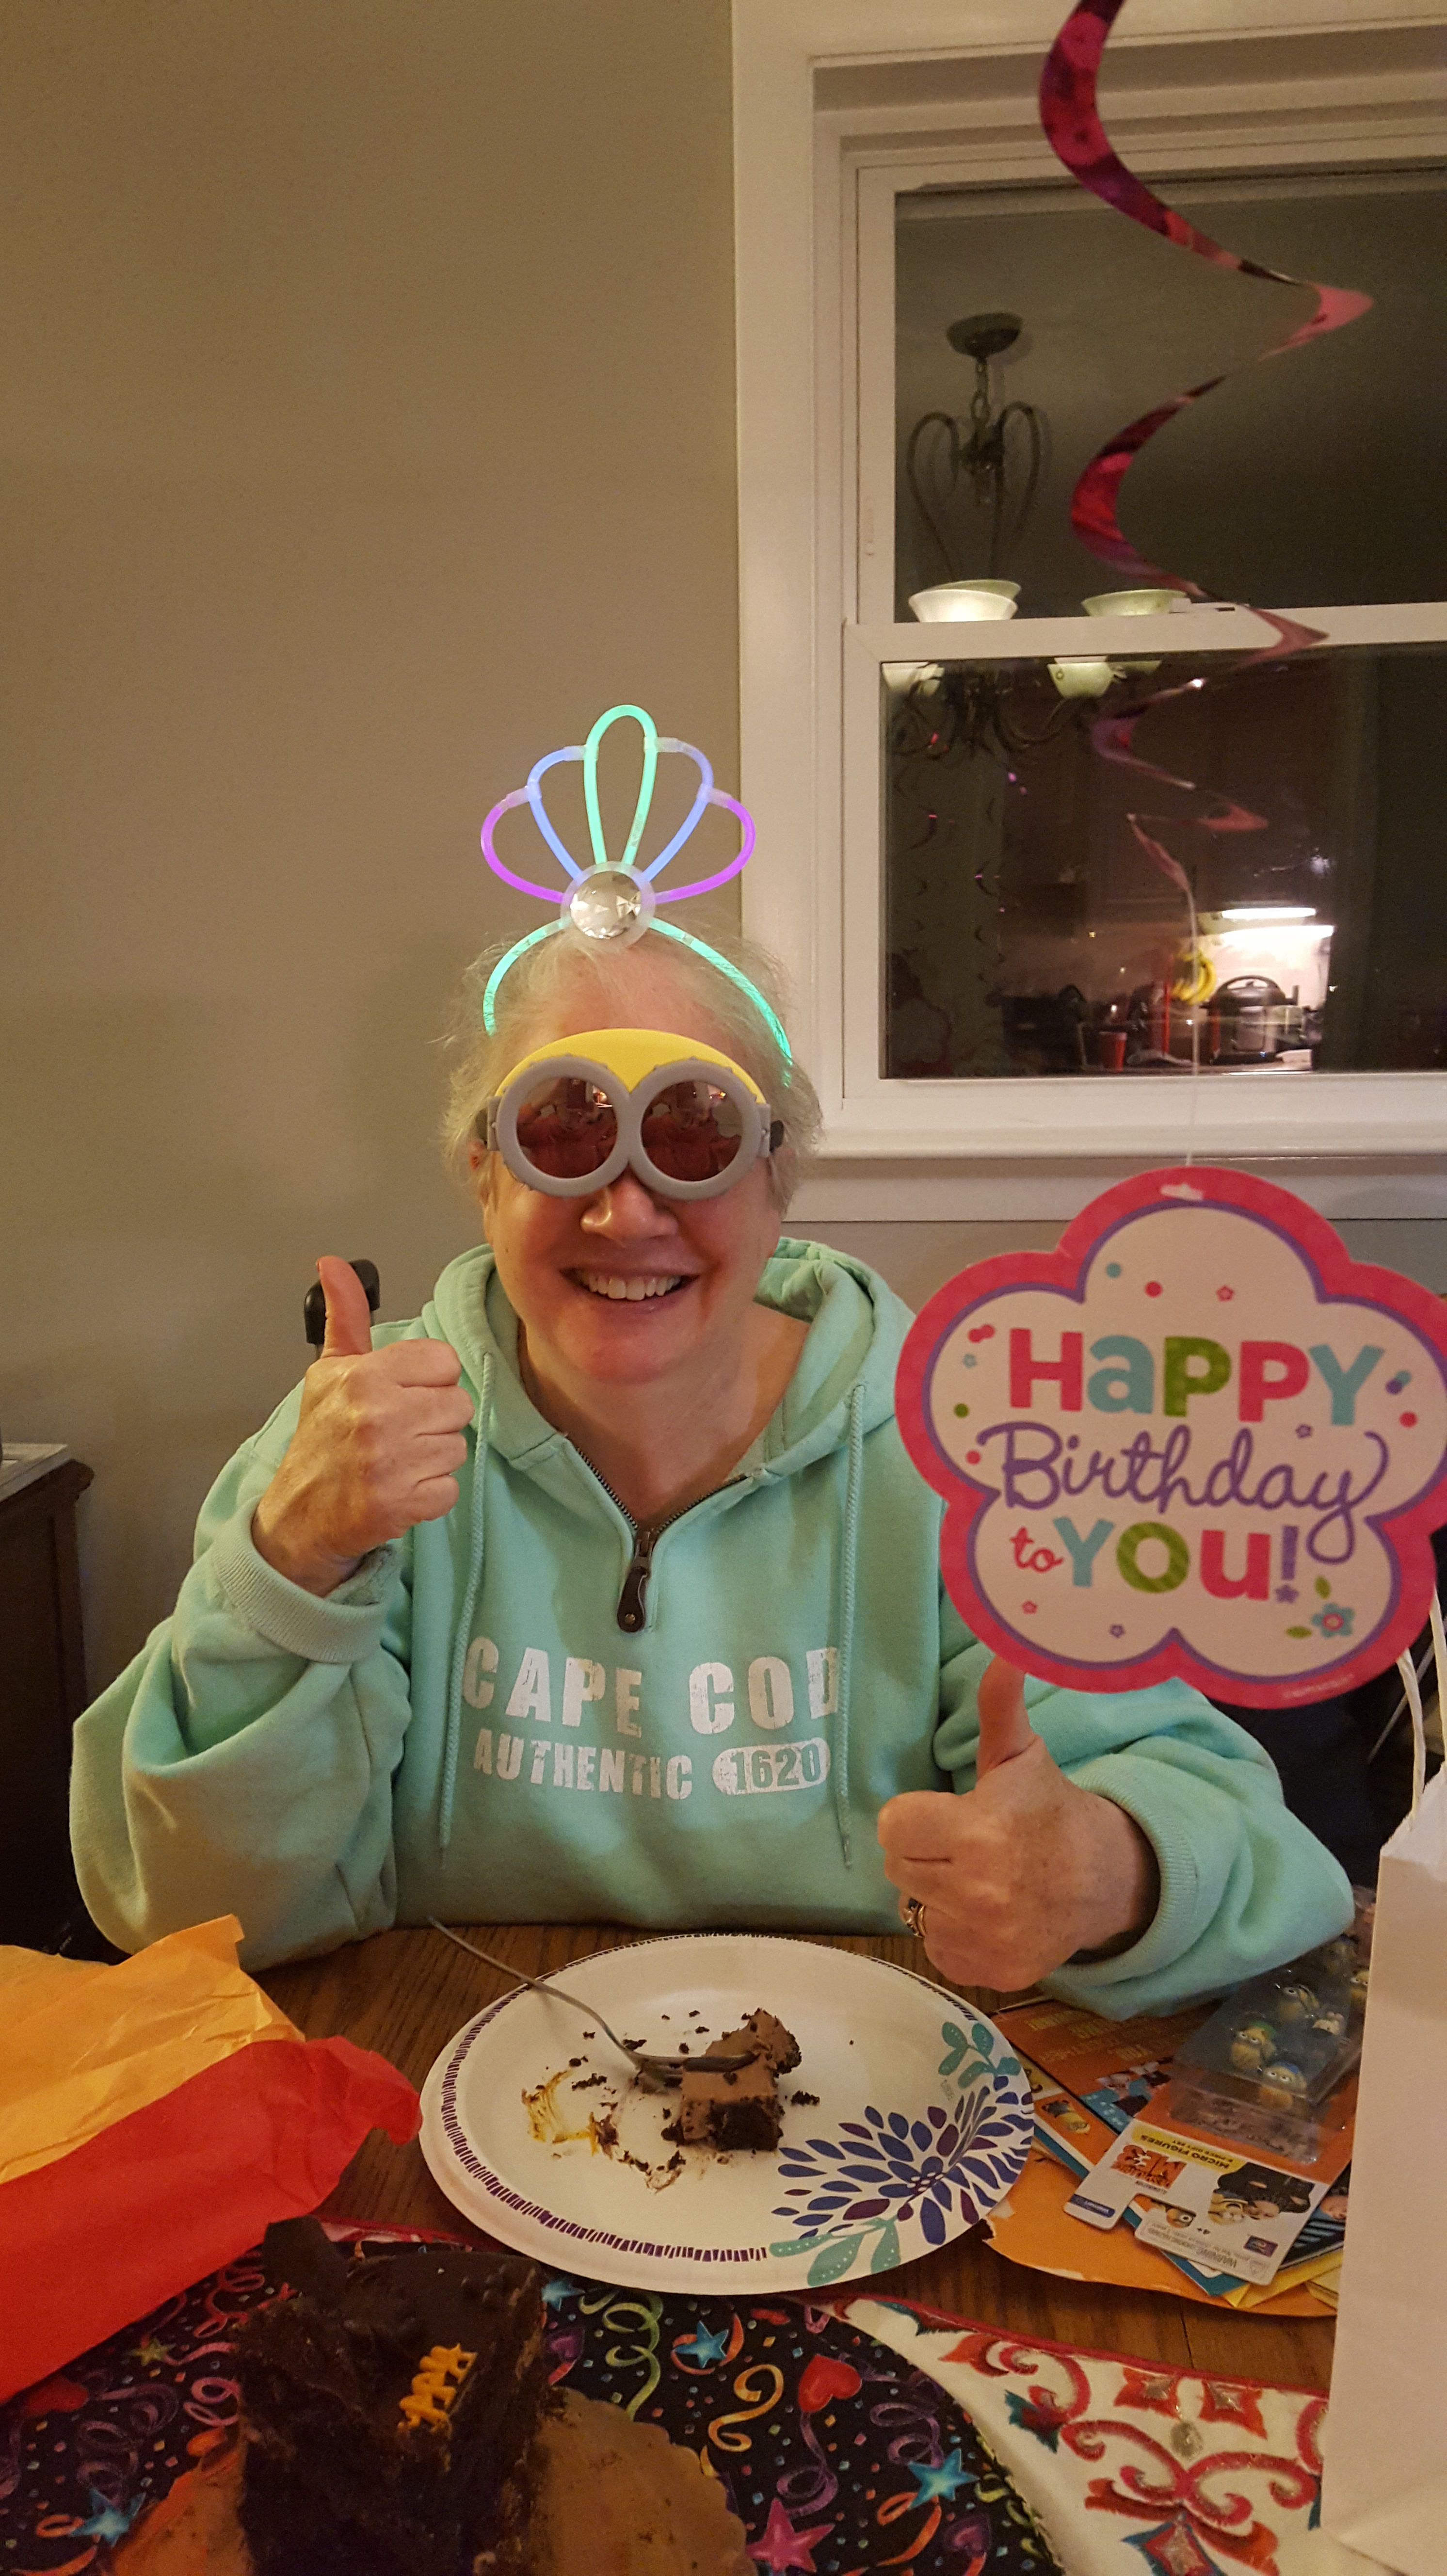
Happy Birthday to me.
Now to quilting, at Lancaster I had a longarm quilter ask about my quilts. She ask who quilted my quilts. I do my own. BUT I have several new quilts that are waiting to be quilted. So I sent one home with her. Have any of you used a longarm quilter? That is how I started my quilting business journey. I have since stopped quilting for customers. So, do you have quilts waiting to be quilted? How about hiring a longarm quilter? I’ll give some of my tips below.
I was excited to see how she quilted my Modern Hex-a-ma-jig quilt. This was made completely with my new Hex-a-ma-jig template. I love how Kim Werth of Rochester, NY quilted my quilt.

Hex-a-ma-jig D.W.
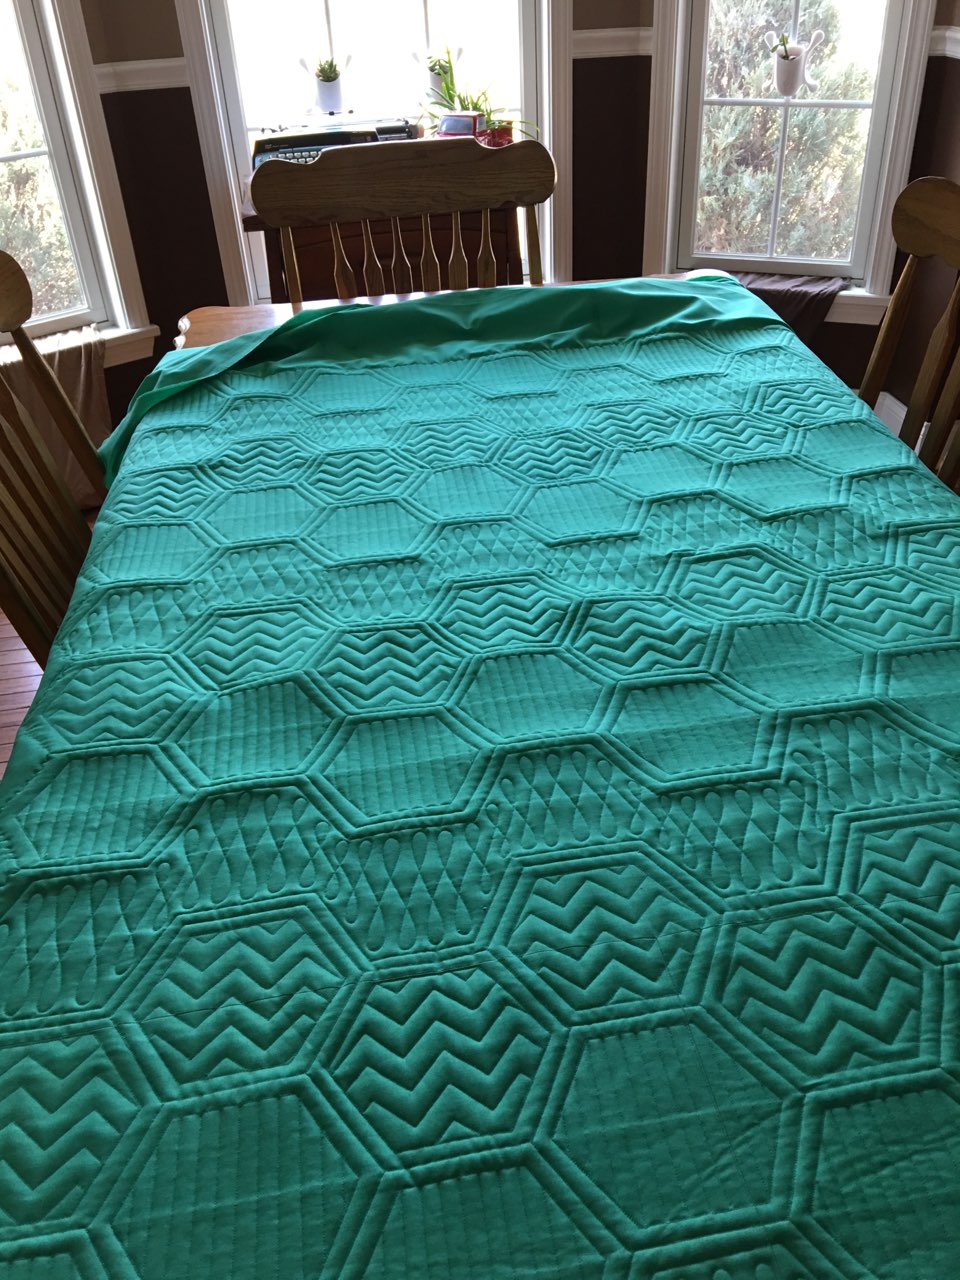
Back of Hex-a-ma-jig D.W.
A few of tips to think about when hiring a longarmer.
Those are a few things I recommend and the tips to hire someone that will do a good job for you.
in quilting,
Debbie
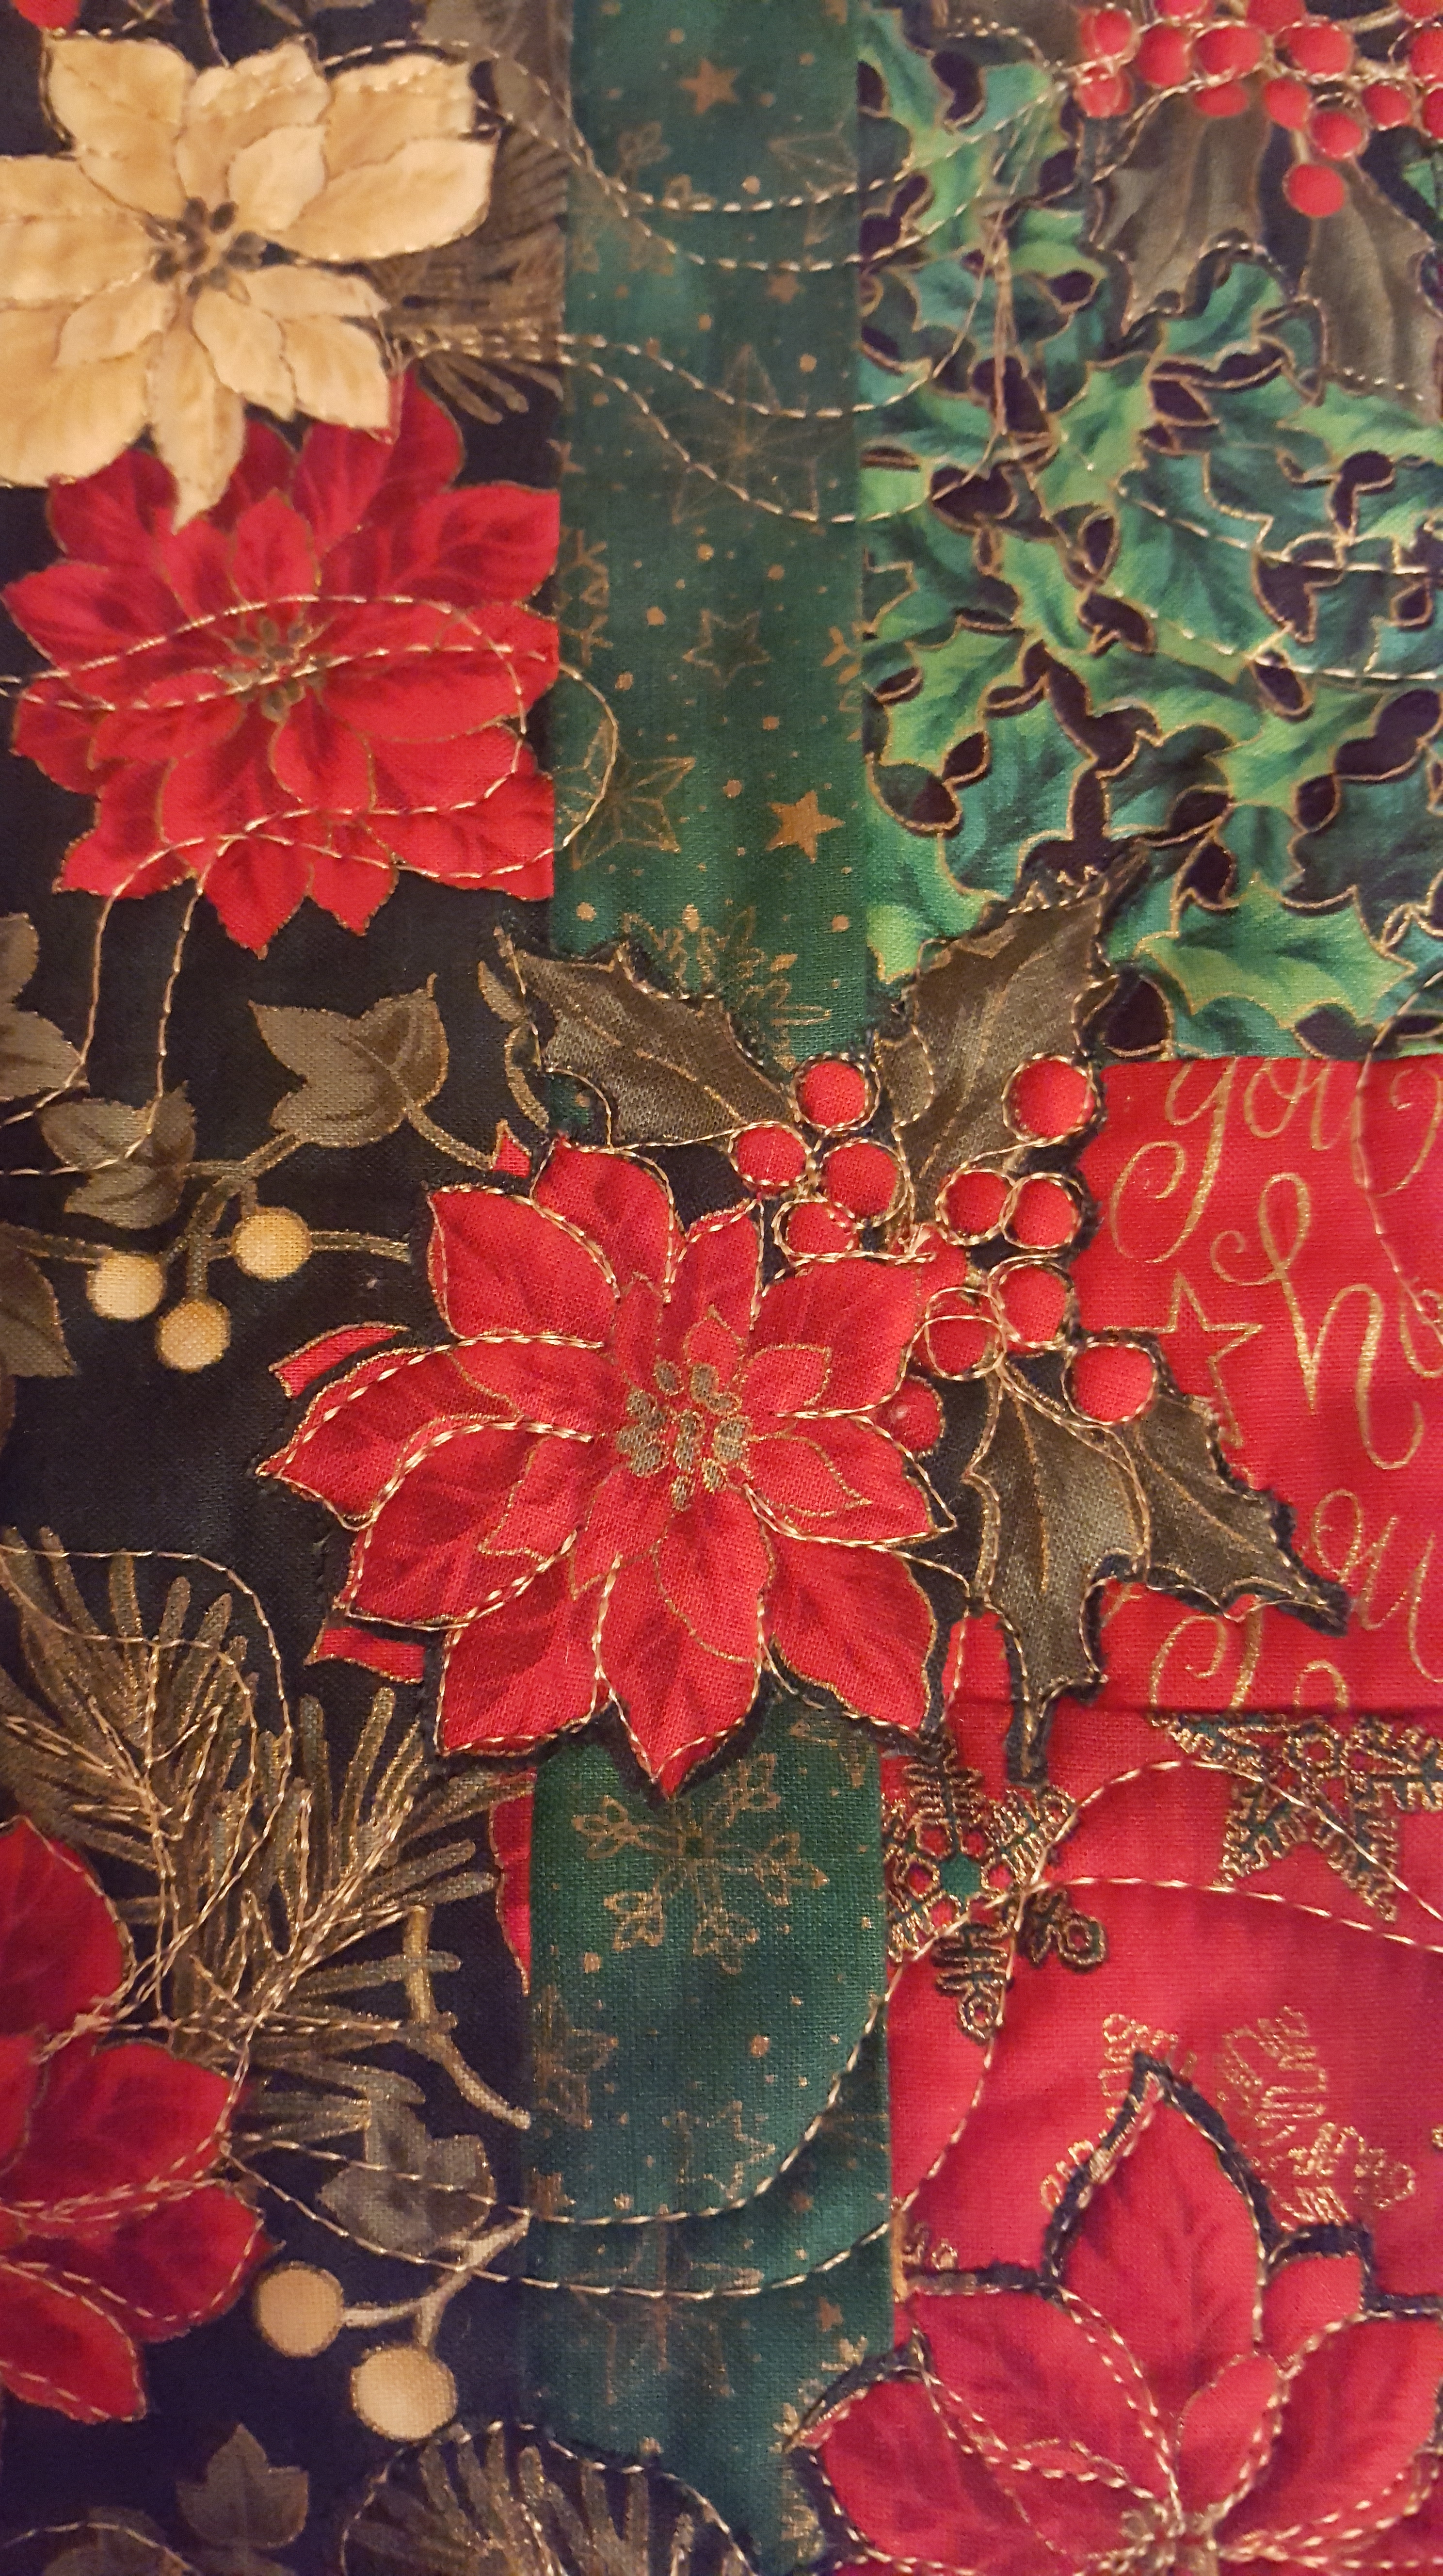
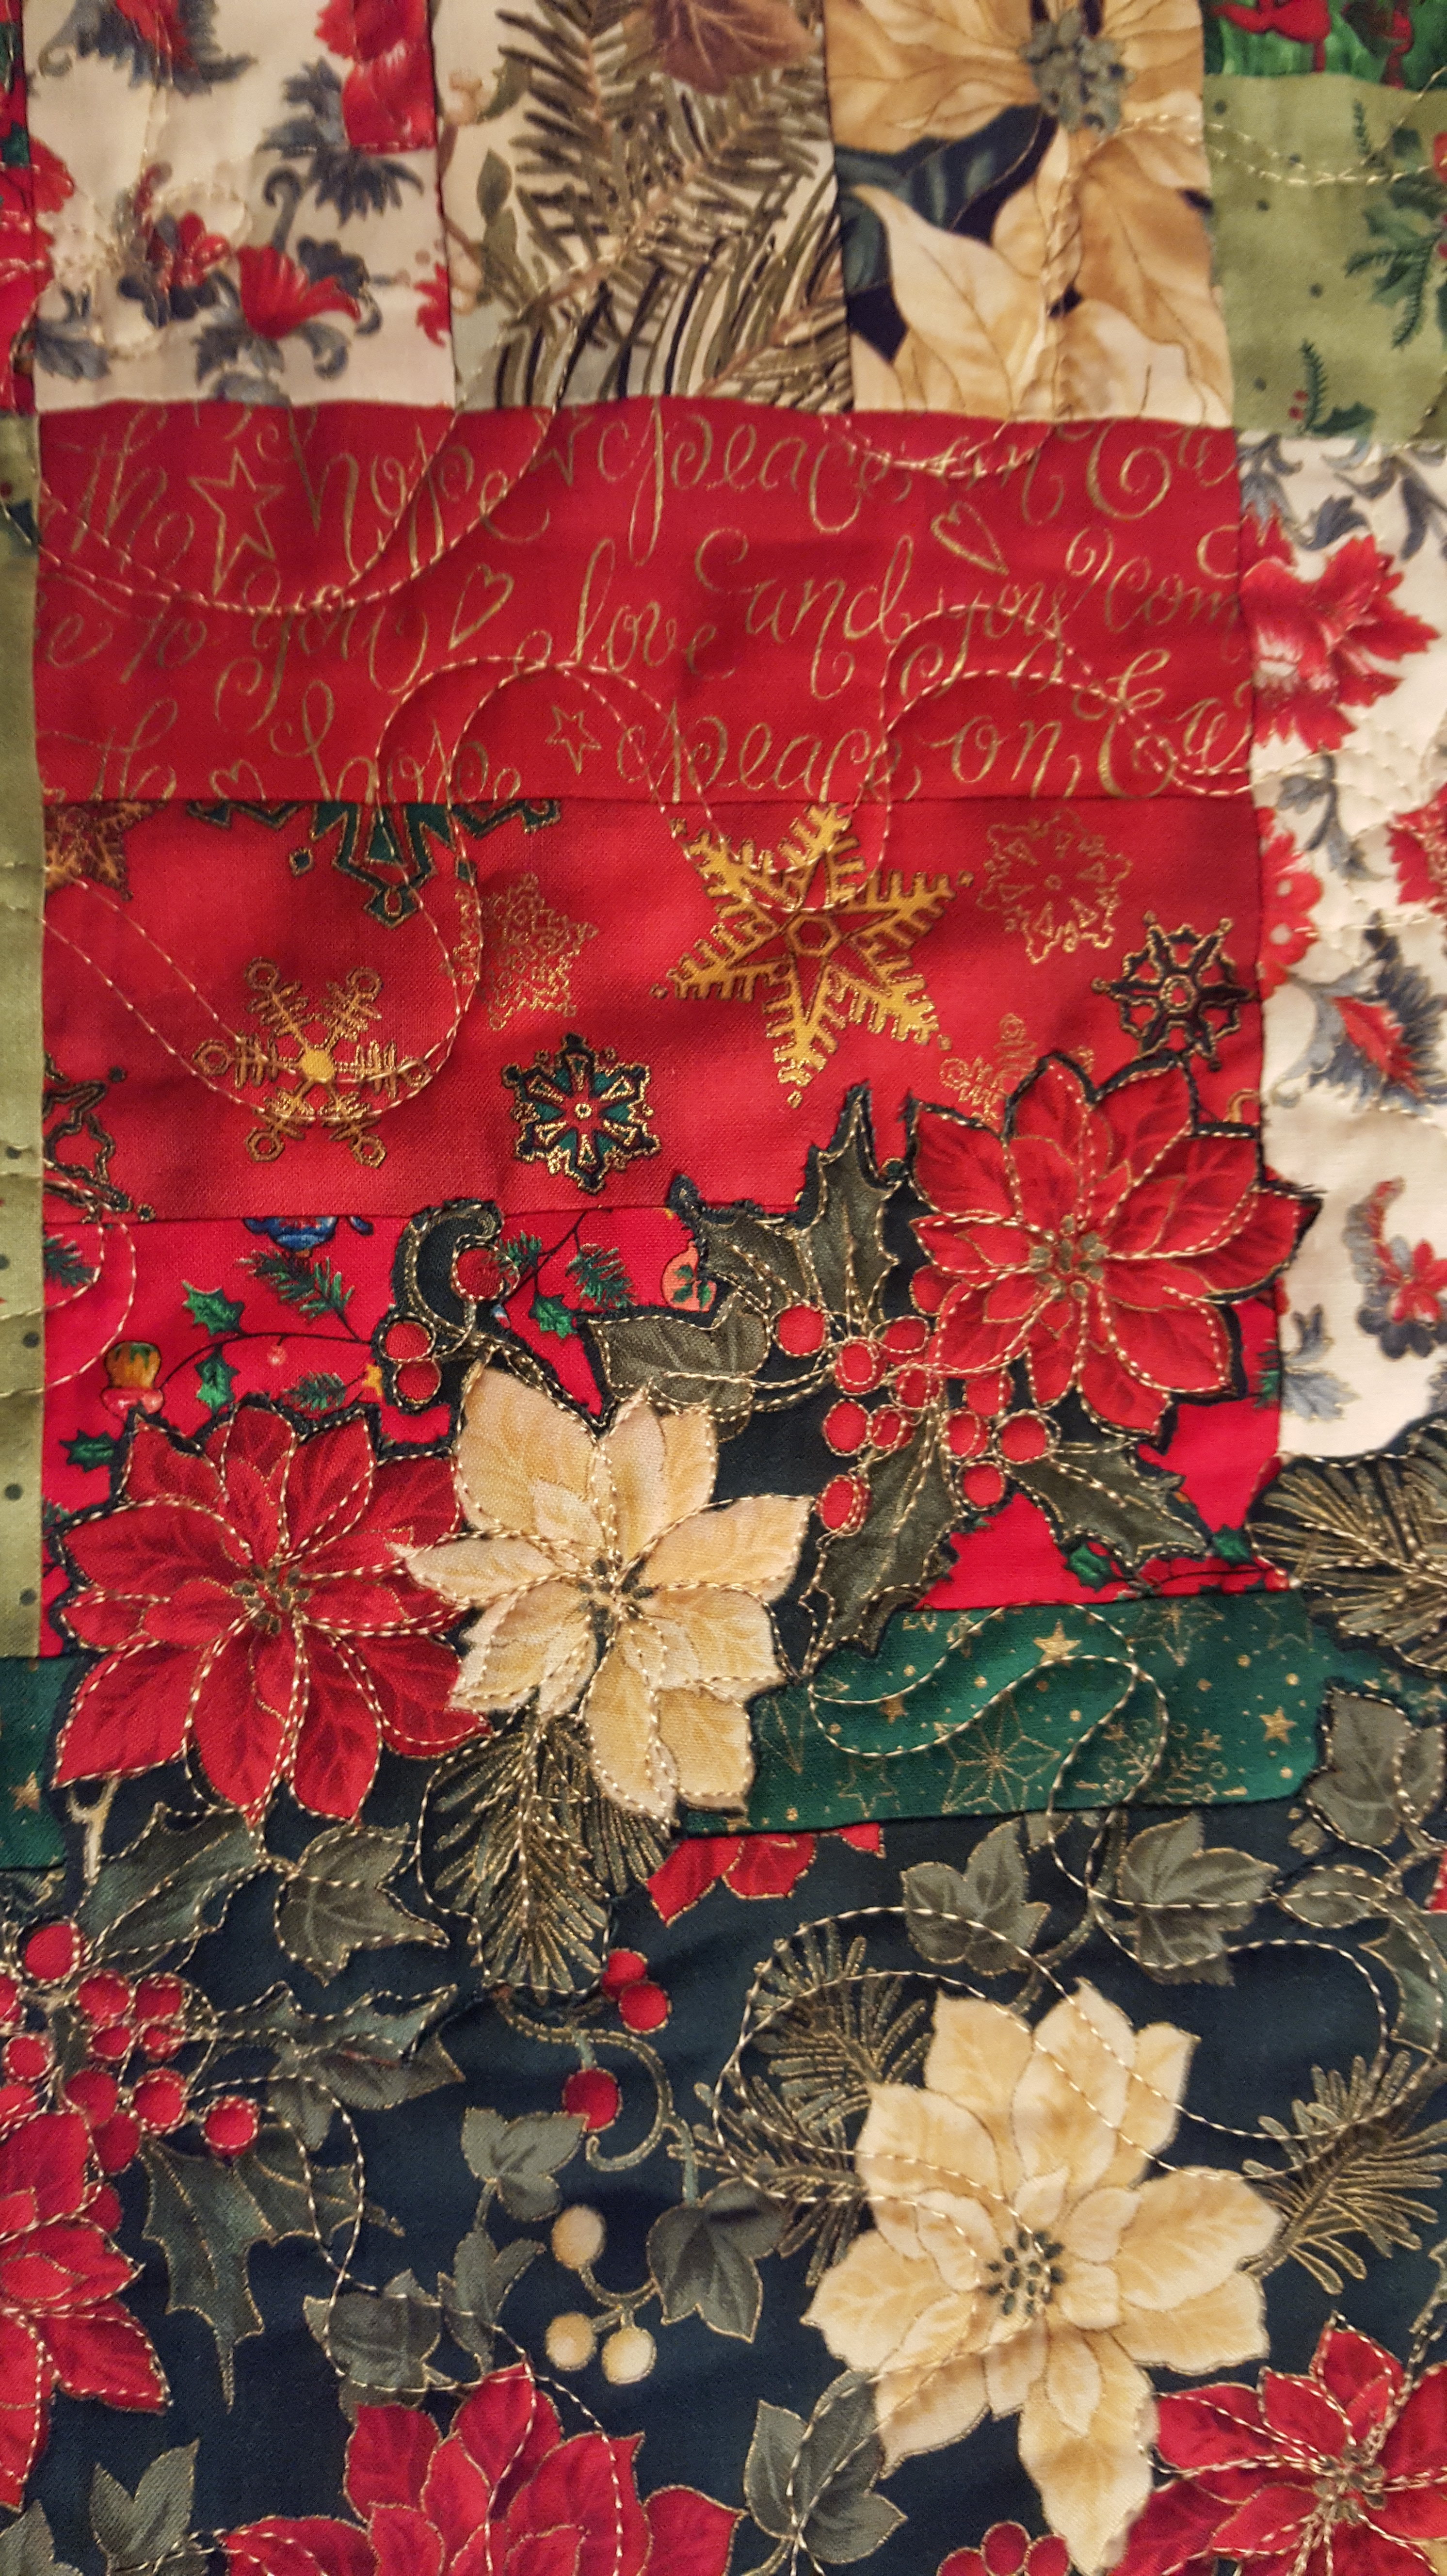
I was all set to post yesterday and realized I didn’t have any new photos for you. So, I spent today quilting! Now I have photos!! One of my guilds had their challenges due tonight. the challenge was beyond borders. The idea was to focus on the border and bring it into the quilt. I had an “old” rail fence quilt from a number of years ago sitting and patiently waiting to be finished. Soooo, I fused some extra border fabric and began adding it to flow into the center of the quilt. (see fussy cutting a few months ago) I love how it turned out. And it worked for the challenge and another UFO is complete!!
I didn’t think about taking a before photo, but below is the finished quilt. I will probably use it as a table topper for Christmas.
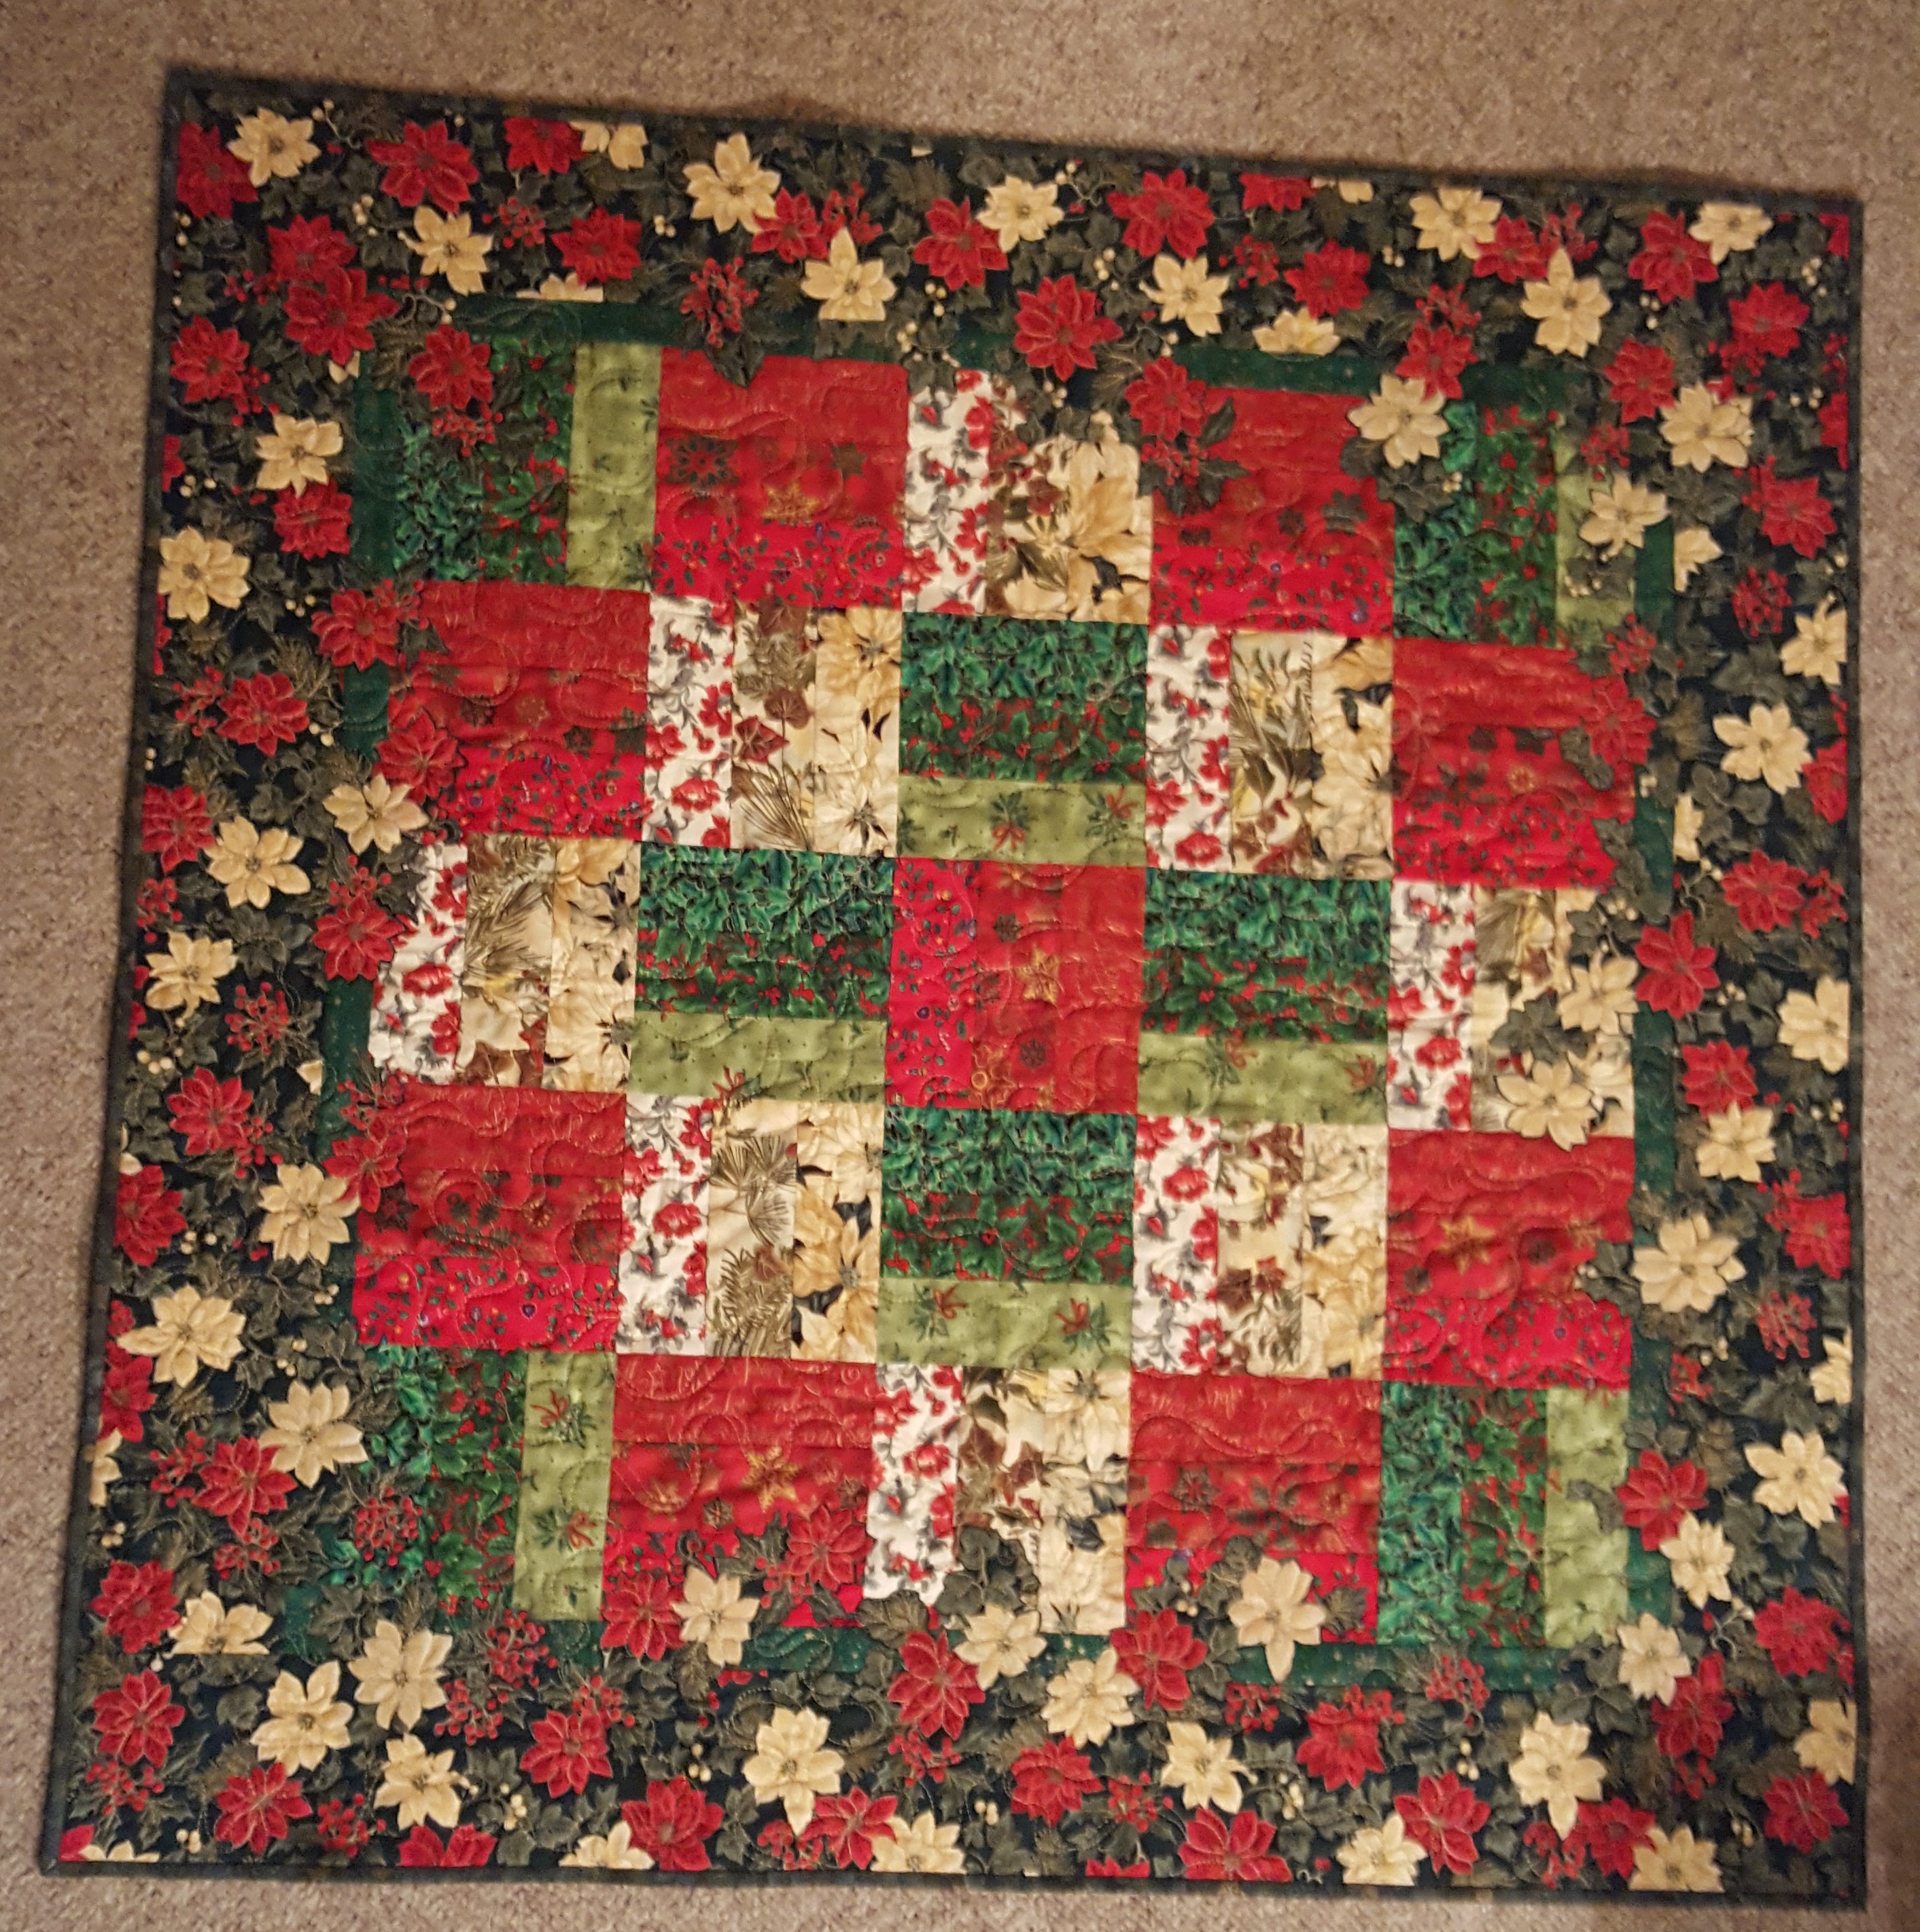
Rail Fence (D.W.)
Beyond Borders Challenge
I quilted the raw edges of the ironed on bits. This saved me from stitching around the applique and they having to then quilt around it also. I wanted the added bit to get the highlight in the quilting. I found a great gold thread that worked well, a little shine but not metallic. A couple of close ups below.

Rail Fence – borders into quilt center
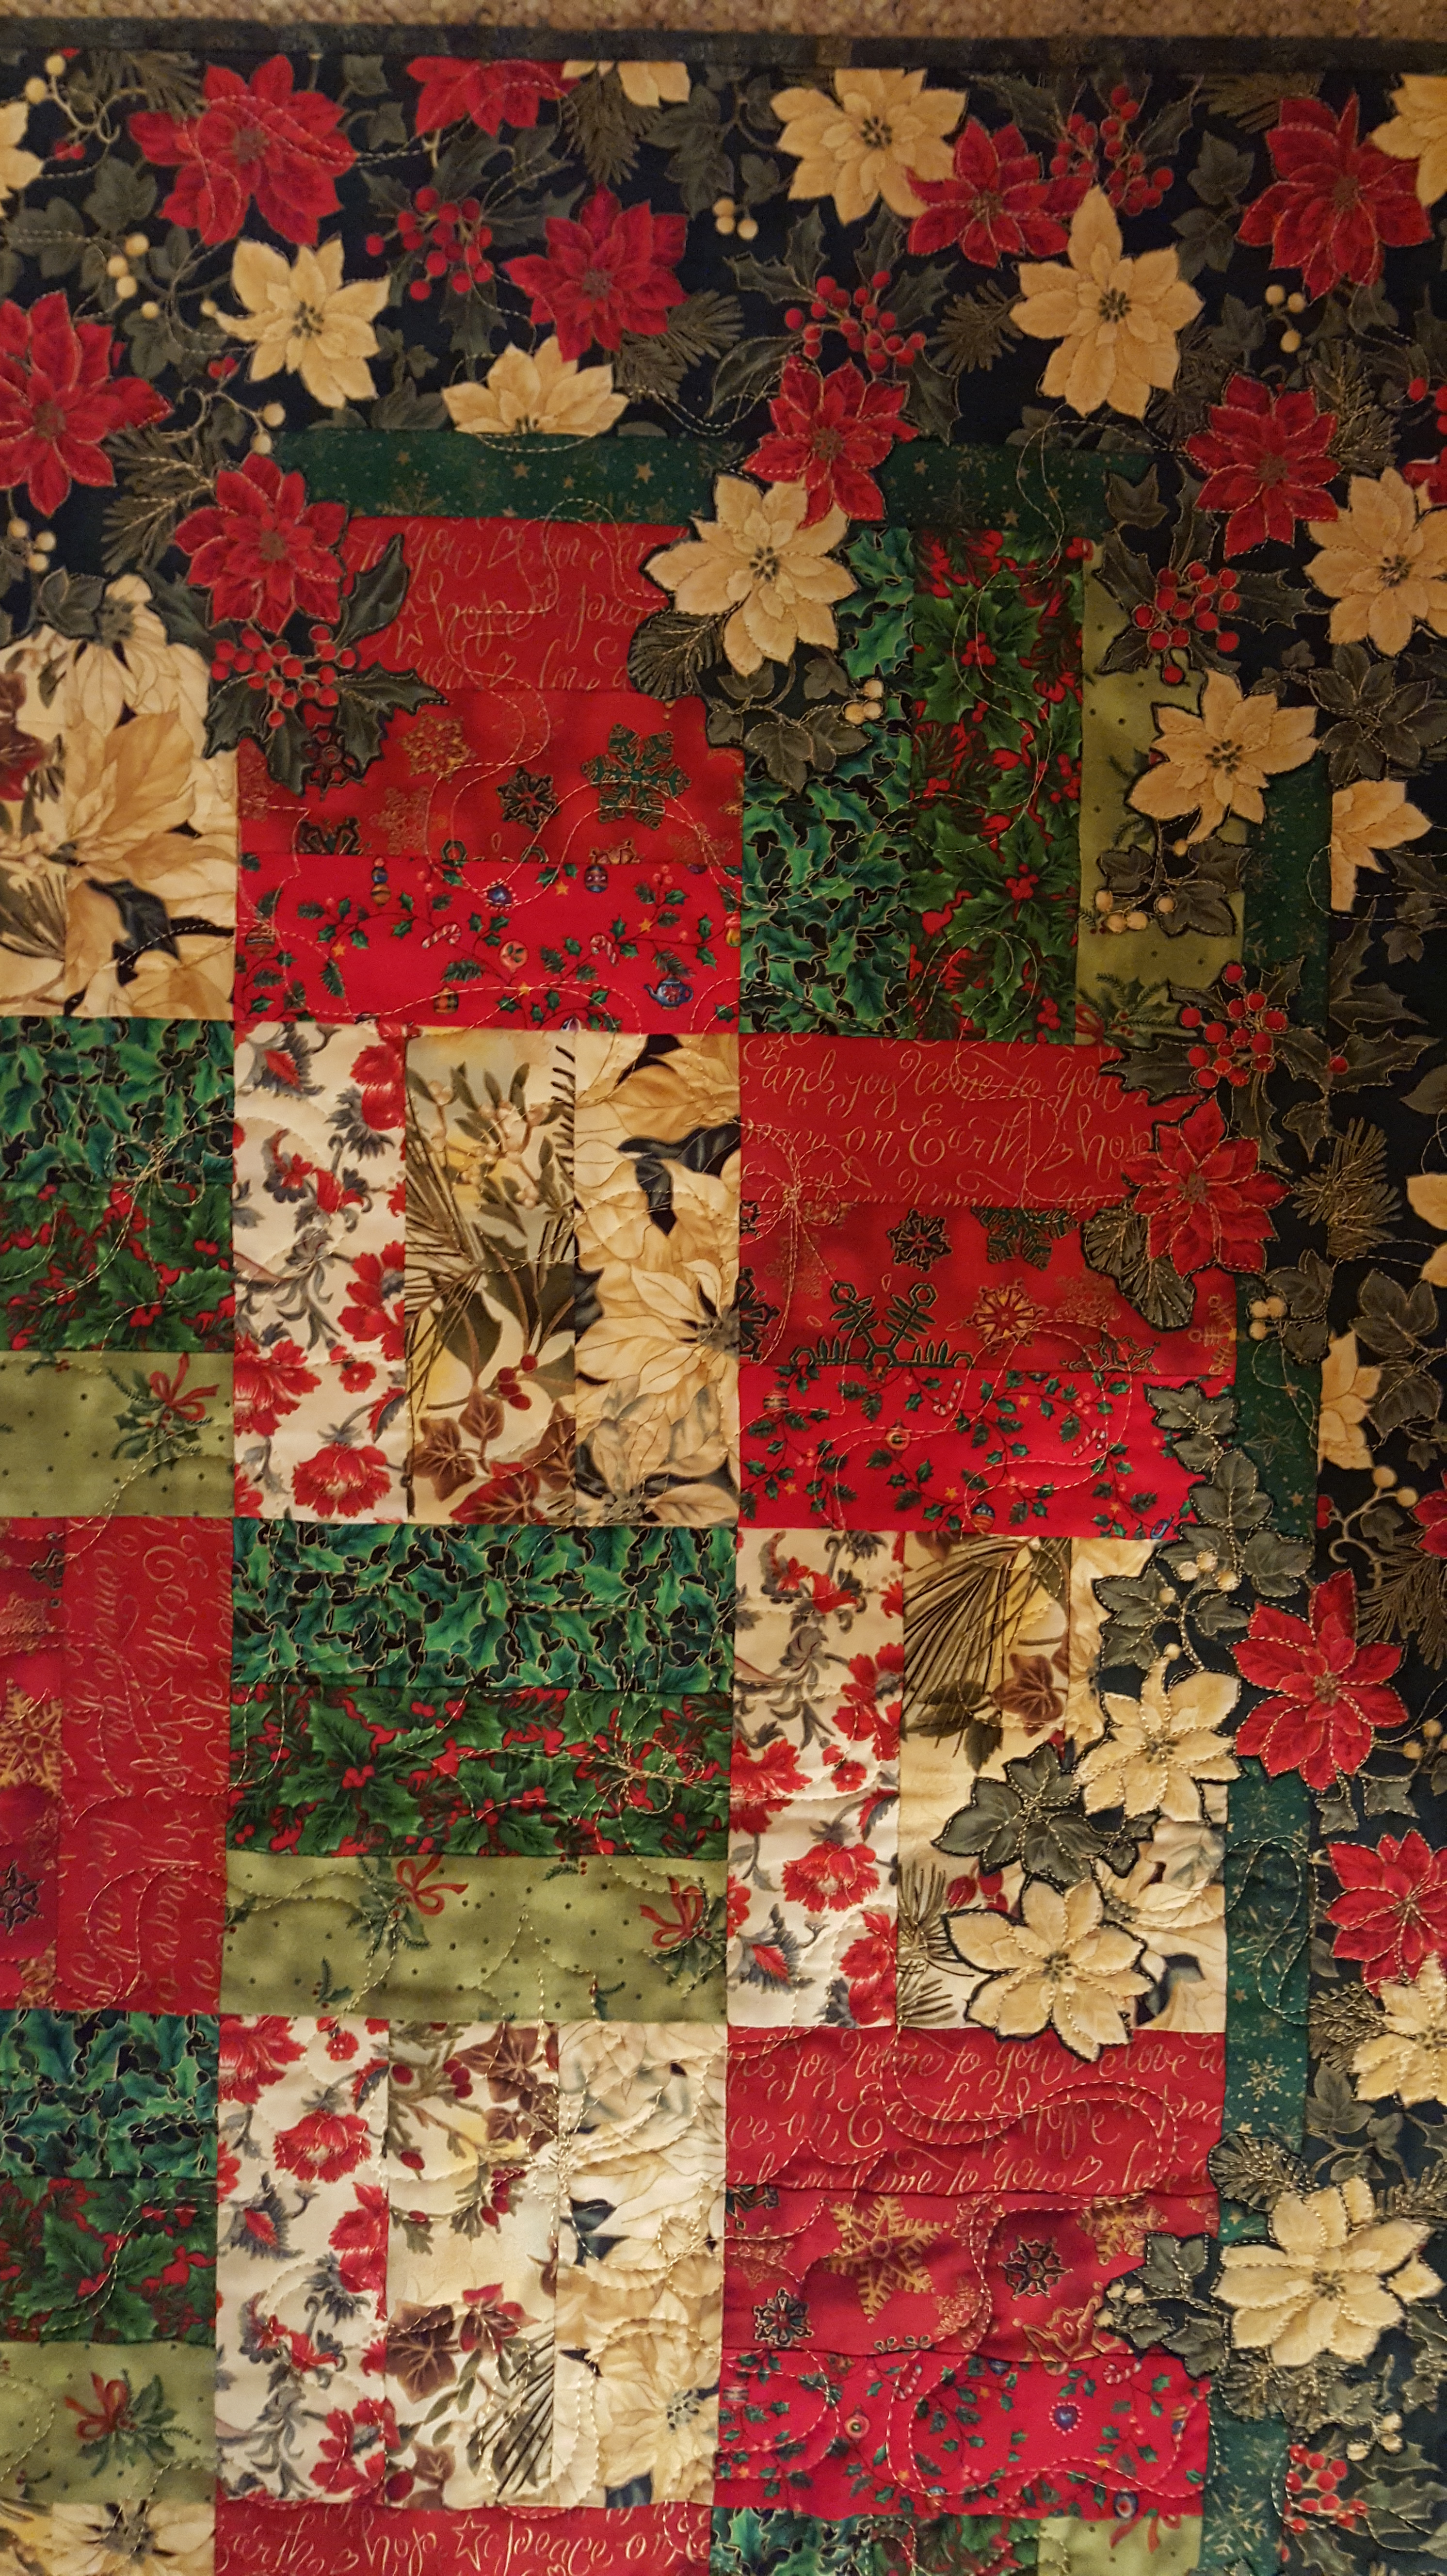
Rail Fence – borders into center
I kept the inside quilting simple, as I wanted all the focus on the border and not much would show with the busy fabrics.
Rail Fence – closeup
Rail Fence – closeup
#1 – Save some time…raw edge applique as you quilt.
#2 – My detailed quilting is in the border. Putting the focus on the poinsettias, not the center rail fence.
in quilting,
Debbie
Hello Lancaster and another show and MORE snow! We are looking at the possibility of 3″+ here in Lancaster. My booth is setup and ready for you. The big question,??? Will quilters venture out? We vendors sure hope so. I saw some amazing booths and quilts. My booth location has changed since last year. You will find me in Booth#1158, to the right as you walk in, instead of left.
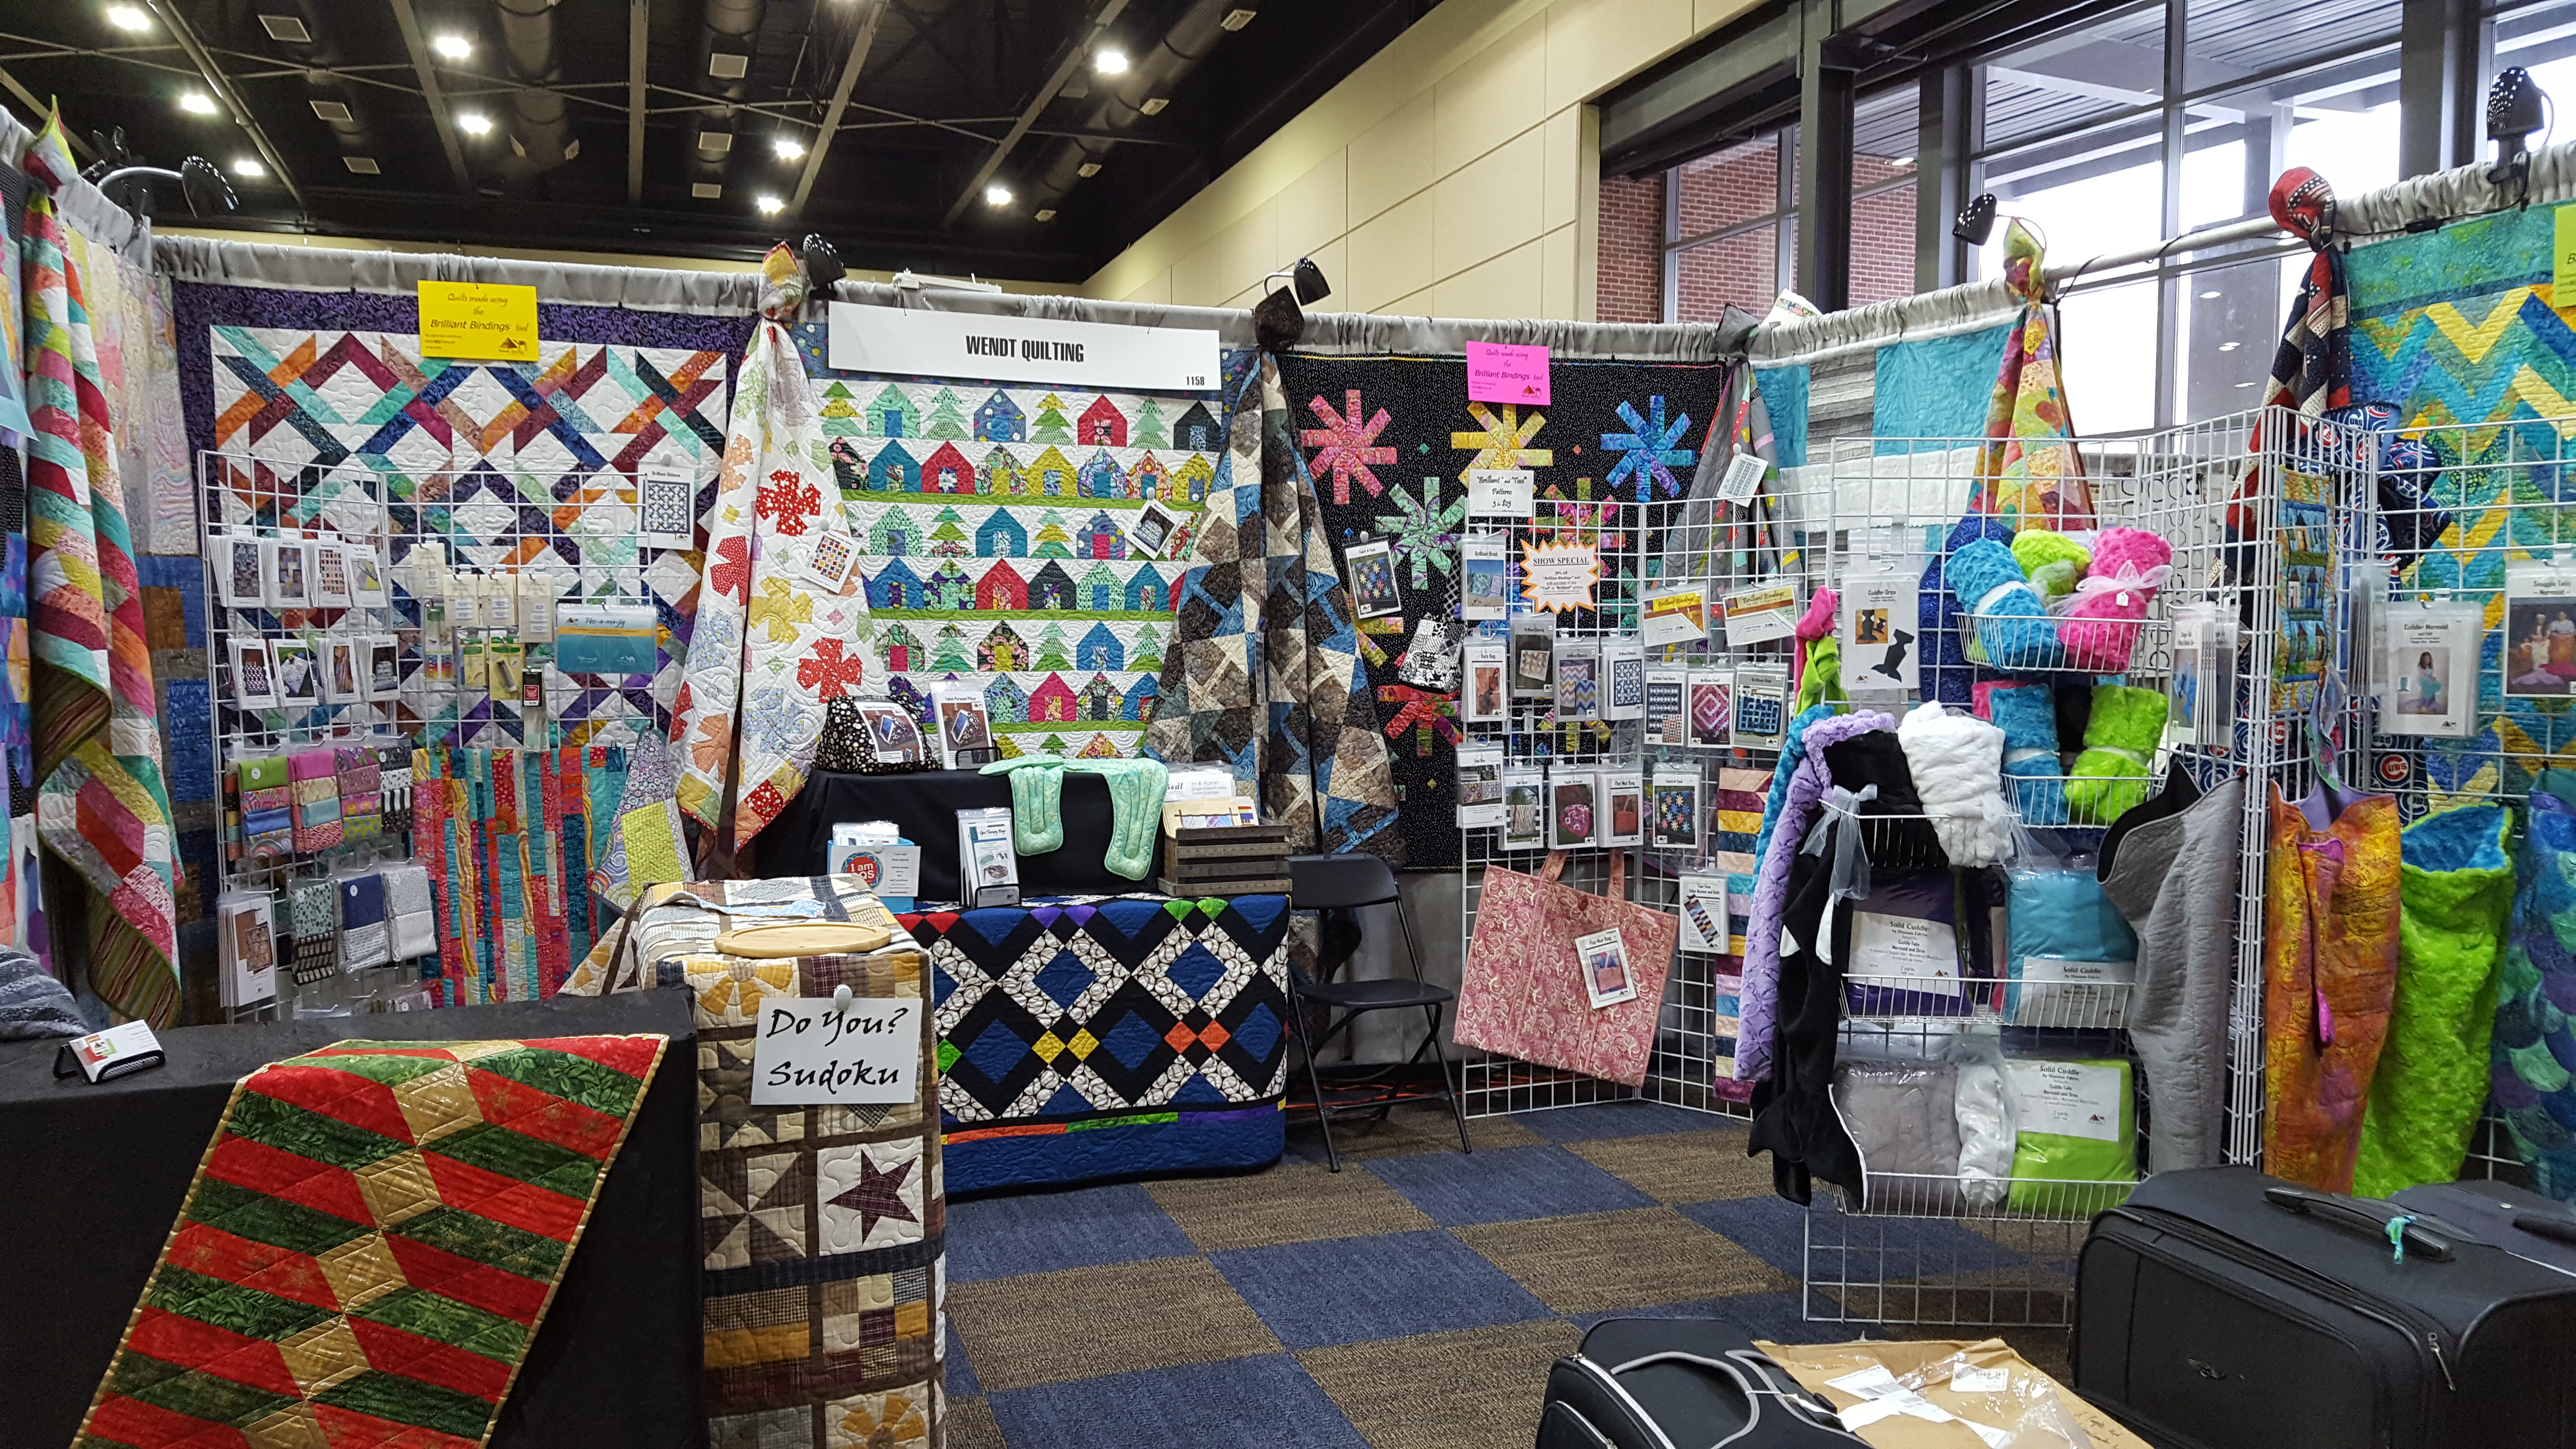
Wendt Quilting Booth #1158 Lancaster
I’m hanging out with my friends Donna and Joanne. I said I needed some tips….their response…bring a hat and boots!! It is cold and snowy out there! Tee Hee! And see my view below after a full day on my feet for setup. My new alpaca socks and a beautiful old home we are staying at in Lancaster. And a bit of color before dinner!
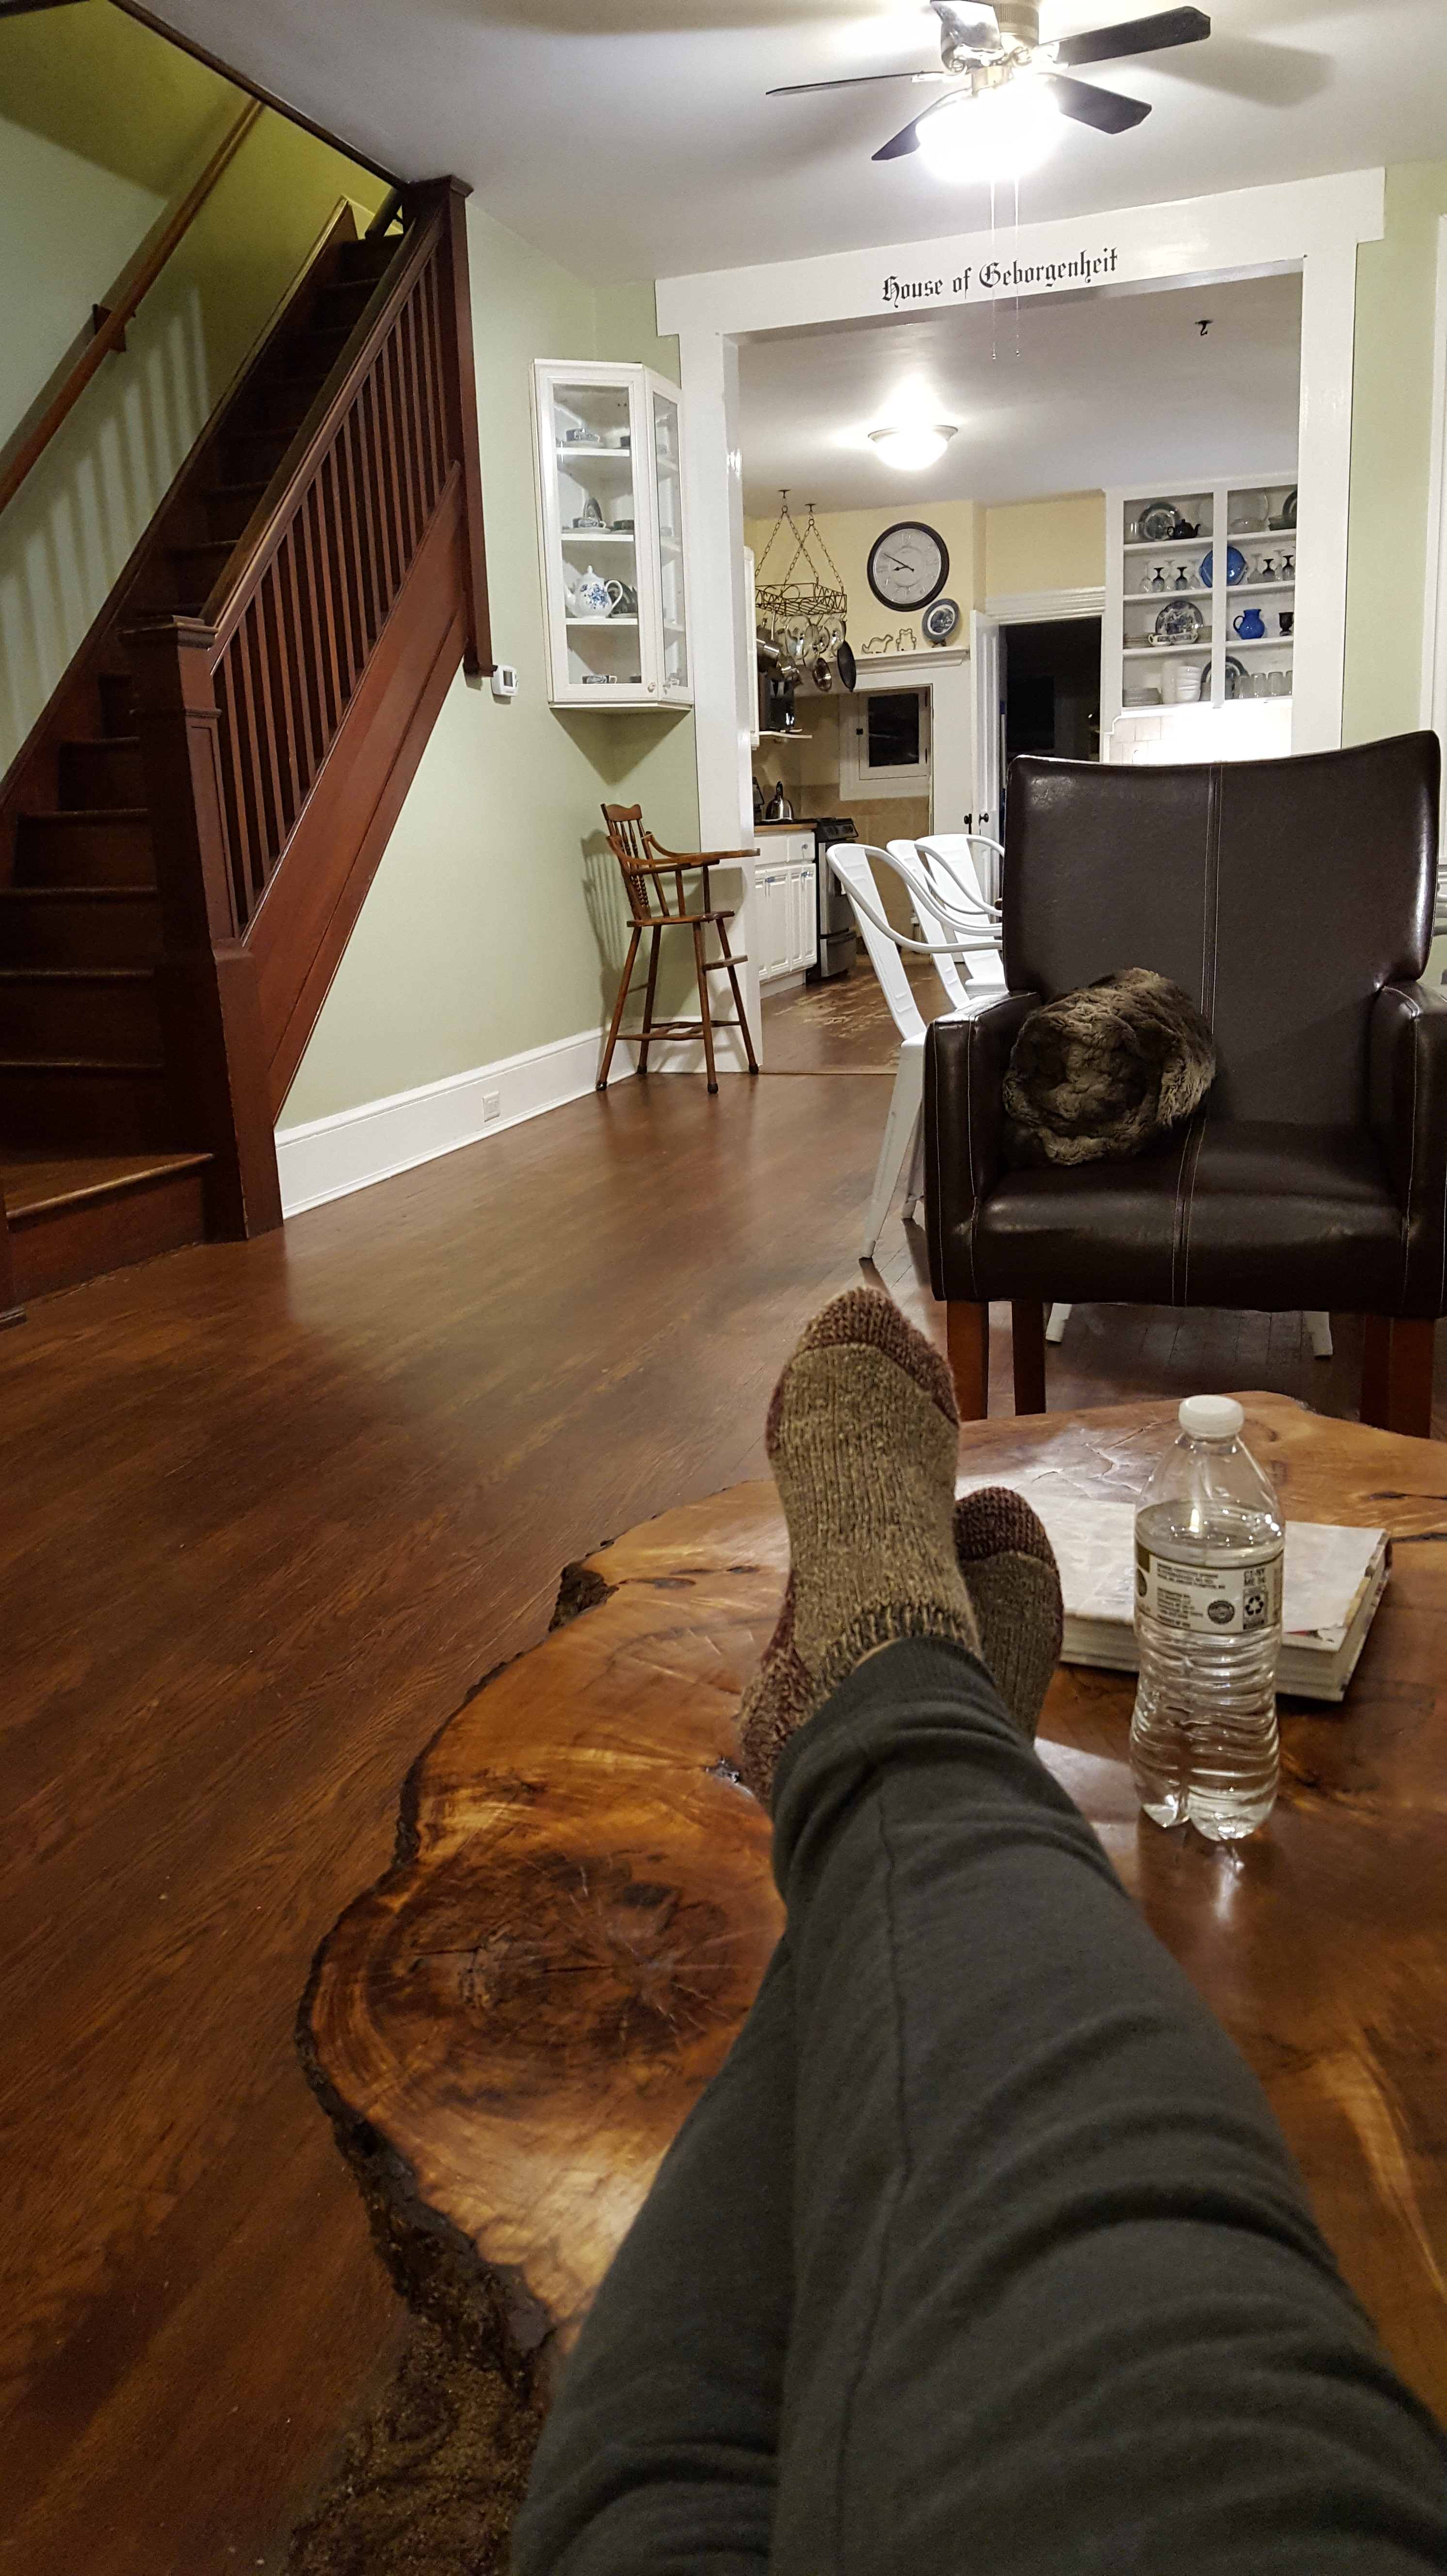
Feet up after setup!
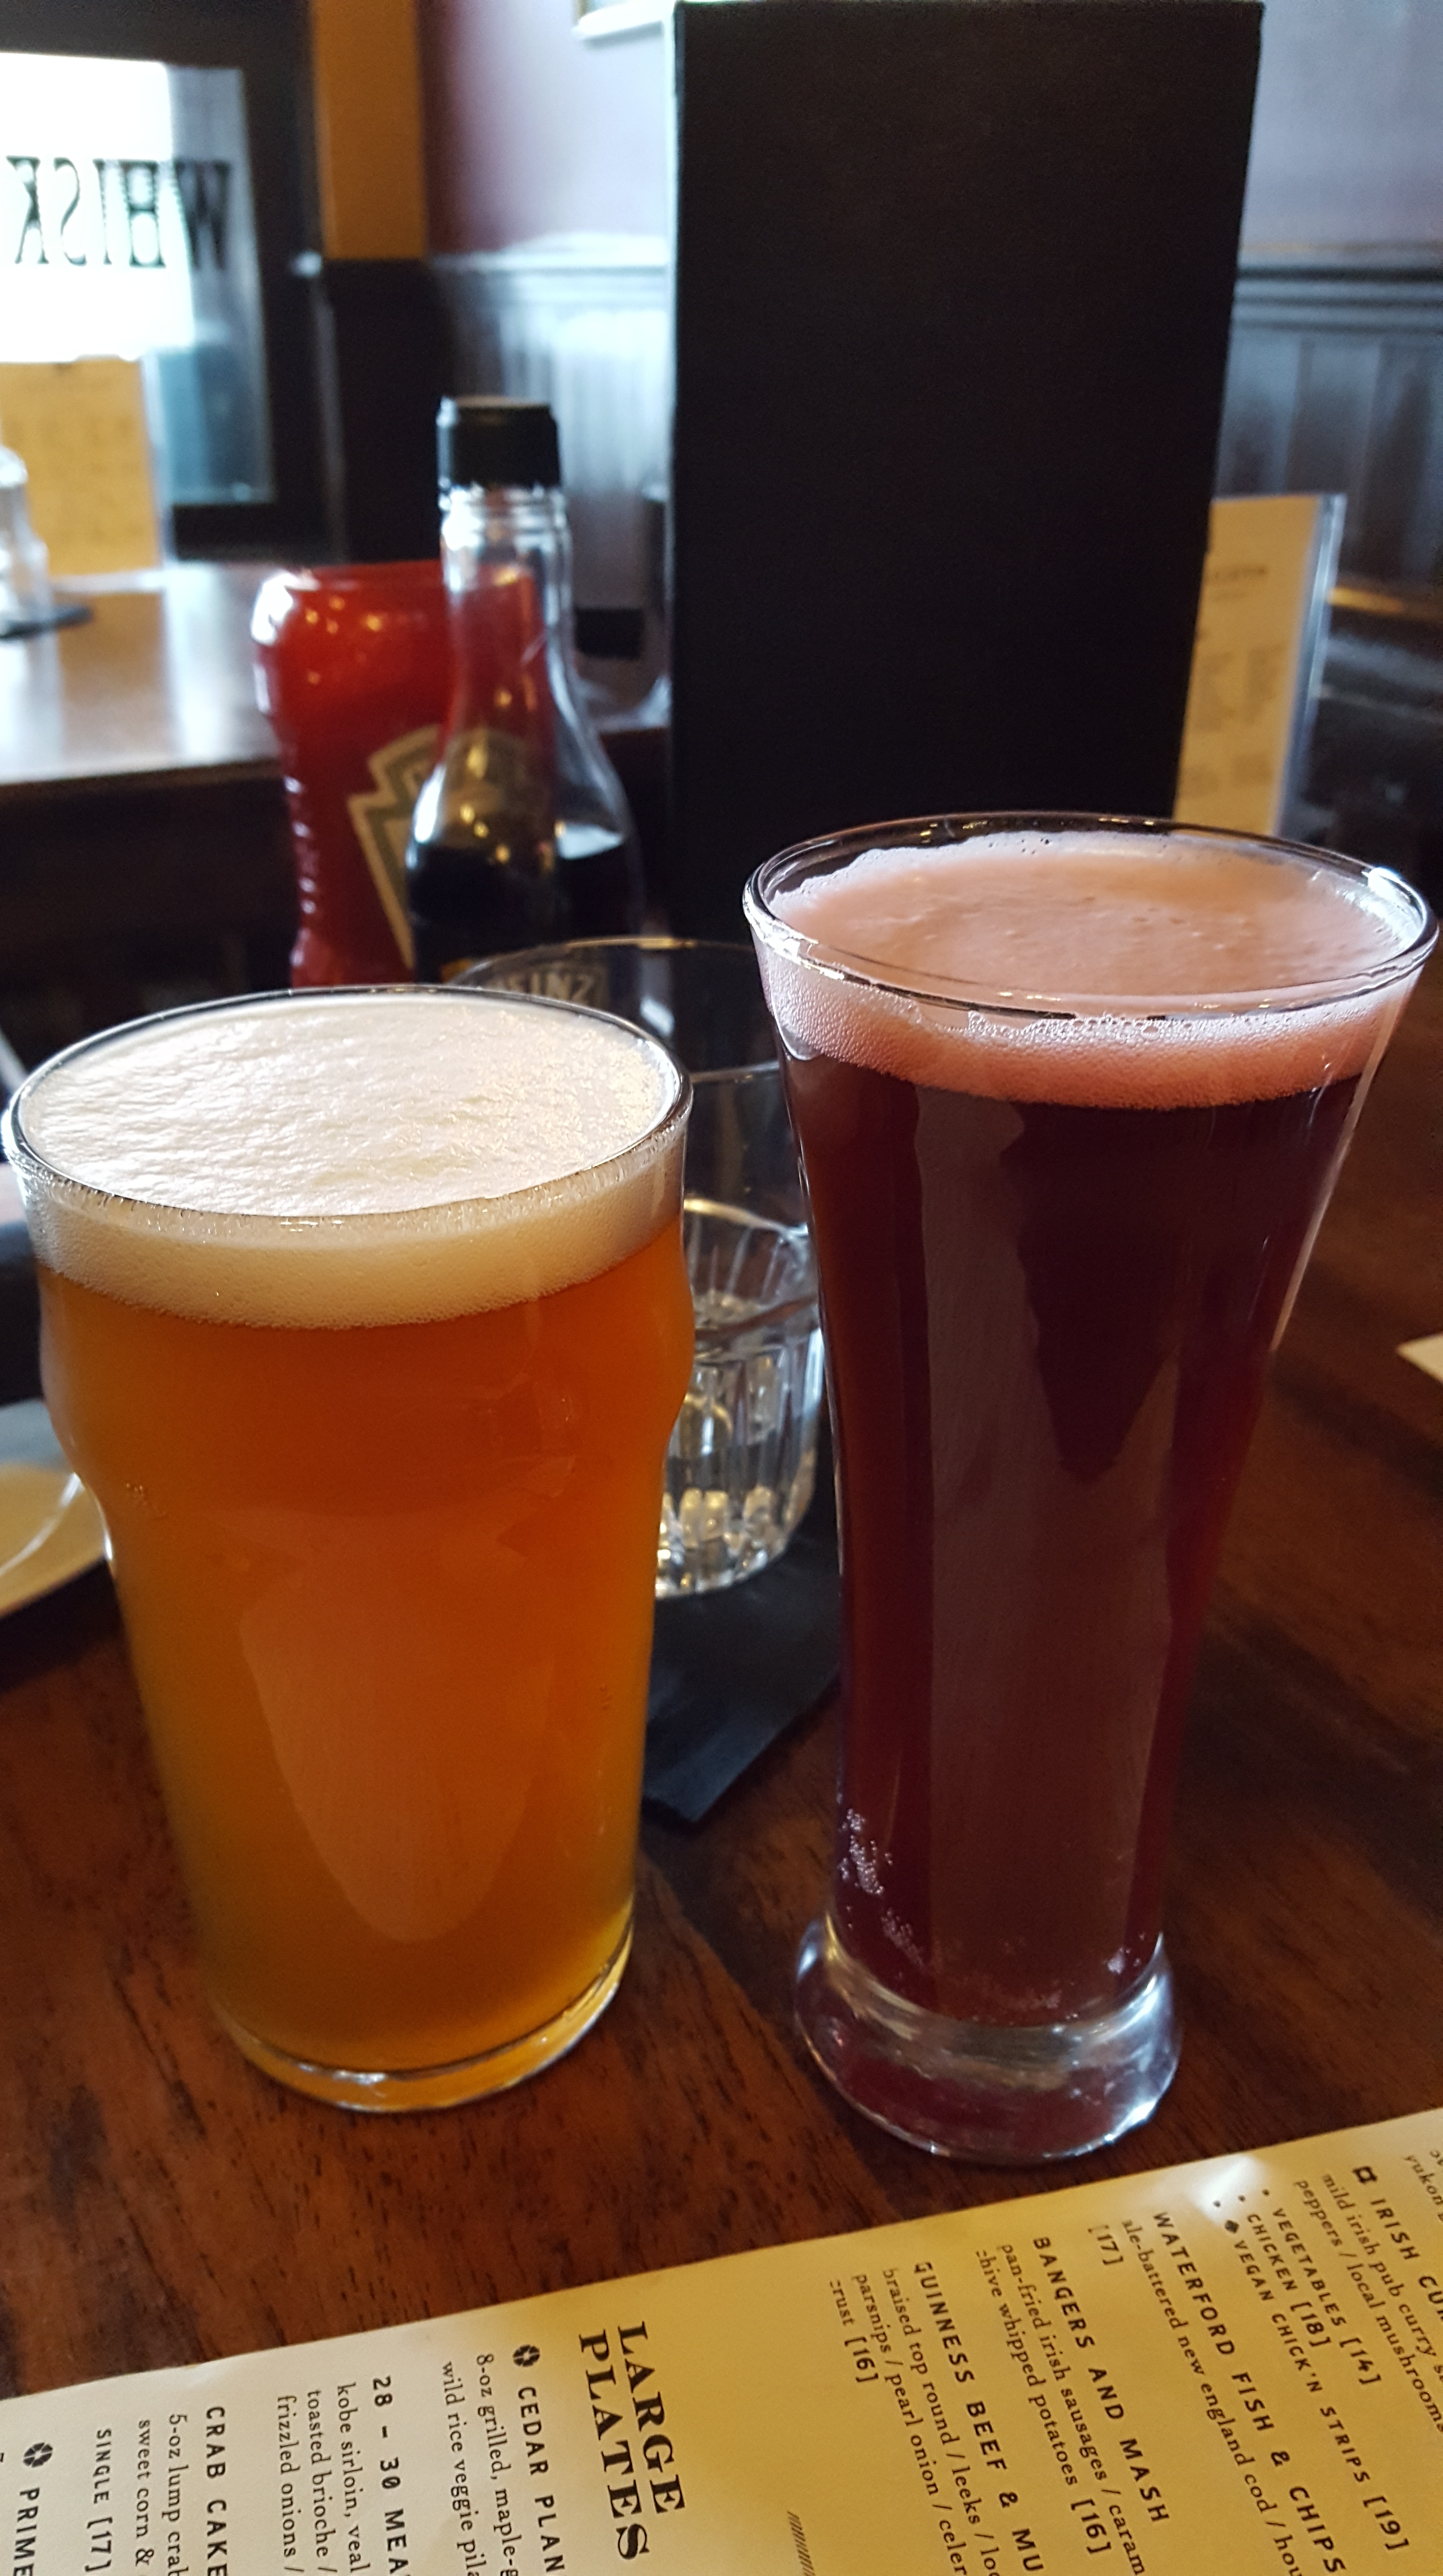
On the right..Lindemans Framboise Lambic.
raspberry craft beer!
A report from my Guild’s show (Thimble Pleasures) this past weekend…..My “You’ve Got a Friend” song challenge won second place in its category! I’m thrilled and appreciative of my peers for voting for my quilt. To take some words from the lyrics, “winter, spring, summer or fall, all you have to do is call…” Inspiration after going to a James Taylor concert with my quilting friend Michelle B. and several other quilter and vendor friends! And thinking of all my friends who are just a phone call away.
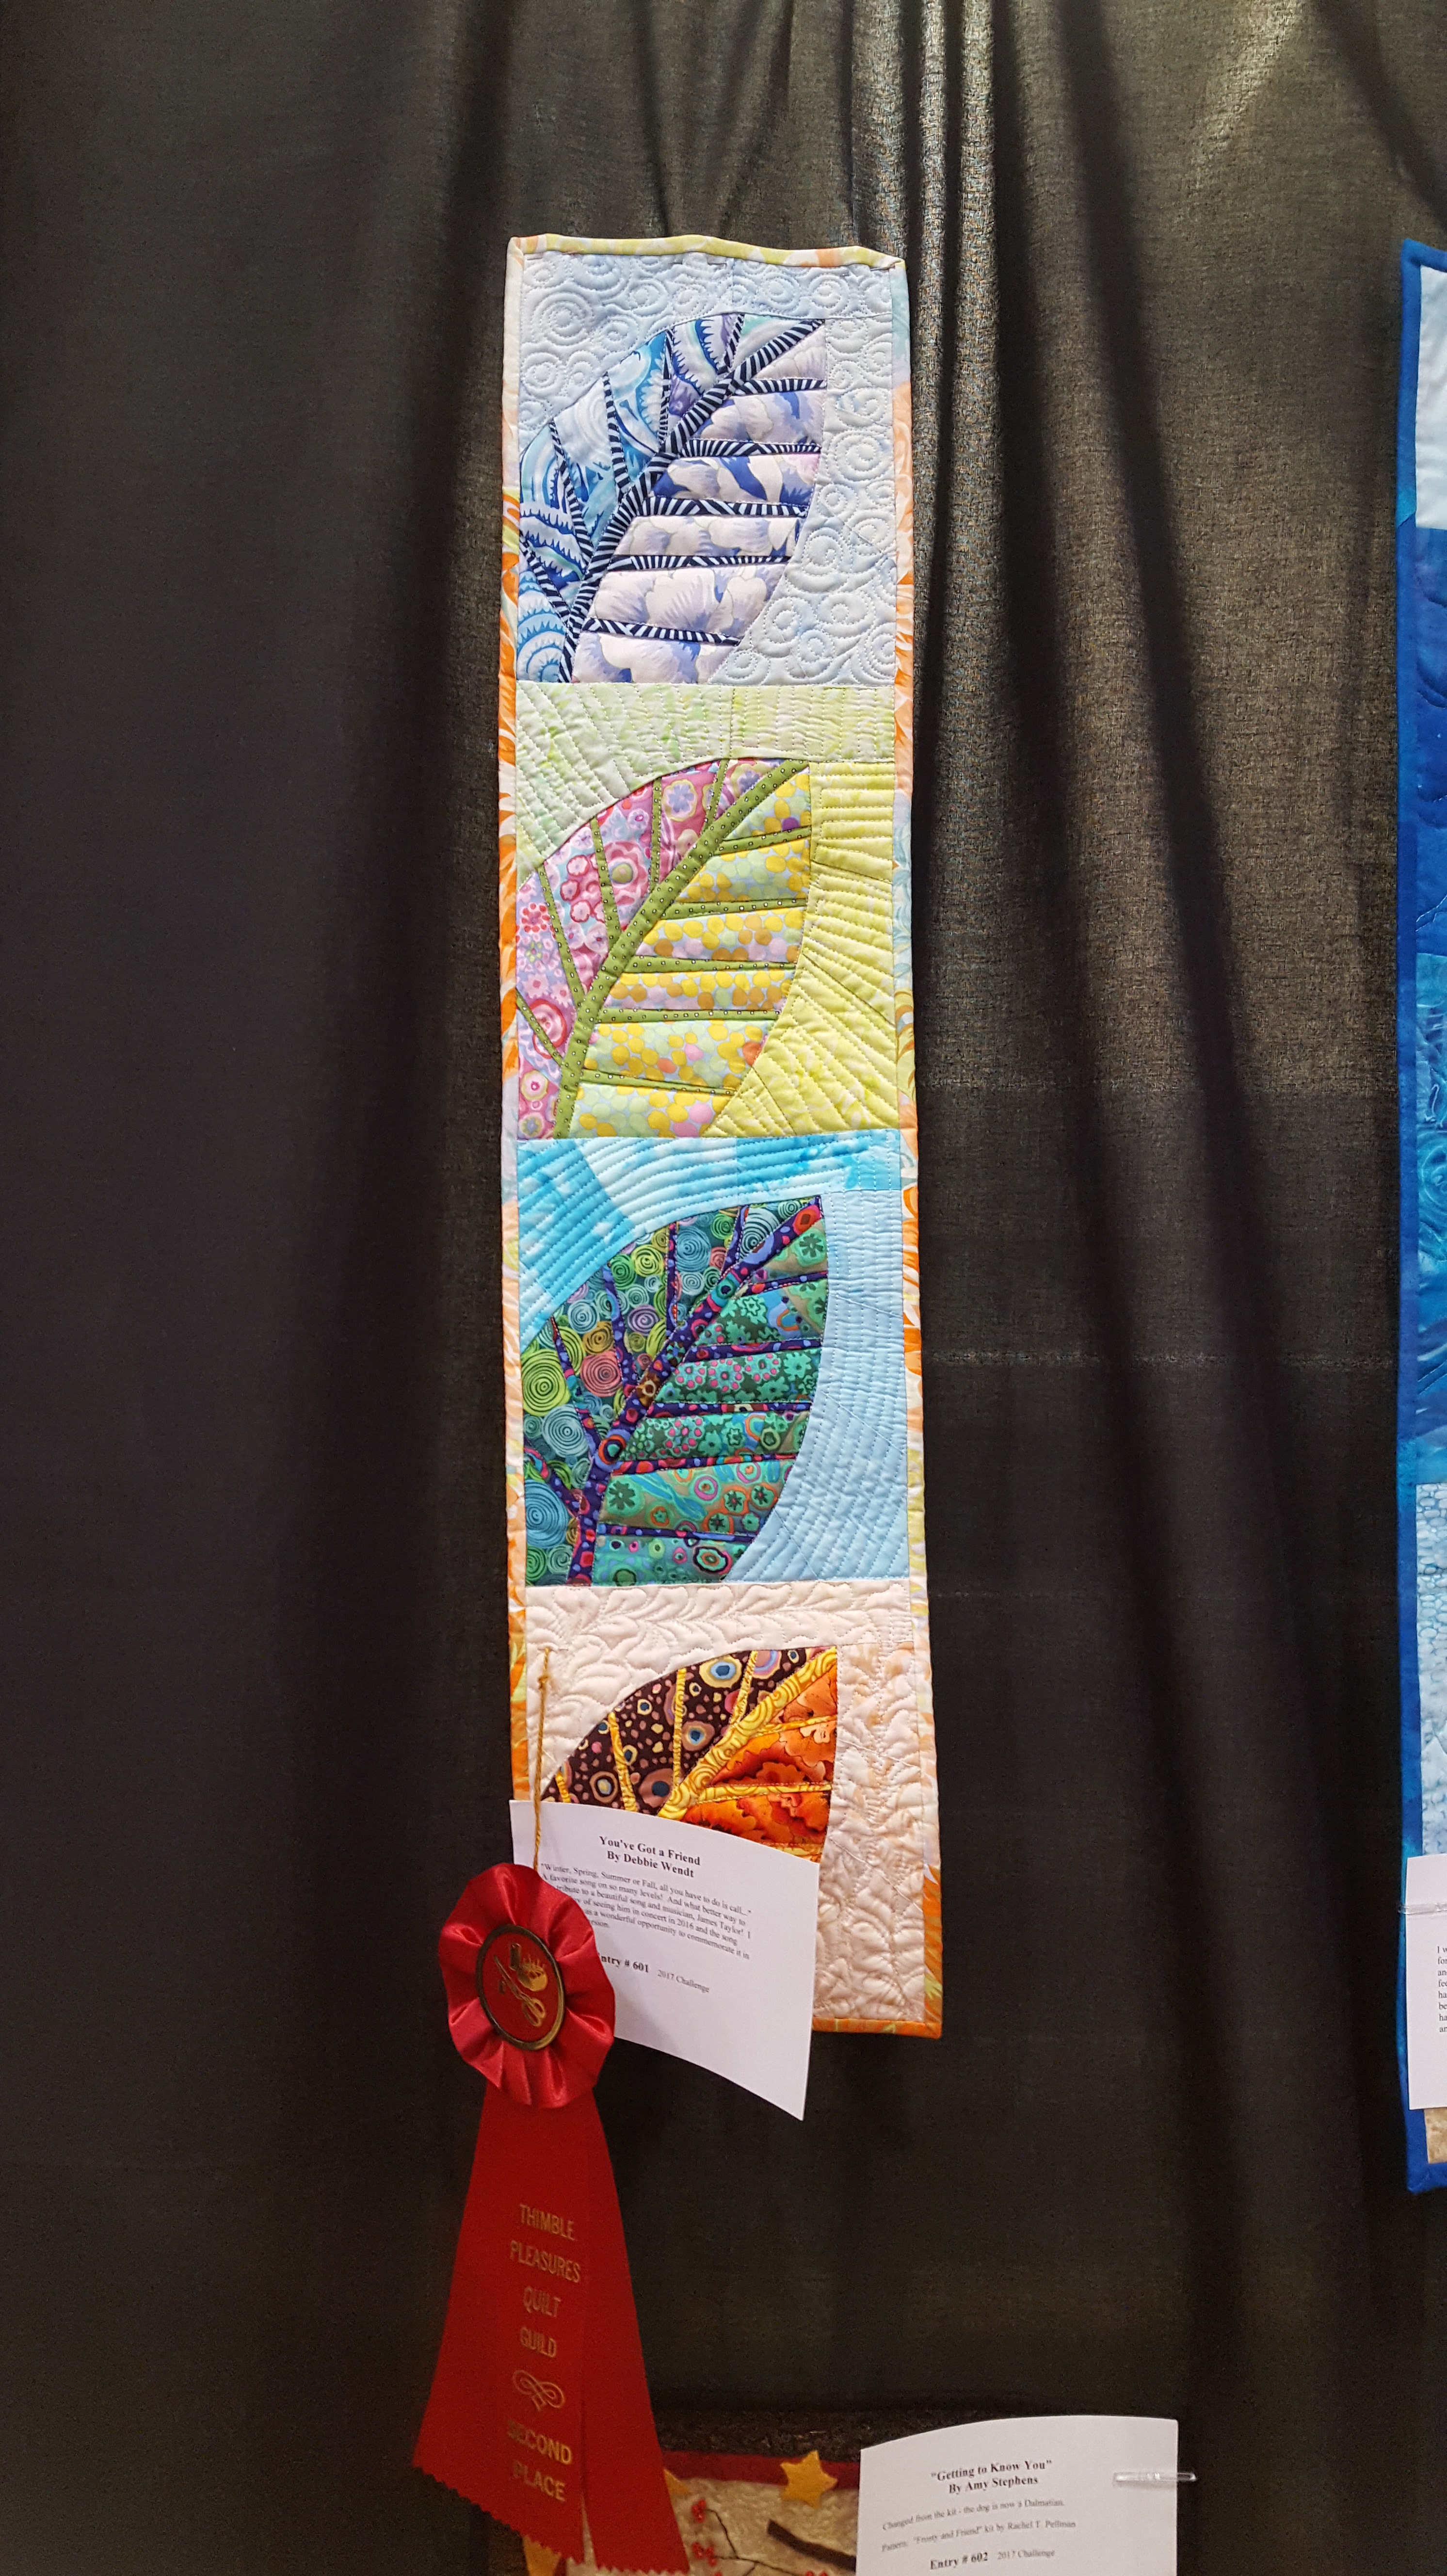
“You’ve Got a Friend” D.W.
So, seriously…
#1 – Bring a hat and boots when traveling to a quilt show in the winter…oh wait, tomorrow is the first day of Spring!
#2- Rehydrate before, during and after you walk a quilt show!
#3- BONUS- make a quilt to commerate an event or favorite song or friend(s) in your life.
in quilting,
Debbie
