Two Tip Tuesday – WQ Facebook page question/answer

I’m getting this in under the wire.  It has got to still be Tuesday on the West coast!  Tonight on the Wendt Quilting Facebook page I had a question on the “Four” Dinner Placemats pattern.  The question was about the wording “offset” two angled edge pieces when sewing a seam.  This is very similar to sewing the end join on binding tails.  The desired outcome is that after sewing the seam the edges continue nice and even so there is no “jump” at the seam.  I will add some photos below on how to make sure this happens.

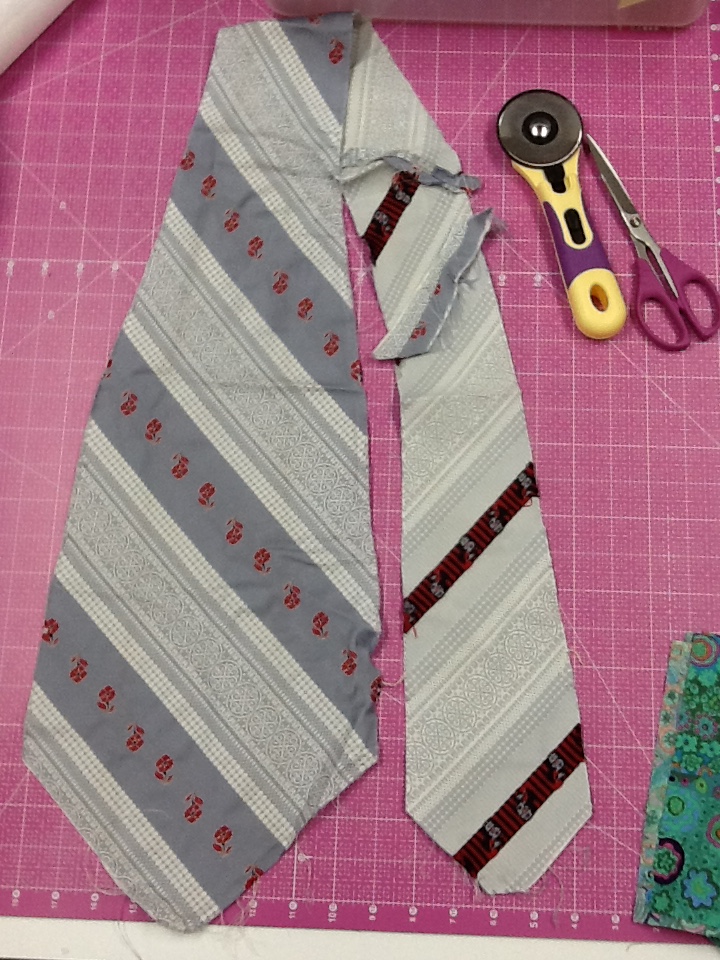
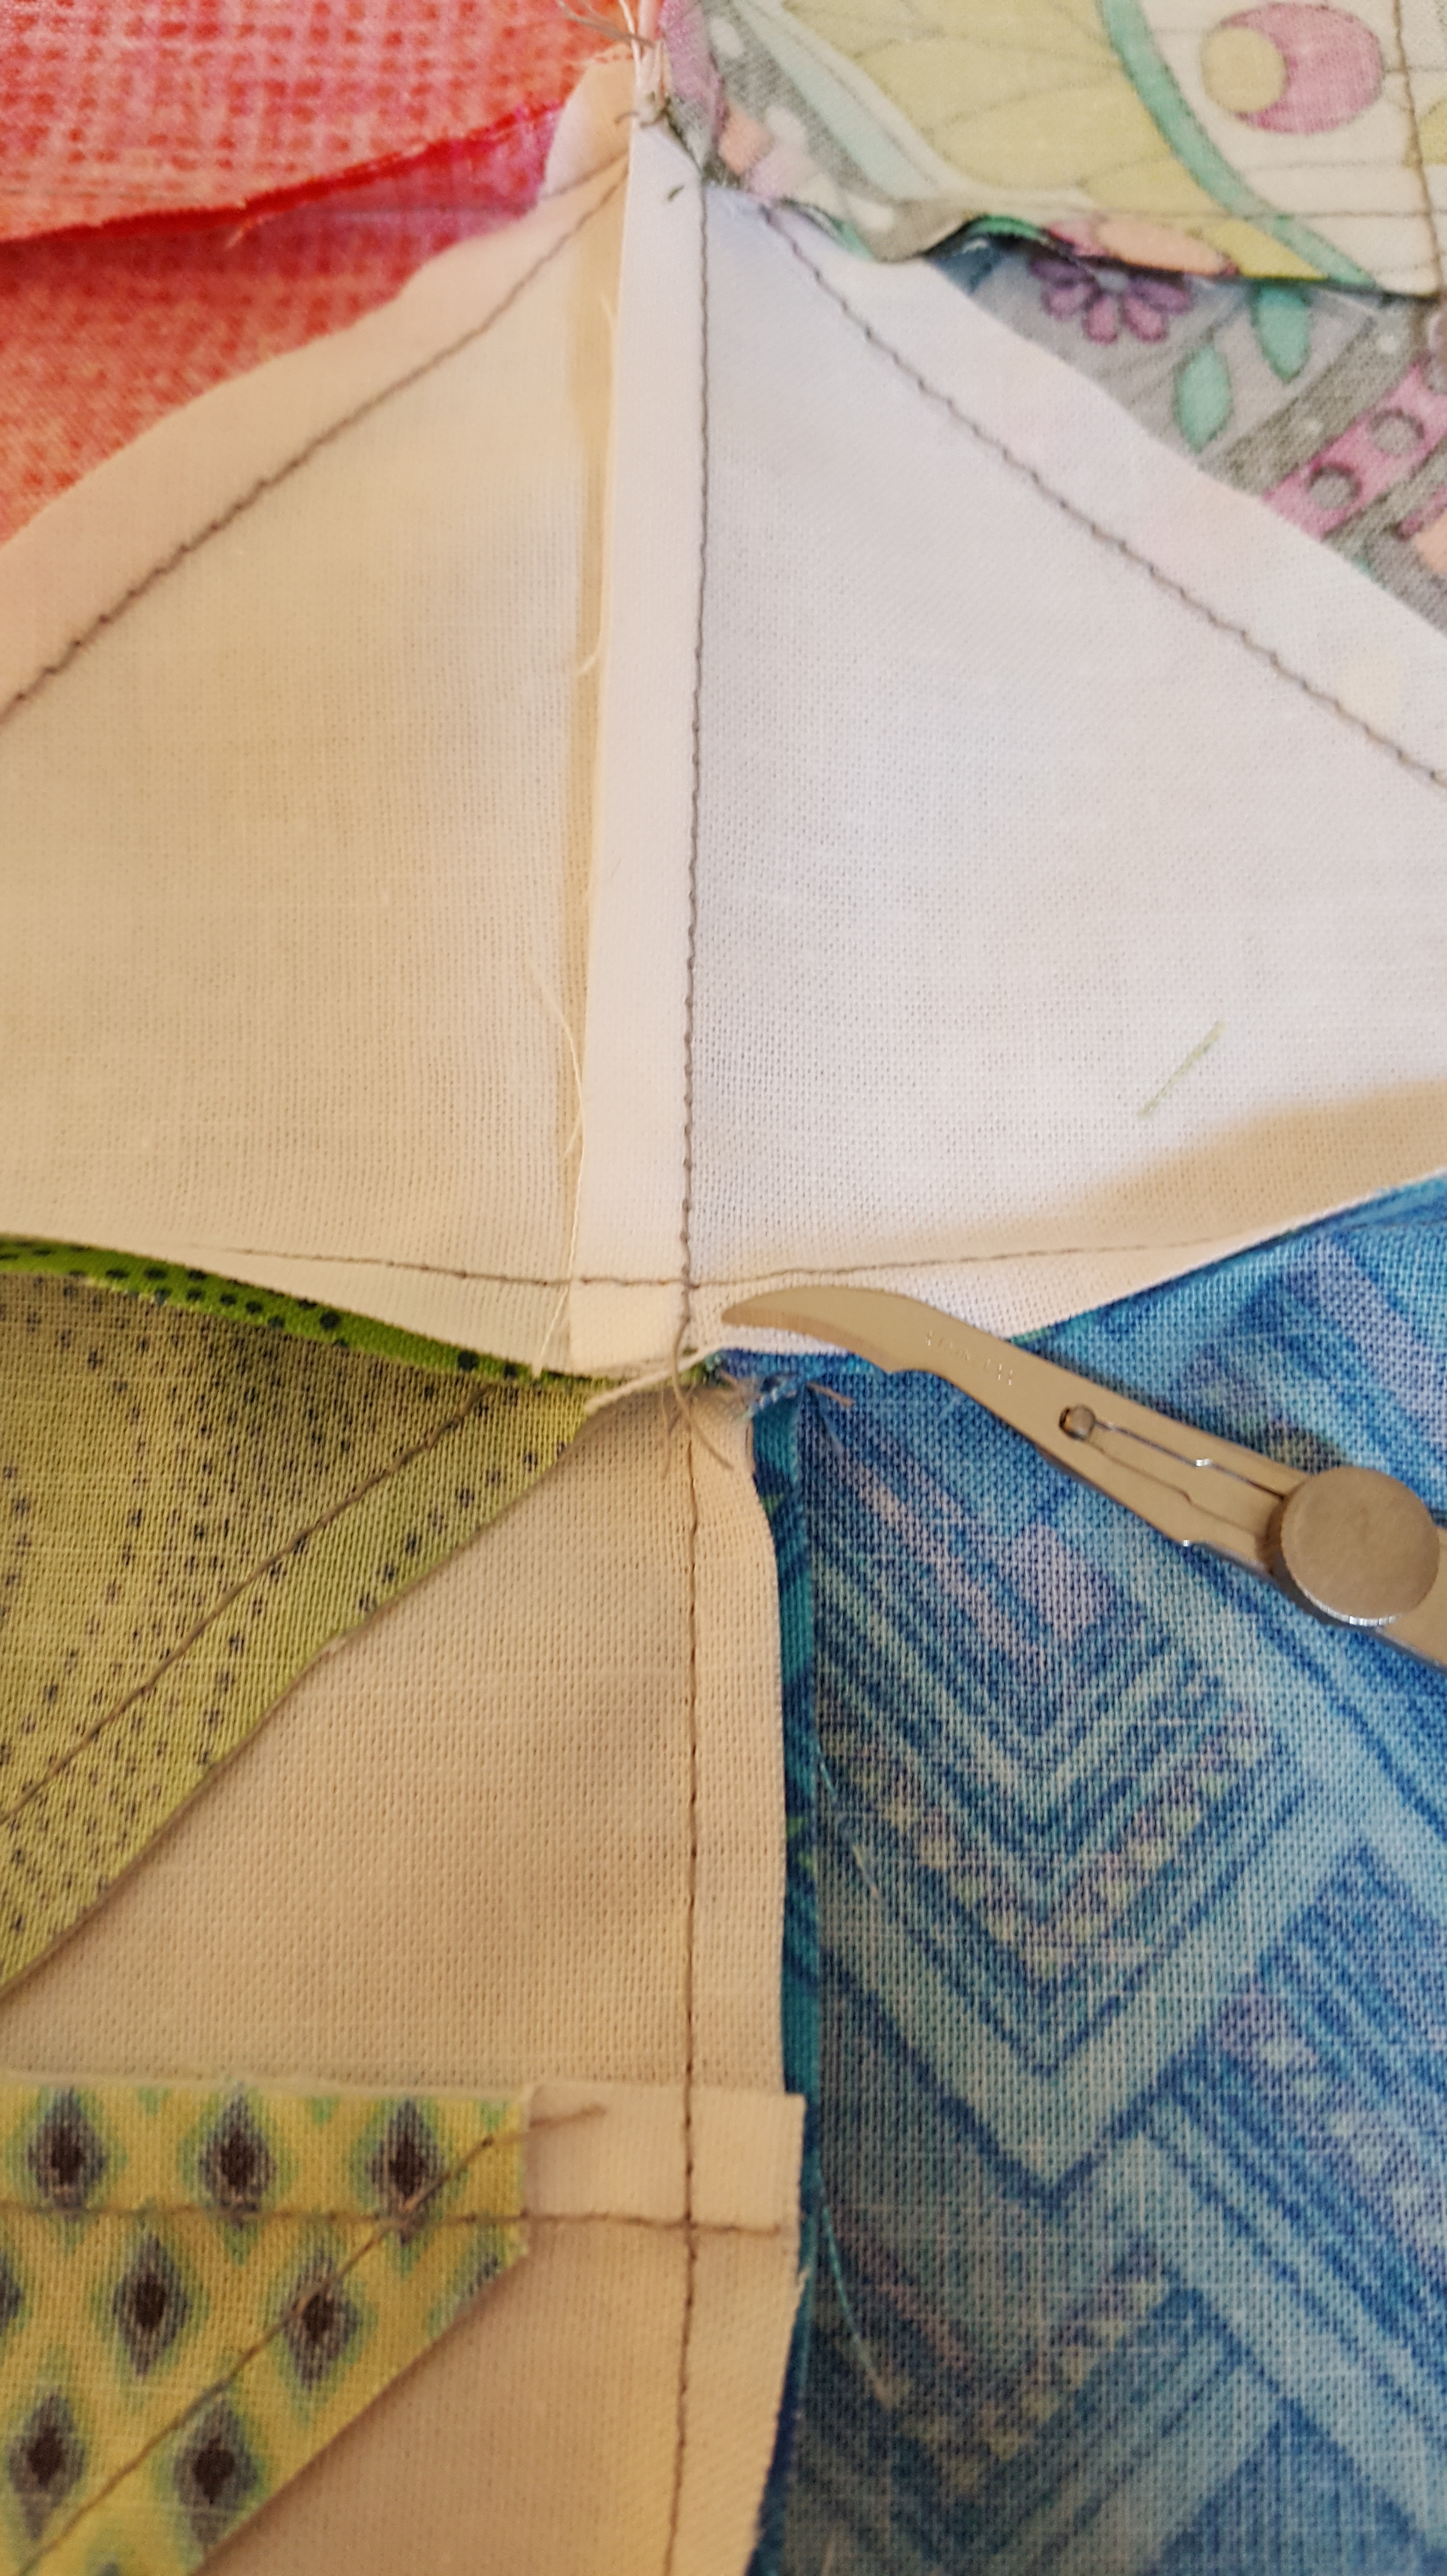
#1- place the two fabrics next to each other as they will look once sewn.  This helps visualize how it should look.


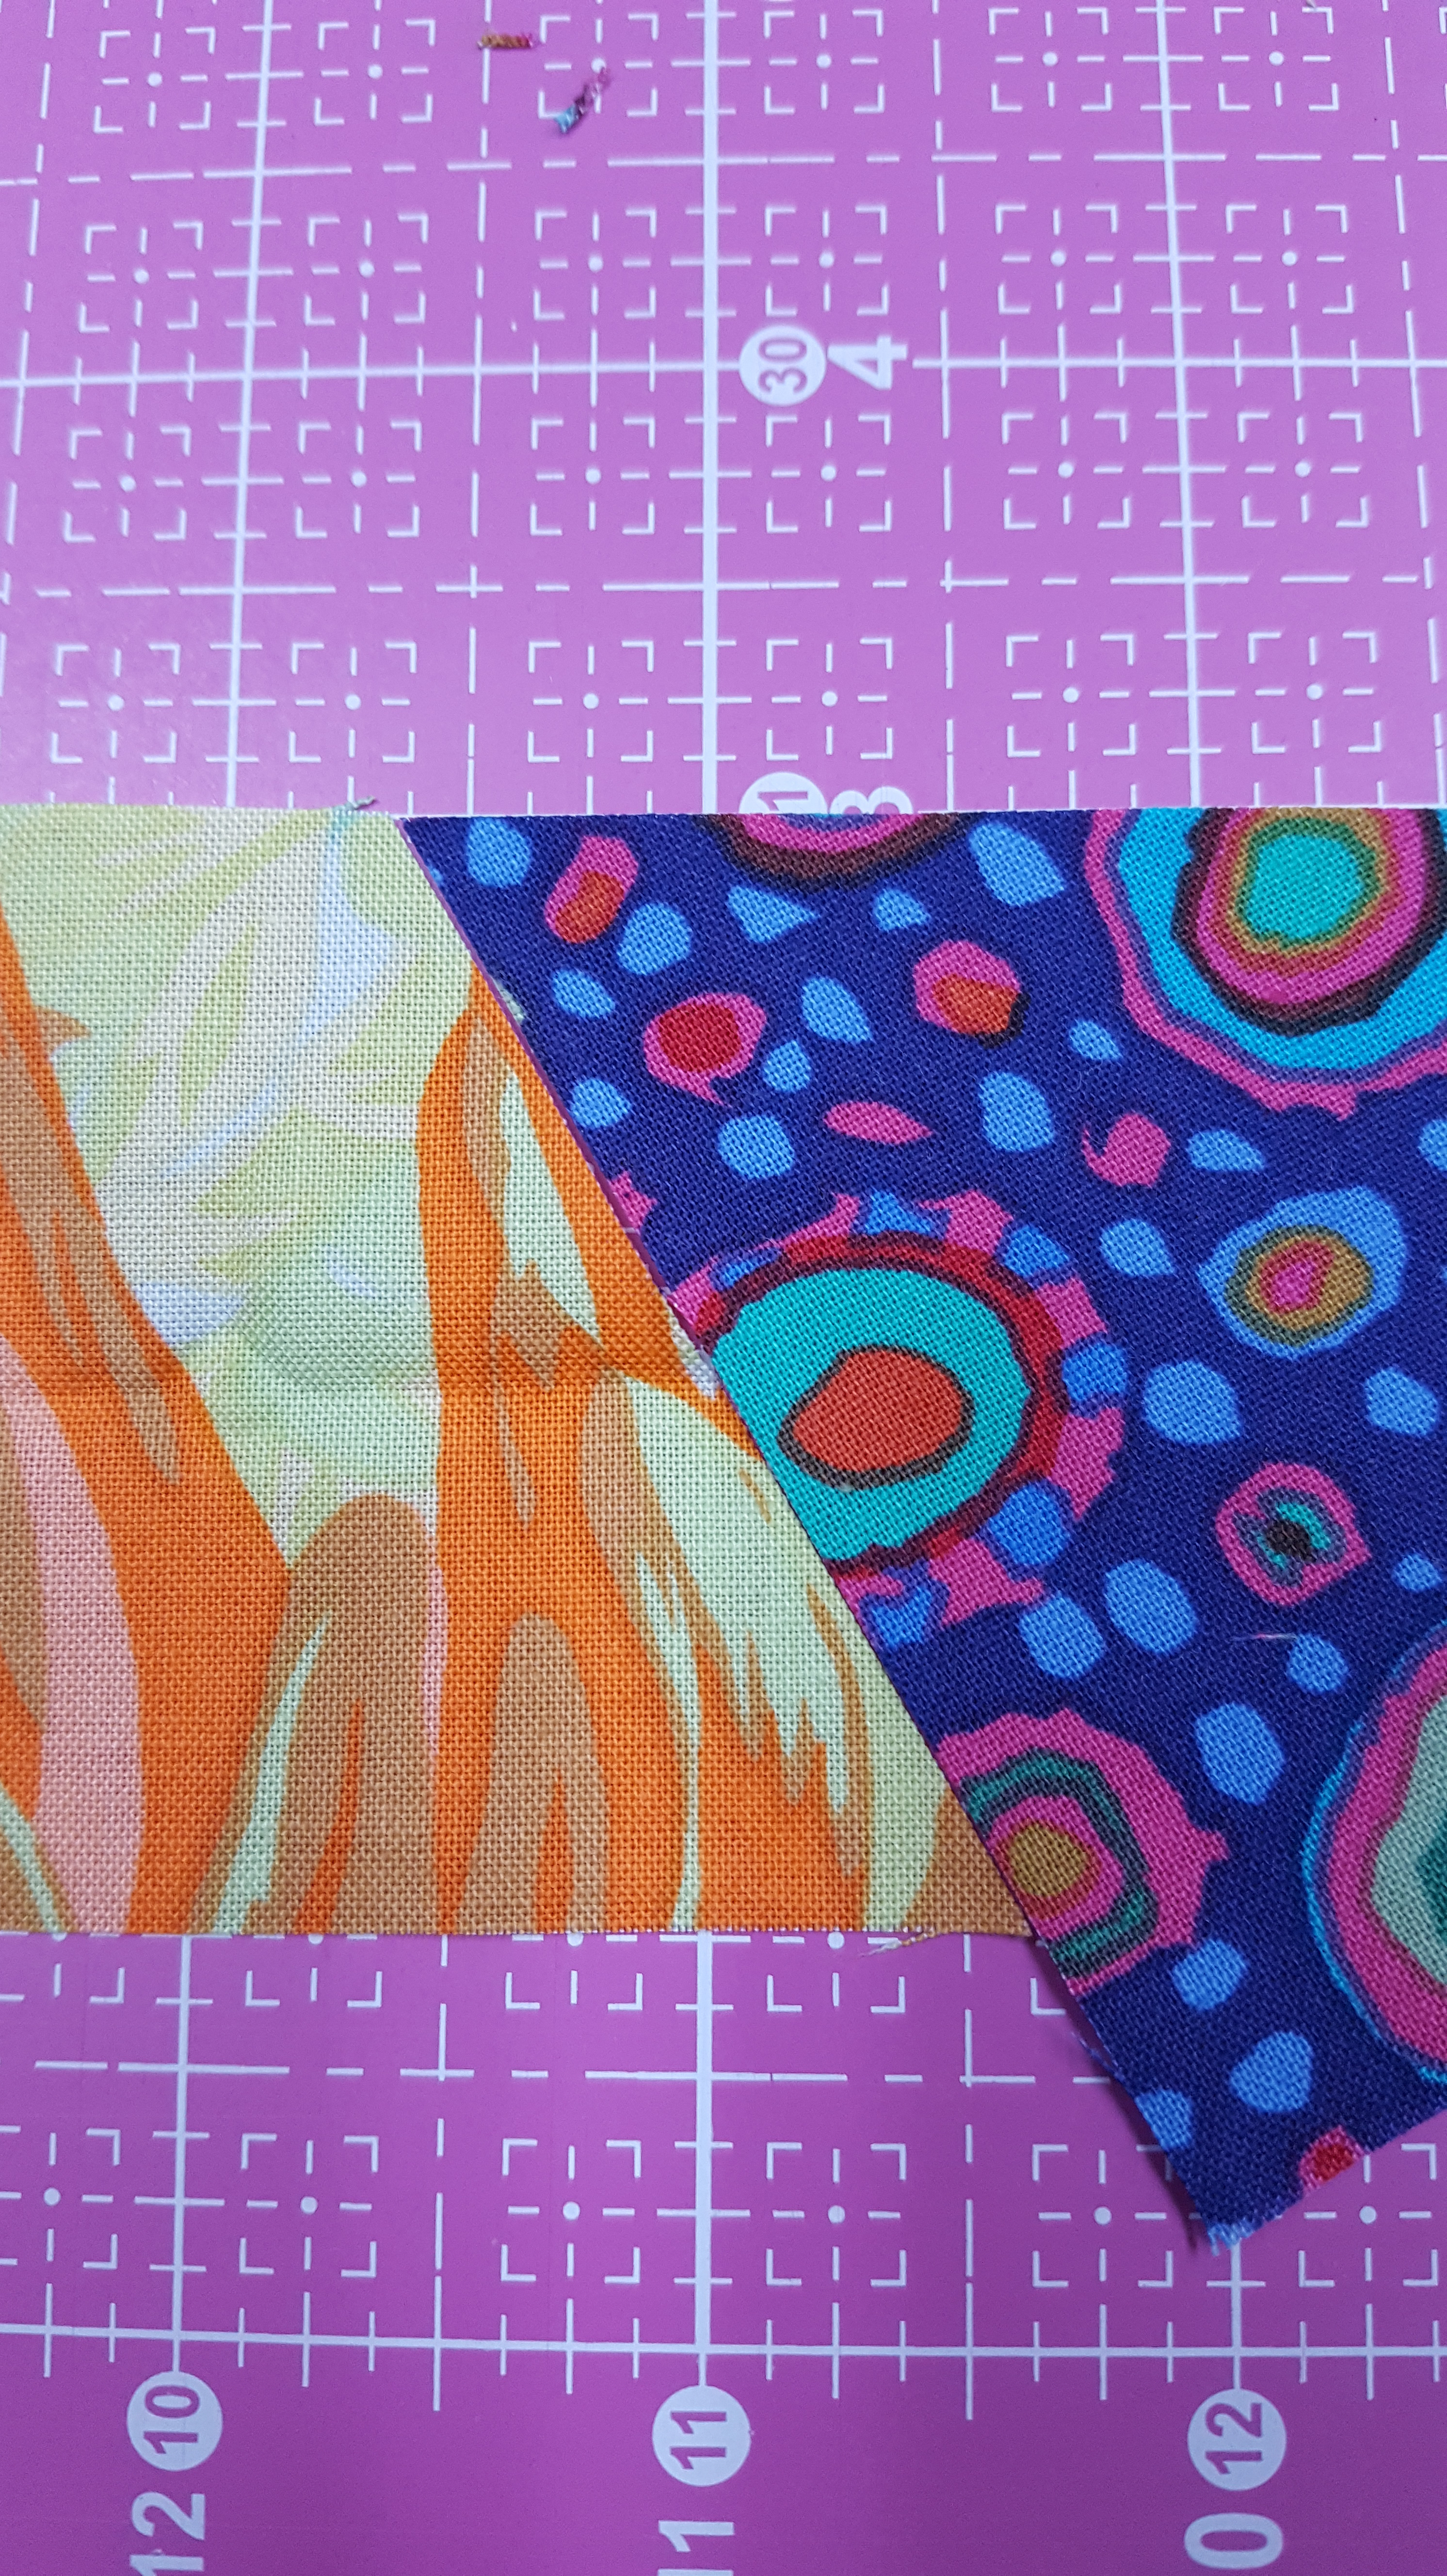
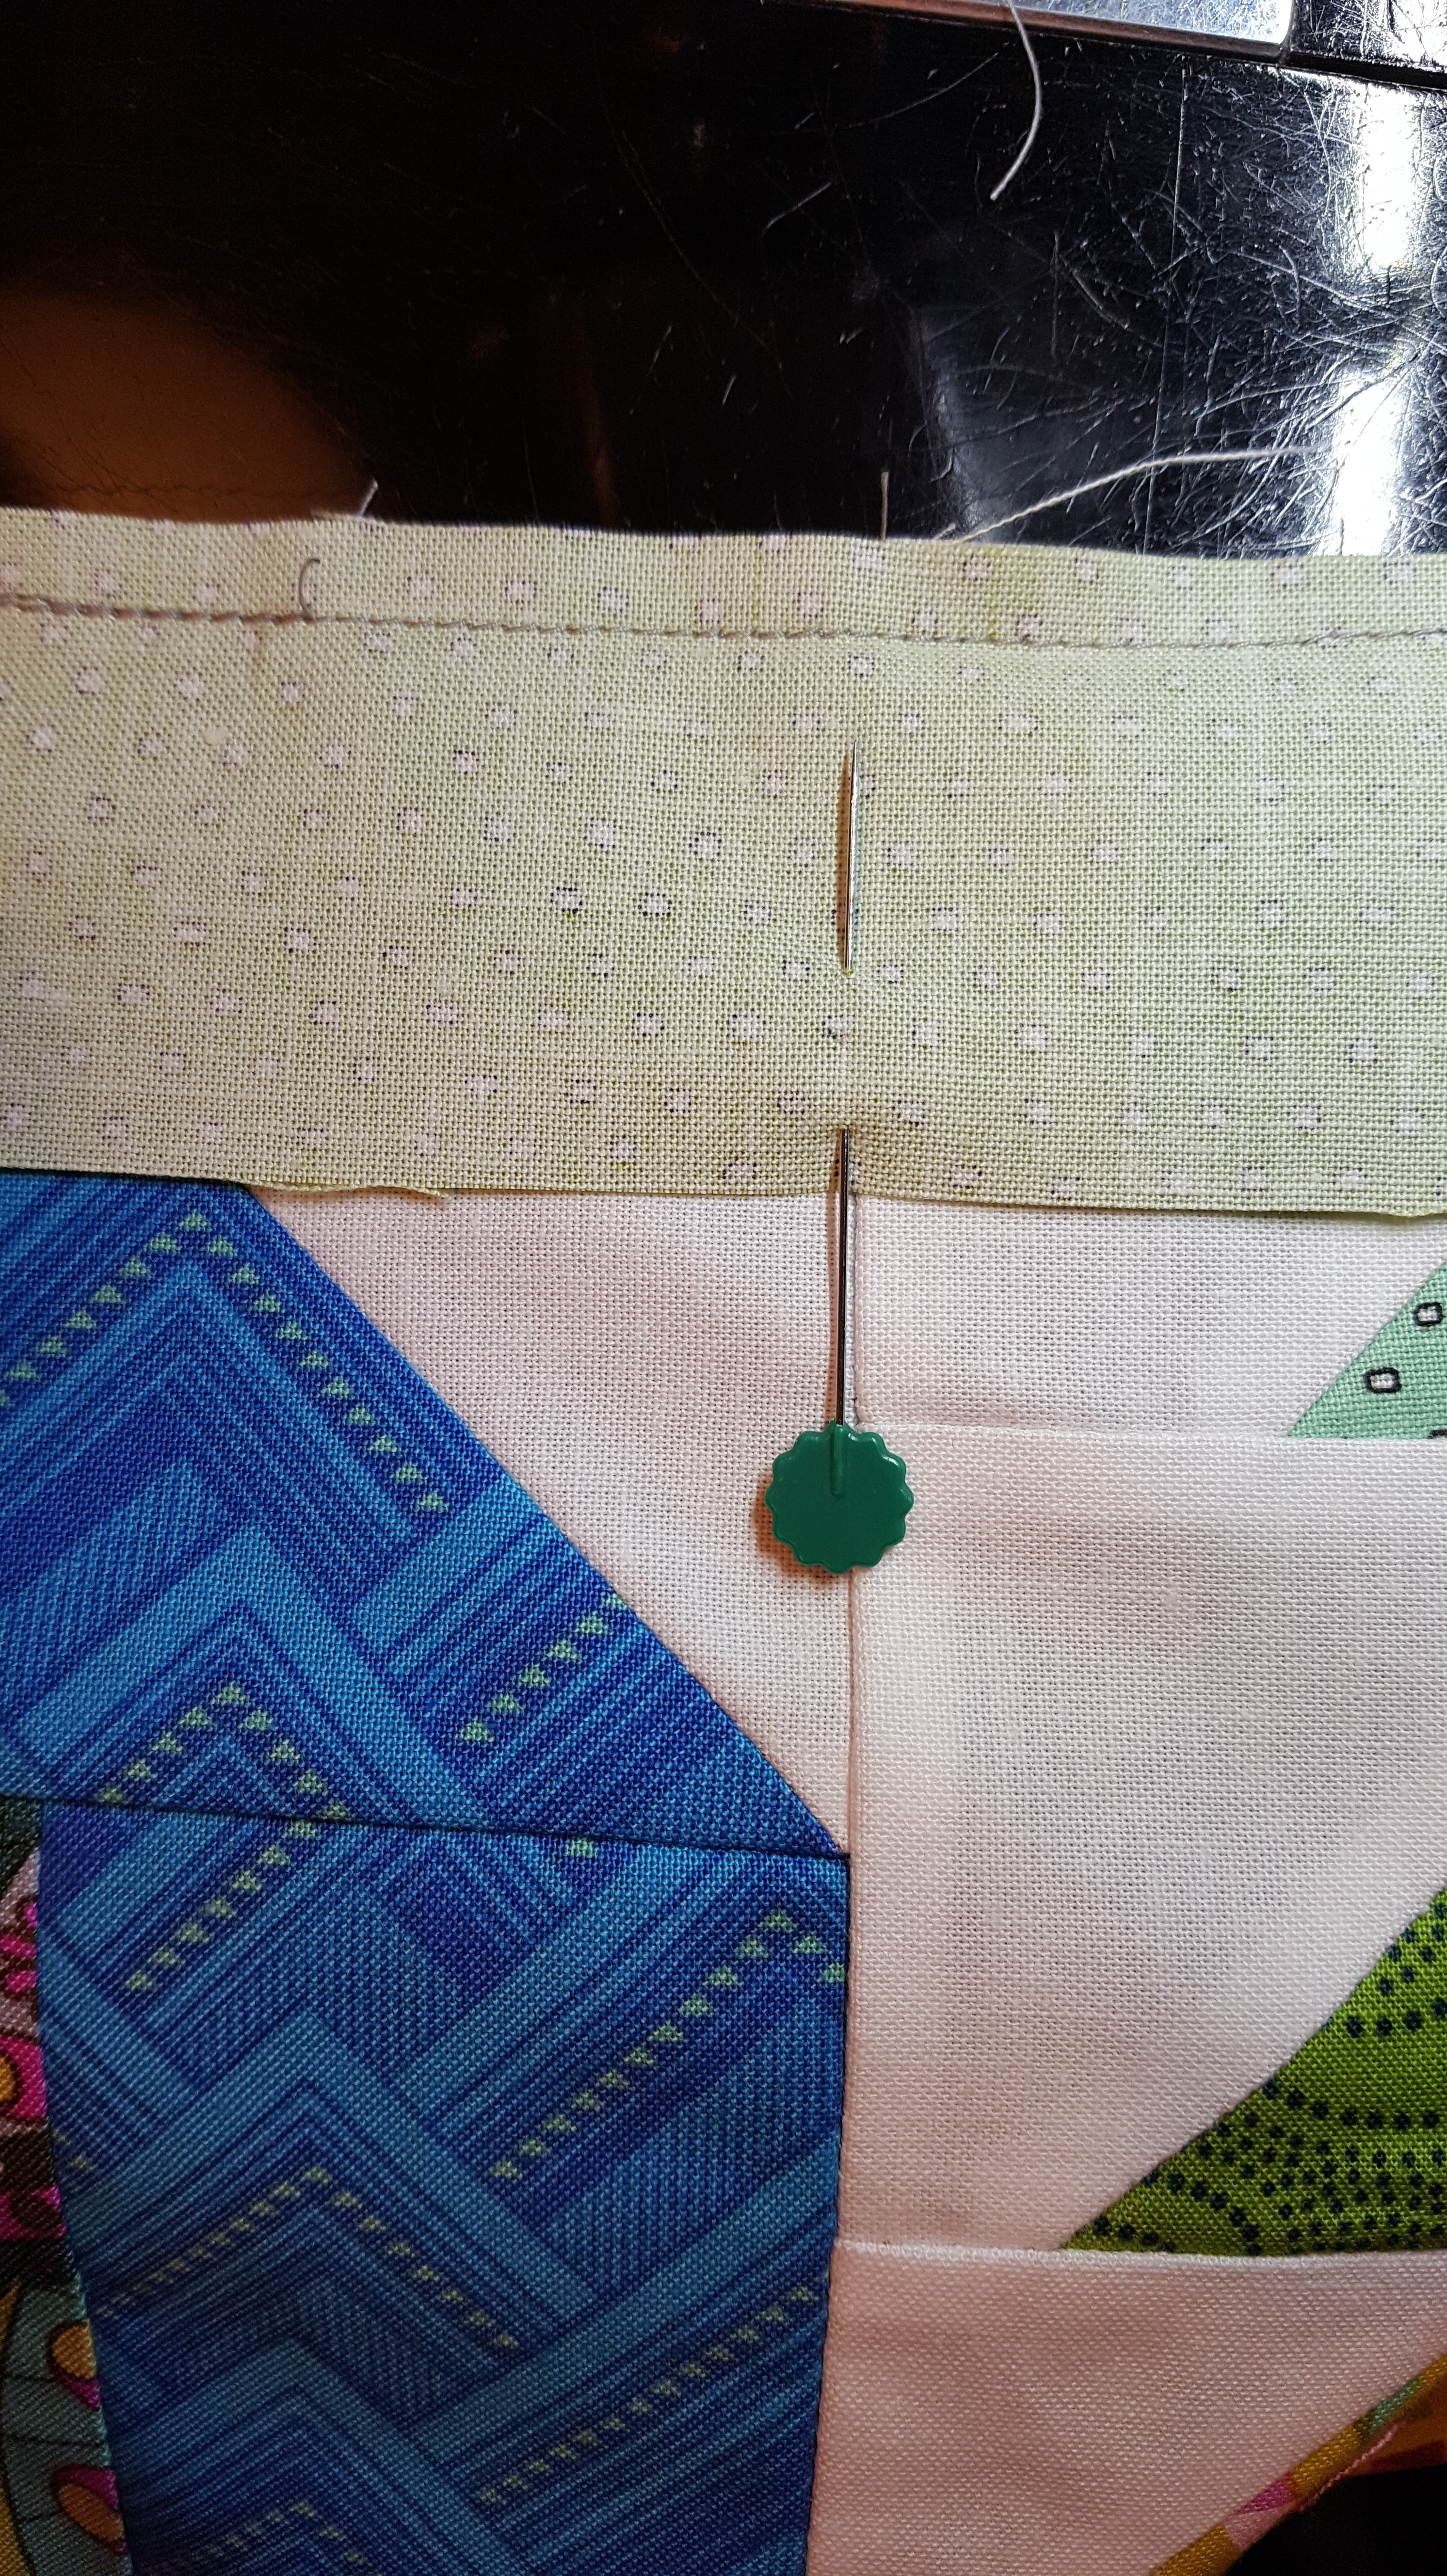
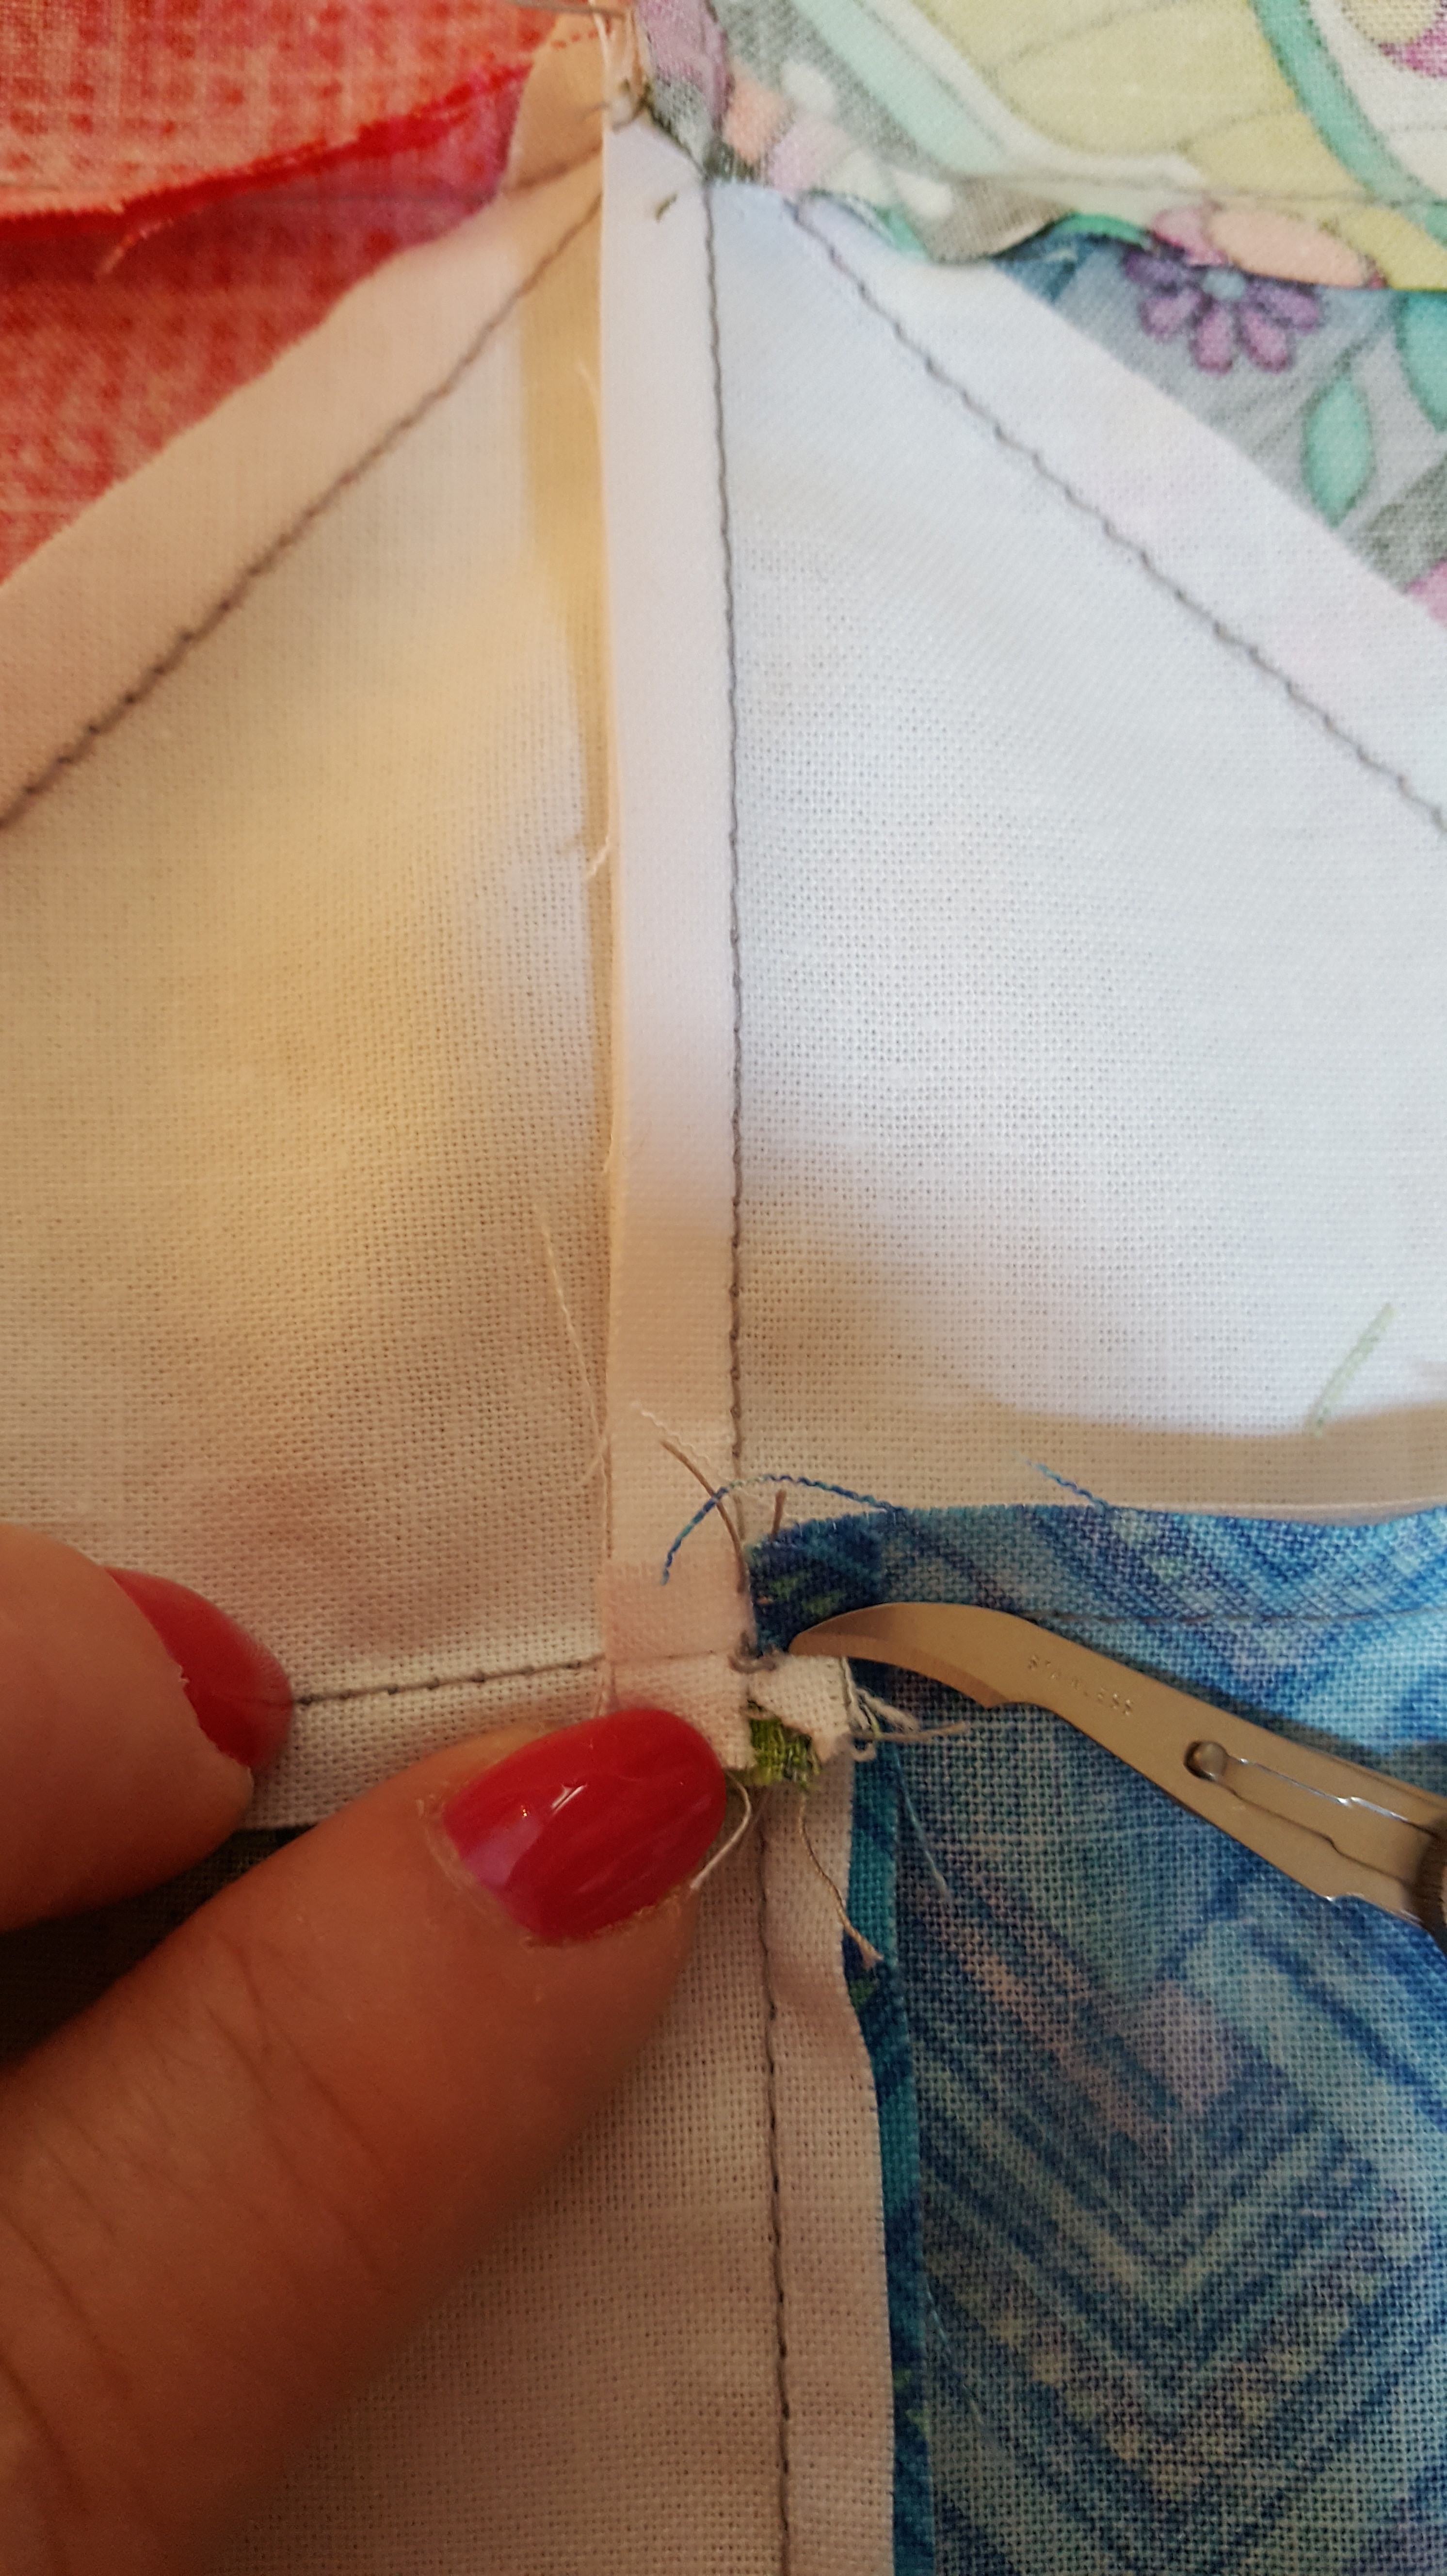
#2- flip one piece on top of the other with right sides together.  Make sure to “offset” the pieces so the seam line crosses at the cut edge.  (You do NOT have the pointy end at the cut edge.  If you do, this will create the jump that you do not want.). In the photo below I have my finger pointing to where the 1/4″ seam line will cross the cut edge.


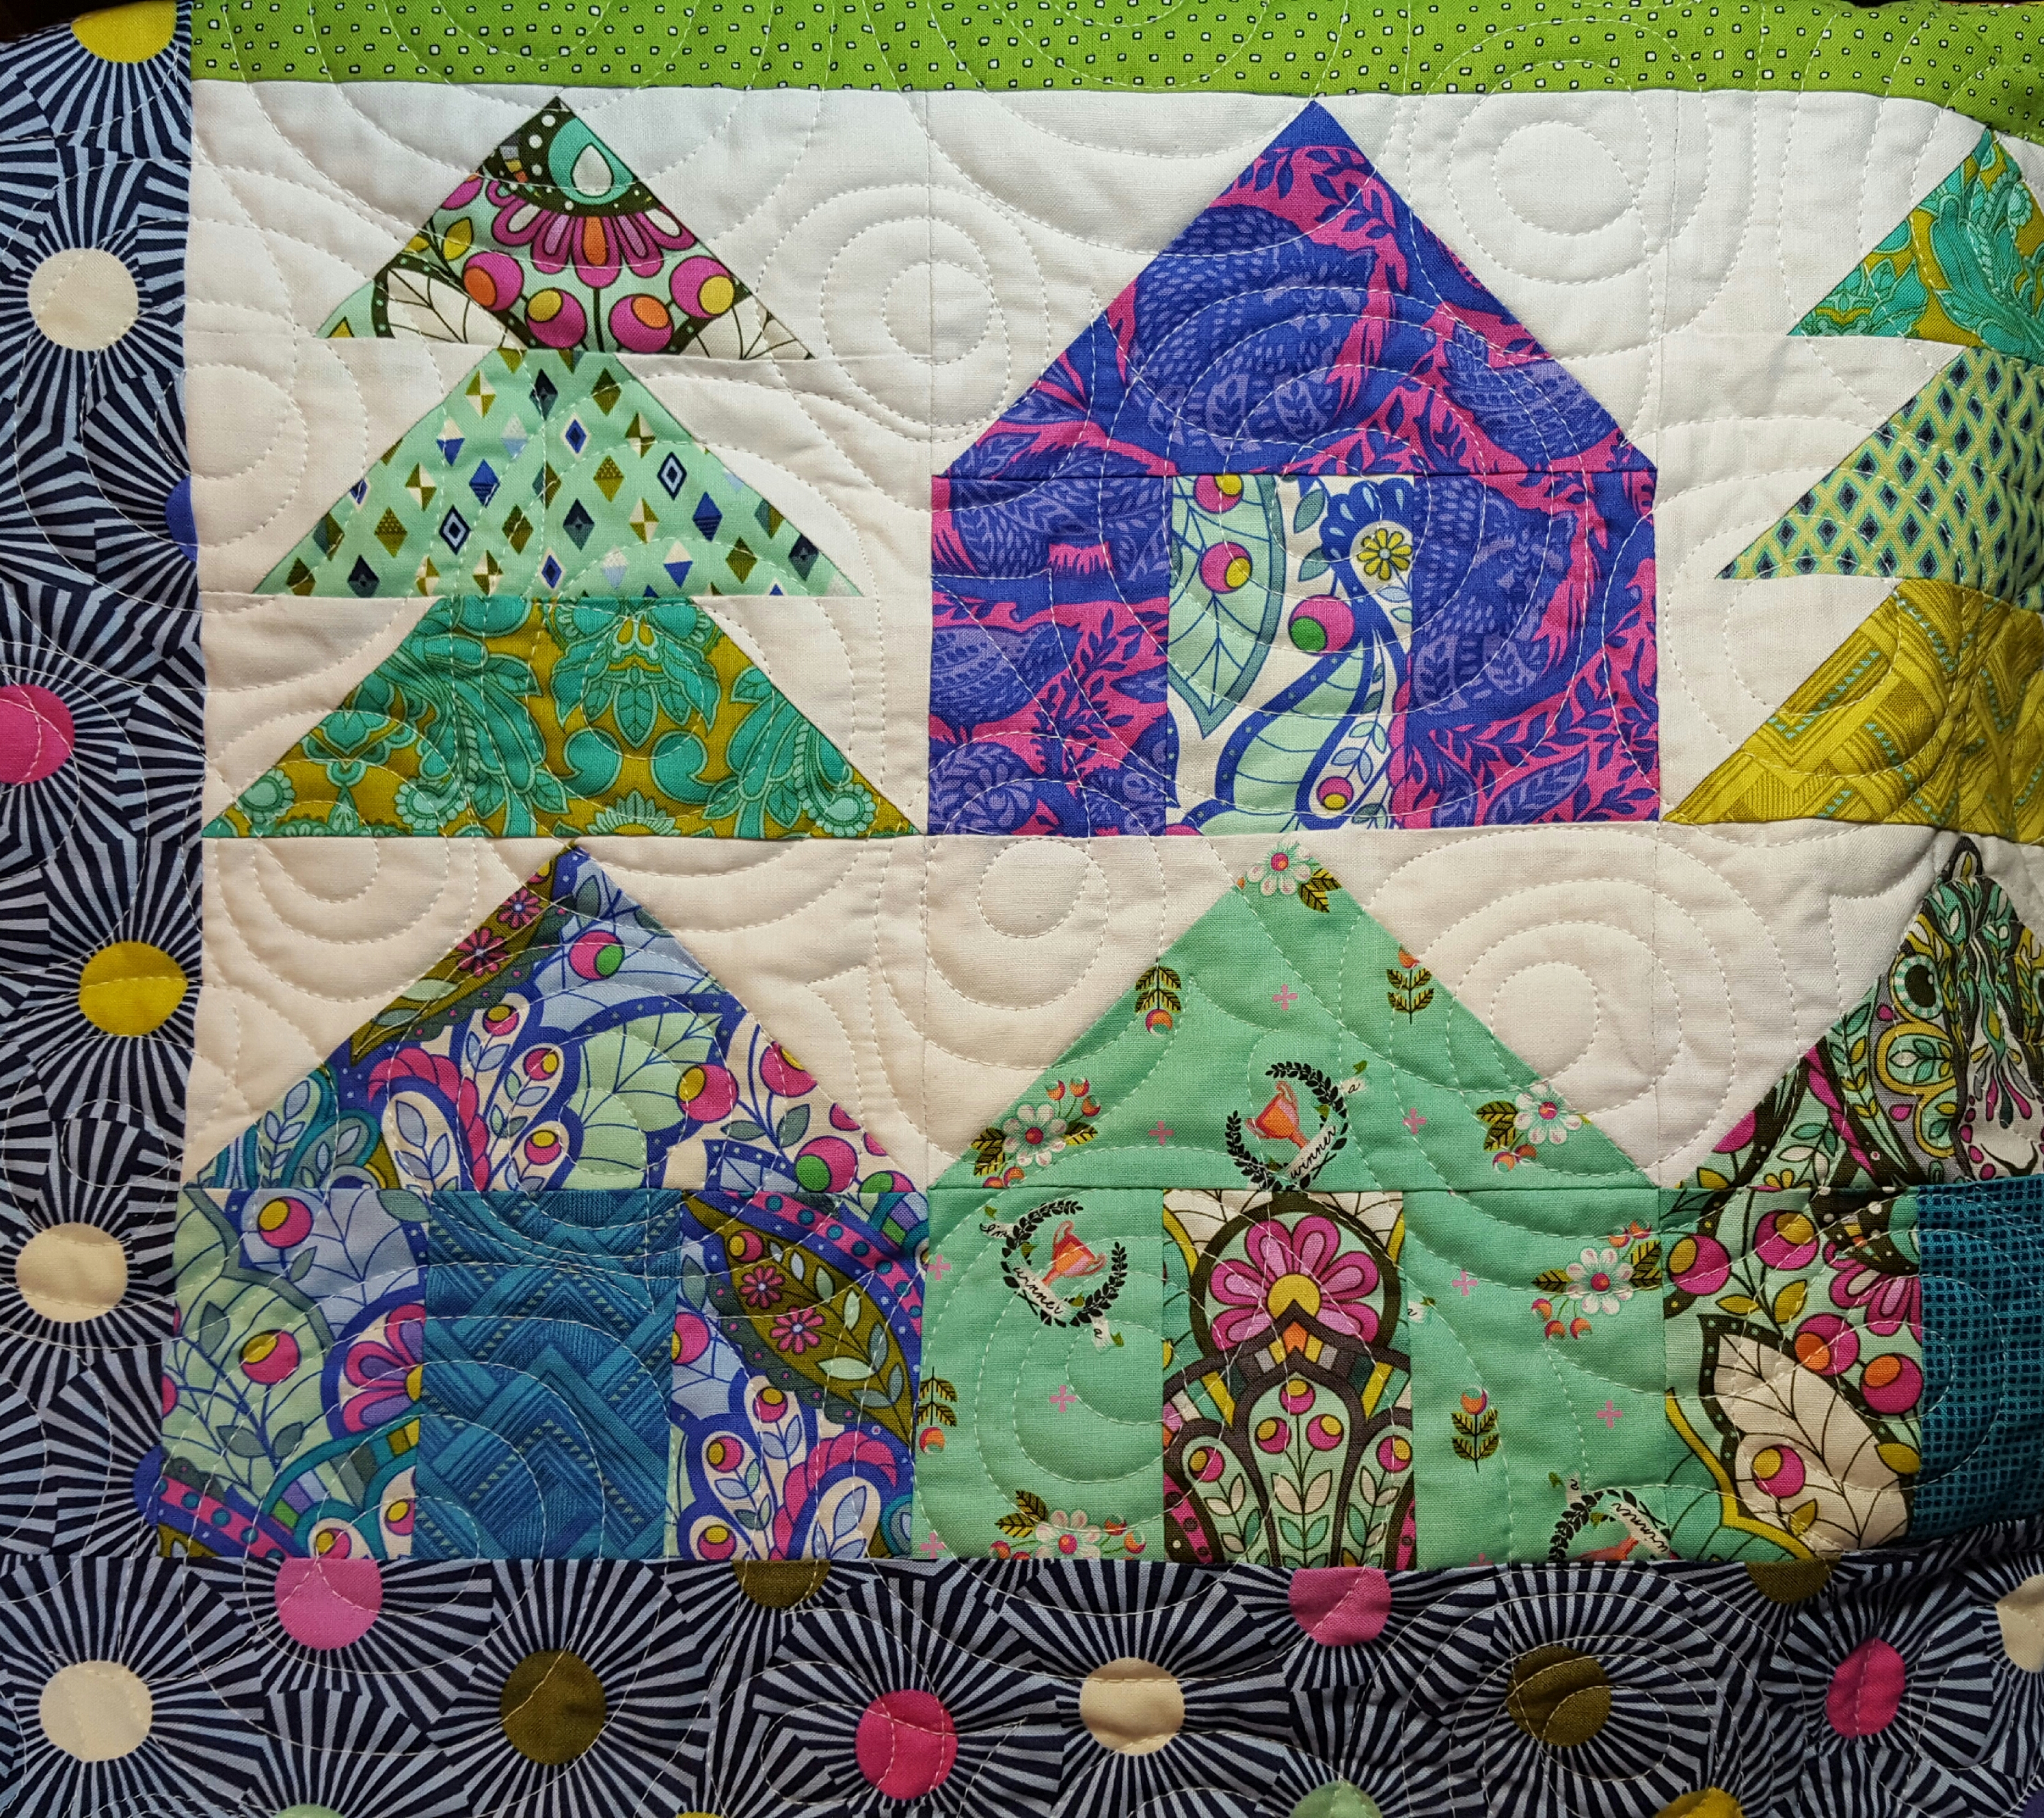
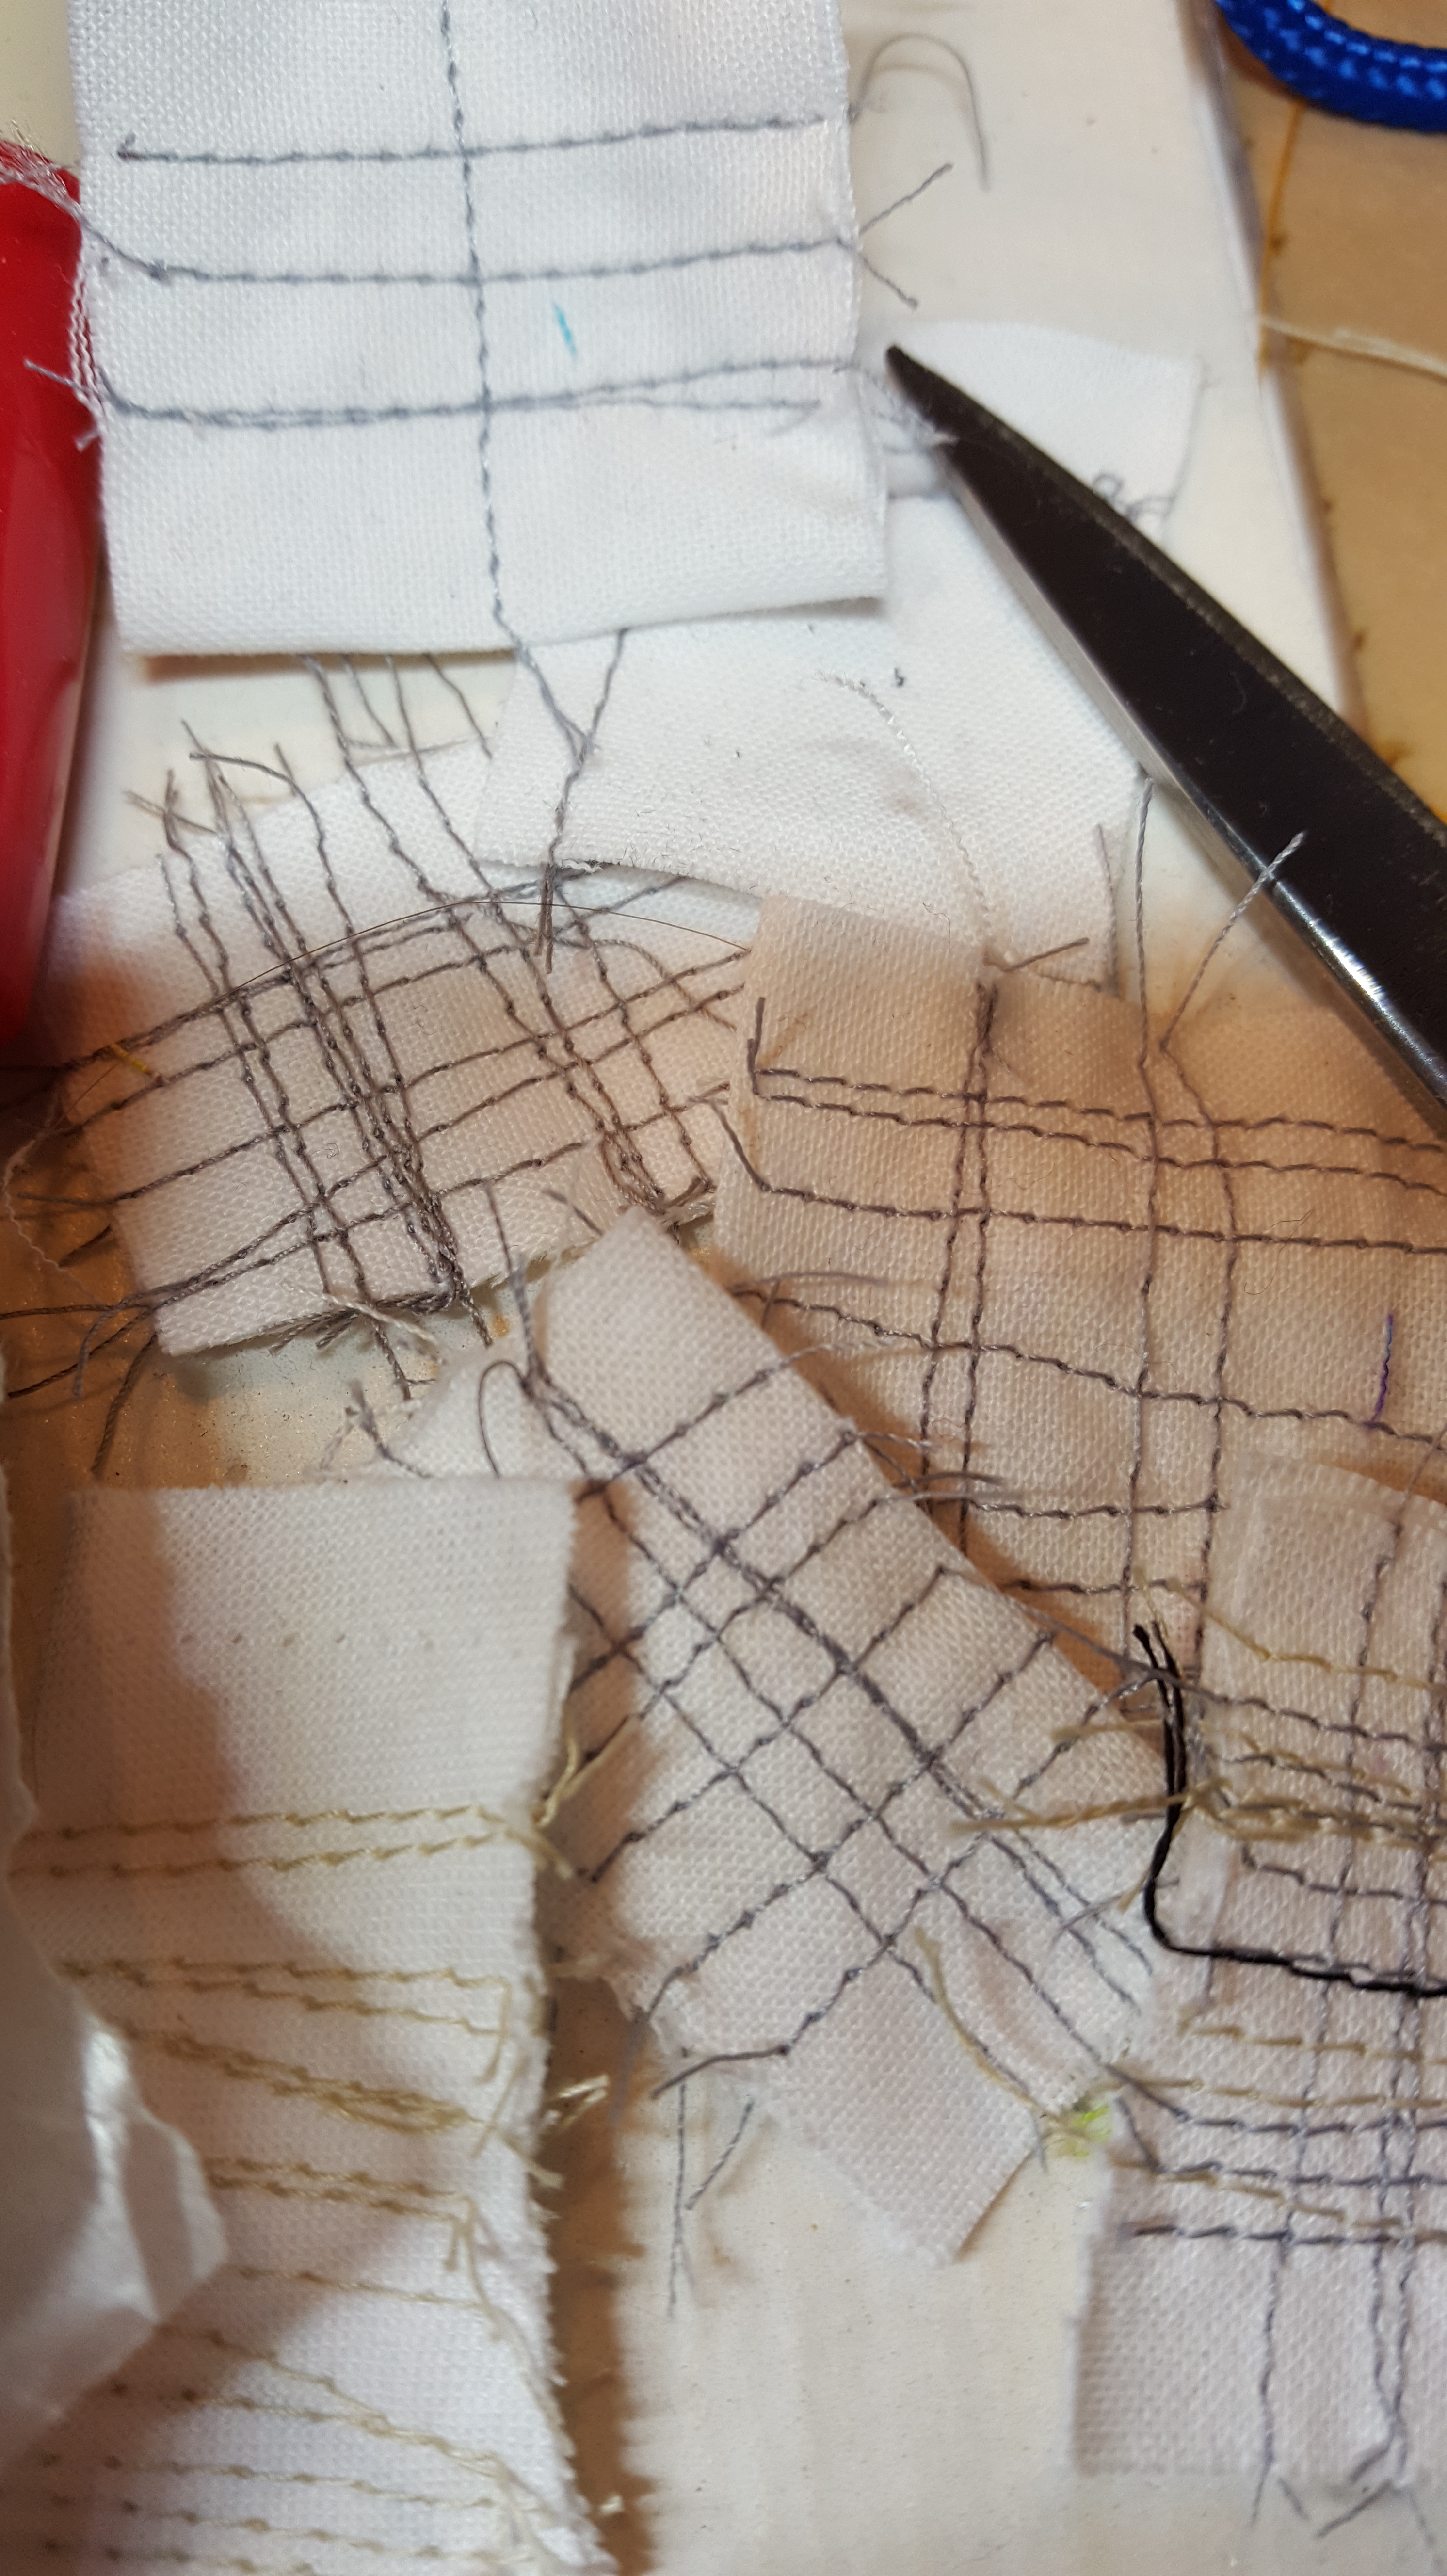
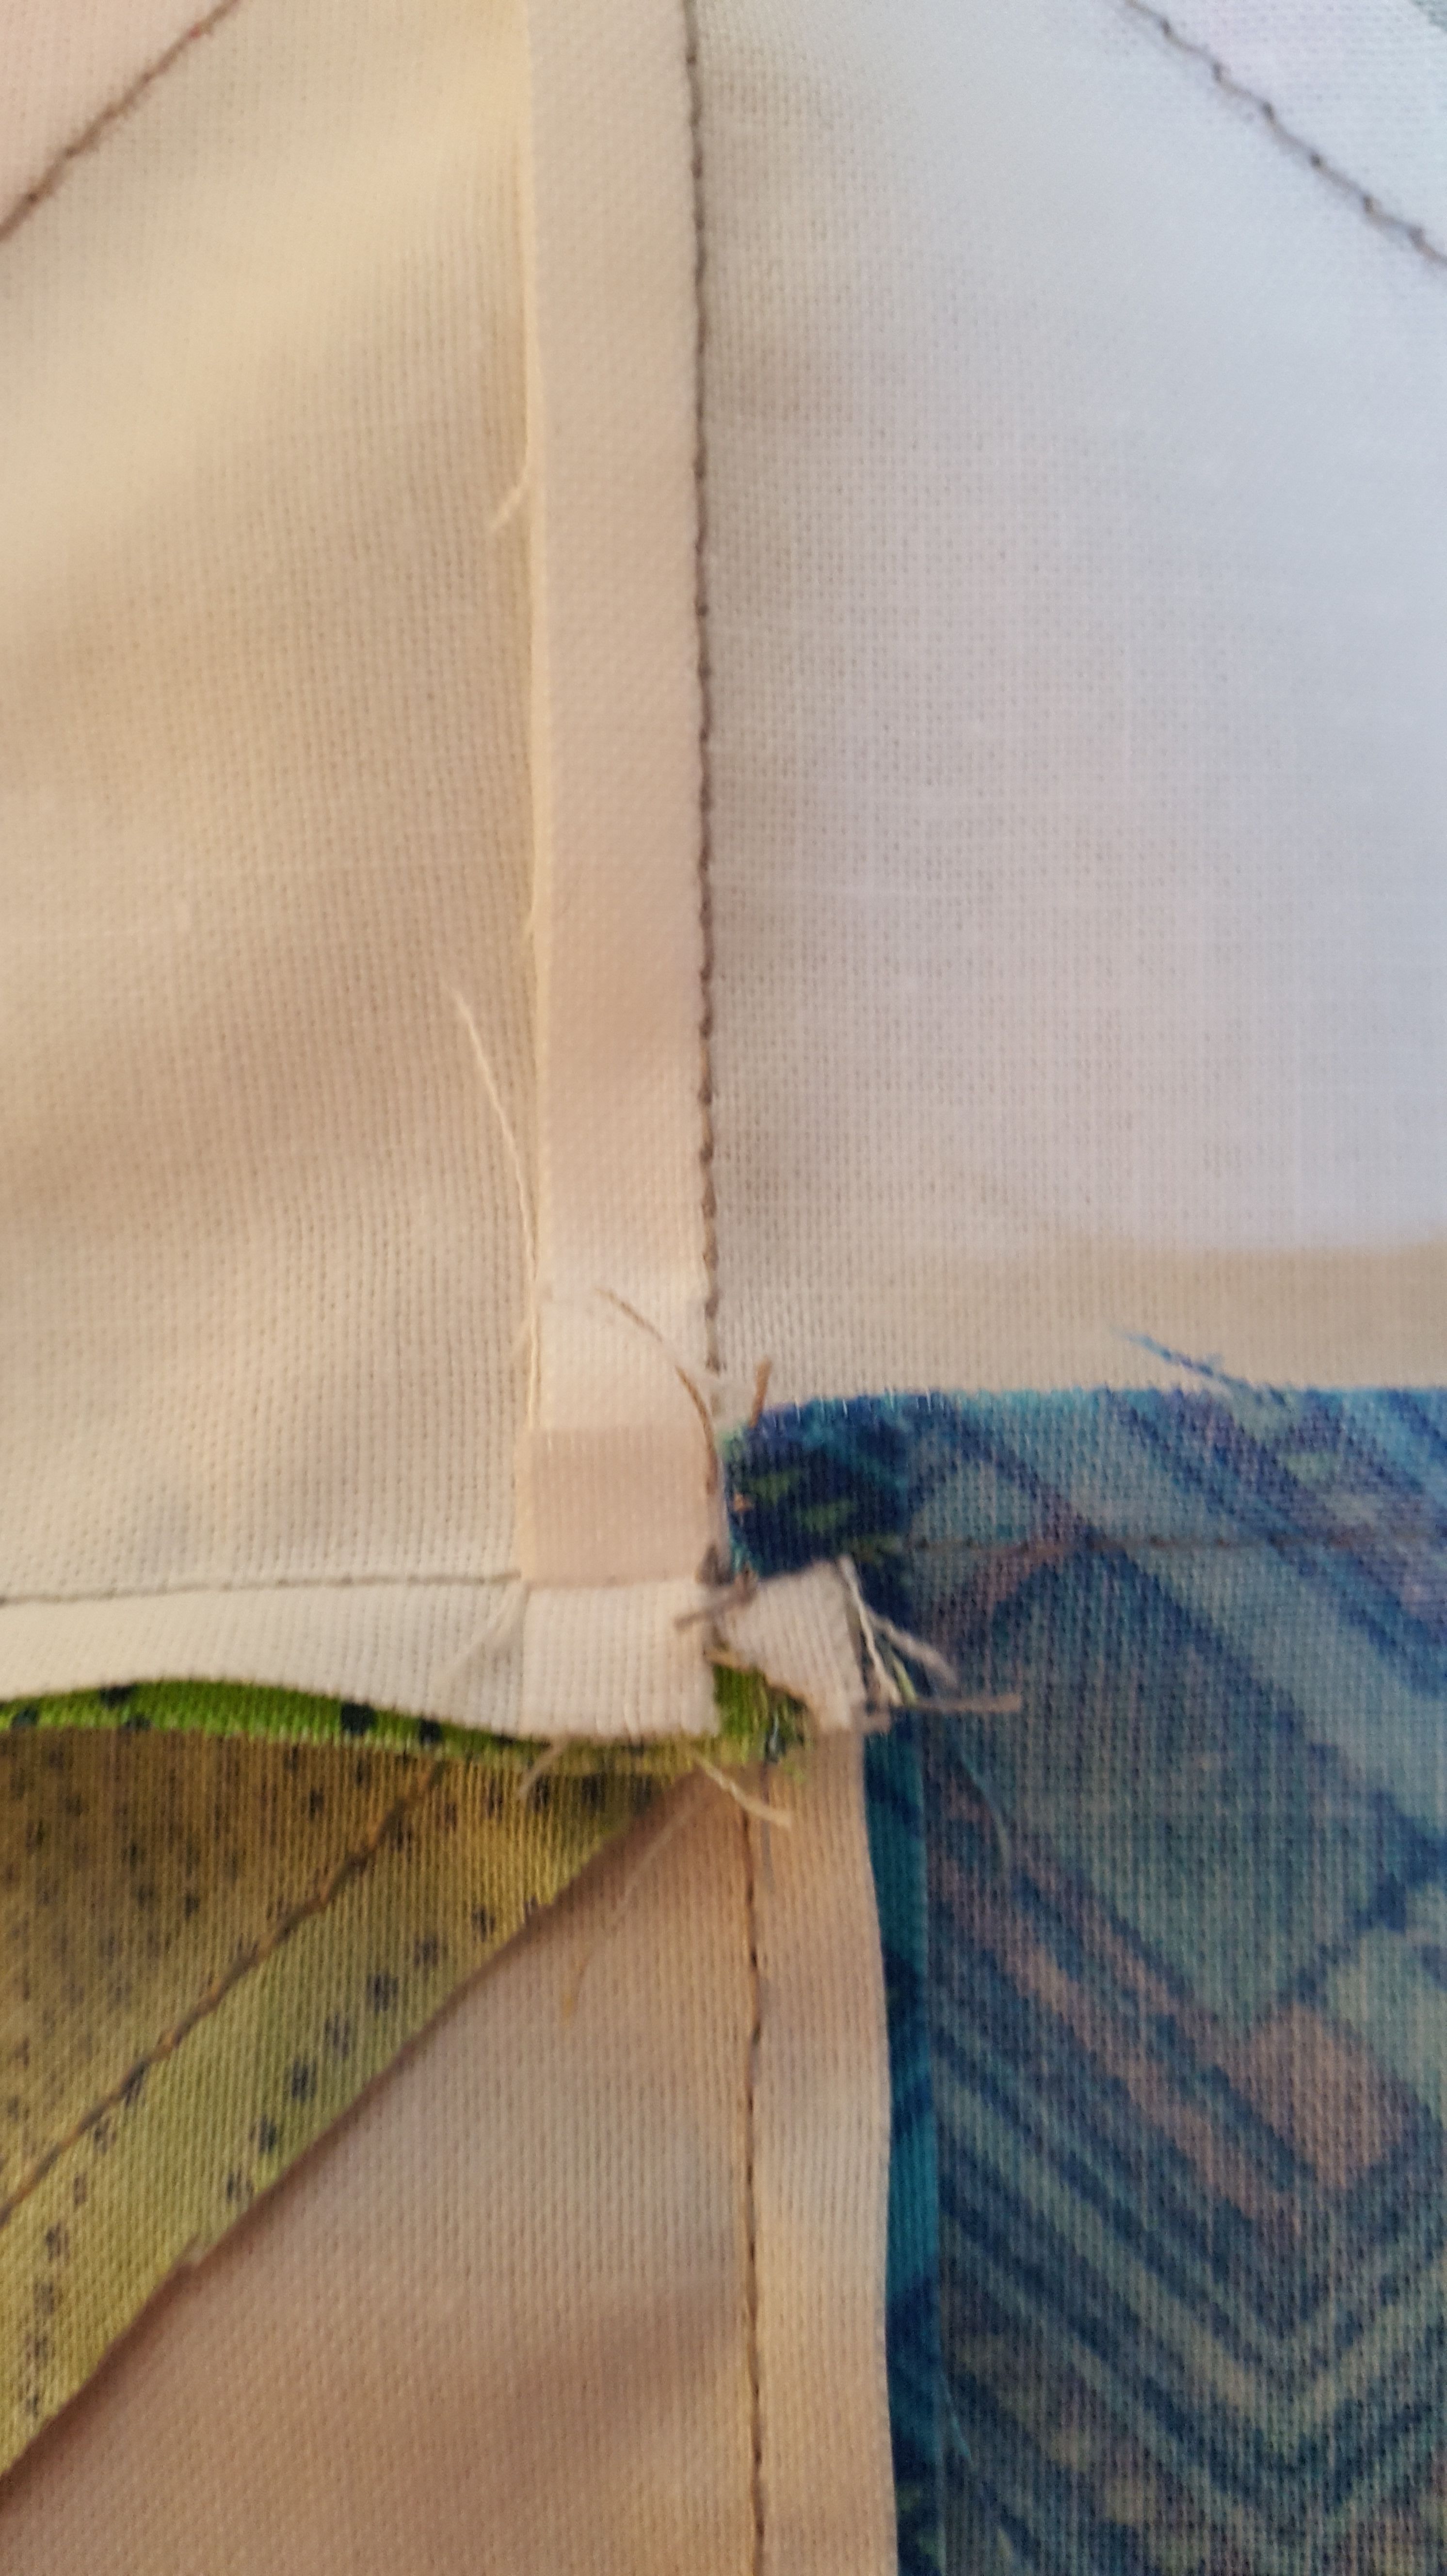
#3- This next photo shows how the seam will look after it has been sewn.  The top edges are in a nice straight line.  (Don’t worry about the outside edge of the purple piece.  On the placemats, they will be trimmed once all seams are sewn.  (And these are the scraps that were hand on my cutting mat!)

I’m happy to clarify this step.  This is one of the steps that is also very important in sewing binding!


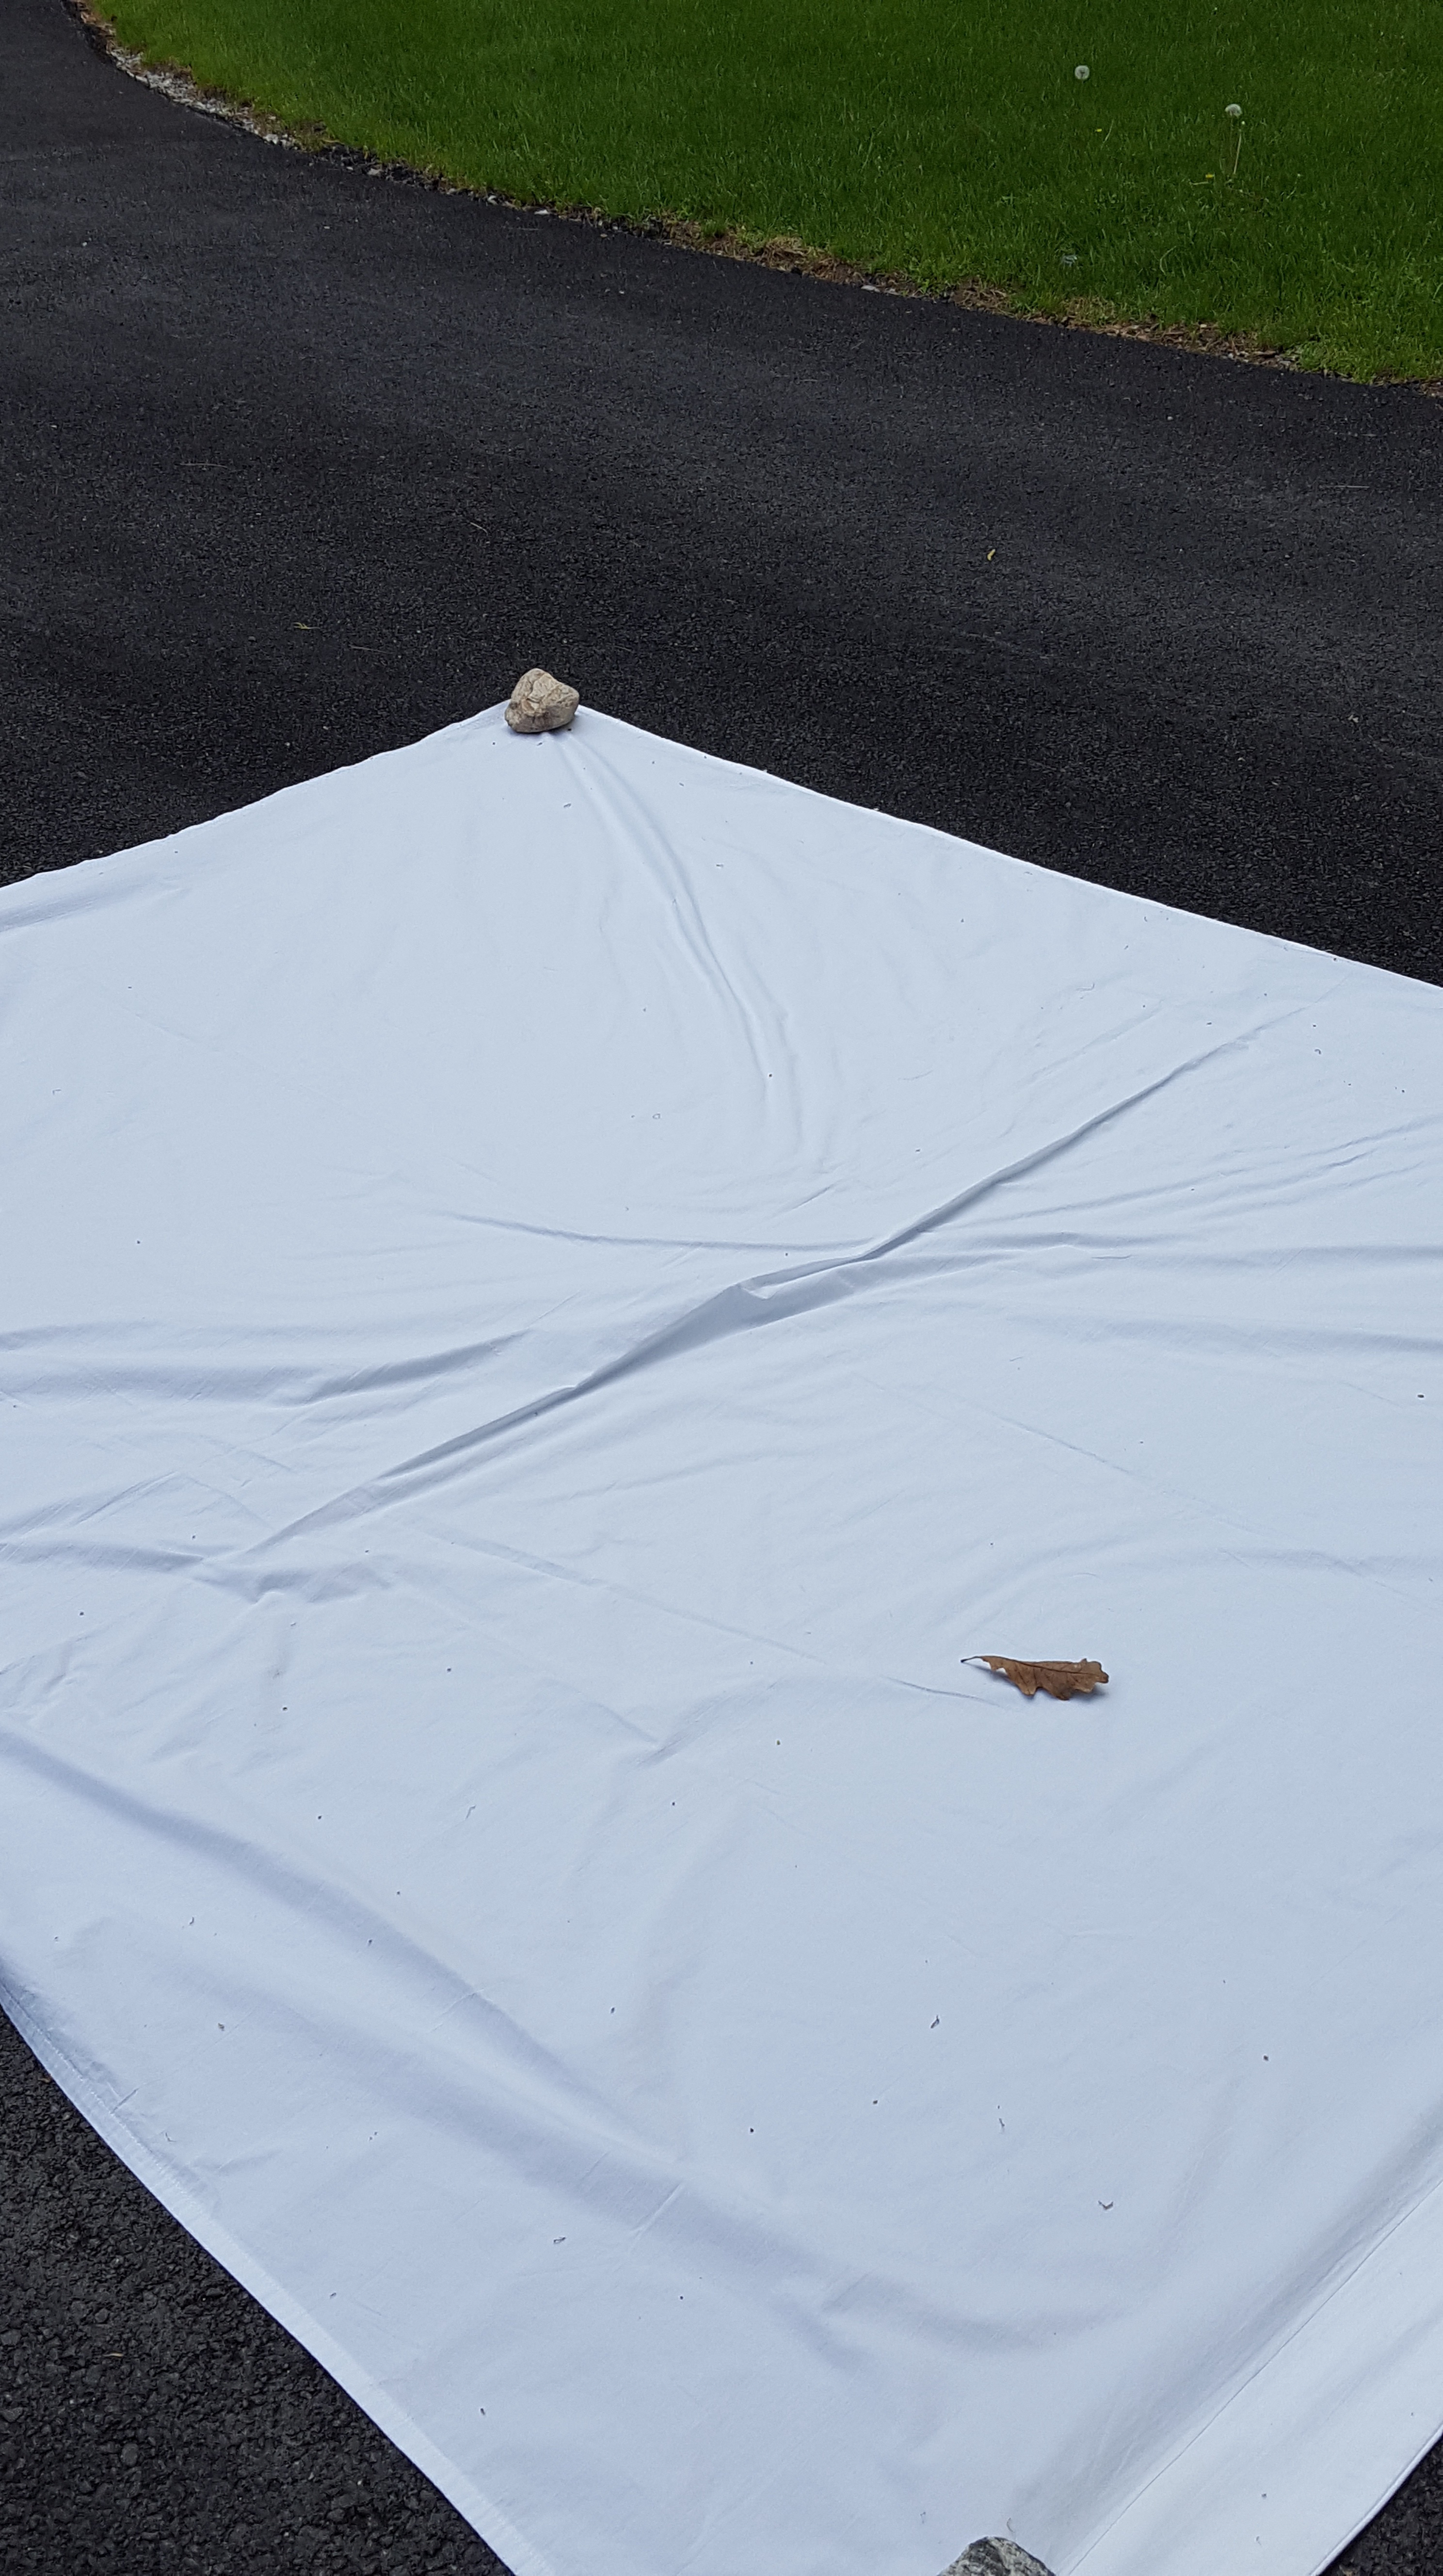
Look at the awesome contrails that were in the sky yesterday.  I don’t think I’ve ever seen this many at once!  I even saw three jets crisscrossing the existing contrails…wow!  Sometimes it is good to stop and look upward!  Catch the inspiration of simple lines in the sky!

in quilting,

Debbie

Posted in Tips, Uncategorized | Leave a comment

Two Tip Tuesday – Ties

So what would you do if you saw an email giving away men’s neckties?  Yep, you say…”sure I’ll take them!”  Well, maybe you wouldn’t, but I sure did.  Look at the box I scored!  And they are mostly open, insides removed and washed!  Score again!  Ready to cut and sew.

18″ x 24″ box of ties

Neckties!


So my tip…

#1- answer the call for free fabric, even if it is in the form of neckties….SCORE!

Look at all that useable fabric.  The one shown below is 9″ at the widest and half is about 24″.  And most of them are silk!  NOW, what to do with them?  I’ve always wanted to make a quilt incorporating ties.  Here is my chance without having to buy a single tie.  I’ve agreed to teach a class on neckties for the Blackstone Heritage Quilters Guild next season.   I’ll probably have enough for the entire class.  Well, not enough for each to make a quilt, but at least enough for a project.  Check back this fall to see what we will make.

Opened necktie

Have you made a necktie quilt?  I’d love to hear about them in the comments!  Some ties are just boring or plain ugly but most have some great pattern and designs hidden in them.  I think I might have to troll “Pinterest”.  There goes a few more hours of my day.  (Just staying cool in the AC!)

If you use ties that are of different fabric types…and because most are silk…it is best to stabilize them or sew them onto a foundation.  A foundation can be as simple as a piece of muslin.

#2- Sew ties onto a foundation for stability.


Now, to change subjects for a minute…  Beth Helfter of Eva Paige Quilt Designs is the headquarters and brains behind the ” Teal Mini Swap”.  Monies raised will go to the Ovarian Cancer Research Foundation and Alliance.  Sign ups (registration) opens July 25th.  Check out her website for full details.  And there is also a Facebook page.  I participated last year and enjoyed meeting my swap partner in Kansas.  (So close to my “hometown”!).  I hope you will consider joining.  Last year over $6,000 was sent to OCRFA!!  Ya never know, we could be partners.

in quilting,

Debbie

Posted in Neckties, Teal Mini Swap, Tips, Uncategorized | Leave a comment

Two Tip Tuesday – missed on the 4th of July

The 4th of July was Tuesday and I missed getting up a post.  I hope those in the USA (or abroad…we always had a wonderful 4th celebration in Cairo) had a wonderful time celebrating our nations birthday with family and friends!  I /we had a great day with our friends that are our FAMILY here in Massachusetts!  My favorite part of the meal was our red/white/blue dessert!


The Minarda in the yard is blooming for the RED (and attracts hummingbirds)!  With the BLUE in my yard leaning toward the violet spectrum.  Well, it looks blue from across the yard.


I love a RWB quilt!  I love the color combination as well as the symbolism for our nations strength.  My R-W-B Boise is so simple to make!  You can find it in patterns on my website.  wendtquilting.com

R-W-B Boise

Have you made a RWB quilt?  Did you keep it or give it to a soldier?  I have given away several over the years.  I encourage you to make a Quilt of Valor!  Our service men and women and veterans are so VERY deserving.

#1- When using a variety of blues, don’t be afraid of them not being “matchy- matchy”.  From navy to royal blue to bright.  It adds GREAT variety and interest.

#2- Same goes for reds!  From burgundy to red to orangey red.  Mix them up!  If one is screaming at you, then pull it out and save it for another project.

in quilting,

Debbie

Posted in fabric, Patterns, Uncategorized | Leave a comment

Two Tip Tuesday – Summer Quilts

I had a successful, FUN trip to the Vermont Quilt Festival.  Great to see friends and quilts. It only took an extra 4 hours to get up there.  A couple quilt shops and Vermont Country Store were must do’s on the way!  And I followed my tip last week…I bought some fabric or made a purchase at each stop!

One of the highlights was going to the Shelburne Museum.  I knew they had quilts on display but did not realize how many old houses, buildings, artwork and even a train and paddle boat we could walk through.  (We didn’t walk through the artwork, but enjoyed it just the same.)

Take a look at my two favorites below!  Be sure to read the bit about “turkey red”.

Appliqué and Pieced Mexican Rose 1850
Shelburne Museum

Appliqué and Pieced Coxcomb Pomegranate 1850-70
Shelburne Museum


LOVE the border on only two sides!  My guess is the bed the quilt was made for was against a wall.  What do you think?  Who ever said it has to be on all sides?!?


Lets talk summer quilts… What batting will you use?  Or no batting?  I’m trying a “washable wool” by “Quilter’s Dream Batting” for the first time.  It is nice, light and thin.  It has some loft when it is quilted.  My go to favorite is 100% Bamboo by “Winline.”  I love how thin and light it is.  Great hand and washes to a soft drapy quilt.   How about using flannel?  It will be light and super thin.  Old time summer quilts often didn’t even have batting.  A top and back, that was it.

#1- Try different battings a for the effect you want.

#2- To keep it real cool, don’t use any batting!

Tonight we had a great thunderstorm.  Rumbles!!  And a beautiful rainbow that turned into a double (my camera barely shows it).

Double Rainbow 6/27/17 D.W.

in quilting,

Debbie

Posted in Uncategorized | Leave a comment

Two Tip Tuesday – Summer

Summertime and what are your quilting plans?  Do you have any?  As I mentioned last week I am the featured designer over at Patchwork Posse.  I think my “Won’t You Be…” quilt would be a great summer project!  You could collect fabrics as you travel and then make a quilt to remember the shops you visited and fun you had along the way.

#1- Buy a piece of fabric from every shop you visit the summer!  Make it worth the stop and fun to remember where you have been.

Are you doing the Row by Row this summer?  It starts tomorrow, June 21st!  The theme is “On the Go”.  So, I’m GOing tomorrow to start collecting!  Not sure I will make a quilt, but I love collecting the patterns!  Then I’m looking forward to heading to Vermont for the Vermont Quilt Festival this weekend.  I’m not vending, so I’m looking forward to actually seeing a show!!

My next project is waiting to be quilted.  So the batting is relaxing.  Yep! Relaxing.  I don’t want any fold lines in the batting when I start.  I lay the batting over the frame so it can relax.

#2- Let you batting relax to remove the fold lines.

I could fluff it in the dryer but usually let it rest.  It doesn’t take more than a few hours, but mine has been sitting for a few days…..so I better get to quilting!

GO, sew, collect and quilt!

And stay cool!

in quilting,

Debbie

Posted in Batting, fabric, guest designer | Leave a comment

Two Tip Tuesday – Featured designer for Patchwork Posse

It is posted on Patchwork Posse!!!!  I can show the quilt!  See below!  Becky Jorgensen is the owner and chose me to be one of her guest designer this year.  June is MY month to be featured on her blog.  I was asked to design a pattern for the members of herIAQ.com group.  You can find it through. Patchwork posse.com The pattern is available for free only to the members.  It is a very educational blog and group with a ton of resources!  You can listen to my interview with Becky and read a bit about me and my business on the blog.  The quilt below is what I designed for the event!  I love showing off fabrics in simple pieced blocks.  I think “Won’t You Be…” Quilt does just that.

“Won’t You Be…”

I hope you will go take a look and enjoy!

Thanks for following me in my quilting journey!

Now On to two tips . . .


There is a sashing (grass)  between the houses rows.  To make sure the blocks line up vertically in the quilt, I am careful to align the seams.  I place a pin at all the block seams before I add the next row of houses.  Then, you can easily see where to line up the row!  Photo is of pin on seam.  The next row is added above the sashing in this photo.

#1- Mark sashing with pins before it is pressed to easily find where to line up the next row.

Marking seam line with pin.

It is easier to work with the quilt in two halves.  Then sew the two halves together.  If you start at the top and work all the way down, you are dealing with most of the weight of the quilt for the last several seams.  So, by doing each half, you only are working with the full weight once for the center seam of the quilt!  The photo of the sashing is at the top of a row.  I worked from the bottom up for the second half of the quilt.  Then I sewed the two halves to make the whole!

#2- Work with a quilt in sections.  As described above, I sewed each half of the quilt.  Then into whole center!  This helps to deal with less weight until the final center seam!

in quilting,

Debbie

Posted in fabric, guest designer, Piecing, Uncategorized | Leave a comment

Two Tip Tuesday – “I Am AQS”

The American Quilter magazine July issue arrived yesterday!!!  And there it was…on the first page if you start from the back…

American Quilter – July 2017

I’m so proud and excited to be chosen for the article.  If you are not an AQS member and want a copy, you can find the information on their website, AmericanQuilter.com.  As the article says, I’ve been a member for most of the at last 30 years.  This issue has the winners from Spring Paducah Quilt Week and Lancaster.  Quite a lot of eye candy!!

Last week I promised the photo of the finished quilt for the International Quilters Association blog….well, it doesn’t get posted until tomorrow so I will wait for the reveal there before I show you here.  But, I’ll give you a sneak peak at one of the blocks in the quilt below!  For those of you who participated in Block Stock this year, you might recognize the block.  I’m excited how the quilt turned out.  Stay tuned!

“Won’t You Be…” block

In sewing the above mentioned quilt, I had a BUNCH of cut off corners when I made the units.  So, I used them as Starters and Enders!  Now, I have a bunch of half squares to use in another project!  Much better than having a bunch of pieces that will only be thrown away.  Checkout the piles below…what usually is the starters and Enders vs. sewn half squares ready to press, trim and use!


#1- Use cut off triangles as Starters and Enders to make half squares!

Half Squares sewn…more useful!

Usual Starters and Enders


One of the questions I am asked a lot is “How and where do I unpick stitches in the middle of a seam to have that seam change directions?”  This will be my second tip for today!

#2 – Opposing seams in the center of a block.  Some say to twirl the seam.  See photos and instructions below!

Crossed seam stitches.
Only unpick first two
stitches in seam allowance
in green fabric

Seam on opposite side
only unpick two stitches


Open seams of unpicked
stitches. See some still
holding on.

Press open
Seam on left going down
Seam on right goin up


in quilting,

Debbie

Posted in Uncategorized | Leave a comment

Two Tip Tuesday – missed weeks

Well, hello again!  It has been a bit hectic with Quilt Market…see booth photos below…my Wendt Quilting booth and my new “By The Numbers” quilts and patterns in the “By The Numbers” booth!

Wendt Quilting

Wendt Quilting


BTN

BTN


…also busy with….the return and getting ready to be the featured designer on iaquilters.com.  I’m almost set with showing the quilt that will be the free pattern from me.  I will post when it is done.

In working on this quilt, I’m drawing sewing lines.  Yes, I still draw lines.  I prefer them to several other methods out there.  Why?  Accuracy, simple (no gadgets), and quick to execute.  All you need is your cut pieces, a pencil and ruler.  A few tips on what makes this fly for me…

#1- use a pencil with a soft lead.  My favorite is shown below.  PaperMate.  I’ve been using this particular brand and exact one for years.  Still glides the best over your fabric!

#2- Hold the pencil at an angle as you drag it along the ruler for a smooth ride over the fabric.

#3- Go ahead and draw your second line to sew on for making a half square triangle with the extra cut off corners.  Use the extra triangles to make add to your project, add to your stash or create a pillow, dresser scarf or table runner with the leftovers!


Tune in next week for the results!

AND are you an AQS member?  Check out the “first page when starting at the back” of the July American Quilter magazine.  I’m the featured “I am AQS” member!!  It was such an honor to be chosen!  And I had a lot of fun telling my story!  Look for me there!

Debbie Wendt
Photo by Bonnie McCaffery

in quilting,

Debbie

Posted in Uncategorized | 1 Comment

Two Tip Tuesday – on Wednesday

Spring Quilt Market is next week and preparations had me running all yesterday.  Thus the day late!  Gina Zeleznok of Sturbridge Quilting and Sewing and I will have the “By The Numbers” booth#3209 and I’ll have my Wendt Quilting booth#3207.  Gina will also have her Grab ‘n Go Kits booth #3211.  She has some georgeous new designs!  I’ve decided to offer my “Wonderful Little World” pattern and foundations to shops.  I love the simplicity of the houses and trees!  I’ll put the photo below.  The houses finish to 3″… Cuteness!!

My LITTLE Wonderful World ~DW

Market prep includes a redo of my catalog.  I have to say, it is very rewarding seeing all my designs listed and pictured.  It reinforces my love of design!!  So, what about you?  Do you have photos off all the quilts you have made?  You should!!!  I know I’ve missed some of mine along the way.  I’ve said for years I need an album.  I even have one a friend made for me.  Time to get it filled up with photos!

#1- Take photos of your work!

How do you take photos?  Holding them up with so the quilt has feet?  Draped over furniture?  On a bed?  One way is to get the entire quilt.  I don’t  have floor space in my house to lay out a full quilt.  Time to improvise.  So, my driveway is big enough!  I put a sheet down, anchored with rocks and hung out a window above to get the “big” picture.  The problem with getting a good shot is trying not to skew the image.  Difficult!!  If possible…Get directly above the center, hold your camera flat (don’t tilt) and take the photo.  You can do the same upright using a quilt stand.  Close ups are also nice to show your quilting and beautiful piecing.

#2- Use a sheet on the ground to protect your quilt when taking photos.

Brilliant Ribbons


Did you know my “Shoo Fly Picnic” quilt has a drop cloth backpack pattern included?! Great for taking the quilt (or any quilt) to an outdoor event and protecting it from the ground.

Shoo Fly Picnic. D.W.

The winner of the Block Stock prize package is Evelyn W. of PA.  I’ll be emailing you!!!

in quilting,

Debbie

Posted in Uncategorized | Leave a comment

Two Tip Tuesday – thanks Paducah

It was GREAT to be in Paducah last week!  Thank you to all who stopped, visited and shopped!  I loved seeing friends, former students, sharing quilt photos and stories.  We had lots of laughs in my booth.  Even discussion on local wine, (teehee).  Check out Purple Toad Winery.  I’ve yet to get there but  have heard and tasted good things!

I did manage to get to Handcock’s of Paducah.  I love all the fabric they carry.  My favorite purchase was not any new items but old.  Take a look at this pillowcase.  Great appliqué inspiration!


Also, I got a couple pics of antique quilts.  First, a lone star and I love how they changed fabrics in the same position.  Still the same colors but completely different fabric.  Love that kind of inspiration!  The second is a Hexagon with back to front binding.  Great plaid backing!

#1- Use antique quilts for inspiration!

#2- Do you have an antique quilt that needs to be cleaned?  Be very gentle!  Try soaking in bath tub, spin out water in washing machine (no washing or agitation!  Just spin.) and lay flat on clean white sheet to dry.

Block Stock has come to a close.  I’ll announce my prize package winner next week.  Thank you to all who made a purchase during the Block Stock Hop!  I look forward to next year’s hop!!

in quilting,

Debbie

Posted in Uncategorized | Leave a comment