Two Tip Tuesday – Ohio Star Remix Reveal

The Ohio Star Remix Reveal was yesterday. I have several Ohio Star blocks made and in several variations (remixes!). The blocks will be a part of my next quilted coat. I am making another for a machine quilting class I’m teaching on Saturday. I’ll show my progress below. I’m still playing with placement and possibilities.

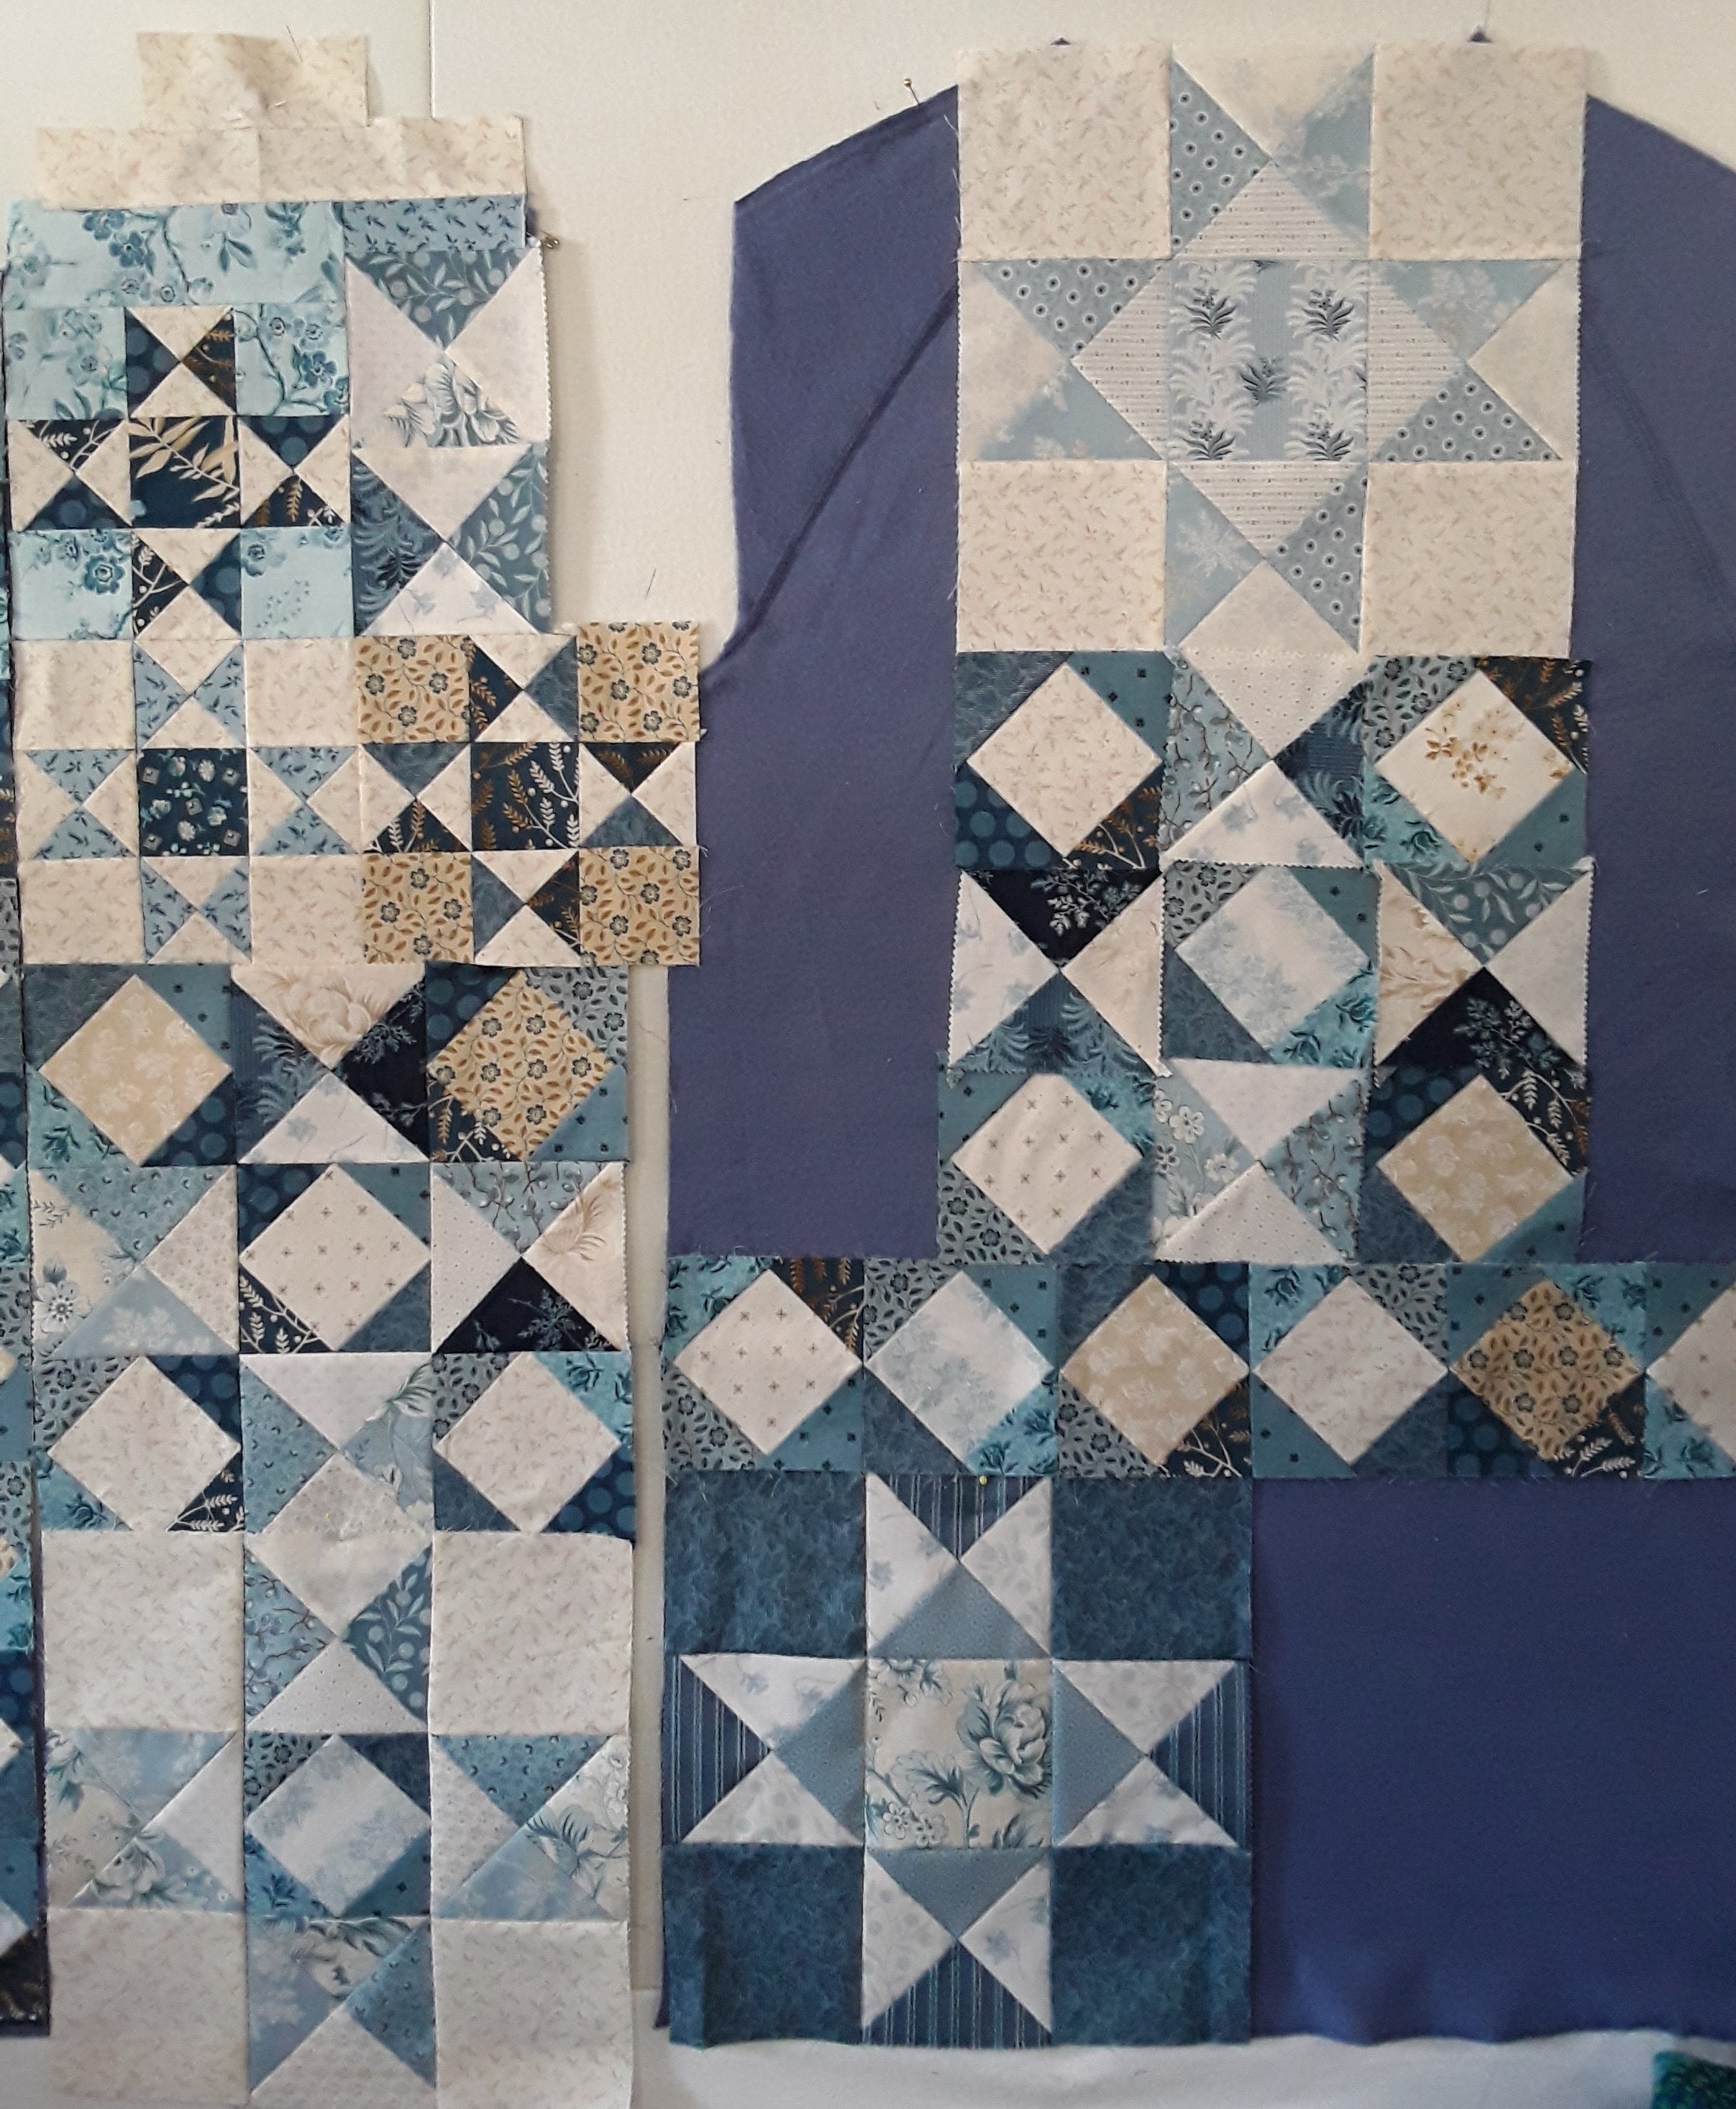
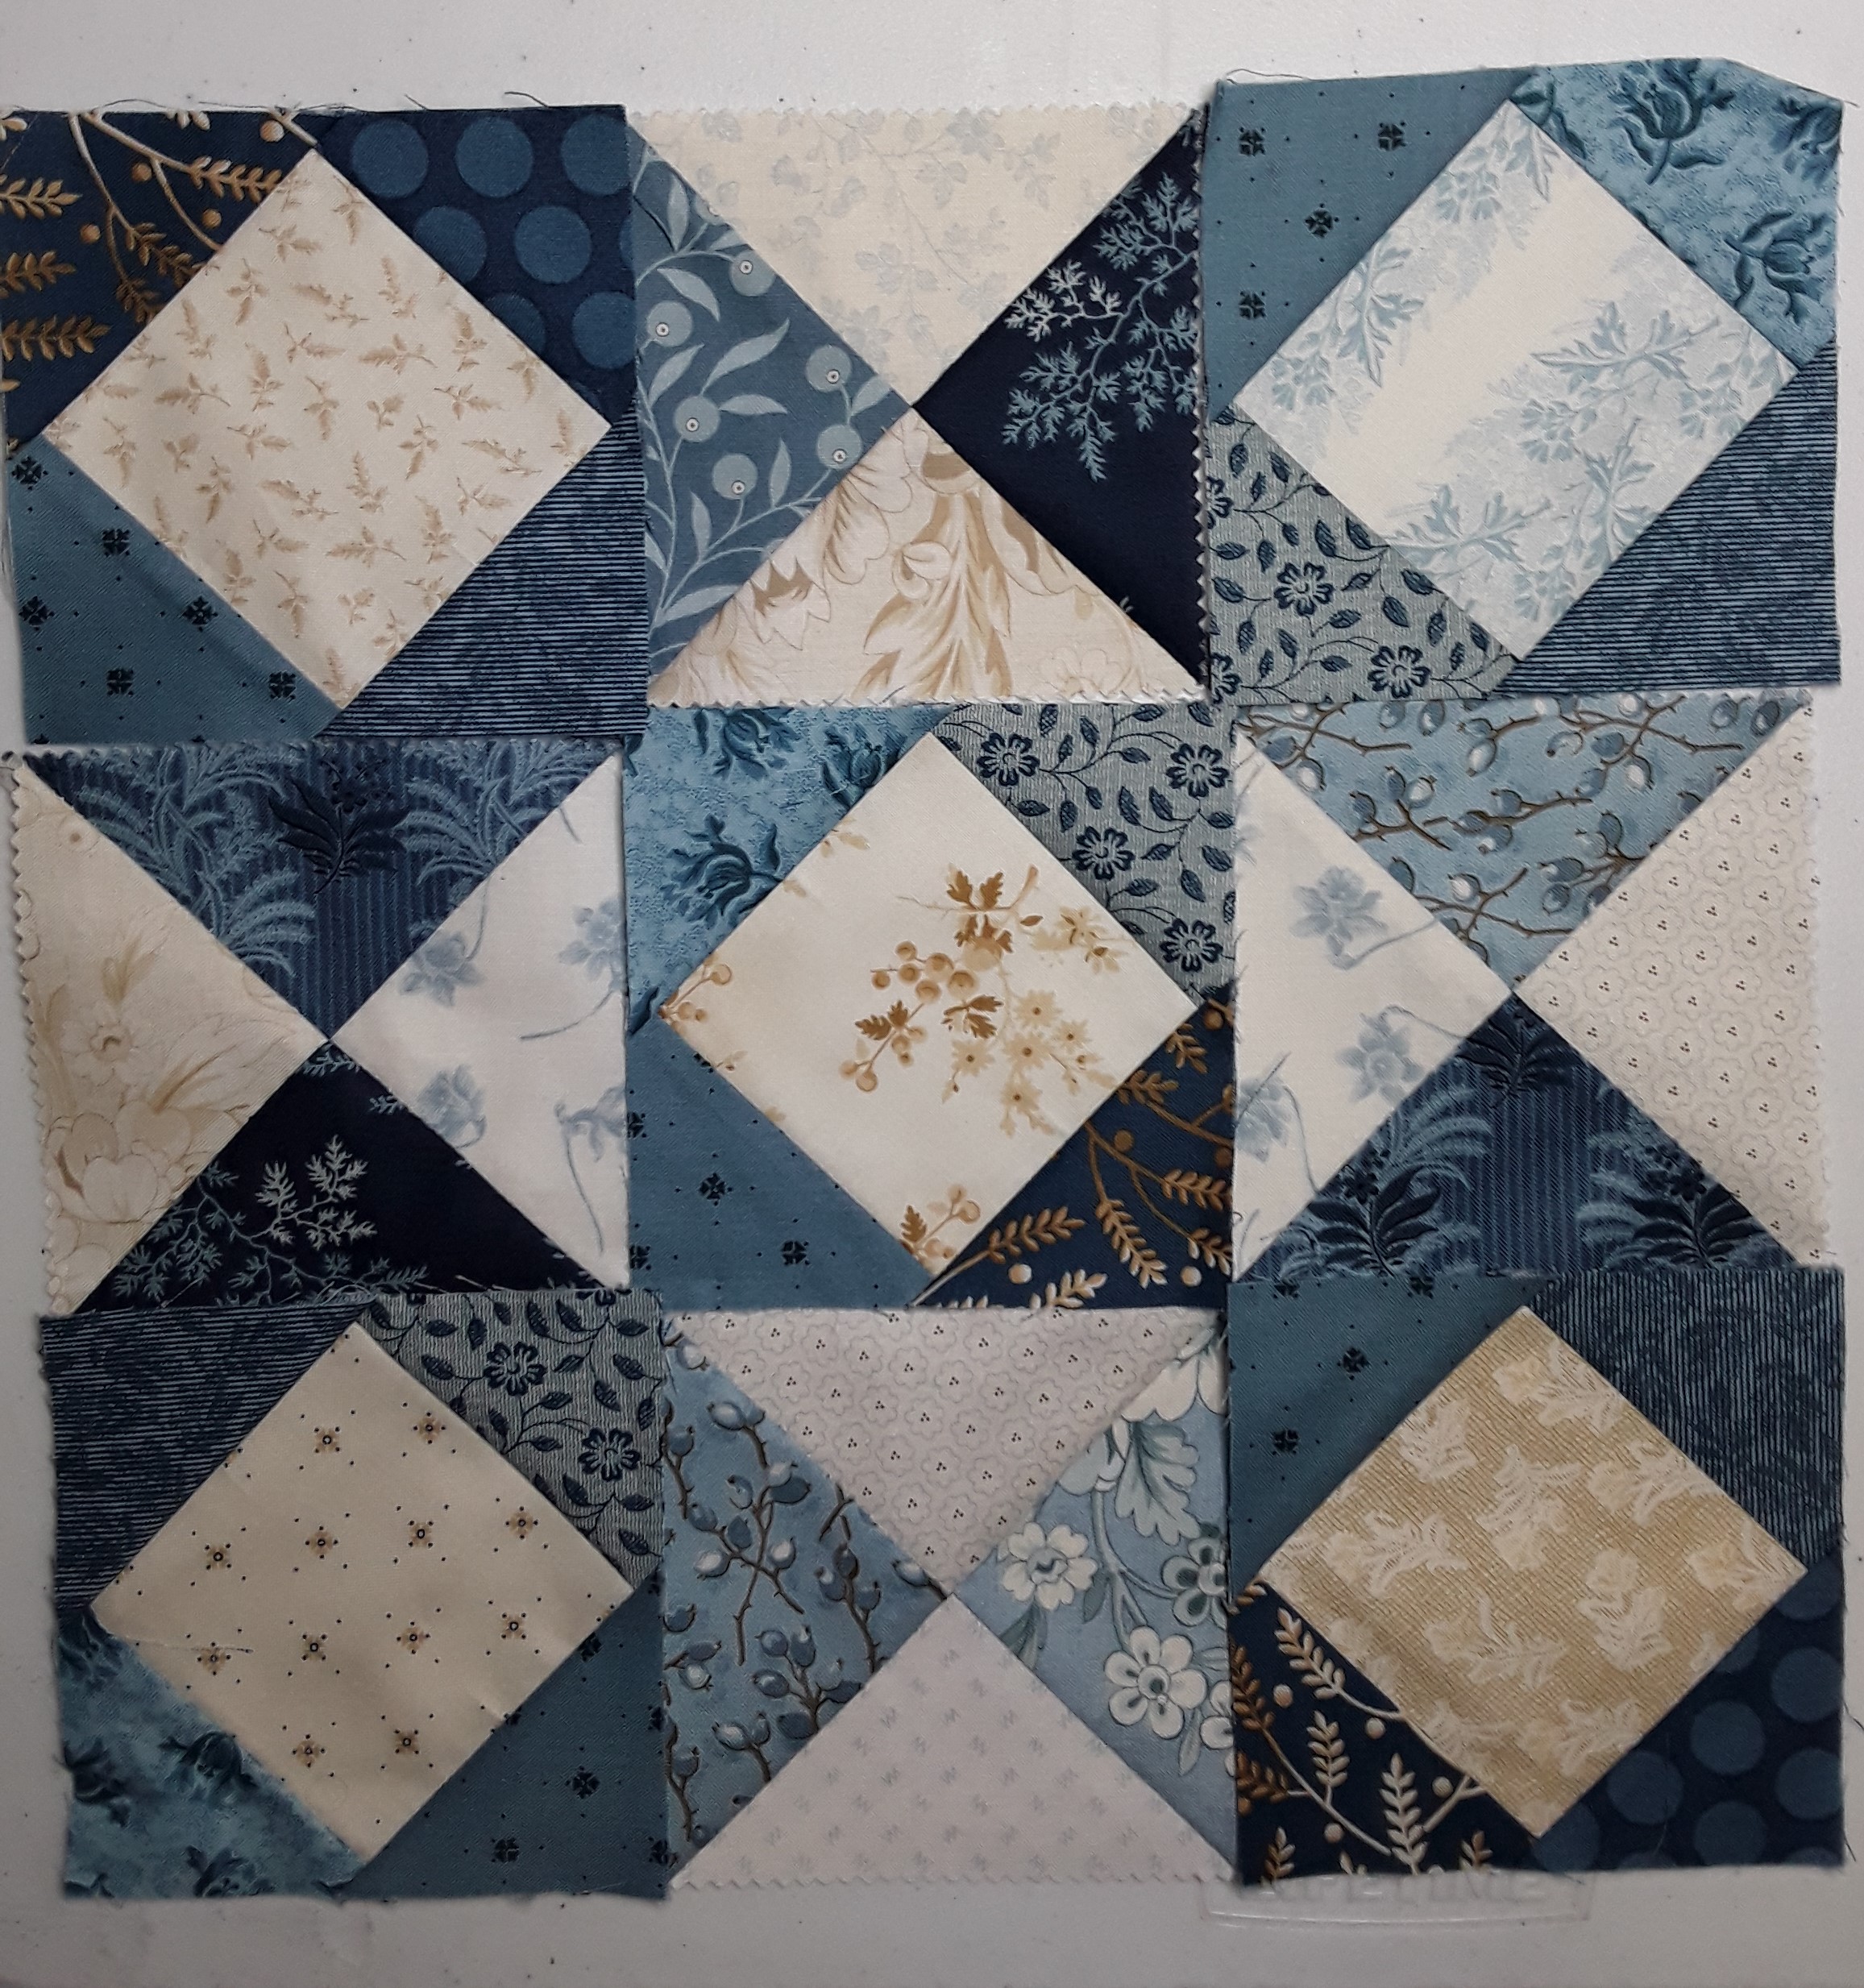
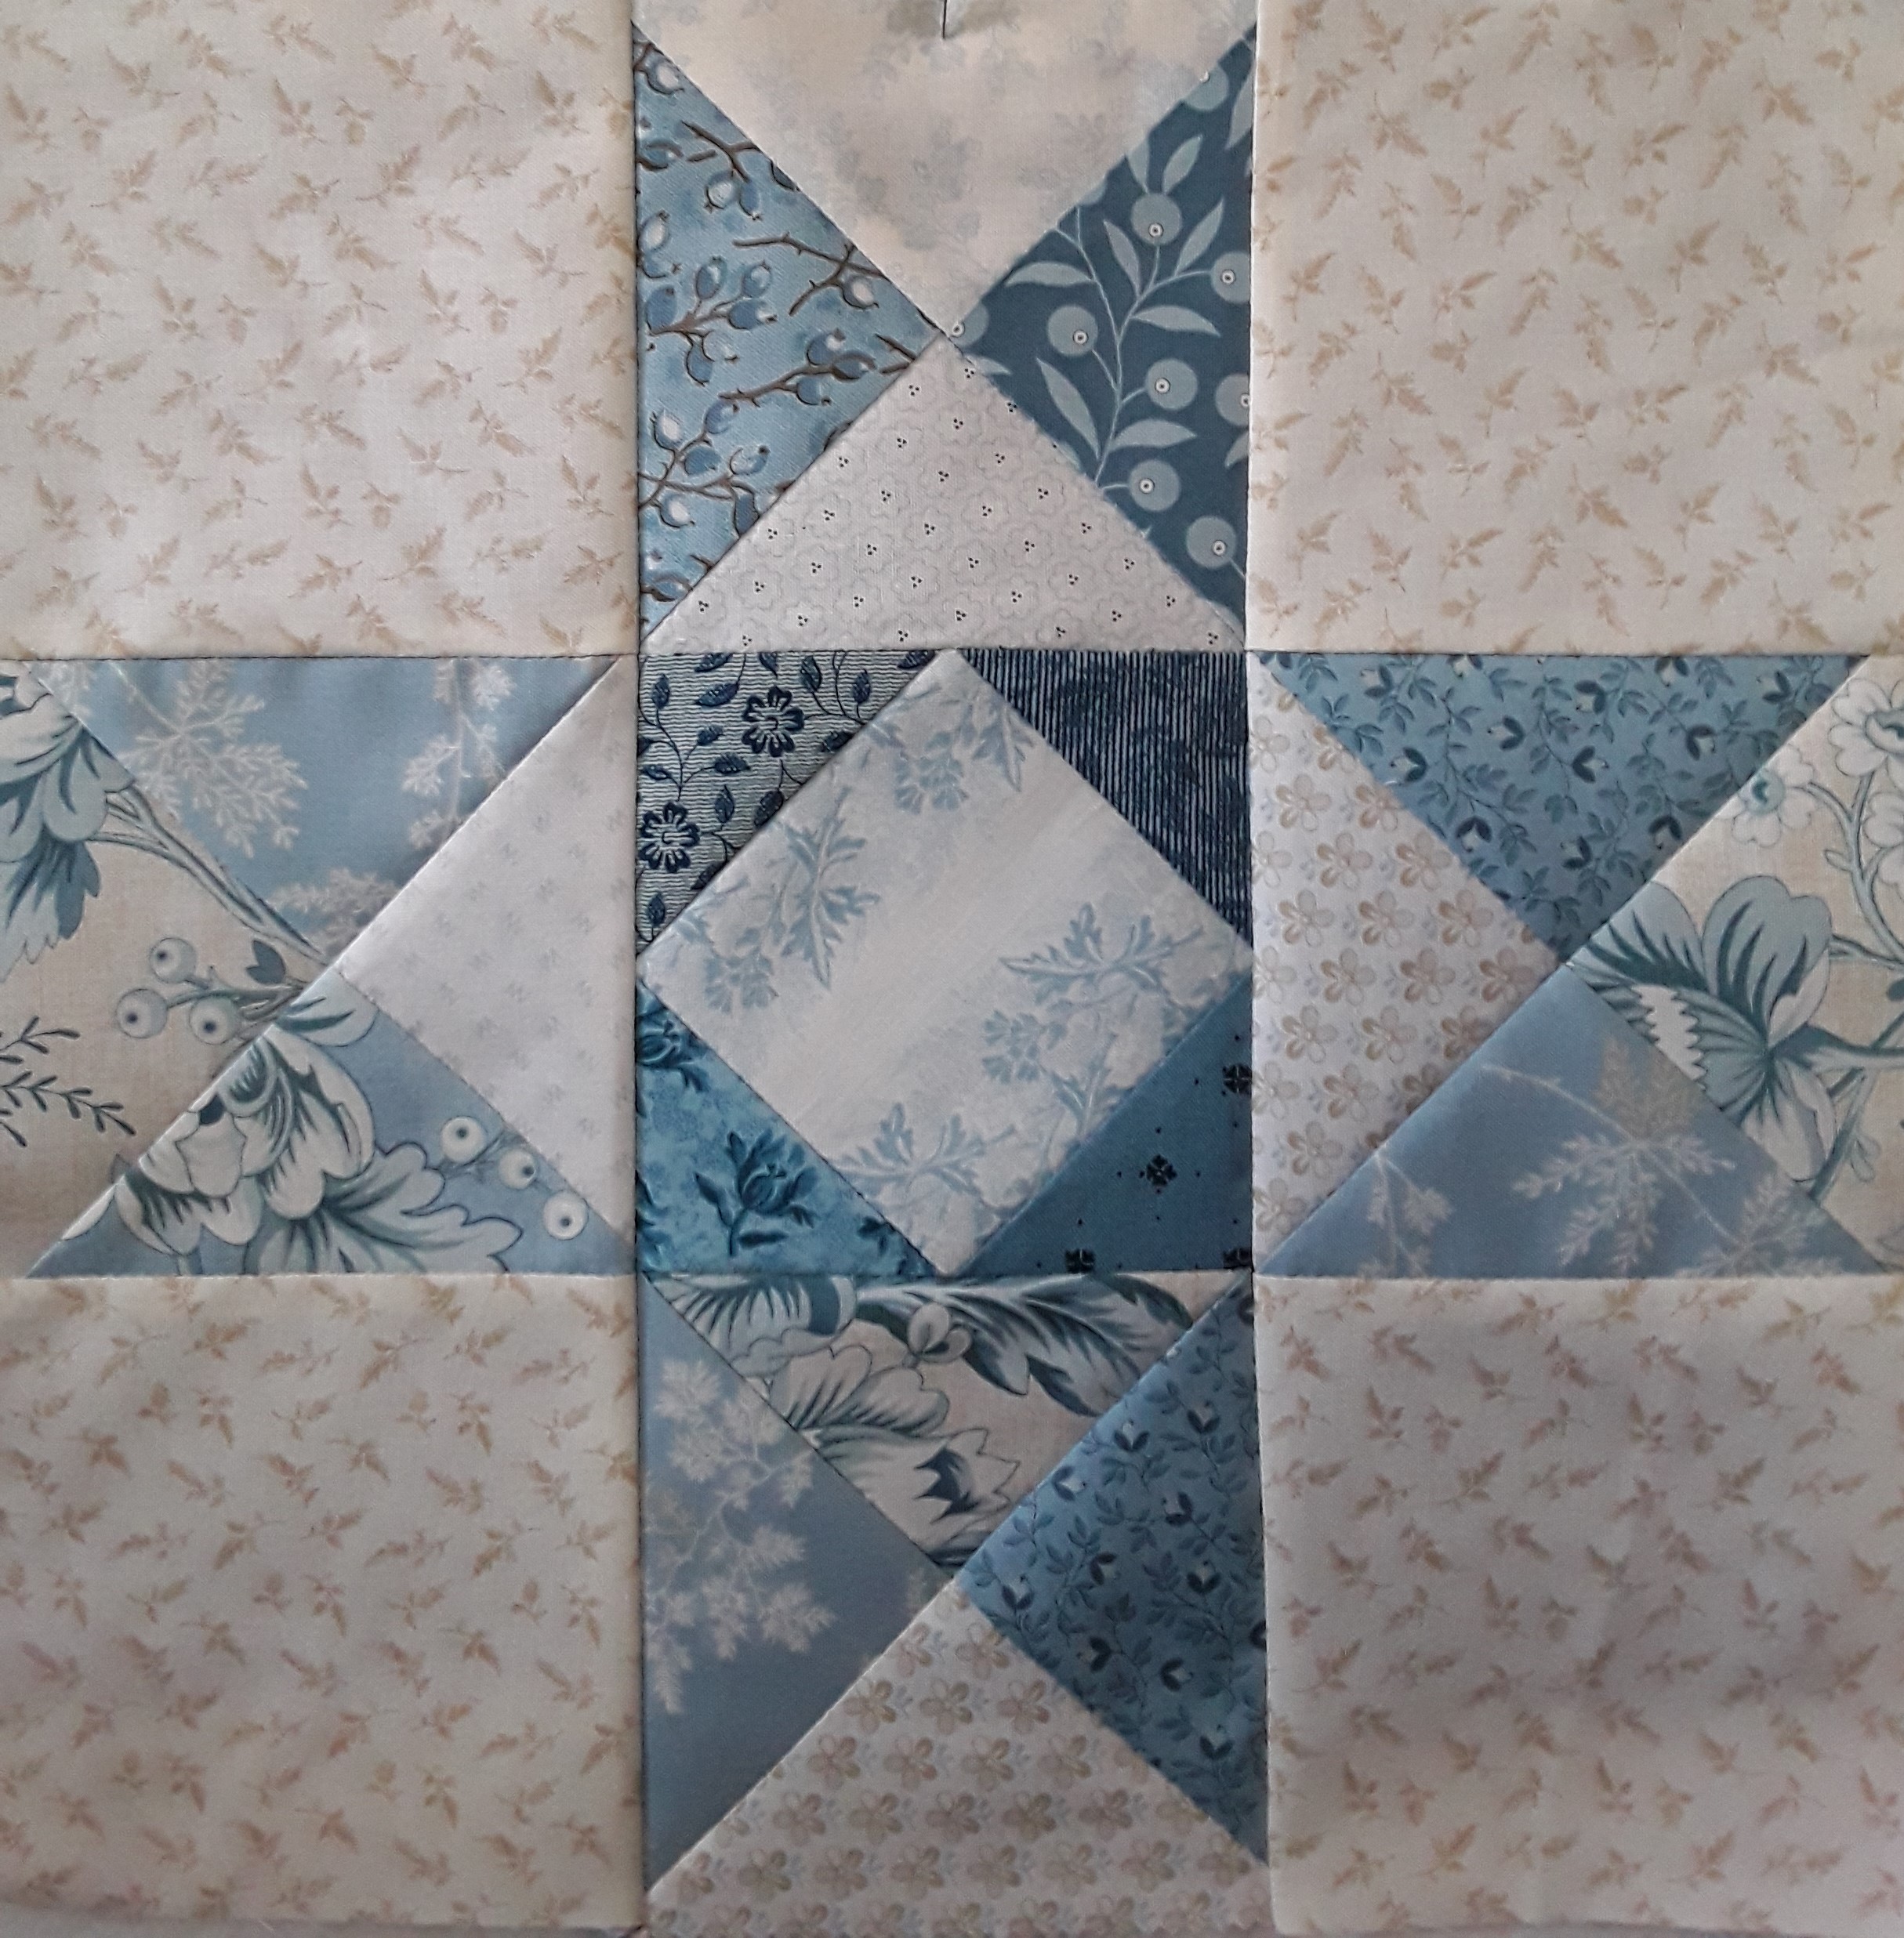
The basics of an Ohio Star Block is 4 quarter squares, a center square and 4 corner squares. One of the block colorings is shown below. Often the inside triangles off the center are a different color. The next photos below shows that coloring but points and backgrounds are scrappy.

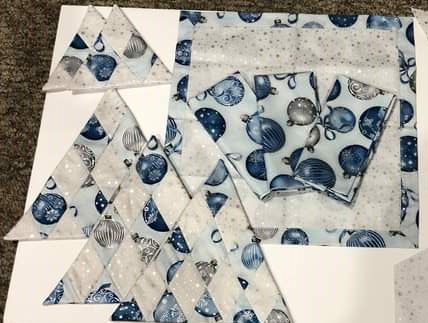
I did some remixing with making things scrappy. Dark points and light points!

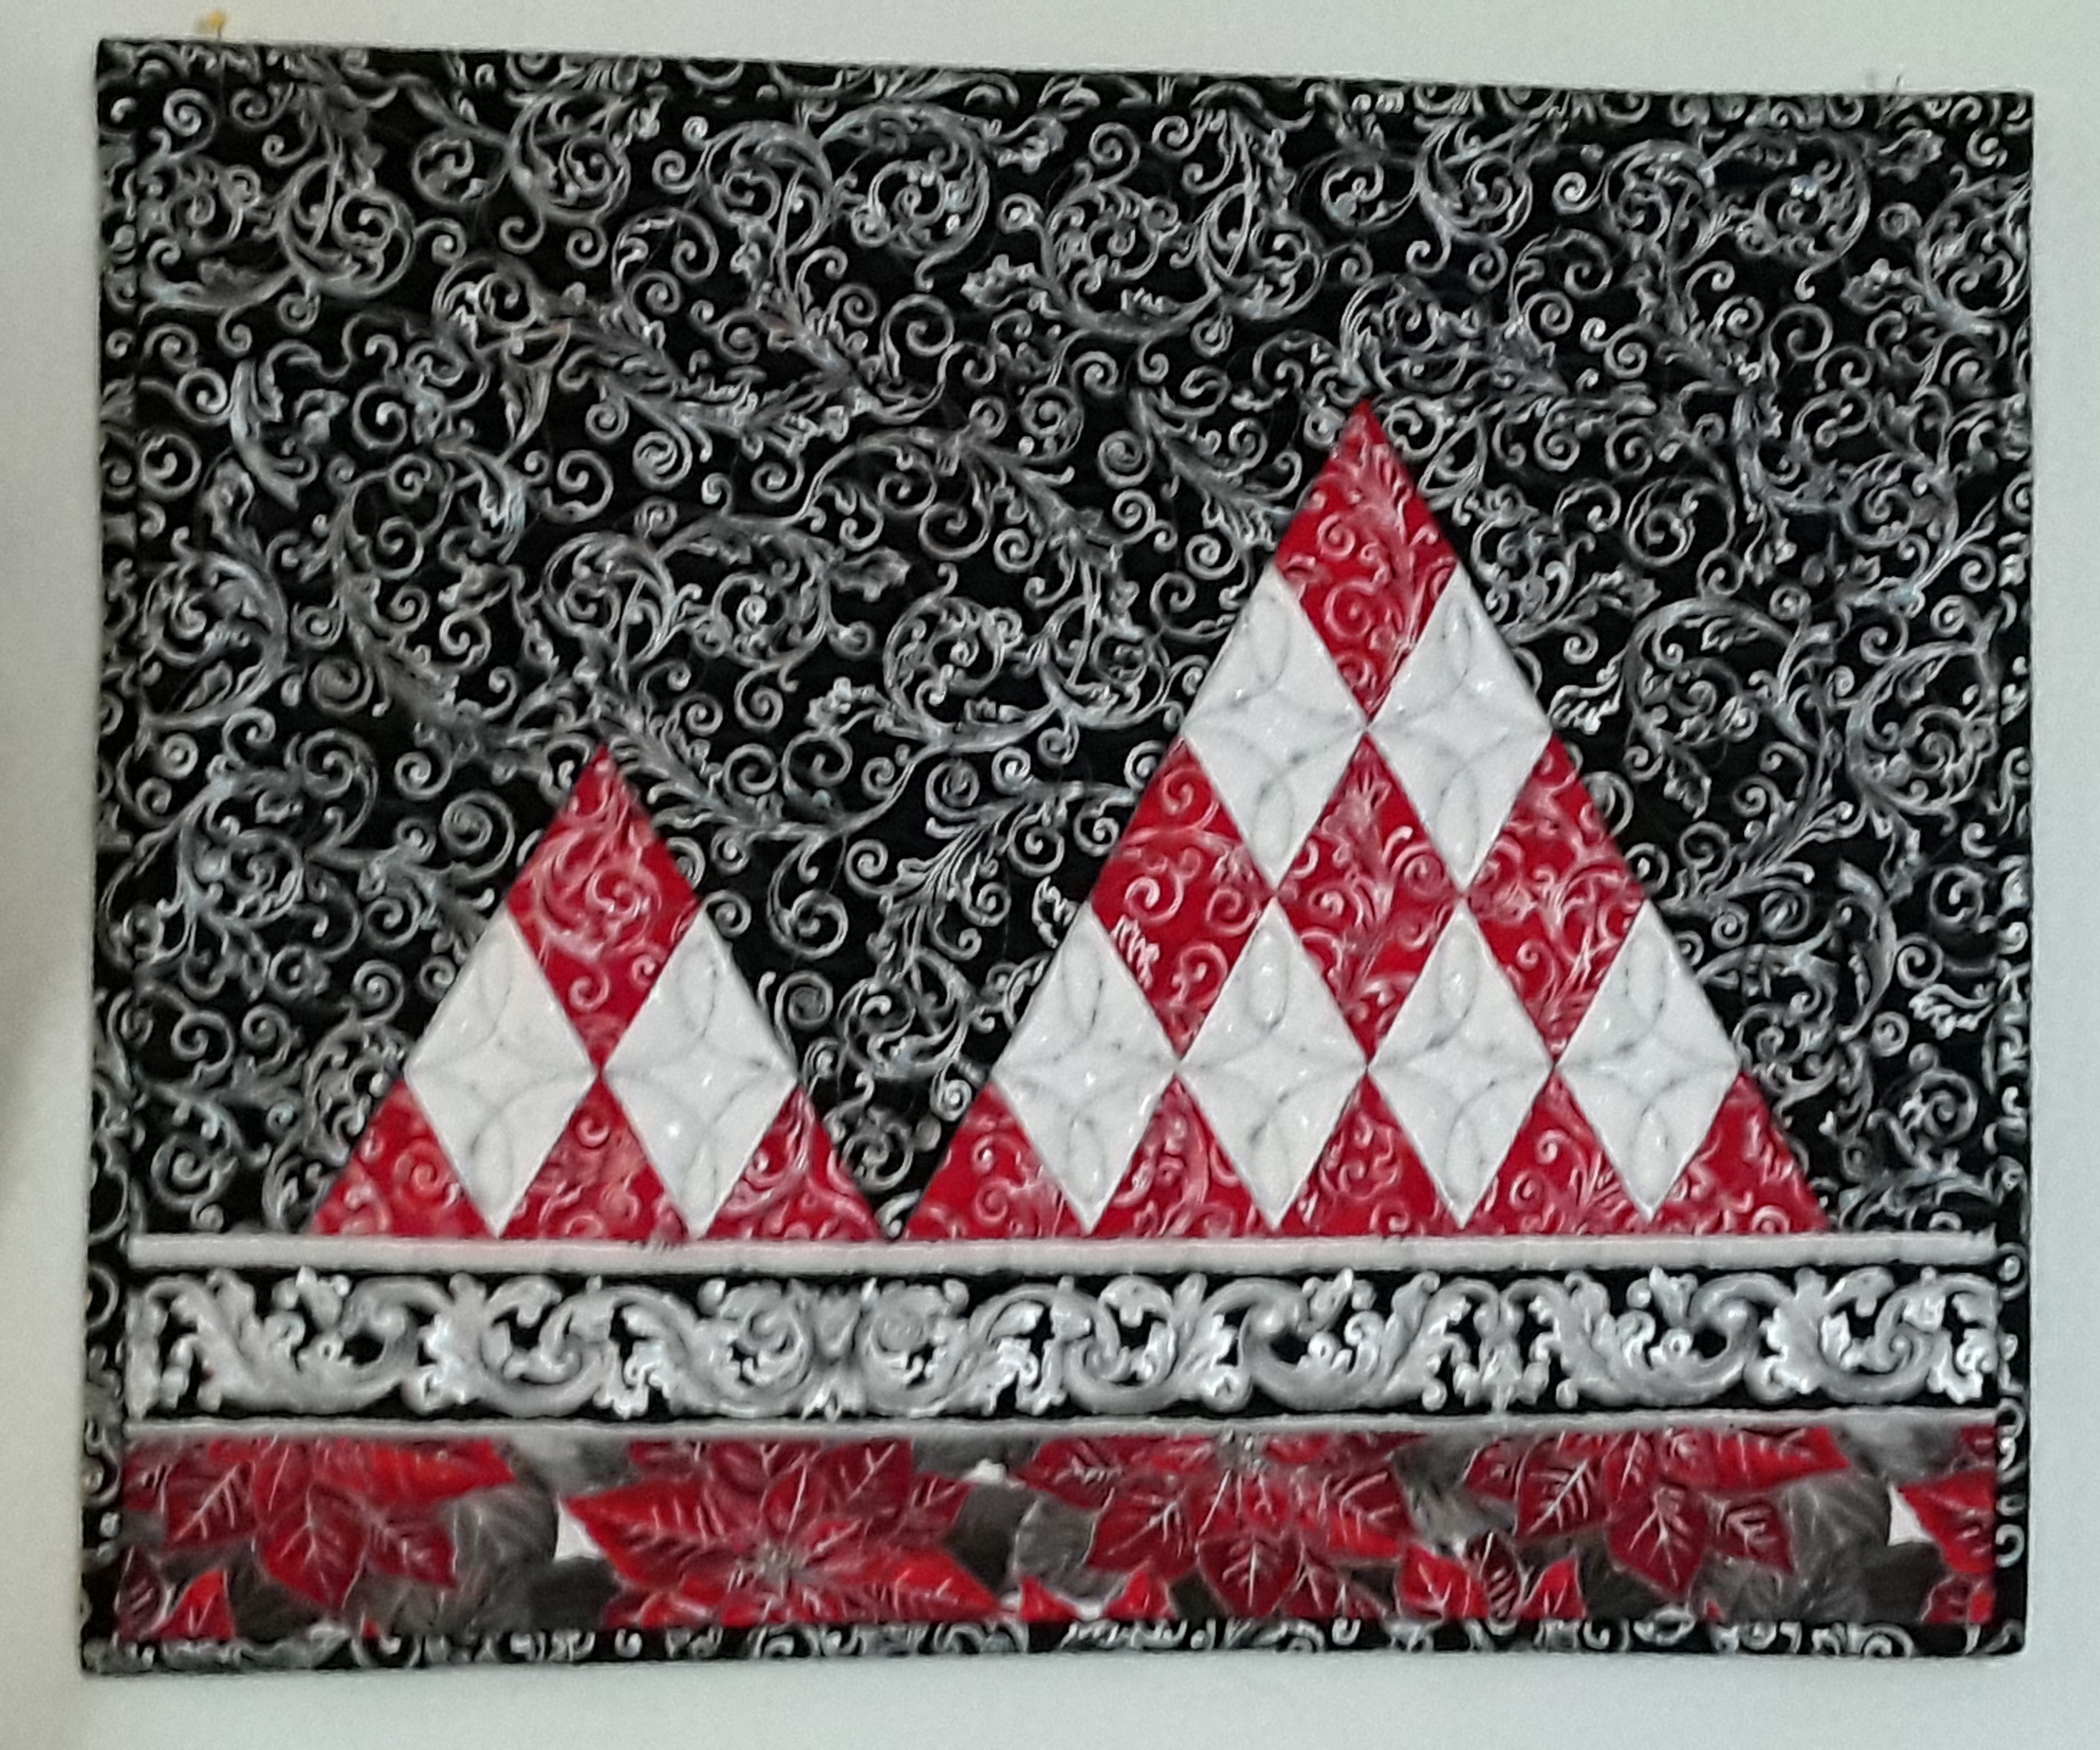
I further changed things up with adding a square in a square as the center square. Still scrappy! Then another remix with adding a square in a square to the center and four corners. I’m excited with all the possibilities this block can remix into.

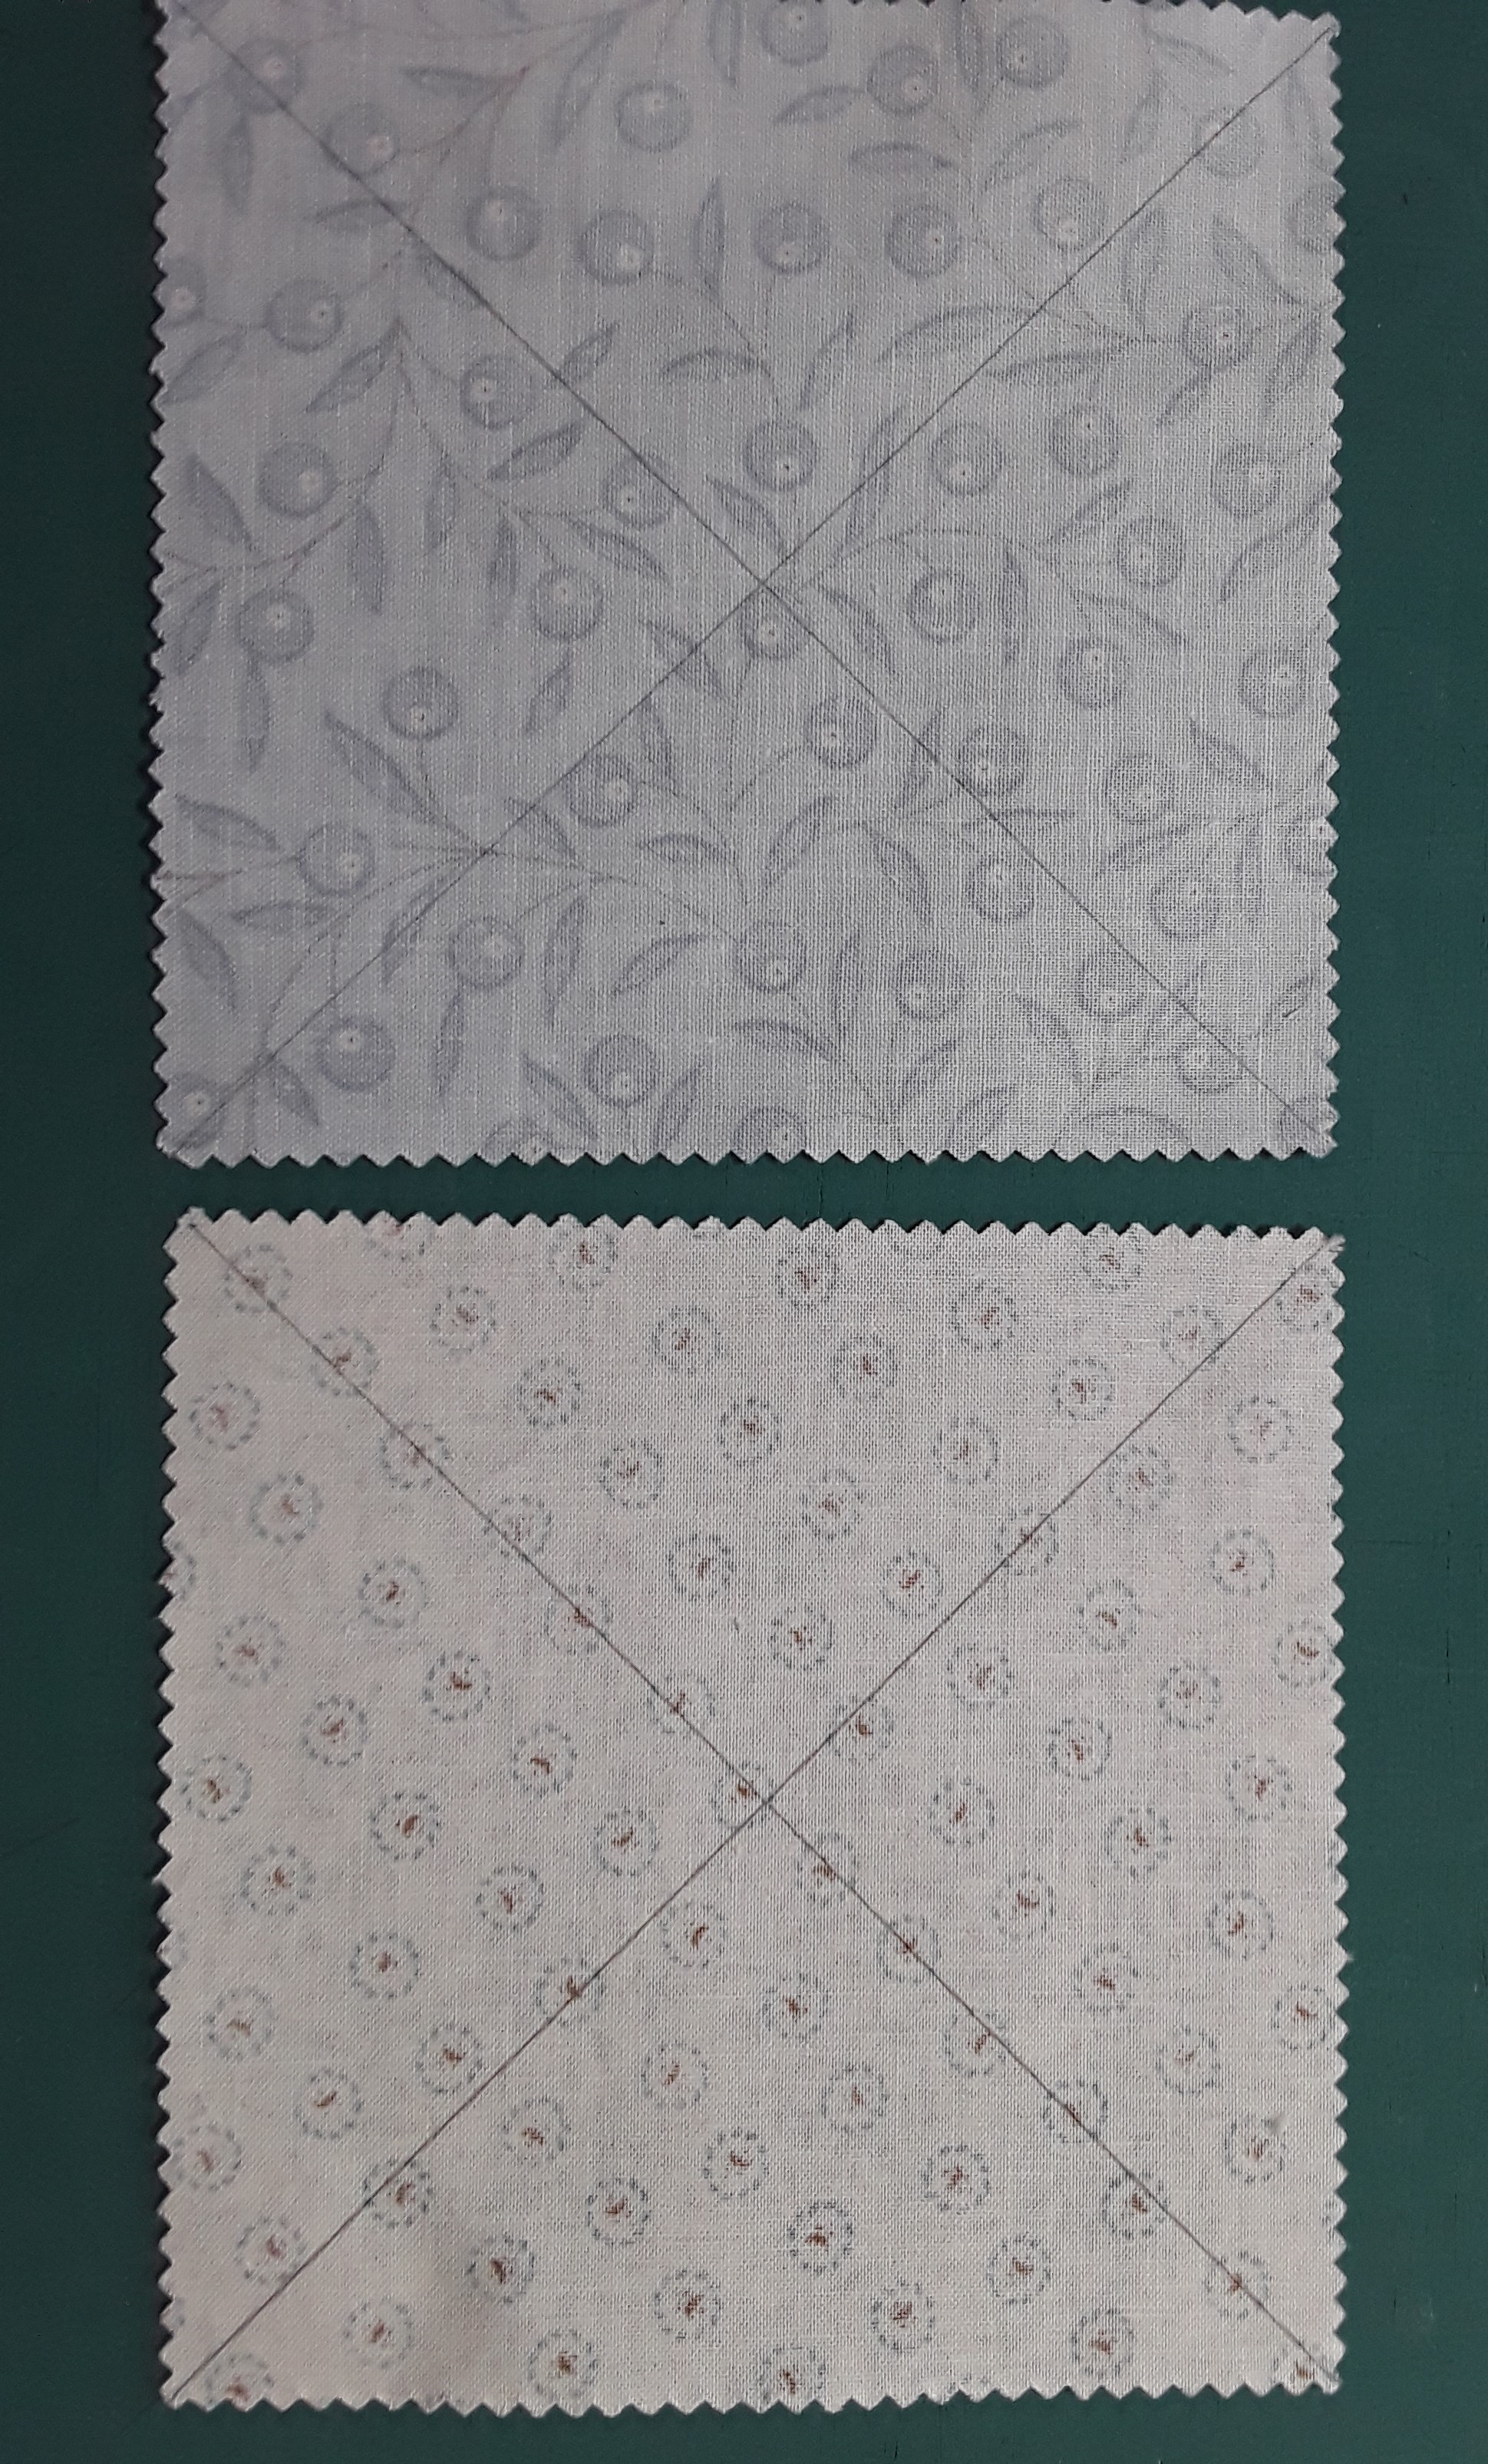
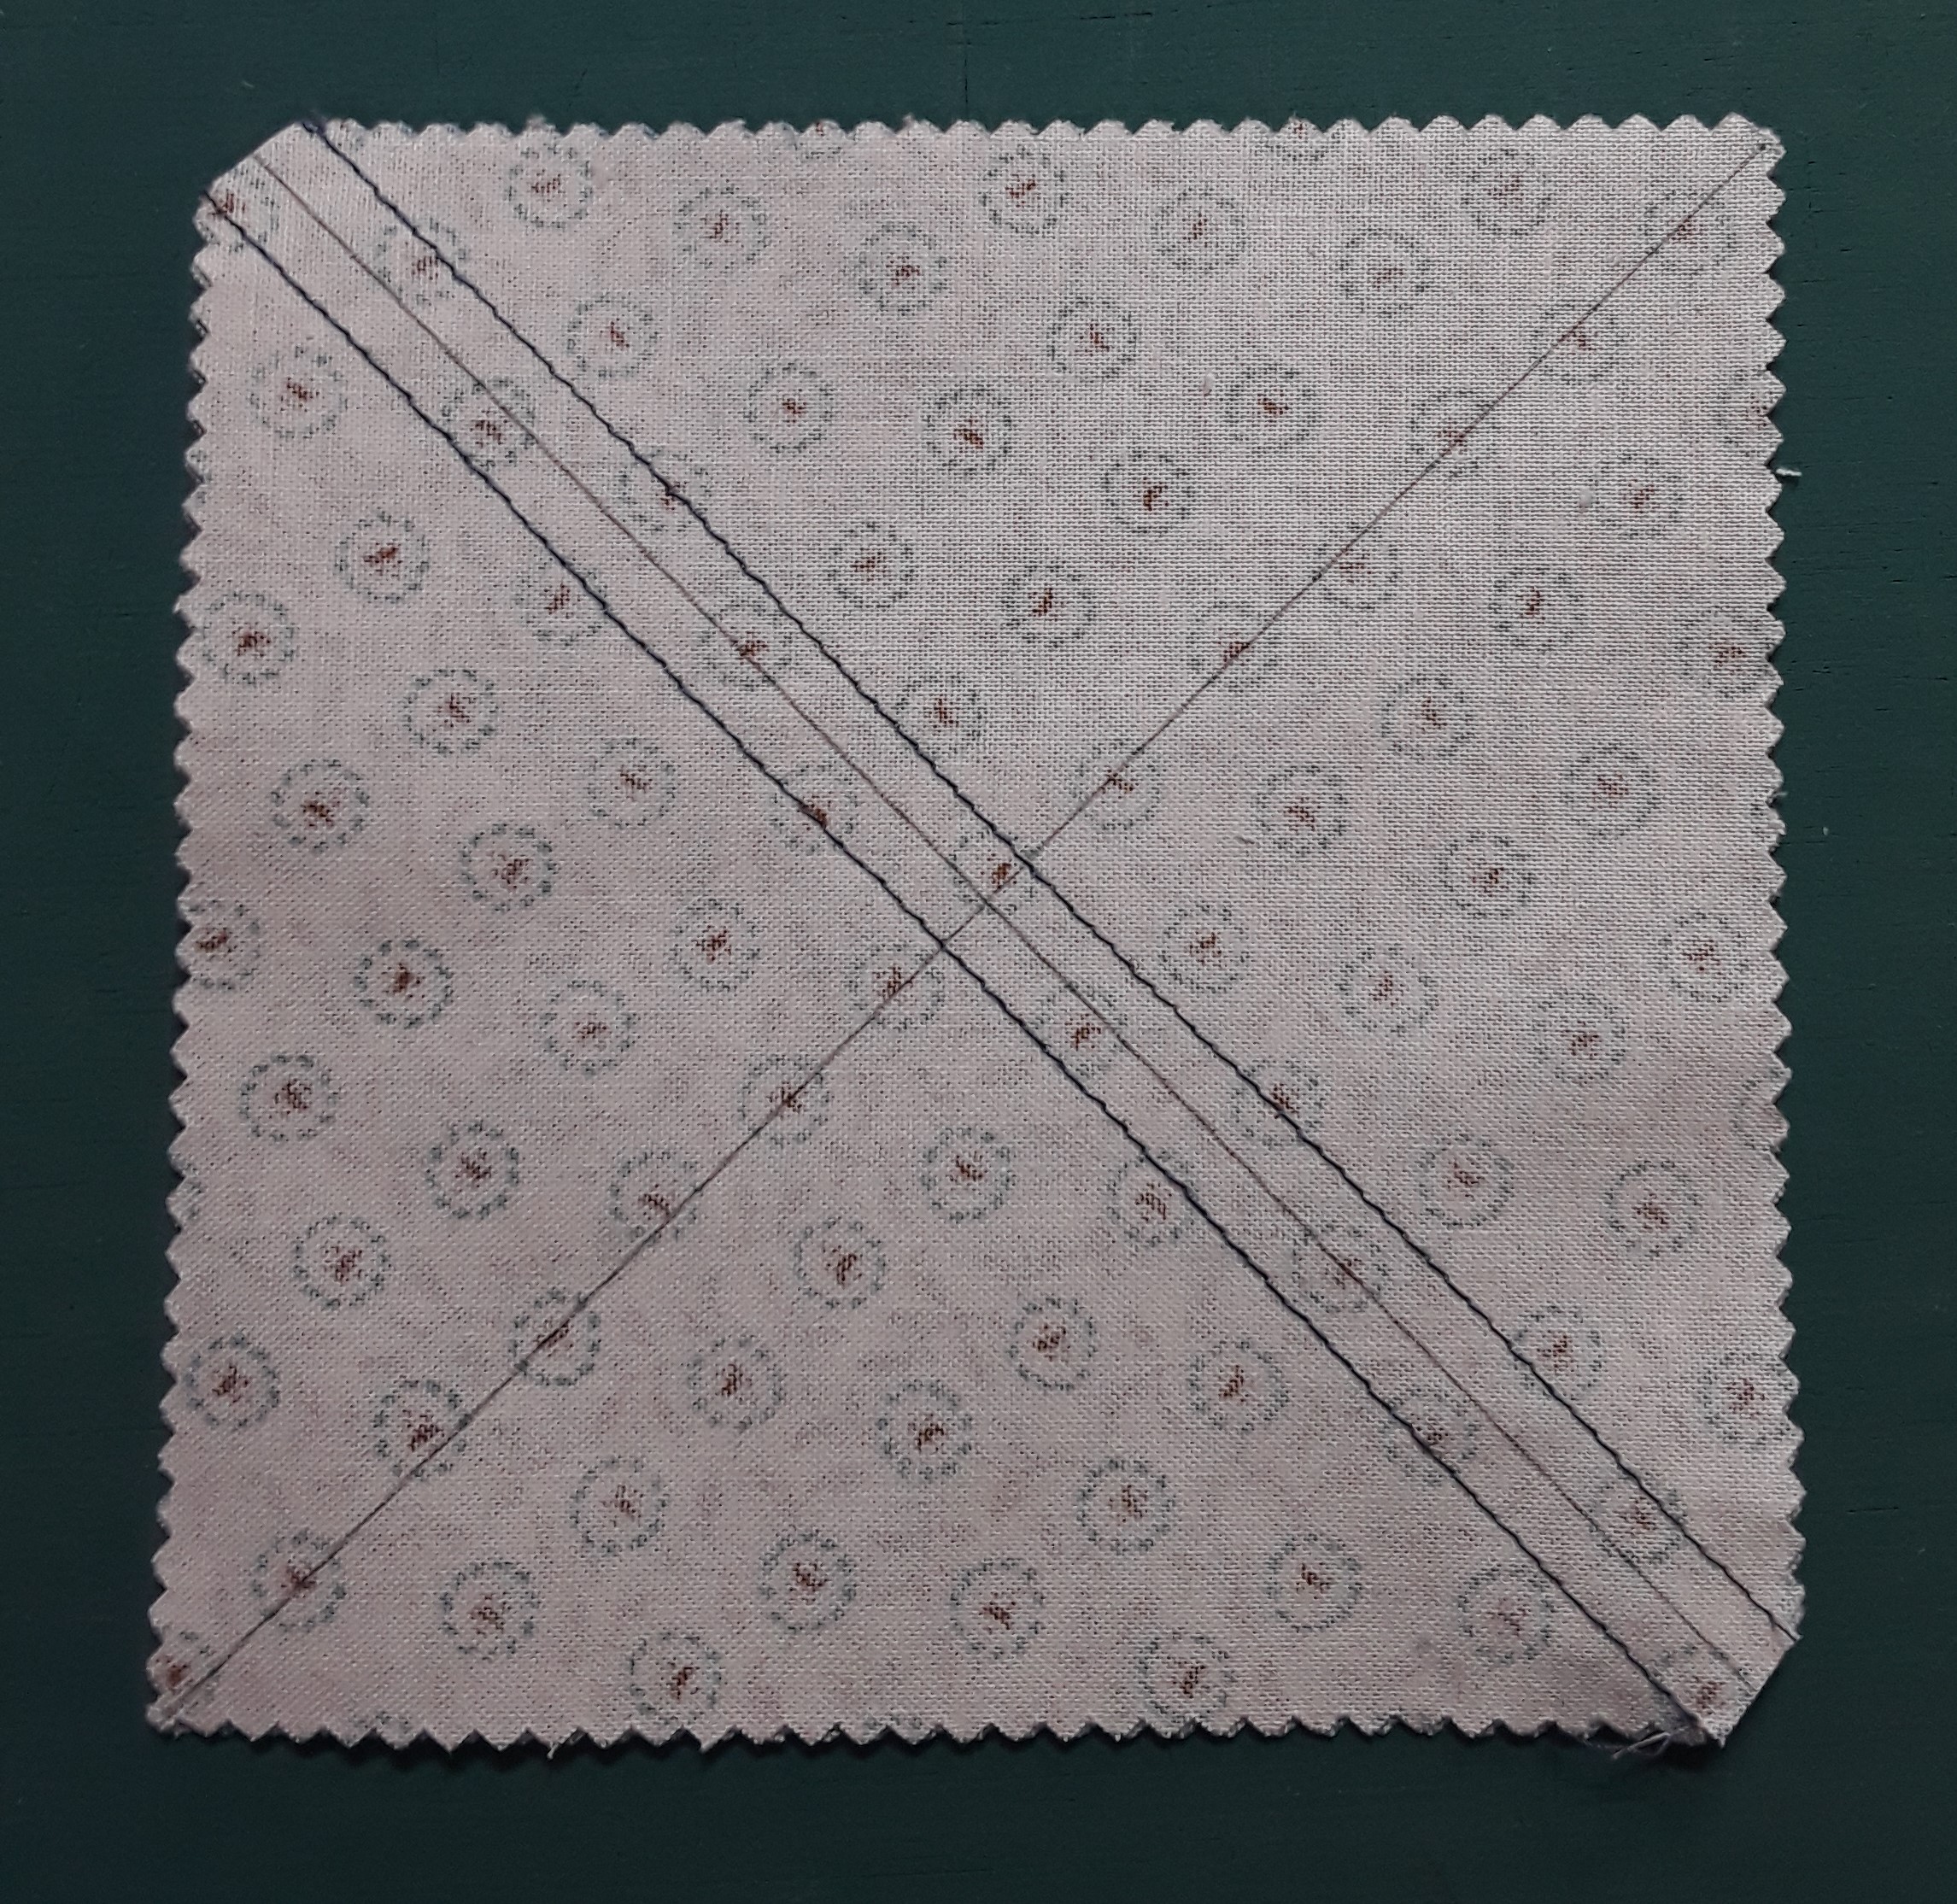
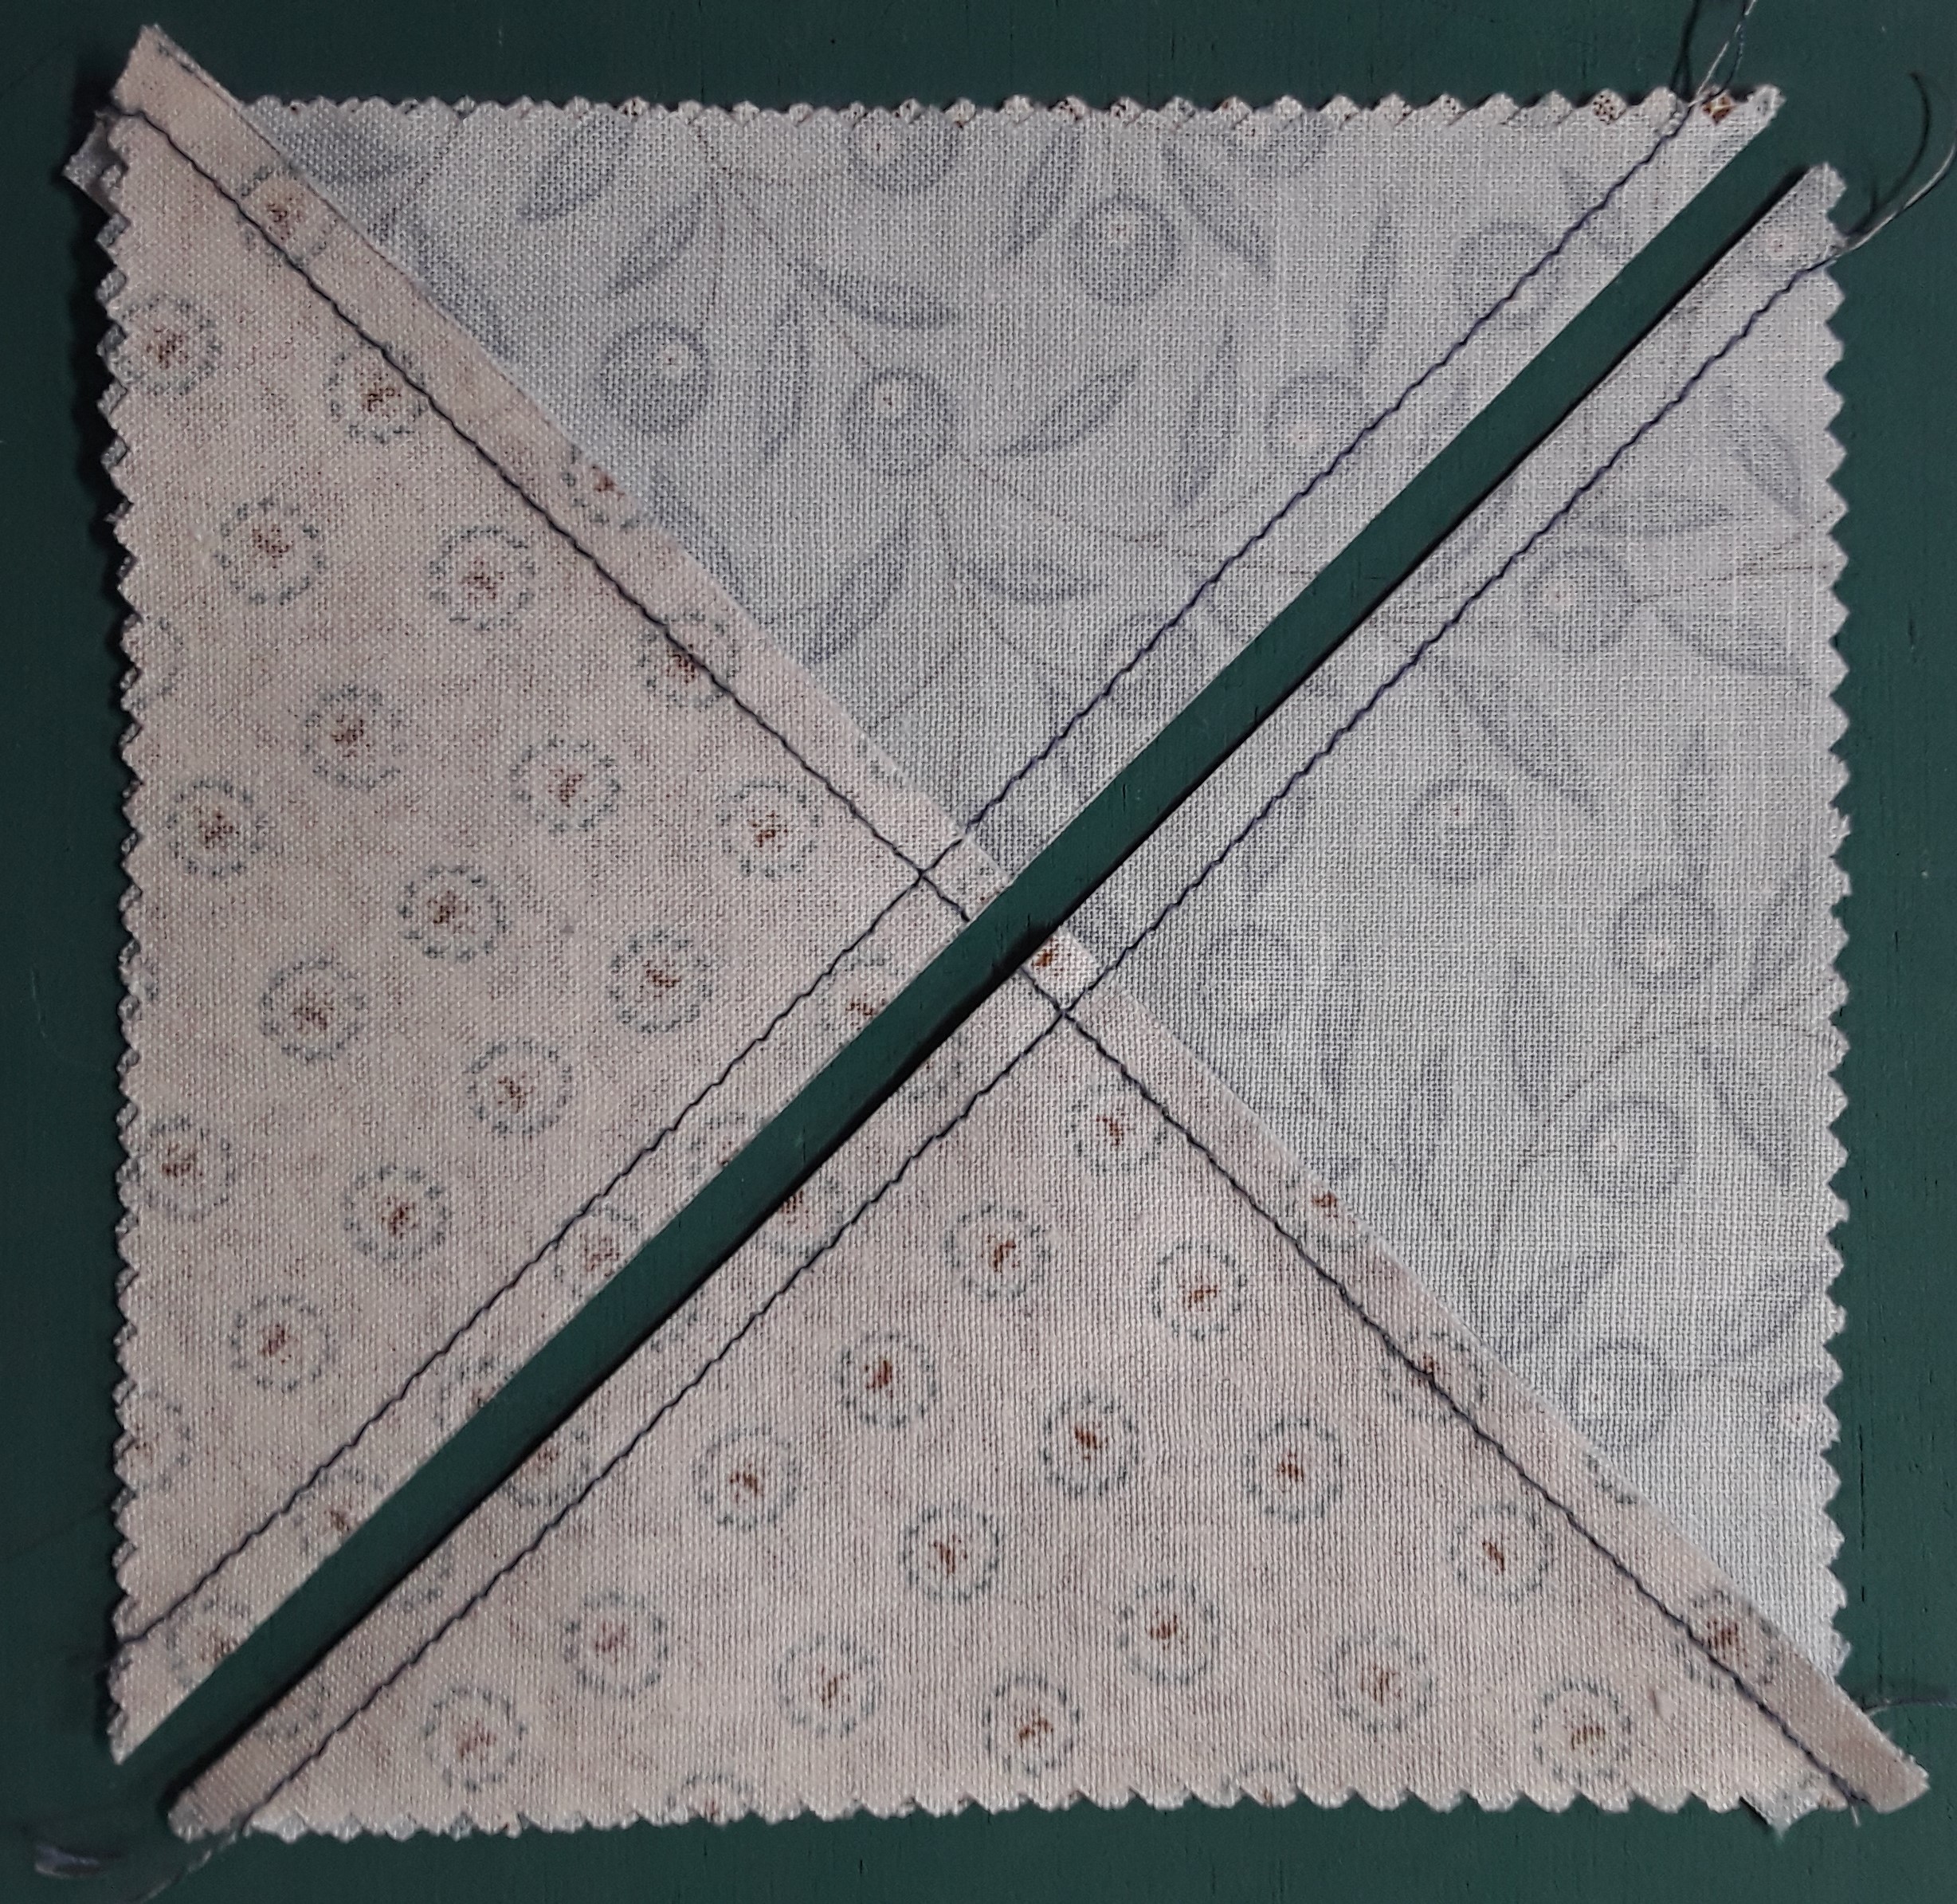
The easiest way to make a quarter square is putting 2 squares together and marking a center line from corner to corner. Then sewing on each side of the line from one corner to corner.

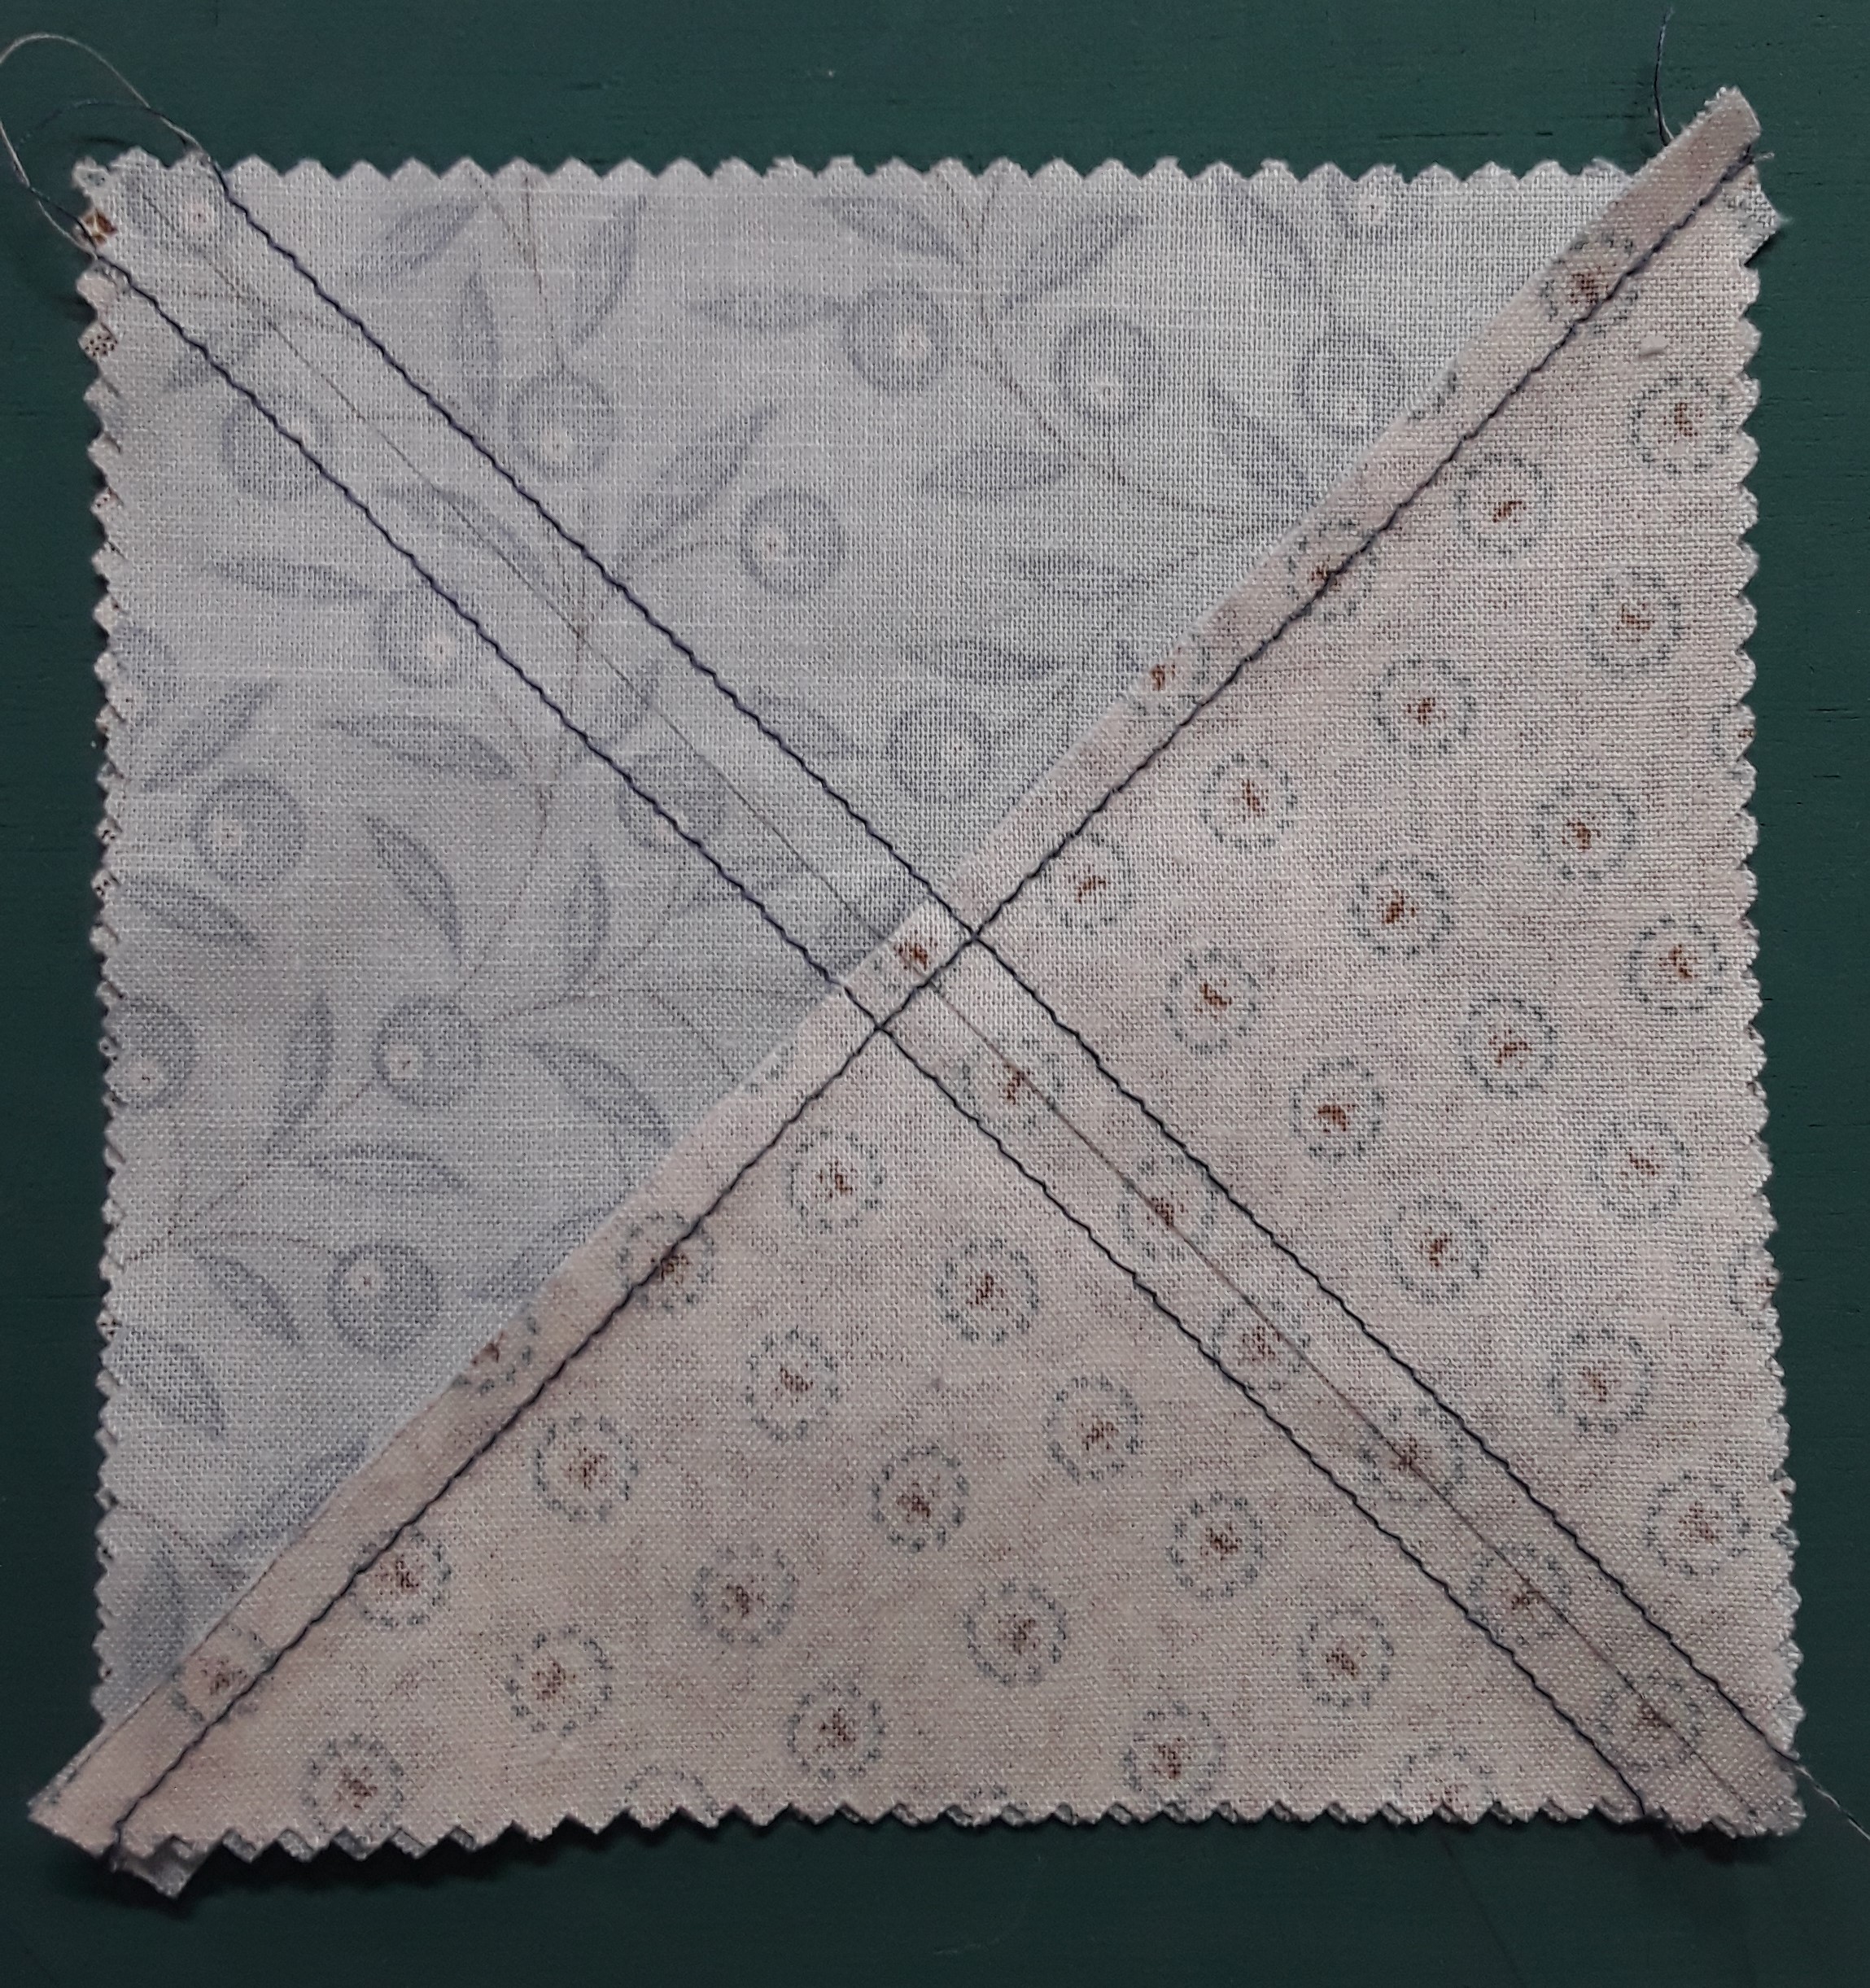
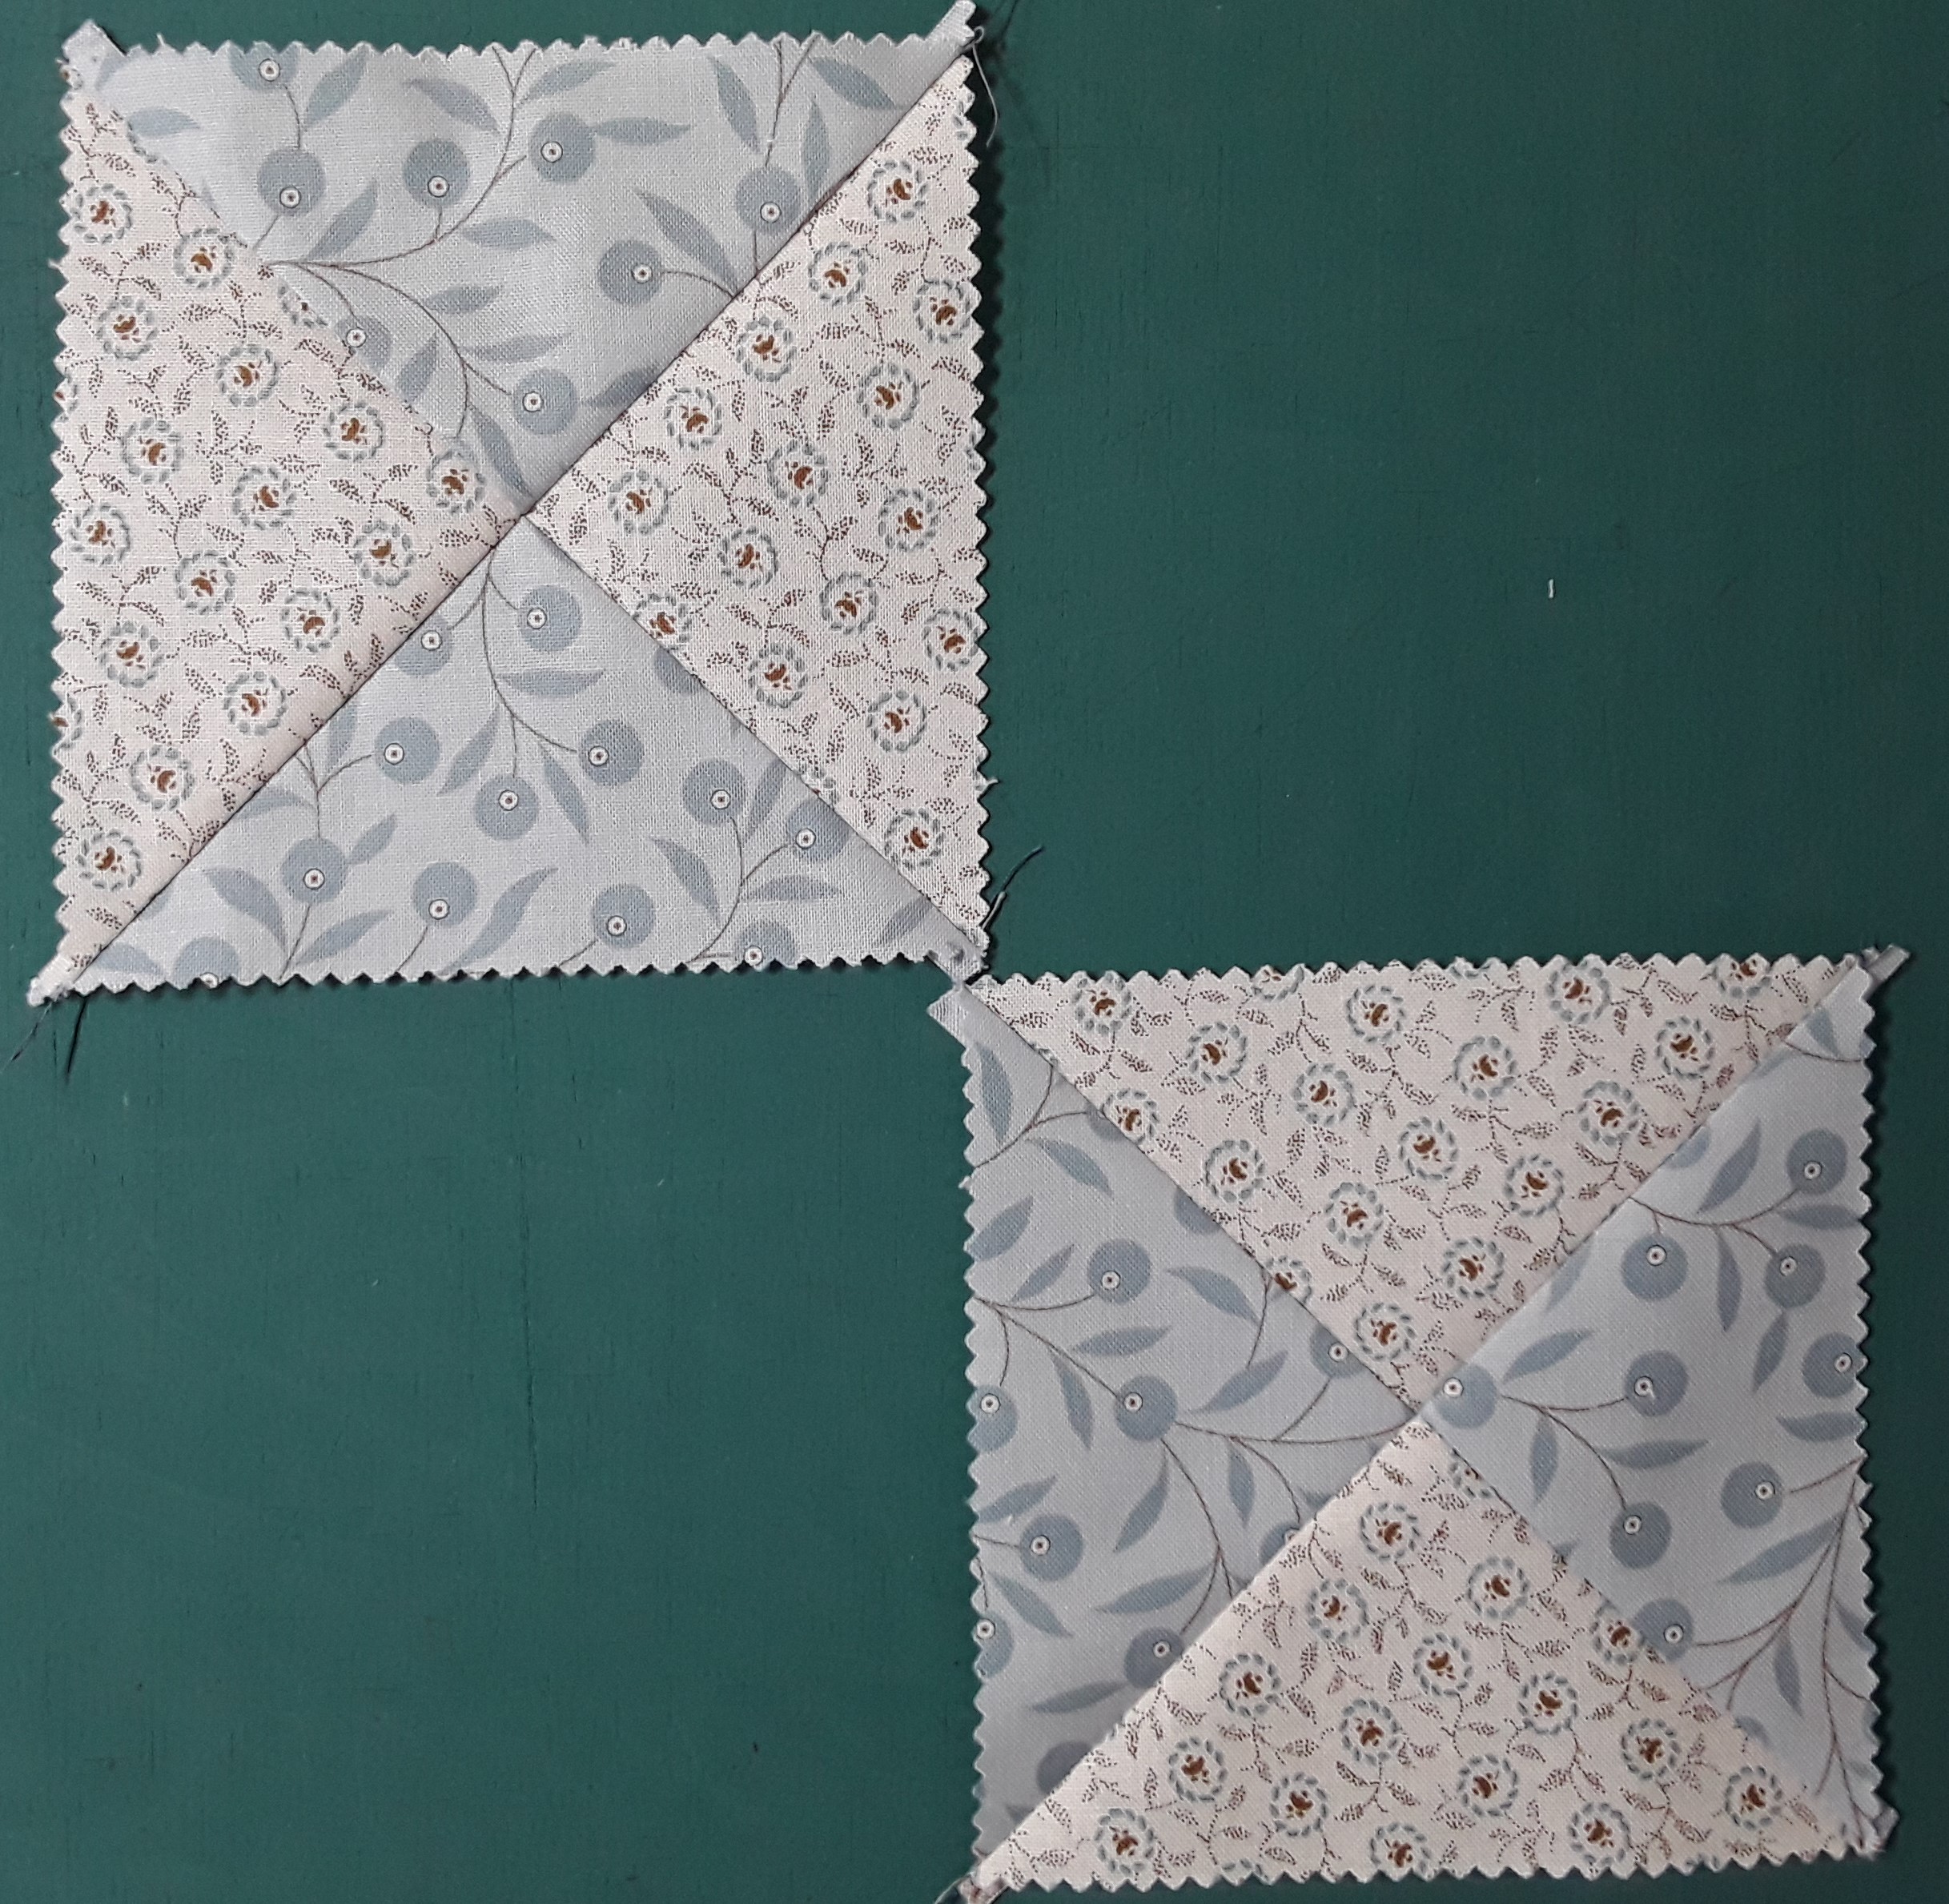
Cut this apart and press towards the darker fabric. The rotate one half so the light is on the dark and dark on the light matching seams snugly together.

Stitch on each side of the opposite corner to corner center line. Cut along center marked line and you have created TWO quarter squares!

Tips…

#1 – Mark from corner to corner on the wrong side of both the light square and dark square. This saves time later. The lines are there and you don’t have to stop and redraw the line on the back of the dark fabric.

#2 – For best results, I sew a scant 1/4″ seam on each side of the drawn lines. The photos below show sewing the scant 1/4″ vs. a true 1/4″. (The left side of my presser foot is a scant 1/4″ from the needle and the right side of the foot is a true 1/4″.) With the smaller seam width, it allows for squaring up for accuracy in correct block sizes!

I hope you’ll try some Ohio Star Blocks! These go together very quickly, especially if you use the plain squares in the center and four corners.

in quilting,

Debbie

Posted in Uncategorized | Leave a comment

Two Tip Tuesday – Ohio Star Remix

Over on Instagram, Sneak Peek #2 was given this week in the Ohio Star Remix. I’m still playing with colors and arrangement and additions. So today, I thought I would give a look at how a TRADITIONAL Ohio Star Block is made. It has a nine patch arrangement with for corner squares, one center square and 4 quarter squares. The coloring can be changed around and the way the quarter squares are made can be simplified. I won’t go into a lot of detail but I do want to show the basic block. The instruction page below is the traditional piecing of the Ohio Star using triangle and squares for a 12″ finished block.

For my Sneak Peek #2, I added a Square in a Square block in place of each of the corner squares and the center square. It really changes up the block! Plus the use of many different fabrics is exciting in my world. I love all the blues!

I’m heading in the direction to have my final reveal be several different remixes of the Ohio Star. Hmmmm! Next week will tell the finish.

#1 – An Ohio Star block is a simple block of squares and triangles. Quarter Square Triangles to be exact. It is typically one of the first blocks quilters learn to make in a Sampler Quilt and a great way to learn how to make a Quarter Square.

#2 – A Quarter Square has the triangles cut twice diagonally across a square. This “X” cut keeps the straight-of-grain on the outside edges of the finished block. We want the straight of grain on the outside edges to help keep the block from stretching out of shape.

Until next week and the REVEAL…

in quilting,

Debbie

Posted in Uncategorized | Leave a comment

Two Tip Tuesday – ROAD 2 CA and Remix

Today seems to be about the “Rs”. I’m in California for ROAD 2 CA. My first time vending at this show. Tonight was Preview and the Show opens tomorrow. They have many health protocols in place and hoping we see a great turnout. My “little” booth is below. When I fly to vend at a show, I have to get creative with setup and the number of quilts I take along. I’m pleased it all worked well.

The second “R” is for the “Quilt Block Remix Challenge”. If you recall last year I participated with several Imagination Renovation of quilt blocks. This is the same idea with a different name. Some of the same quilt pattern designers and some new. I look forward to exploring the Ohio Star Block. We will have 4 weeks of posting on Instagram. You can find me @debbiewendtquilting . I’ll be adding bits of the block challenge here as well. The first week is the Fabric Pull, second week – Sneak Peek #1, third week – Sneak Peek #2 and fourth week – Reveal! All posts on Instagram will be on Mondays. My fabric pull and #1 Sneak Peek are below. I’m not sure what direction this block will end up taking, but I am having fun dreaming up some possibilities.

I hope you will follow along and search out our little challenge. I am always amazed how many remix ideas are posted. I love working with Edyta Sitar’s Something Blue fabric line!

Oh, and AQS has announced the teachers for the Quilt Show in Paducah….you will find my name! I’m teaching 4 classes and the enrollment begins at the end of the month. The Daytona Beach show is fast approaching. There is still time to enroll in my Bindings A World of Options lecture!

What will 2022 have in store for you? A new project (or several)? A Quilt Show? A class? I hope you find many happy moments!

Tips will be show related…

Since we were freezing in the convention center tonight – #1 – Take LAYERS (of clothes!) You never know what a convention center temperature will be. AND #2 – Hydrate! There is nothing worse than getting a headache from not drinking enough water.

in quilting,

Debbie

Posted in Uncategorized | Leave a comment

Two Tip Tuesday – Snow, Cold and a Coat

This past week we finally got snow! Yes! I love snow! 11″ to be exact. Several inches more than predicted but that is fine by me. Once we got the driveway clear, thanks to our snowblower, it was time to take some pictures. Just the day before I finished my Quilted Car Coat. I’m very pleased with how it turned out.

This Car Coat is a sample for the Blackstone Valley Heritage Quilter’s next workshop. I dug deep into my stash for a stack of sweatshirts I had been saving and also found an old quilt top I bought at a sale a number of years ago. Perfect for the coat I wanted to create. I made several quilted jackets YEARS ago but I wanted to update the idea with this one. I wanted a longer car coat length and to use the “found” old quilt top. The sweatshirts didn’t match in color but in size. (You can see the two colors of sweatshirts where the hood meets the neck edge.) I ripped and cut to create my foundation. Then layed out the pieces onto the old quilt top. Played with arrangement. Cut up the quilt….YES, I did and so happy I did. I quilted the cut out top pieces onto the sweatshirt pieces and then pieced it all back together. I even added a hood and covered the seams. I will add pockets next. (I’ll have to unstitch a bit of the side seams to add the pockets, but that is fine by me. I love pockets!)

I even had the perfect feedsack fabric to use as binding that went beautifully with the vintage top. I was a bit nervous to see if I would have enough of the fabric for the binding. I used my trusty bias binding chart I’ve had for years. It is called “Quilter’s Strip Ticket – Yardage Tables” by Lamb Art Press copyright is 1985!! Yes, I’ve had it a few years. It told me if I needed 162″ length of 2 1/4″ wide binding, I would need a 20″ square. Bingo, I had enough!

#1 – Sometimes the smallest piece of fabric can yield big results. The 20″ square of fabric got enough bias binding strips to bind the outside edges of my coat. Check for similar charts, where others have done the math for you! (I don’t think the chart I have is still available.)

This was a great “re-do” / “re-make” / “update” / “repurpose”!! Two old sweatshirts, and old quilt and some time and I now have a beautiful new Quilted Car Coat!

#2 – An old quilt top (some of this one was in sad shape where seams were apart) can be recycled into a different useful item!

in quilting,

Debbie

Posted in Uncategorized | Leave a comment

Two Tip Tuesday – Happy New Year

It is hard for me to believe we are into a new year and 2022, when did that happen?!? But, it did!! As we head into 2022, I’m looking forward to new quilt shows and a return to the regulars. I’m working on a new book for my Hex-a-Mini, details to follow. I’m also planning some new classes and getting some new patterns ironed out. (Hmmm, that could be a pun!)

Keeping today short and looking back at one of my first “oldie but goodie” tip.

#1 – Measure twice, cut once! This is a great reminder, always. I often teach beginners and one of the first things I show them is how I count before I cut. Yes, I can read a ruler but I ALWAYS make sure I to count it out, aloud. It sure keeps me from making a lot of miscuts.

And the second is one of my favorites…

#2 – If you don’t love it, stop and rethink. You may need to set that project aside or scrap it all together. It sure isn’t worth your time if you don’t like the fabric, color, or technique. Move on to something that makes you HAPPY!

Speaking of happy. I had some leftover fabric I quilted up when I made my great niece a quilt. My sister saw the quilted piece on her visit this summer. She took it home to make pillows for her granddaughter (the same little one, my great niece!). Well when I was “home” for Christmas that fabric showed up with my sister at my parent’s house….she bought some yummy pink Cuddle fabric for the backing. AND Yes, I made the pillows for her to give! They turned out very sweet. The report was that they were crawled all over. One of the pillows and the quilt it matches shown below.

in quilting,

Debbie

Posted in Uncategorized | Leave a comment

Two Tip Tuesday – After Christmas Sewing

I visited a fabric store yesterday in Orlando with my sister-in-law, that she frequents. The Sewing Studio Fabric Superstore in Maitland, FL. Another sister-in-law and one of my nieces went along. They both fell in love with a certain character fabric, what to make? A Pillow Case! I have the Hot Dog Pillow Case as a FREE pattern on my website. They are quick and easy to make. We changed the top cuff as they wanted more color and to show off the fabric. The pillow case on the left is folded back to fit in the picture. We also made the wider…more pop of color!

One of the fabrics had a definite direction….and not the way we wanted it to finish. So, no problem. We turned the fabric to accommodate the directional fabric and re-cut and stitched two sections together to get closer to the correct size. It ended up being a bit shorter piece for the main body. And why we increased the top cuff!!

#1 – Play with FUN fabric for a quick gift or fun sewing project and make a pillow case!

#2 – If you have a directional fabric, make sure it falls in the direction you want it on the end product. Below you will see how I made a stick figure on the pillow piece diagram to make sure it would end up correctly. (Yes, blurry since I blew up the original photo. My stick figure is shown on its side!)

I hope you find some fun things to sew to finish off 2021!! Ready, set and more sewing for 2022!

in quilting,

Debbie

Posted in Uncategorized | Leave a comment

Two Tip Tuesday – Happy Holidays

As we head into the hurried days before Christmas, are you still sewing? I finished a quilt and delivered it! I’ll put a pic below. This flannel quilt went to a friend’s little daughter. She loved it and so did her daughter. In fact the comment was, “she won’t get off of it!” It was a bit windy for the hurried photo.

Here is the close up. Some quilts are made to be snuggled and don’t need fancy quilting. Simple and finished! I wanted the pink border to be highlighted, so I stitched in the ditch. With quilting on each side of the inside border it helped to bring this border to the forefront. Simple loops fill the inside and straight lines on the outside border. I followed the pattern of the fabric so I didn’t even have to mark my spacing. (The fabric did that work for me!!) I did the binding all by machine. This sped up the process and is a nice finish for a baby quilt. Since this is going to a little one, the simplistic quilting works well. Plus it will be washed and used, what I want every gifted quilt to be!

#1 – Does your border fabric have a design you can follow? The border fabric on this quilt had perfect spacing to do some straight line quilting.

#2 – Simple quilting, that is not dense makes for wonderful “drape-y” quilts, perfect for a flannel quilt.

This quilt was made using a 3 yard quilt pattern by Donna Robertson of Fabric Cafe. The pattern name is Attraction. It is also one of the patterns in her book, Easy Peasy 3 Yard Quilts. I love Donna’s patterns as they are designed for three 1 yard cuts of fabric and go together quickly!

I hope you have success in finishing up your gifts. Merry Christmas to you and yours!

in quilting,

Debbie

Posted in Uncategorized | Leave a comment

Two Tip Tuesday – Fabulous Finds!

Are you an AQS member? Did you get the latest American Quilter magazine, January 2022? Check out page 15 for fabulous Finds….I’m so excited Hex-a-Mini is a featured FIND!!! WooHoo! See the page below with a closeup of the write up!

You can order Hex-a-Mini on my website HERE. If you are in need of a Christmas present, what about making placemats using Hex-a-Mini to make these Pyramid Trees? The trees layout is included in the instruction booklet!

Speaking of my website…Please get your online orders in before Friday if you want them shipped before the New Year. I’ll be taking a break for Christmas <grin> and shipping will be delayed until the new year.

On a Brilliant Bindings note, I had some tools stored at my parent’s house. I requested they send them to me for some orders. (no worries, more tools are being manufactured and will arrive after the first of the year) So to my surprise, this is how they arrived carefully packed in a box inside the shipping box. I love my Dad, such care and ingenuity to keep the edges protected. We peel the paper from one side of the tool, as this is how they arrive from the manufacture, before we package each one with their cover and directions. Loving care every step of the way!

My Two Tips for today are on a personal note….

1 – Have fun shopping and getting ready for Christmas! Be safe out there! Remember a kind smile is always welcome….your eyes can smile behind a mask.

2 – Take time to look at the lights, hear the music and share a drink with a friend.

My favorite recipe this time of year is Spiced Tea… Great to make and give as gifts!

  • 1 cup Tang
  • 1/2 cup instant Lemonade mix
  • 1/2 cup sugar
  • 2 1/2 cups instant Tea mix with lemon
  • 2 teaspoons cinnamon
  • 1 teaspoon cloves
  • Combine all ingredients. Measure 1 cup into zip plastic bag. Makes 4+ gift bags. Add directions on a gift card. Add 2 tablespoons of Spiced Tea mix to 1 cup of hot water. Enjoy!

in quilting (and a hot cuppa!)

Debbie

Posted in Uncategorized | Leave a comment

10 Days of Holiday Prep – Day 9

Welcome Back! Today is Day 9 and my turn to share another Holiday Prep Idea.

I LOVE bindings on quilts. I designed a tool for bindings, teach bindings and design quilts using my Brilliant Bindings tool. So….why bindings on a holiday prep hop?….How about back to front bindings? This is a great way to finish the edges of a placemat or …..use this same technique to make beautiful napkins to add to your holiday table. The photos below are from a class I taught last year on this technique and are my students’ beautiful results!! (Note the Winter Tree-Land coasters from Day 7!)

To make FOUR NAPKINS, you will need 1 yard of fabric for the front centers and 1 1/8 yards for the backs (the back will be the edges on the front!). Check out my website Wendt Quilting for a free downloadable pattern!

CUT: 4 napkin centers – 16″ squares and 4 napkin backs – 20″ squares

Place a center front on the middle of a back with wrong side together. Finish each using the back to front binding technique. They are that simple! Back to front binding steps in the download show a narrow binding, I prefer a wider 1″ binding edge for the napkins!!

I have used a back to front binding on my mug rugs and placemats. Check out my “Four” Dinner or any other meal Placemats and Hexie Fun Placemats and Mug Rug patterns!

Nothing says the holidays like home baked cookies. Adding a single napkin as a basket liner to a basket of homemade cookies makes a beautiful hostess gift or gift for any occasion. Our family favorite cookies is Crispy Oatmeal Cookies. (you can’t eat just one!) The Hexie Mug Rug in the recipe photo above used Hex-a-ma-jig Jr.

Crispy Oatmeal Cookies on Hex-a-ma-jig Jr. Mug Rug

ENJOY the HOLIDAYS! If you are looking for some beautiful Christmas fabric, be sure to check out the selection on my website.

in quilting,

Debbie Wendt

Posted in Uncategorized | Leave a comment

Two Tip Tuesday – Time to Recharge

When do you recharge? Some days just go so quickly, there is no time to do what you planned. Do this ever happen to you? It happened to me today. I was set to do two tips and then got an email from a customer saying Hex-a-Mini was not on my website….OOPS! That slipped right past me. So, NOW it is on my website. Yay! Check out my new Hex-a-Mini and all the wonderful project you can make with this tool. Not exactly what I had was going to do today, but so important and I got it done. So Two Tips will be a bit slim today. HOWEVER, with the Winter Tree-Land post yesterday and another Holiday Prep idea tomorrow, I hope you will forgive me.

I recharged this weekend with donating a decorated tree to Trees of Hope! Those mug shapes I showed a couple weeks ago are now with a new home. A young mom won my tree, Sleigh Ride!! I found a beautiful flocked 6 1/2 foot tree to adorn with bells, bows, mugs and more bells! “Just hear those sleigh bells jingling….” Trees of Hope is a wonderful event and get me in the spirit of Christmas giving. Donations from raffling off the Trees goes to DetecTogether and the Alzheimer’s Association, to further educate and assist all affected. Sleigh Ride on the left, a close up and then again in right photo. My friend Sue Pelland of Sue Pelland Designs did the tree in the far corner, “Planes, Trains and Automobiles”.

The mugs I decorated are purchased wooden ornaments. I used fusible to adhere Christmas fabric and “cocoa foam” to the ornament shape. It was a quick easy project that made adorable decorations. Remember right handed and left handed mugs. See them below in Christmas plaid fabric. I even turned the traced fusible shapes in different directions to add variety to the plaids! FUN! No sewing involved, just ironed onto the wood!

#1 – When drawing of paper backed fusible, be sure to reverse your image since you need the fusible to be on the wrong side of the fabric.

#2 – Turn the pieces in different angles for a variety in the plaid design!

Bonus – Be sure to leave a little space around the outside of the drawn lines. This ensures the edge is crisp when cut and has fusible all the way to the cut edge.

in quilting,

Debbie

Posted in Uncategorized | Leave a comment